
Usd Survival Guide
![]()
This repository aims to be a practical onboarding guide to USD for software developers and pipeline TDs. For more information what makes this guide unique, see the motivation section.
This guide was officially introduced at Siggraph 2023 - Houdini Hive. Special thanks to SideFX for hosting me and throwing such a cool Houdini lounge and presentation line up!
Contributors
License
This guide is licensed under the Apache License 2.0. For more information as to how this affects copyright and distribution see our license page.
Prerequisites
Before starting our journey, make sure you are all packed:
- It is expected to have a general notion of what Usd is. If this is your first contact with the topic, check out the links in motivation. The introduction resources there take 1-2 hours to consume for a basic understanding and will help with understanding this guide.
- A background in VFX industry. Though not strictly necessary, it helps to know the general vocabulary of the industry to understand this guide. This guide aims to stay away from Usd specific vocabulary, where possible, to make it more accessible to the general VFX community.
- Motivation to learn new stuff. Don't worry to much about all the custom Usd terminology being thrown at you at the beginning, you'll pick it up it no time once you start working with Usd!
Next Steps
To get started, let's head over to the Core Elements section!
This guide primarily uses Houdini to explain concepts, as it is one of the most accessible and easiest ways to learn the ways of Usd with. You can install a non-commercial version for free from their website. It is highly recommended to use it when following this guide.
Motivation
As USD has been consistently increasing its market share in the recent years, it is definitely a technology to be aware of when working in any industry that uses 3d related data. It is becoming the de facto standard format on how different applications and vendors exchange their data.
You might be thinking:
Oh no another guide! Do we really need this?
This guide aims to solve the following 'niche':
- It aims to be an onboarding guide for software developers & pipeline developers so that you can hit the ground running.
- It aims to be practical as opposed to offering a high-level overview. This means you'll find a lot of code examples from actual production scenarios as well as a more hands on approach instead of overviews/terminology explanations. We'll often link to resources you can look into before a certain section to have a better understanding should vocabulary issues arise.
- It aims to soften the steep learning curve that some aspects of USD have by having a look at common production examples so you can have those sweet "aha, that's how it works" moments.
Basically think of it as a balance of links listed in the below resources section.
If this is your first time working with Usd, we recommend watching this 20 minute video from Apple:
Understand USD fundamentals (Frm WWDC 2022)
It covers the basic terminology in a very succinct manner.
Resources
We highly recommend also checking out the following resources:
- USD - Pixar
- USD - Interest Forum
- USD - Working Group
- USD - SideFX/Houdini
- Book Of USD - Remedy Entertainment
- USD CookBook - Colin Kennedy
- USD - Nvidia
- USD - Apple
At this point of the guide, we just want to state, that we didn't re-invent the wheel here: A big thank you to all the (open-source) projects/tutorials/guides that cover different aspects of Usd. You have been a big help in designing this guide as well as giving great insights. There is no one-to-rule them all documentation, so please consider contributing back to these projects if possible!
Contributing and Acknowledgements
Please consider contributing back to the Usd project in the official Usd Repository and via the Usd User groups.
Feel free to fork this repository and share further examples/improvements. If you run into issues, please flag them by submitting a ticket.
Contributors
Structure
On this page will talk about how this guide is structured and what the best approach to reading it is.
Table of Contents
Structure
Most of our sections follow this simple template:
- Table of Contents: Here we show the structure of the individual page, so we can jump to what we are interested in.
- TL;DR (Too Long; Didn't Read) - In-A-Nutshell: Here we give a short summary of the page, the most important stuff without all the details.
- What should I use it for?: Here we explain what relevance the page has in our day to day work with USD.
- Resources: Here we provide external supplementary reading material, often the USD API docs or USD glossary.
- Overview: Here we cover the individual topic in broad strokes, so you get the idea of what it is about.
This guide uses Houdini as its "backbone" for exploring concepts, as it is one of the easiest ways to get started with USD.
You can grab free-for-private use copy of Houdini via the SideFX website. SideFX is the software development company behind the Houdini.
Almost all demos we show are from within Houdini, although you can also save the output of all our code snippets to a .usd file and view it in USD view or USD manager by calling stage.Export("/file/path.usd")/layer.Export("/file/path.usd")
You can find all of our example files in our Usd Survival Guide - GitHub Repository as well in our supplementary Usd Asset Resolver - GitHub Repository. Among these files are Houdini .hip scenes, Python snippets and a bit of C++/CMake code.
We also indicate important to know tips with stylized blocks, these come in the form of:
We often provide "Pro Tips" that give you pointers how to best approach advanced topics.
Danger blocks warn you about common pitfalls or short comings of USD and how to best workaround them.
Collapsible Block | Click me to show my content!
For longer code snippets, we often collapse the code block to maintain site readability.
print("Hello world!")
Learning Path
We recommend working through the guide from start to finish in chronological order. While we can do it in a random order, especially our Basic Building Blocks of Usd and Composition build on each other and should therefore be done in order.
To give you are fair warning though, we do deep dive a bit in the beginning, so just make sure you get the gist of it and then come back later when you feel like you need a refresher or deep dive on a specific feature.
How To Run Our Code Examples
We also have code blocks, where if you hover other them, you can copy the content to you clipboard by pressing the copy icon on the right. Most of our code examples are "containered", meaning they can run by themselves.
This does come with a bit of the same boiler plate code per example. The big benefit though is that we can just copy and run them and don't have to initialize our environment.
Most snippets create in memory stages or layers. If we want to use the snippets in a Houdini Python LOP, we have to replace the stage/layer access as follows:
In Houdini we can't call hou.pwd().editableStage() and hou.pwd().editableLayer() in the same Python LOP node.
Therefore, when running our high vs low level API examples, make sure you are using two different Python LOP nodes.
from pxr import Sdf, Usd
## Stages
# Native USD
stage = Usd.Stage.CreateInMemory()
# Houdini Python LOP
stage = hou.pwd().editableStage()
## Layers
# Native USD
layer = Sdf.Layer.CreateAnonymous()
# Houdini Python LOP
layer = hou.pwd().editableLayer()
Documentation
If you want to locally build this documentation, you'll have to download mdBook, mdBook-admonish and mdBook-mermaid and add their parent directories to the PATHenv variable so that the executables are found.
You can do this via bash (after running source setup.sh):
export MDBOOK_VERSION="0.4.28"
export MDBOOK_ADMONISH_VERSION="1.9.0"
export MDBOOK_MERMAID_VERSION="0.12.6"
export MDBOOK_SITEMAP_VERSION="0.1.0"
curl -L https://github.com/rust-lang/mdBook/releases/download/v$MDBOOK_VERSION/mdbook-v$MDBOOK_VERSION-x86_64-unknown-linux-gnu.tar.gz | tar xz -C ${REPO_ROOT}/tools
curl -L https://github.com/tommilligan/mdbook-admonish/releases/download/v$MDBOOK_ADMONISH_VERSION/mdbook-admonish-v$MDBOOK_ADMONISH_VERSION-x86_64-unknown-linux-gnu.tar.gz | tar xz -C ${REPO_ROOT}/tools
curl -L https://github.com/badboy/mdbook-mermaid/releases/download/v$MDBOOK_MERMAID_VERSION/mdbook-mermaid-v$MDBOOK_MERMAID_VERSION-x86_64-unknown-linux-gnu.tar.gz | tar xz -C ~/tools
export PATH=${REPO_ROOT}/tools:$PATH
You then can just run the following to build the documentation in html format:
./docs.sh
The documentation will then be built in docs/book.
Future Development
We do not cover the following topics yet:
- Cameras
- Render related schemas
- USD C++
- OCIO
- Render Procedurals
USD Essentials
In our essentials section, we cover the basics of USD from a software developer perspective.
That means we go over the most common base classes we'll interacting with in our day-to-day work.
Our approach is to start by looking at the smallest elements in USD and increasing complexity until we talk about how different broader aspects/concepts of USD work together.
That does mean we do not provide a high level overview. As mentioned in our motivation section, this guide is conceptualized to be an onboarding guide for developers. We therefore take a very code heavy and deep dive approach from the get-go.
Don't be scared though! We try to stay as "generic" as possible, avoiding USD's own terminology where possible.
Are you ready to dive into the wonderful world of USD? Then let's get started!
API Overview
Before we dive into the nitty gritty details, let's first have a look at how the USD API is structured.
Overall there are two different API "levels":
flowchart TD
    pxr([pxr]) --> highlevel([High Level -> Usd])
    pxr --> lowlevel([Low Level -> PcP/Sdf])
Most tutorials focus primarily on the high level API, as it is a bit more convenient when starting out. The more you work in Usd though, the more you'll start using the lower level API. Therefore this guide will often have examples for both levels.
We'd actually recommend starting out with the lower level API as soon as you can, as it will force you to write performant code from the start.
Now there are also a few other base modules that supplement these two API levels, we also have contact with them in this guide:
- Gf: The Graphics Foundations module provides all math related classes and utility functions (E.g matrix and vector data classes)
- Vt : The Value Types module provides the value types for what USD can store. Among these is also the
Vt.Array, which allows us to efficiently map USD arrays (of various data types like int/float/vectors) to numpy arrays for fast data processing. - Plug: This module manages USD's plugin framework.
- Tf: The Tools Foundations module gives us access to profiling, debugging and C++ utilities (Python/Threading). It also houses our type registry (for a variety of USD classes).
For a full overview, visit the excellently written USD Architecture Overview - Official API Docs section.
TL;DR - API Overview In-A-Nutshell
Here is the TL;DR version. Usd is made up of two main APIs:
- High level API:
- Low level API:
Individual components of Usd are loaded via a plugin based system, for example Hydra, kinds, file plugins (Vdbs, abc) etc.
Here is a simple comparison:
### High Level ### (Notice how we still use elements of the low level API)
from pxr import Sdf, Usd
stage = Usd.Stage.CreateInMemory()
prim_path = Sdf.Path("/bicycle")
prim = stage.DefinePrim(prim_path, "Xform")
attr = prim.CreateAttribute("tire:size", Sdf.ValueTypeNames.Float)
attr.Set(10)

### Low Level ###
from pxr import Sdf
layer = Sdf.Layer.CreateAnonymous()
prim_path = Sdf.Path("/bicycle")
prim_spec = Sdf.CreatePrimInLayer(layer, prim_path)
prim_spec.specifier = Sdf.SpecifierDef
prim_spec.typeName = "Xform"
attr_spec = Sdf.AttributeSpec(prim_spec, "tire:size", Sdf.ValueTypeNames.Float)
attr_spec.default = 10
What should I use it for?
You'll be using these two API levels all the time when working with Usd. The high level API is often used with read ops, the low level with write ops or inspecting the underlying caches of the high level API.
Resources
When should I use what?
As a rule of thumb, you use the high level API when:
- Reading data of a stage
- Using Usd Schema Classes (E.g. UsdGeomMesh, UsdClipsAPI, UsdGeomPrimvarsAPI)
And the low level API when:
- Creating/Copying/Moving data of a layer
- Performance is critical (When is it ever not?)
High Level API
The Usd Core API docs page is a great place to get an overview over the high level API:
Basically everything in the pxr.Usd namespace nicely wraps things in the pxr.Sdf/pxr.Pcp namespace with getters/setters, convenience classes and functions.
Therefore it is a bit more OOP oriented and follows C++ code design patterns.
This level always operates on the composed state of the stage. This means as soon as you are working stages, you'll be using the higher level API. It also takes care of validation data/setting common data, whereas the lower level API often leaves parts up to the user.
Low Level API
Great entry points for the lower level API:
This level always operates individual layers. You won't have access to the stage aka composed view of layers.
Workflows
The typical workflow is to do all read/query operations in the high level API by creating/accessing a stage and then to do all the write operations in the low level API.
In DCCs, the data creation is done by the software, after that it is your job to massage the data to its final form based on what your pipeline needs:
In the daily business, you'll be doing this 90% of the time:
- Rename/Remove prims
- Create additional properties/attributes/relationships
- Add metadata
Sounds simple, right? Ehm right??
Well yes and no. This guide tries to give you good pointers of common pitfalls you might run into.
So let's get started with specifics!
Elements
In this sub-section we have a look at the basic building blocks of Usd.
Our approach is incrementally going from the smallest building blocks to the larger ones (except for metadata we squeeze that in later as a deep dive), so the recommended order to work through is as follows:
- Paths
- Data Containers (Prims & Properties)
- Data Types
- Schemas ('Classes' in OOP terminology)
- Metadata
- Layers & Stages (Containers of actual data)
- Traversing/Loading Data (Purpose/Visibility/Activation/Population)
- Animation/Time Varying Data
- Materials
- Transforms
- Collections
- Notices/Event Listeners
- Standalone Utilities
This will introduce you to the core classes you'll be using the most and then increasing the complexity step by step to see how they work together with the rest of the API.
We try to stay terminology agnostic as much as we can, but some vocab you just have to learn to use USd. We compiled a small cheat sheet here, that can assist you with all those weird Usd words.
Getting down the basic building blocks down is crucial, so take your time! In the current state the examples are a bit "dry", we'll try to make it more entertaining in the future.
Get yourself comfortable and let's get ready to roll! You'll master the principles of Usd in no time!
Paths
As Usd is a hierarchy based format, one of its core functions is handling paths. In order to do this, Usd provides the pxr.Sdf.Path class. You'll be using quite a bunch, so that's why we want to familiarize ourselves with it first.
pxr.Sdf.Path("/My/Example/Path")
Table of Contents
TL;DR - Paths In-A-Nutshell
Here is the TL;DR version: Paths can encode the following path data:
Prim: "/set/bicycle" - Separator/Property:Attribute: "/set/bicycle.size" - Separator.Relationship: "/set.bikes[/path/to/target/prim]" - Separator./ Targets[](Prim to prim target paths e.g. collections of prim paths)
Variants("/set/bicycle{style=blue}wheel.size")
from pxr import Sdf
# Prims
prim_path = Sdf.Path("/set/bicycle")
prim_path_str = Sdf.Path("/set/bicycle").pathString # Returns the Python str "/set/bicycle"
# Properties (Attribute/Relationship)
property_path = Sdf.Path("/set/bicycle.size")
property_with_namespace_path = Sdf.Path("/set/bicycle.tire:size")
# Relationship targets
prim_rel_target_path = Sdf.Path("/set.bikes[/set/bicycles]")           # Prim to prim linking (E.g. path collections)
# Variants
variant_path = prim_path.AppendVariantSelection("style", "blue") # Returns: Sdf.Path('/set/bicycle{style=blue}')
variant_path = Sdf.Path('/set/bicycle{style=blue}frame/screws')
What should I use it for?
Anything that is path related in your hierarchy, use Sdf.Path objects. It will make your life a lot easier than if you were to use strings.
Resources
Overview
Each element in the path between the "/" symbol is a prim similar to how on disk file paths mark a folder or a file.
Most Usd API calls that expect Sdf.Path objects implicitly take Python strings as well, we'd recommend using Sdf.Paths from the start though, as it is faster and more convenient.
We recommend going through these small examples (5-10 min), just to get used to the Path class.
Creating a path & string representation
from pxr import Sdf
path = Sdf.Path("/set/bicycle")
path_name = path.name     # Similar to os.path.basename(), returns the last element of the path
path_empty = path.isEmpty # Property to check if path is empty
# Path validation (E.g. for user created paths)
Sdf.Path.IsValidPathString("/some/_wrong!_/path") # Returns: (False, 'Error Message')
# Join paths (Similar to os.path.join())
path = Sdf.Path("/set/bicycle")
path.AppendPath(Sdf.Path("frame/screws")) # Returns: Sdf.Path("/set/bicycle/frame/screws")
# Manually join individual path elements
path = Sdf.Path(Sdf.Path.childDelimiter.join(["set", "bicycle"]))
# Get the parent path
parent_path = path.GetParentPath() # Returns Sdf.Path("/set")
parent_path.IsRootPrimPath()       # Returns: True (Root prims are prims that only
                                   #                have a single '/')
ancestor_range = path.GetAncestorsRange() # Returns an iterator for the parent paths, the same as recursively calling GetParentPath()
# Add child path
child_path = path.AppendChild("wheel") # Returns: Sdf.Path("/set/bicycle/wheel")
# Check if path is a prim path (and not a attribute/relationship path)
path.IsPrimPath() # Returns: True
# Check if path starts with another path
# Important: It actually compares individual path elements (So it is not a str.startswith())
Sdf.Path("/set/cityA/bicycle").HasPrefix(Sdf.Path("/set"))      # Returns: True
Sdf.Path("/set/cityA/bicycle").HasPrefix(Sdf.Path("/set/city")) # Returns: False
Sdf.Path("/set/bicycle").GetCommonPrefix(Sdf.Path("/set"))      # Returns: Sdf.Path("/set")
# Relative/Absolute paths
path = Sdf.Path("/set/cityA/bicycle")
rel_path = path.MakeRelativePath("/set")     # Returns: Sdf.Path('cityA/bicycle')
abs_path = rel_path.MakeAbsolutePath("/set") # Returns: Sdf.Path('/set/cityA/bicycle')
abs_path.IsAbsolutePath()                    # Returns: True -> Checks path[0] == "/"
# Do not use this is performance critical loops
# See for more info: https://openusd.org/release/api/_usd__page__best_practices.html
# This gives you a standard python string
path_str = path.pathString
Special Paths: emptyPath & absoluteRootPath
from pxr import Sdf
# Shortcut for Sdf.Path("/")
root_path = Sdf.Path.absoluteRootPath
root_path == Sdf.Path("/") # Returns: True
# We'll cover in a later section how to rename/remove things in Usd,
# so don't worry about the details how this works yet. Just remember that
# an emptyPath exists and that its usage is to remove something.
src_path = Sdf.Path("/set/bicycle")
dst_path = Sdf.Path.emptyPath
edit = Sdf.BatchNamespaceEdit()
edit.Add(src_path, dst_path)
Variants
We can also encode variants into the path via the {variantSetName=variantName} syntax.
# Variants (see the next sections) are also encoded
# in the path via the "{variantSetName=variantName}" syntax.
from pxr import Sdf
path = Sdf.Path("/set/bicycle")
variant_path = path.AppendVariantSelection("style", "blue") # Returns: Sdf.Path('/set/bicycle{style=blue}')
variant_path = Sdf.Path('/set/bicycle{style=blue}frame/screws')
# Property path to prim path with variants
property_path = Sdf.Path('/set/bicycle{style=blue}frame/screws.size')
variant_path = property_path.GetPrimOrPrimVariantSelectionPath() # Returns: Sdf.Path('/set/bicycle{style=blue}frame/screws')
# Typical iteration example:
variant_path = Sdf.Path('/set/bicycle{style=blue}frame/screws')
if variant_path.ContainsPrimVariantSelection():          # Returns: True # For any variant selection in the whole path
    for parent_path in variant_path.GetAncestorsRange():
        if parent_path.IsPrimVariantSelectionPath():
            print(parent_path.GetVariantSelection())     # Returns: ('style', 'blue')

# When authoring relationships, we usually want to remove all variant encodings in the path:
variant_path = Sdf.Path('/set/bicycle{style=blue}frame/screws')
prim_rel_target_path = variant_path.StripAllVariantSelections() # Returns: Sdf.Path('/set/bicycle/frame/screws')
Properties
Paths can also encode properties (more about what these are in the next section).
Notice that attributes and relationships are both encoded with the "." prefix, hence the name property is used to describe them both.
When using Usd, we'll rarely run into the relationship [] encoded targets paths. Instead we use the Usd.Relationship/Sdf.RelationshipSpec methods to set the path connections. Therefore it is just good to know they exist.
# Properties (see the next section) are also encoded
# in the path via the "." (Sdf.Path.propertyDelimiter) token
from pxr import Sdf
path = Sdf.Path("/set/bicycle.size")
property_name = path.name # Be aware, this will return 'size' (last element)
# Append property to prim path
Sdf.Path("/set/bicycle").AppendProperty("size") # Returns: Sdf.Path("/set/bicycle.size")
# Properties can also be namespaced with ":" (Sdf.Path.namespaceDelimiter)
path = Sdf.Path("/set/bicycle.tire:size")
property_name = path.name                 # Returns: 'tire:size'
property_name = path.ReplaceName("color") # Returns: Sdf.Path("/set/bicycle.color")
# Check if path is a property path (and not a prim path)
path.IsPropertyPath() # Returns: True
# Check if path is a property path (and not a prim path)
Sdf.Path("/set/bicycle.tire:size").IsPrimPropertyPath()  # Returns: True
Sdf.Path("/set/bicycle").IsPrimPropertyPath()            # Returns: False
# Convenience methods
path = Sdf.Path("/set/bicycle").AppendProperty(Sdf.Path.JoinIdentifier(["tire", "size"]))
namespaced_elements = Sdf.Path.TokenizeIdentifier("tire:size")   # Returns: ["tire", "size"]
last_element = Sdf.Path.StripNamespace("/set/bicycle.tire:size") # Returns: 'size'
# With GetPrimPath we can strip away all property encodings
path = Sdf.Path("/set/bicycle.tire:size")
prim_path = path.GetPrimPath() # Returns: Sdf.Path('/set/bicycle')

# We can't actually differentiate between a attribute and relationship based on the property path.
# Hence the "Property" terminology.
# In practice we rarely use/see this as this is a pretty low level API use case.
# The only 'common' case, where you will see this is when calling the Sdf.Layer.Traverse function.
# To encode prim relation targets, we can use:
prim_rel_target_path = Sdf.Path("/set.bikes[/set/bicycle]")
prim_rel_target_path.IsTargetPath() # Returns: True
prim_rel_target_path = Sdf.Path("/set.bikes").AppendTarget("/set/bicycle")
# We can also encode check if a path is a relational attribute.
# ToDo: I've not seen this encoding being used anywhere so far.
# "Normal" attr_spec.connectionsPathList connections as used in shaders
# are encoded via Sdf.Path("/set.bikes[/set/bicycle.someOtherAttr]")
attribute_rel_target_path = Sdf.Path("/set.bikes[/set/bicycles].size")
attribute_rel_target_path.IsRelationalAttributePath()  # Returns: True
Data Containers (Prims & Properties)
For Usd to store data at the paths, we need a data container.
To fill this need, Usd has the concept of prims.
Prims can own properties, which can either be attributes or relationships. These store all the data that can be consumed by clients. Prims are added to layers which are then written to on disk Usd files.
In the high level API it looks as follows:
flowchart LR
    prim([Usd.Prim]) --> property([Usd.Property])
    property --> attribute([Usd.Attribute])
    property --> relationship([Usd.Relationship])
In the low level API:
flowchart LR
    prim([Sdf.PrimSpec]) --> property([Sdf.PropertySpec])
    property --> attribute([Sdf.AttributeSpec])
    property --> relationship([Sdf.RelationshipSpec])
Structure
Large parts of the (high level and parts of the low level) API follow this pattern:
- <ContainerType>.Has<Name>() or <ContainerType>.Is<Name>()
- <ContainerType>.Create<Name>()
- <ContainerType>.Get<Name>()
- <ContainerType>.Set<Name>()
- <ContainerType>.Clear<Name>() or .Remove<Name>()
The high level API also has the extra destinction of <ContainerType>.HasAuthored<Name>() vs .Has<Name>().
HasAuthored only returns explicitly defined values, where Has is allowed to return schema fallbacks.
The low level API only has the explicitly defined values, as does not operate on the composed state and is therefore not aware of schemas (at least when it comes to looking up values).
Let's do a little thought experiment:
- If we were to compare Usd to .json files, each layer would be a .json file, where the nested key hierarchy is the Sdf.Path. Each path would then have standard direct key/value pairs like
typeName/specifierthat define metadata as well as theattributesandrelationshipskeys which carry dicts with data about custom properties. - If we would then write an API for the .json files, our low level API would directly edit the keys. This is what the Sdf API does via
Sdf.PrimSpec/Sdf.PropertySpec/Sdf.AttributeSpec/Sdf.RelationshipSpecclasses. These are very small wrappers that set the keys more or less directly. They are still wrappers though. - To make our lives easier, we would also create a high level API, that would call into the low level API. The high level API would then be a public API, so that if we decide to change the low-level API, the high level API still works. Usd does this via the
Usd.Prim/Usd.Property/Usd.Attribute/Usd.Relationshipclasses. These classes provide OOP patterns like Getter/Setters as well as common methods to manipulate the underlying data.
This is in very simplified terms how the Usd API works in terms of data storage.
Table of Contents
TL;DR - Data Containers (Prims/Properties/Attributes/Relationships) In-A-Nutshell
- In order to store data at our
Sdf.Paths, we need data containers. Usd therefore has the concept ofUsd.Prims/Sdf.PrimSpecs, which can holdUsd.Propertyies/Sdf.PropertySpecs - To distinguish between data and data relations,
Usd.Propertyies are separated in:Usd.Attributes/Sdf.AttributeSpecs: These store data of different types (float/ints/arrays/etc.)UsdGeom.Primvars: These are the same as attributes with extra features:- They are created the same way as attributes, except they use the
primvars.<myAttributeName>namespace. - They get inherited down the hierarchy if they are of constant interpolation (They don't vary per point/vertex/prim).
- They are exported to Hydra (Usd's render scene description abstraction API), so you can use them for materials/render settings/etc.
- They are created the same way as attributes, except they use the
Usd.Relationships/Sdf.RelationshipSpecs: These store mapping from prim to prim(s) or attribute to attribute.
What should I use it for?
In production, these are the classes you'll have the most contact with. They handle data creation/storage/modification. They are the heart of what makes Usd be Usd.
Resources
- Usd.Prim
- Usd.Property
- Usd.Attribute
- Usd.Relationship
- Sdf.PrimSpec
- Sdf.PropertySpec
- Sdf.AttributeSpec
- Sdf.RelationshipSpec
Overview
We cover the details for prims and properties in their own sections as they are big enough topics on their own:
Prims
For an overview and summary please see the parent Data Containers section.
Table of Contents
- Prim Basics
- Hierarchy (Parent/Child)
- Schemas
- Composition
- Loading Data (Activation/Visibility)
- Properties (Attributes/Relationships)
Overview
The main purpose of a prim is to define and store properties. The prim class itself only stores very little data:
- Path/Name
- A connection to its properties
- Metadata related to composition and schemas as well as core metadata(specifier, typeName, kind,activation, assetInfo, customData)
This page covers the data on the prim itself, for properties check out this section.
The below examples demonstrate the difference between the higher and lower level API where possible. Some aspects of prims are only available via the high level API, as it acts on composition/stage related aspects.
There is a lot of code duplication in the below examples, so that each example works by itself. In practice editing data is very concise and simple to read, so don't get overwhelmed by all the examples.
Prim Basics
Setting core metadata via the high level is not all exposed on the prim itself via getters/setters, instead the getters/setters come in part from schemas or schema APIs. For example setting the kind is done via the Usd.ModelAPI.
High Level
from pxr import Kind, Sdf, Usd
stage = Usd.Stage.CreateInMemory()
prim_path = Sdf.Path("/cube")
prim = stage.DefinePrim(prim_path, "Xform") # Here defining the prim uses a `Sdf.SpecifierDef` define op by default.
# The specifier and type name is something you'll usually always set.
prim.SetSpecifier(Sdf.SpecifierOver)
prim.SetTypeName("Cube")
# The other core specs are set via schema APIs, for example:
model_API = Usd.ModelAPI(prim)
if not model_API.GetKind():
    model_API.SetKind(Kind.Tokens.group)
We are also a few "shortcuts" that check specifiers/kinds (.IsAbstract, .IsDefined, .IsGroup, .IsModel), more about these in the kind section below.
Low Level
The Python lower level Sdf.PrimSpec offers quick access to setting common core metadata via standard class instance attributes:
from pxr import Sdf
layer = Sdf.Layer.CreateAnonymous()
prim_path = Sdf.Path("/cube")
prim_spec = Sdf.CreatePrimInLayer(layer, prim_path) # Here defining the prim uses a `Sdf.SpecifierOver` define op by default.
# The specifier and type name is something you'll usually always set.
prim_spec.specifier = Sdf.SpecifierDef # Or Sdf.SpecifierOver/Sdf.SpecifierClass
prim_spec.typeName = "Cube"
prim_spec.active = True # There is also a prim_spec.ClearActive() shortcut for removing active metadata
prim_spec.kind = "group"    # There is also a prim_spec.ClearKind() shortcut for removing kind metadata
prim_spec.instanceable = False # There is also a prim_spec.ClearInstanceable() shortcut for removing instanceable metadata.
prim_spec.hidden = False # A hint for UI apps to hide the spec for viewers

# You can also set them via the standard metadata commands:
from pxr import Sdf
layer = Sdf.Layer.CreateAnonymous()
prim_path = Sdf.Path("/cube")
prim_spec = Sdf.CreatePrimInLayer(layer, prim_path)
# The specifier and type name is something you'll usually always set.
prim_spec.SetInfo(prim_spec.SpecifierKey, Sdf.SpecifierDef) # Or Sdf.SpecifierOver/Sdf.SpecifierClass
prim_spec.SetInfo(prim_spec.TypeNameKey, "Cube")
# These are some other common specs:
prim_spec.SetInfo(prim_spec.ActiveKey, True)
prim_spec.SetInfo(prim_spec.KindKey, "group")
prim_spec.SetInfo("instanceable", False)
prim_spec.SetInfo(prim_spec.HiddenKey, False)
We will look at specifics in the below examples, so don't worry if you didn't understand everything just yet :)
Specifiers
Usd has the concept of specifiers.
The job of specifiers is mainly to define if a prim should be visible to hierarchy traversals. More info about traversals in our Layer & Stage section.
Here is an example USD ascii file with all three specifiers.
def Cube "definedCube" ()
{
    double size = 2
}

over Cube "overCube" ()
{
    double size = 2
}

class Cube "classCube" ()
{
    double size = 2
}
This is how it affects traversal:
### High Level ###
from pxr import Sdf, Usd
stage = Usd.Stage.CreateInMemory()
# Replicate the Usd file example above:
stage.DefinePrim("/definedCube", "Cube").SetSpecifier(Sdf.SpecifierDef)
stage.DefinePrim("/overCube", "Cube").SetSpecifier(Sdf.SpecifierOver)
stage.DefinePrim("/classCube", "Cube").SetSpecifier(Sdf.SpecifierClass)
## Traverse with default filter (USD calls filter 'predicate')
# UsdPrimIsActive & UsdPrimIsDefined & UsdPrimIsLoaded & ~UsdPrimIsAbstract
for prim in stage.Traverse():
    print(prim)
# Returns:
# Usd.Prim(</definedCube>)
## Traverse with 'all' filter (USD calls filter 'predicate')
for prim in stage.TraverseAll():
    print(prim)
# Returns:
# Usd.Prim(</definedCube>)
# Usd.Prim(</overCube>)
# Usd.Prim(</classCube>)
## Traverse with IsAbstract (== IsClass) filter (USD calls filter 'predicate')
predicate = Usd.PrimIsAbstract
for prim in stage.Traverse(predicate):
    print(prim)
# Returns:
# Usd.Prim(</classCube>)
## Traverse with ~PrimIsDefined filter (==IsNotDefined) (USD calls filter 'predicate')
predicate = ~Usd.PrimIsDefined
for prim in stage.Traverse(predicate):
    print(prim)
# Returns:
# Usd.Prim(</overCube>)
Sdf.SpecifierDef: def(define)
This specifier is used to specify a prim in a hierarchy, so that is it always visible to traversals.
### High Level ###
from pxr import Sdf, Usd
stage = Usd.Stage.CreateInMemory()
prim_path = Sdf.Path("/bicycle")
# The .DefinePrim method uses a Sdf.SpecifierDef specifier by default
prim = stage.DefinePrim(prim_path, "Xform")
prim.SetSpecifier(Sdf.SpecifierDef)

### Low Level ###
from pxr import Sdf
layer = Sdf.Layer.CreateAnonymous()
prim_path = Sdf.Path("/bicycle")
# The .CreatePrimInLayer method uses a Sdf.SpecifierOver specifier by default
prim_spec = Sdf.CreatePrimInLayer(layer, prim_path)
prim_spec.specifier = Sdf.SpecifierDef
Sdf.SpecifierOver: over
Prims defined with over only get loaded if the prim in another layer has been specified with a defspecified. It gets used when you want to add data to an existing hierarchy, for example layering only position and normals data onto a character model, where the base model has all the static attributes like topology or UVs.
By default stage traversals will skip over over only prims. Prims that only have an over also do not get forwarded to Hydra render delegates.
### High Level ###
from pxr import Sdf, Usd
stage = Usd.Stage.CreateInMemory()
prim_path = Sdf.Path("/bicycle")
# The .DefinePrim method uses a Sdf.SpecifierDef specifier by default
prim = stage.DefinePrim(prim_path, "Xform")
prim.SetSpecifier(Sdf.SpecifierOver)
# or
prim = stage.OverridePrim(prim_path)
# The prim class' IsDefined method checks if a prim (and all its parents) have the "def" specifier.
print(prim.GetSpecifier() == Sdf.SpecifierOver, not prim.IsDefined() and not prim.IsAbstract())

### Low Level ###
from pxr import Sdf
layer = Sdf.Layer.CreateAnonymous()
prim_path = Sdf.Path("/bicycle")
# The .CreatePrimInLayer method uses a Sdf.SpecifierOver specifier by default
prim_spec = Sdf.CreatePrimInLayer(layer, prim_path)
prim_spec.specifier = Sdf.SpecifierOver
Sdf.SpecifierClass: class
The class specifier gets used to define "template" hierarchies that can then get attached to other prims. A typical example would be to create a set of geometry render settings that then get applied to different parts of the scene by creating an inherit composition arc. This way you have a single control point if you want to adjust settings that then instantly get reflected across your whole hierarchy.
- By default stage traversals will skip over
classprims. - Usd refers to class prims as "abstract", as they never directly contribute to the hierarchy.
- We target these class prims via inherits/internal references and specialize composition arcs
### High Level ###
from pxr import Sdf, Usd
stage = Usd.Stage.CreateInMemory()
prim_path = Sdf.Path("/bicycle")
# The .DefinePrim method uses a Sdf.SpecifierDef specifier by default
prim = stage.DefinePrim(prim_path, "Xform")
prim.SetSpecifier(Sdf.SpecifierClass)
# or
prim = stage.CreateClassPrim(prim_path)
# The prim class' IsAbstract method checks if a prim (and all its parents) have the "Class" specifier.
print(prim.GetSpecifier() == Sdf.SpecifierClass, prim.IsAbstract())

### Low Level ###
from pxr import Sdf
layer = Sdf.Layer.CreateAnonymous()
prim_path = Sdf.Path("/bicycle")
# The .CreatePrimInLayer method uses a Sdf.SpecifierOver specifier by default
prim_spec = Sdf.CreatePrimInLayer(layer, prim_path)
prim_spec.specifier = Sdf.SpecifierClass
Type Name
The type name specifies what concrete schema the prim adheres to. In plain english: Usd has the concept of schemas, which are like OOP classes. Each prim can be an instance of a class, so that it receives the default attributes of that class. More about schemas in our schemas section. You can also have prims without a type name, but in practice you shouldn't do this. For that case USD has an "empty" class that just has all the base attributes called "Scope".
### High Level ###
from pxr import Sdf, Usd
stage = Usd.Stage.CreateInMemory()
prim_path = Sdf.Path("/bicycle")
prim = stage.DefinePrim(prim_path, "Xform")
prim.SetTypeName("Xform")

### Low Level ###
from pxr import Sdf
layer = Sdf.Layer.CreateAnonymous()
prim_path = Sdf.Path("/bicycle")
prim_spec = Sdf.CreatePrimInLayer(layer, prim_path)
prim_spec.typeName = "Xform"

# Default type without any fancy bells and whistles:
prim.SetTypeName("Scope")
prim_spec.typeName = "Scope"
Kind
The kind metadata can be attached to prims to mark them what kind hierarchy level it is. This way we can quickly traverse and select parts of the hierarchy that are of interest to us, without traversing into every child prim.
For a full explanation we have a dedicated section: Kinds
Here is the reference code on how to set kinds. For a practical example with stage traversals, check out the kinds page.
### High Level ###
from pxr import Kind, Sdf, Usd
stage = Usd.Stage.CreateInMemory()
prim_path = Sdf.Path("/bicycle")
prim = stage.DefinePrim(prim_path, "Xform")
model_API = Usd.ModelAPI(prim)
model_API.SetKind(Kind.Tokens.component)
# The prim class' IsModel/IsGroup method checks if a prim (and all its parents) are (sub-) kinds of model/group.
model_API.SetKind(Kind.Tokens.model)
kind = model_API.GetKind()
print(kind, (Kind.Registry.GetBaseKind(kind) or kind) == Kind.Tokens.model, prim.IsModel())
model_API.SetKind(Kind.Tokens.group)
kind = model_API.GetKind()
print(kind, (Kind.Registry.GetBaseKind(kind) or kind) == Kind.Tokens.group, prim.IsGroup())

### Low Level ###
from pxr import Kind, Sdf
layer = Sdf.Layer.CreateAnonymous()
prim_path = Sdf.Path("/bicycle")
prim_spec = Sdf.CreatePrimInLayer(layer, prim_path)
prim_spec.SetInfo("kind", Kind.Tokens.component)
Active
The active metadata controls if the prim and its children are loaded or not.
We only cover here how to set the metadata, for more info checkout our Loading mechansims section. Since it is a metadata entry, it can not be animated. For animated pruning we must use visibility.
from pxr import Sdf, Usd
### High Level ###
stage = Usd.Stage.CreateInMemory()
prim_path = Sdf.Path("/bicycle")
prim = stage.DefinePrim(prim_path, "Xform")
prim.SetActive(False)

### Low Level ###
layer = Sdf.Layer.CreateAnonymous()
prim_path = Sdf.Path("/cube")
prim_spec = Sdf.CreatePrimInLayer(layer, prim_path)
prim_spec.active = False
# Or
prim_spec.SetInfo(prim_spec.ActiveKey, True)
Metadata
We go into more detail about metadata in our Metadata section.
As you can see on this page, most of the prim functionality is actually done via metadata, except path, composition and property related functions/attributes.
Tokens (Low Level API)
Prim (as well as property, attribute and relationship) specs also have the tokens they can set as their metadata as class attributes ending with 'Key'.
These 'Key' attributes are the token names that can be set on the spec via SetInfo, for example prim_spec.SetInfo(prim_spec.KindKey, "group")
from pxr import Sdf
layer = Sdf.Layer.CreateAnonymous()
prim_path = Sdf.Path("/cube")
prim_spec = Sdf.CreatePrimInLayer(layer, prim_path)
prim_spec.SetInfo(prim_spec.KindKey, "group")
Debugging (Low Level API)
You can also print a spec as its ascii representation (as it would be written to .usda files):
from pxr import Sdf
layer = Sdf.Layer.CreateAnonymous()
prim_path = Sdf.Path("/cube")
prim_spec = Sdf.CreatePrimInLayer(layer, prim_path)
prim_spec.specifier = Sdf.SpecifierDef
prim_spec.SetInfo(prim_spec.KindKey, "group")
attr_spec = Sdf.AttributeSpec(prim_spec, "size", Sdf.ValueTypeNames.Float)
# Running this
print(prim_spec.GetAsText())
# Returns:
"""
def "cube" (
    kind = "group"
)
{
    float size
}
"""
Hierarchy (Parent/Child)
From any prim you can navigate to its hierarchy neighbors via the path related methods. The lower level API is dict based when accessing children, the high level API returns iterators or lists.
### High Level ###
# Has: 'IsPseudoRoot'
# Get: 'GetParent', 'GetPath', 'GetName', 'GetStage',
#      'GetChild', 'GetChildren', 'GetAllChildren',
#      'GetChildrenNames', 'GetAllChildrenNames',
#      'GetFilteredChildren', 'GetFilteredChildrenNames',
# The GetAll<MethodNames> return children that have specifiers other than Sdf.SpecifierDef
from pxr import Sdf, Usd
stage = Usd.Stage.CreateInMemory()
prim_path = Sdf.Path("/set/bicycle")
prim = stage.DefinePrim(prim_path, "Xform")
parent_prim = prim.GetParent()
print(prim.GetPath()) # Returns: Sdf.Path("/set/bicycle")
print(prim.GetParent()) # Returns: Usd.Prim("/set")
print(parent_prim.GetChildren()) # Returns: [Usd.Prim(</set/bicycle>)]
print(parent_prim.GetChildrenNames()) # Returns: ['bicycle']

### Low Level ###
from pxr import Sdf
layer = Sdf.Layer.CreateAnonymous()
prim_path = Sdf.Path("/set/bicycle")
prim_spec = Sdf.CreatePrimInLayer(layer, prim_path)
print(prim_spec.path) # Returns: Sdf.Path("/set/bicycle")
print(prim_spec.name) # Returns: "bicycle"
# To rename a prim, you can simply set the name attribute to something else.
# If you want to batch-rename, you should use the Sdf.BatchNamespaceEdit class, see our explanation [here]()
prim_spec.name = "coolBicycle"
print(prim_spec.nameParent) # Returns: Sdf.PrimSpec("/set")
print(prim_spec.nameParent.nameChildren) # Returns: {'coolBicycle': Sdf.Find('anon:0x7f6e5a0e3c00:LOP:/stage/pythonscript3', '/set/coolBicycle')}
print(prim_spec.layer) # Returns: The active layer object the spec is on.
Schemas
We explain in more detail what schemas are in our schemas section. In short: They are the "base classes" of Usd. Applied schemas are schemas that don't define the prim type and instead just "apply" (provide values) for specific metadata/properties
The 'IsA' check is a very valueable check to see if something is an instance of a (base) class. It is similar to Python's isinstance method.
### High Level ###
# Has: 'IsA', 'HasAPI', 'CanApplyAPI'
# Get: 'GetTypeName', 'GetAppliedSchemas'
# Set: 'SetTypeName', 'AddAppliedSchema', 'ApplyAPI'
# Clear: 'ClearTypeName', 'RemoveAppliedSchema', 'RemoveAPI'
from pxr import Sdf, Usd
stage = Usd.Stage.CreateInMemory()
prim_path = Sdf.Path("/bicycle")
prim = stage.DefinePrim(prim_path, "Xform")
# Typed Schemas
prim.SetTypeName("Xform")
# Applied schemas
prim.AddAppliedSchema("SkelBindingAPI")
# AddAppliedSchema does not check if the schema actually exists,
# you have to use this for codeless schemas.
# prim.RemoveAppliedSchema("SkelBindingAPI")
# Single-Apply API Schemas
prim.ApplyAPI("GeomModelAPI") # Older USD versions: prim.ApplyAPI("UsdGeomModelAPI")

### Low Level ###
# To set applied API schemas via the low level API, we just
# need to set the `apiSchemas` key to a Token Listeditable Op.
from pxr import Sdf
layer = Sdf.Layer.CreateAnonymous()
prim_path = Sdf.Path("/bicycle")
prim_spec = Sdf.CreatePrimInLayer(layer, prim_path)
# Typed Schemas
prim_spec.typeName = "Xform"
# Applied Schemas
schemas = Sdf.TokenListOp.Create(
    prependedItems=["SkelBindingAPI", "GeomModelAPI"]
)
prim_spec.SetInfo("apiSchemas", schemas)
Prim Type Definition (High Level)
With the prim definition we can inspect what the schemas provide. Basically you are inspecting the class (as to the prim being the instance, if we compare it to OOP paradigms). In production, you won't be using this a lot, it is good to be aware of it though.
from pxr import Sdf, Tf, Usd, UsdGeom
stage = Usd.Stage.CreateInMemory()
prim_path = Sdf.Path("/bicycle")
prim = stage.DefinePrim(prim_path, "Xform")
prim.ApplyAPI("GeomModelAPI") # Older USD versions: prim.ApplyAPI("UsdGeomModelAPI")
prim_def = prim.GetPrimDefinition()
print(prim_def.GetAppliedAPISchemas()) # Returns: ['GeomModelAPI']
print(prim_def.GetPropertyNames())
# Returns: All properties that come from the type name schema and applied schemas
"""
['model:drawModeColor', 'model:cardTextureZPos', 'model:drawMode', 'model:cardTextureZNeg',
'model:cardTextureYPos', 'model:cardTextureYNeg', 'model:cardTextureXPos', 'model:cardTextur
eXNeg', 'model:cardGeometry', 'model:applyDrawMode', 'proxyPrim', 'visibility', 'xformOpOrde
r', 'purpose']
"""
# You can also bake down the prim definition, this won't flatten custom properties though.
dst_prim = stage.DefinePrim("/flattenedExample")
dst_prim = prim_def.FlattenTo(dst_prim)
# This will also flatten all metadata (docs etc.), this should only be used, if you need to export
# a custom schema to an external vendor. (Not sure if this the "official" way to do it, I'm sure
# there are better ones.)
Prim Type Info (High Level)
The prim type info holds the composed type info of a prim. You can think of it as as the class that answers Python type() like queries for Usd. It caches the results of type name and applied API schema names, so that prim.IsA(<typeName>) checks can be used to see if the prim matches a given type.
The prim's prim.IsA(<typeName>) checks are highly performant, you should use them as often as possible when traversing stages to filter what prims you want to edit. Doing property based queries to determine if a prim is of interest to you, is a lot slower.
from pxr import Sdf, Tf, Usd, UsdGeom
stage = Usd.Stage.CreateInMemory()
prim_path = Sdf.Path("/bicycle")
prim = stage.DefinePrim(prim_path, "Xform")
prim.ApplyAPI("GeomModelAPI")
print(prim.IsA(UsdGeom.Xform)) # Returns: True
print(prim.IsA(Tf.Type.FindByName('UsdGeomXform'))) # Returns: True
prim_type_info = prim.GetPrimTypeInfo()
print(prim_type_info.GetAppliedAPISchemas()) # Returns: ['GeomModelAPI']
print(prim_type_info.GetSchemaType()) # Returns: Tf.Type.FindByName('UsdGeomXform')
print(prim_type_info.GetSchemaTypeName()) # Returns: Xform
Composition
We discuss handling composition in our Composition section as it follows some different rules and is a bigger topic to tackle.
Loading Data (Purpose/Activation/Visibility)
We cover this in detail in our Loading Data section.
### High Level ###
from pxr import Sdf, Tf, Usd, UsdGeom
# Has: 'HasAuthoredActive', 'HasAuthoredHidden'
# Get: 'IsActive', 'IsLoaded', 'IsHidden'
# Set: 'SetActive', 'SetHidden'
# Clear: 'ClearActive', 'ClearHidden'
# Loading: 'Load', 'Unload'
stage = Usd.Stage.CreateInMemory()
prim_path = Sdf.Path("/bicycle")
prim = stage.DefinePrim(prim_path, "Xform")
## Activation: Controls subhierarchy loading of prim.
prim.SetActive(False) #
# prim.ClearActive()
## Visibility: Controls the visiblity for render delegates (subhierarchy will still be loaded)
imageable_API = UsdGeom.Imageable(prim)
visibility_attr = imageable_API.CreateVisibilityAttr()
visibility_attr.Set(UsdGeom.Tokens.invisible)
## Purpose: Controls if the prim is visible for what the renderer requested.
imageable_API = UsdGeom.Imageable(prim)
purpose_attr = imageable_API.CreatePurposeAttr()
purpose_attr.Set(UsdGeom.Tokens.render)
## Payload loading: Control payload loading (High Level only as it redirects the request to the stage).
# In our example stage here, we have no payloads, so we don't see a difference.
prim.Load()
prim.Unload()
# Calling this on the prim is the same thing.
prim = stage.GetPrimAtPath(prim_path)
prim.GetStage().Load(prim_path)
prim.GetStage().Unload(prim_path)
## Hidden: # Hint to hide for UIs
prim.SetHidden(False)
# prim.ClearHidden()

### Low Level ###
from pxr import Sdf, UsdGeom
layer = Sdf.Layer.CreateAnonymous()
prim_path = Sdf.Path("/set/bicycle")
prim_spec = Sdf.CreatePrimInLayer(layer, prim_path)
## Activation: Controls subhierarchy loading of prim.
prim_spec.active = False
# prim_spec.ClearActive()
## Visibility: Controls the visiblity for render delegates (subhierarchy will still be loaded)
visibility_attr_spec = Sdf.AttributeSpec(prim_spec, UsdGeom.Tokens.visibility, Sdf.ValueTypeNames.Token)
visibility_attr_spec.default = UsdGeom.Tokens.invisible
## Purpose: Controls if the prim is visible for what the renderer requested.
purpose_attr_spec = Sdf.AttributeSpec(prim_spec, UsdGeom.Tokens.purpose, Sdf.ValueTypeNames.Token)
purpose_attr_spec.default = UsdGeom.Tokens.render
## Hidden: # Hint to hide for UIs
prim_spec.hidden = True
# prim_spec.ClearHidden()
Properties/Attributes/Relationships
We cover properties in more detail in our properties section.
Technically properties are also stored as metadata on the Sdf.PrimSpec. So later on when we look at composition, keep in mind that the prim stack therefore also drives the property stack. That's why the prim index is on the prim level and not on the property level.
...
print(prim_spec.properties, prim_spec.attributes, prim_spec.relationships)
print(prim_spec.GetInfo("properties"))
...
Here are the basics for both API levels:
High Level API
from pxr import Usd, Sdf
# Has: 'HasProperty', 'HasAttribute', 'HasRelationship'
# Get: 'GetProperties', 'GetAuthoredProperties', 'GetPropertyNames', 'GetPropertiesInNamespace', 'GetAuthoredPropertiesInNamespace'
#      'GetAttribute', 'GetAttributes', 'GetAuthoredAttributes'
#      'GetRelationship', 'GetRelationships', 'GetAuthoredRelationships'
#      'FindAllAttributeConnectionPaths', 'FindAllRelationshipTargetPaths'
# Set: 'CreateAttribute', 'CreateRelationship'
# Clear: 'RemoveProperty',
stage = Usd.Stage.CreateInMemory()
prim_path = Sdf.Path("/bicycle")
prim = stage.DefinePrim(prim_path, "Cube")
# As the cube schema ships with a "size" attribute, we don't have to create it first
# Usd is smart enough to check the schema for the type and creates it for us.
size_attr = prim.GetAttribute("size")
size_attr.Set(10)
## Looking up attributes
print(prim.GetAttributes())
# Returns: All the attributes that are provided by the schema
"""
[Usd.Prim(</bicycle>).GetAttribute('doubleSided'), Usd.Prim(</bicycle>).GetAttribute('extent'), Usd.
Prim(</bicycle>).GetAttribute('orientation'), Usd.Prim(</bicycle>).GetAttribute('primvars:displayCol
or'), Usd.Prim(</bicycle>).GetAttribute('primvars:displayOpacity'), Usd.Prim(</bicycle>).GetAttribut
e('purpose'), Usd.Prim(</bicycle>).GetAttribute('size'), Usd.Prim(</bicycle>).GetAttribute('visibili
ty'), Usd.Prim(</bicycle>).GetAttribute('xformOpOrder')]
"""
print(prim.GetAuthoredAttributes())
# Returns: Only the attributes we have written to in the active stage.
# [Usd.Prim(</bicycle>).GetAttribute('size')]
## Looking up relationships:
print(prim.GetRelationships())
# Returns:
# [Usd.Prim(</bicycle>).GetRelationship('proxyPrim')]
box_prim = stage.DefinePrim("/box")
prim.GetRelationship("proxyPrim").SetTargets([box_prim.GetPath()])
# If we now check our properties, you can see both the size attribute
# and proxyPrim relationship show up.
print(prim.GetAuthoredProperties())
# Returns:
# [Usd.Prim(</bicycle>).GetRelationship('proxyPrim'),
#  Usd.Prim(</bicycle>).GetAttribute('size')]
## Creating attributes:
# If we want to create non-schema attributes (or even schema attributes without using
# the schema getter/setters), we can run:
tire_size_attr = prim.CreateAttribute("tire:size", Sdf.ValueTypeNames.Float)
tire_size_attr.Set(5)
Low Level API
To access properties on Sdf.PrimSpecs we can call the properties, attributes, relationships methods. These return a dict with the {'name': spec} data.
Here is an example of what is returned when you create cube with a size attribute:
from pxr import Sdf
layer = Sdf.Layer.CreateAnonymous()
prim_path = Sdf.Path("/cube")
prim_spec = Sdf.CreatePrimInLayer(layer, prim_path)
prim_spec.specifier = Sdf.SpecifierDef
attr_spec = Sdf.AttributeSpec(prim_spec, "size", Sdf.ValueTypeNames.Float)
print(prim_spec.attributes) # Returns: {'size': Sdf.Find('anon:0x7f6efe199480:LOP:/stage/python', '/cube.size')}
attr_spec.default = 10
# To remove a property you can run:
# prim_spec.RemoveProperty(attr_spec)
# Let's re-create what we did in the high level API example.
box_prim_path = Sdf.Path("/box")
box_prim_spec = Sdf.CreatePrimInLayer(layer, box_prim_path)
box_prim_spec.specifier = Sdf.SpecifierDef
rel_spec = Sdf.RelationshipSpec(prim_spec, "proxyPrim")
rel_spec.targetPathList.explicitItems = [box_prim_path]
# Get all authored properties (in the active layer only)
print(prim_spec.properties)
# Returns:
"""
{'size': Sdf.Find('anon:0x7ff87c9c2000', '/cube.size'),
 'proxyPrim': Sdf.Find('anon:0x7ff87c9c2000', '/cube.proxyPrim')}
"""
Since the lower level API doesn't see the schema properties, these commands will only return what is actually in the layer, in Usd speak authored.
With the high level API you can get the same/similar result by calling prim.GetAuthoredAttributes() as you can see above. When you have multiple layers, the prim.GetAuthoredAttributes(), will give you the created attributes from all layers, where as the low level API only the ones from the active layer.
As mentioned in the properties section, properties is the base class, so the properties method will give you
the merged dict of the attributes and relationship dicts.
Properties
For an overview and summary please see the parent Data Containers section.
Here is an overview of the API structure, in the high level API it looks as follows:
flowchart TD
    property([Usd.Property])
    property --> attribute([Usd.Attribute])
    property --> relationship([Usd.Relationship])
In the low level API:
flowchart TD
    property([Sdf.PropertySpec])
    property --> attribute([Sdf.AttributeSpec])
    property --> relationship([Sdf.RelationshipSpec])
Table of Contents
- Properties
- Attributes
- Relationships
- Schemas
Resources
- Usd.Property
- Usd.Attribute
- Usd.Relationship
- Usd.GeomPrimvar
- Usd.GeomPrimvarsAPI
- Usd.GeomImageable
- Usd.GeomBoundable
Properties
Let's first have a look at the shared base class Usd.Property. This inherits most its functionality from Usd.Object, which mainly exposes metadata data editing. We won't cover how metadata editing works for properties here, as it is extensively covered in our metadata section.
So let's inspect what else the class offers:
# Methods & Attributes of interest:
# 'IsDefined', 'IsAuthored'
# 'FlattenTo'
# 'GetPropertyStack'
from pxr import Usd, Sdf
### High Level ###
stage = Usd.Stage.CreateInMemory()
prim_path = Sdf.Path("/bicycle")
prim = stage.DefinePrim(prim_path, "Cube")
# Check if the attribute defined
attr = prim.CreateAttribute("height", Sdf.ValueTypeNames.Double)
print(attr.IsDefined()) # Returns: True
attr = prim.GetAttribute("someRandomName")
print(attr.IsDefined())
if not attr:
    prim.CreateAttribute("someRandomName", Sdf.ValueTypeNames.String)
# Check if the attribute has any written values in any layer
print(attr.IsAuthored()) # Returns: True
attr.Set("debugString")
# Flatten the attribute to another prim (with optionally a different name)
# This is quite usefull when you need to copy a specific attribute only instead
# of a certain prim.
prim_path = Sdf.Path("/box")
prim = stage.DefinePrim(prim_path, "Cube")
attr.FlattenTo(prim, "someNewName")
# Inspect the property value source layer stack.
# Note the method signature takes a time code as an input. If you supply a default time code
# value clips will be stripped from the result.
time_code = Usd.TimeCode(1001)
print(attr.GetPropertyStack(time_code))
### Low Level ###
# The low level API does not offer any "extras" worthy of noting.
As you can see, the .GetProperty/.GetAttribute/.GetRelationship methods return an object instead of just returning None. This way we can still check for .IsDefined(). We can also use them as "truthy"/"falsy" objects, e.g. if not attr which makes it nicely readable.
For a practical of the .GetPropertyStack() method see our Houdini section, where we use it to debug if time varying data actually exists. We also cover it in more detail in our composition section.
Attributes
Attributes in USD are the main data containers to hold all of you geometry related data. They are the only element in USD that can be animateable.
Attribute Types (Detail/Prim/Vertex/Point) (USD Speak: Interpolation)
To determine on what geo prim element an attribute applies to, attributes are marked with interpolation metadata.
We'll use Houdini's naming conventions as a frame of reference here:
You can read up more info in the Usd.GeomPrimvar docs page.
UsdGeom.Tokens.constant(Same as Houdini'sdetailattributes): Global attributes (per prim in the hierarchy).UsdGeom.Tokens.uniform(Same as Houdini'sprimattributes): Per prim attributes (e.g. groups of polygons).UsdGeom.Tokens.faceVarying(Same as Houdini'svertexattributes): Per vertex attributes (e.g. UVs).UsdGeom.Tokens.varying(Same as Houdini'svertexattributes): This the same as face varying, except for nurbs surfaces.UsdGeom.Tokens.vertex(Same as Houdini'spointattributes): Per point attributes (e.g. point positions).
To summarize:
| Usd Name | Houdini Name |
|---|---|
| UsdGeom.Tokens.constant | detail |
| UsdGeom.Tokens.uniform | prim |
| UsdGeom.Tokens.faceVarying | vertex |
| UsdGeom.Tokens.vertex | point |
from pxr import Sdf, Usd, UsdGeom
stage = Usd.Stage.CreateInMemory()
prim_path = Sdf.Path("/bicycle")
prim = stage.DefinePrim(prim_path, "Xform")
attr = prim.CreateAttribute("tire:size", Sdf.ValueTypeNames.Float)
attr.Set(10)
attr.SetMetadata("interpolation", UsdGeom.Tokens.constant)

### Low Level ###
from pxr import Sdf, UsdGeom
layer = Sdf.Layer.CreateAnonymous()
prim_path = Sdf.Path("/bicycle")
prim_spec = Sdf.CreatePrimInLayer(layer, prim_path)
prim_spec.specifier = Sdf.SpecifierDef
prim_spec.typeName = "Xform"
attr_spec = Sdf.AttributeSpec(prim_spec, "tire:size", Sdf.ValueTypeNames.Double)
attr_spec.default = 10
attr_spec.interpolation = UsdGeom.Tokens.constant
# Or
attr_spec.SetInfo("interpolation", UsdGeom.Tokens.constant)
For attributes that don't need to be accessed by Hydra (USD's render abstraction interface), we don't need to set the interpolation. In order for an attribute, that does not derive from a schema, to be accessible for the Hydra, we need to namespace it with primvars:, more info below at primvars. If the attribute element count for non detail (constant) attributes doesn't match the corresponding prim/vertex/point count, it will be ignored by the renderer (or crash it).
When we set schema attributes, we don't need to set the interpolation, as it is provided from the schema.
Attribute Data Types & Roles
We cover how to work with data classes in detail in our data types/roles section. For array attributes, USD has implemented the buffer protocol, so we can easily convert from numpy arrays to USD Vt arrays and vice versa. This allows us to write high performance attribute modifications directly in Python. See our Houdini Particles section for a practical example.
from pxr import Gf, Sdf, Usd
stage = Usd.Stage.CreateInMemory()
prim_path = Sdf.Path("/bicycle")
prim = stage.DefinePrim(prim_path, "Xform")
# When we create attributes, we have to specify the data type/role via a Sdf.ValueTypeName
attr = prim.CreateAttribute("tire:size", Sdf.ValueTypeNames.Float)
# We can then set the attribute to a value of that type.
# Python handles the casting to the correct precision automatically for base data types.
attr.Set(10)
# For attributes the `typeName` metadata specifies the data type/role.
print(attr.GetTypeName()) # Returns: Sdf.ValueTypeNames.Float
# Non-base data types
attr = prim.CreateAttribute("someArray", Sdf.ValueTypeNames.Half3Array)
attr.Set([Gf.Vec3h()] * 3)
attr = prim.CreateAttribute("someAssetPathArray", Sdf.ValueTypeNames.AssetArray)
attr.Set(Sdf.AssetPathArray(["testA.usd", "testB.usd"]))

### Low Level ###
from pxr import Gf, Sdf
layer = Sdf.Layer.CreateAnonymous()
prim_path = Sdf.Path("/bicycle")
prim_spec = Sdf.CreatePrimInLayer(layer, prim_path)
prim_spec.specifier = Sdf.SpecifierDef
prim_spec.typeName = "Xform"
attr_spec = Sdf.AttributeSpec(prim_spec, "tire:size", Sdf.ValueTypeNames.Double)
# We can then set the attribute to a value of that type.
# Python handles the casting to the correct precision automatically for base data types.
attr_spec.default = 10
# For attributes the `typeName` metadata specifies the data type/role.
print(attr_spec.typeName) # Returns: Sdf.ValueTypeNames.Float
# Non-base data types
attr_spec = Sdf.AttributeSpec(prim_spec, "someArray", Sdf.ValueTypeNames.Half3Array)
attr_spec.default = ([Gf.Vec3h()] * 3)
attr_spec = Sdf.AttributeSpec(prim_spec, "someAssetPathArray", Sdf.ValueTypeNames.AssetArray)
attr_spec.default = Sdf.AssetPathArray(["testA.usd", "testB.usd"])
# Creating an attribute spec with the same data type as an existing attribute (spec)
# is as easy as passing in the type name from the existing attribute (spec)
same_type_attr_spec = Sdf.AttributeSpec(prim_spec, "tire:radius", attr.GetTypeName())
# Or
same_type_attr_spec = Sdf.AttributeSpec(prim_spec, "tire:radius", attr_spec.typeName)
The role specifies the intent of the data, e.g. points, normals, color and will affect how renderers/DCCs handle the attribute. This is not a concept only for USD, it is there in all DCCs. For example a color vector doesn't need to be influenced by transform operations where as normals and points do.
Here is a comparison to when we create an attribute a float3 normal attribute in Houdini.

Static (Default) Values vs Time Samples vs Value Blocking
We talk about how animation works in our animation section.
from pxr import Sdf, Usd
### High Level ###
stage = Usd.Stage.CreateInMemory()
prim_path = Sdf.Path("/bicycle")
prim = stage.DefinePrim(prim_path, "Cube")
size_attr = prim.GetAttribute("size")
for frame in range(1001, 1005):
    time_code = Usd.TimeCode(float(frame - 1001))
    # .Set() takes args in the .Set(<value>, <frame>) format
    size_attr.Set(frame, time_code)
print(size_attr.Get(1005)) # Returns: 4

### Low Level ###
from pxr import Sdf
layer = Sdf.Layer.CreateAnonymous()
prim_path = Sdf.Path("/bicycle")
prim_spec = Sdf.CreatePrimInLayer(layer, prim_path)
prim_spec.specifier = Sdf.SpecifierDef
prim_spec.typeName = "Cube"
attr_spec = Sdf.AttributeSpec(prim_spec, "size", Sdf.ValueTypeNames.Double)
for frame in range(1001, 1005):
    value = float(frame - 1001)
    # .SetTimeSample() takes args in the .SetTimeSample(<path>, <frame>, <value>) format
    layer.SetTimeSample(attr_spec.path, frame, value)
print(layer.QueryTimeSample(attr_spec.path, 1005)) # Returns: 4
We can set an attribute with a static value (USD speak default) or with time samples (or both, checkout the animation section on how to handle this edge case). We can also block it, so that USD sees it as if no value was written. For attributes from schemas with default values, this will make it fallback to the default value.
from pxr import Sdf, Usd
stage = Usd.Stage.CreateInMemory()
prim_path = Sdf.Path("/bicycle")
prim = stage.DefinePrim(prim_path, "Cube")
size_attr = prim.GetAttribute("size")
## Set default value
time_code = Usd.TimeCode.Default()
size_attr.Set(10, time_code)
# Or:
size_attr.Set(10) # The default is to set `default` (non-per-frame) data.
## Set per frame value
for frame in range(1001, 1005):
    time_code = Usd.TimeCode(frame)
    size_attr.Set(frame, time_code)
# Or
# As with Sdf.Path implicit casting from strings in a lot of places in the USD API,
# the time code is implicitly casted from a Python float.
# It is recommended to do the above, to be more future proof of
# potentially encoding time unit based samples.
for frame in range(1001, 1005):
    size_attr.Set(frame, frame)
## Block the value. This makes the attribute look to USD as if no value was written.
# For attributes from schemas with default values, this will make it fallback to the default value.
height_attr = prim.CreateAttribute("height", Sdf.ValueTypeNames.Float)
height_attr.Set(Sdf.ValueBlock())
For more examples (also for the lower level API) check out the animation section.
Re-writing a range of values from a different layer
An important thing to note is that when we want to re-write the data of an attribute from a different layer, we have to get all the existing data first and then write the data, as otherwise we are changing the value source. To understand better why this happens, check out our composition section.
Let's demonstrate this:
Change existing values | Click to expand code
from pxr import Sdf, Usd
# Spawn reference data
layer = Sdf.Layer.CreateAnonymous()
prim_path = Sdf.Path("/bicycle")
prim_spec = Sdf.CreatePrimInLayer(layer, prim_path)
prim_spec.specifier = Sdf.SpecifierDef
prim_spec.typeName = "Cube"
attr_spec = Sdf.AttributeSpec(prim_spec, "size", Sdf.ValueTypeNames.Double)
for frame in range(1001, 1010):
    value = float(frame - 1001)
    layer.SetTimeSample(attr_spec.path, frame, value)
# Reference data
stage = Usd.Stage.CreateInMemory()
ref = Sdf.Reference(layer.identifier, "/bicycle")
prim_path = Sdf.Path("/bicycle")
prim = stage.DefinePrim(prim_path)
ref_api = prim.GetReferences()
ref_api.AddReference(ref)

# Now if we try to read and write the data at the same time,
# we overwrite the (layer composition) value source. In non USD speak:
# We change the layer the data is coming from. Therefore we won't see
# the original data after setting the first time sample.
size_attr = prim.GetAttribute("size")
for time_sample in size_attr.GetTimeSamples():
    size_attr_value = size_attr.Get(time_sample)
    print(time_sample, size_attr_value)
    size_attr.Set(size_attr_value, time_sample)
# Prints:
"""
1001.0 0.0
1002.0 0.0
1003.0 0.0
1004.0 0.0
1005.0 0.0
1006.0 0.0
1007.0 0.0
1008.0 0.0
1009.0 0.0
"""

# Let's undo the previous edit.
prim.RemoveProperty("size") # Removes the local layer attribute spec
# Collect data first ()
data = {}
size_attr = prim.GetAttribute("size")
for time_sample in size_attr.GetTimeSamples():
    size_attr_value = size_attr.Get(time_sample)
    print(time_sample, size_attr_value)
    data[time_sample] = size_attr_value
# Prints:
"""
1001.0 0.0
1002.0 1.0
1003.0 2.0
1004.0 3.0
1005.0 4.0
1006.0 5.0
1007.0 6.0
1008.0 7.0
1009.0 8.0
"""
# Then write it
for time_sample, value in data.items():
    size_attr_value = size_attr.Get(time_sample)
    size_attr.Set(value + 10, time_sample)
For heavy data it would be impossible to load everything into memory to offset it. USD's solution for that problem is Layer Offsets.
What if we don't want to offset the values, but instead edit them like in the example above?
In a production pipeline you usually do this via a DCC that imports the data, edits it and then re-exports it (often per frame and loads it via value clips). So we mitigate the problem by distributing the write to a new file(s) on multiple machines/app instances. Sometimes though we actually have to edit the samples in an existing file, for example when post processing data. In our point instancer section we showcase a practical example of when this is needed.
To edit the time samples directly, we can open the layer as a stage or edit the layer directly. To find the layers you can inspect the layer stack or value clips, but most of the time you know the layers, as you just wrote to them:
from pxr import Sdf, Usd
# Spawn example data, this would be a file on disk
layer = Sdf.Layer.CreateAnonymous()
prim_path = Sdf.Path("/bicycle")
prim_spec = Sdf.CreatePrimInLayer(layer, prim_path)
prim_spec.specifier = Sdf.SpecifierDef
prim_spec.typeName = "Cube"
attr_spec = Sdf.AttributeSpec(prim_spec, "size", Sdf.ValueTypeNames.Double)
for frame in range(1001, 1010):
    value = float(frame - 1001)
    layer.SetTimeSample(attr_spec.path, frame, value)

# Edit content
layer_identifiers = [layer.identifier]
for layer_identifier in layer_identifiers:
    prim_path = Sdf.Path("/bicycle")
    ### High Level ###
    stage = Usd.Stage.Open(layer_identifier)
    prim = stage.GetPrimAtPath(prim_path)
    size_attr = prim.GetAttribute("size")
    for frame in size_attr.GetTimeSamples():
        size_attr_value = size_attr.Get(frame)
        # .Set() takes args in the .Set(<value>, <frame>) format
        size_attr.Set(size_attr_value + 125, frame)
    ### Low Level ###
    # Note that this edits the same layer as the stage above.
    layer = Sdf.Layer.FindOrOpen(layer_identifier)
    prim_spec = layer.GetPrimAtPath(prim_path)
    attr_spec = prim_spec.attributes["size"]
    for frame in layer.ListTimeSamplesForPath(attr_spec.path):
        value = layer.QueryTimeSample(attr_spec.path, frame)
        layer.SetTimeSample(attr_spec.path, frame, value + 125)
Time freezing (mesh) data
If we want to time freeze a prim (where the data comes from composed layers), we simply re-write a specific time sample to the default value.
Pro Tip | Time Freeze | Click to expand code
from pxr import Sdf, Usd
# Spawn example data, this would be a file on disk
layer = Sdf.Layer.CreateAnonymous()
prim_path = Sdf.Path("/bicycle")
prim_spec = Sdf.CreatePrimInLayer(layer, prim_path)
prim_spec.specifier = Sdf.SpecifierDef
prim_spec.typeName = "Cube"
attr_spec = Sdf.AttributeSpec(prim_spec, "size", Sdf.ValueTypeNames.Double)
for frame in range(1001, 1010):
    value = float(frame - 1001)
    layer.SetTimeSample(attr_spec.path, frame, value)
# Reference data
stage = Usd.Stage.CreateInMemory()
ref = Sdf.Reference(layer.identifier, "/bicycle")
prim_path = Sdf.Path("/bicycle")
prim = stage.DefinePrim(prim_path)
ref_api = prim.GetReferences()
ref_api.AddReference(ref)

# Freeze content
freeze_frame = 1001
attrs = []
for prim in stage.Traverse():
    ### High Level ###
    for attr in prim.GetAuthoredAttributes():
        # attr.Set(attr.Get(freeze_frame))
        ### Low Level ###
        attrs.append(attr)

### Low Level ###
active_layer = stage.GetEditTarget().GetLayer()
with Sdf.ChangeBlock():
    for attr in attrs:
        attr_spec =  active_layer.GetAttributeAtPath(attr.GetPath())
        if not attr_spec:
            prim_path = attr.GetPrim().GetPath()
            prim_spec = active_layer.GetPrimAtPath(prim_path)
            if not prim_spec:
                prim_spec = Sdf.CreatePrimInLayer(active_layer, prim_path)
            attr_spec = Sdf.AttributeSpec(prim_spec, attr.GetName(),attr.GetTypeName())
        attr_spec.default = attr.Get(freeze_frame)
If you have to do this for a whole hierarchy/scene, this does mean that you are flattening everything into your memory, so be aware! USD currently offers no other mechanism.
We'll leave "Time freezing" data from the active layer to you as an exercise.
Hint | Time Freeze | Active Layer | Click to expand
We just need to write the time sample of your choice to the attr_spec.default attribute and clear the time samples ;
Attribute To Attribute Connections (Node Graph Encoding)
Attributes can also encode relationship-like paths to other attributes. These connections are encoded directly on the attribute. It is up to Usd/Hydra to evaluate these "attribute graphs", if you simply connect two attributes, it will not forward attribute value A to connected attribute B (USD does not have a concept for a mechanism like that (yet)).
Attribute connections are encoded from target attribute to source attribute.
The USD file syntax is: <data type> <attribute name>.connect = </path/to/other/prim.<attribute name>
Currently the main use of connections is encoding node graphs for shaders via the UsdShade.ConnectableAPI.
Here is an example of how a material network is encoded.
def Scope "materials"
{
    def Material "karmamtlxsubnet" (
    )
    {
        token outputs:mtlx:surface.connect = </materials/karmamtlxsubnet/mtlxsurface.outputs:out>

        def Shader "mtlxsurface" ()
        {
            uniform token info:id = "ND_surface"
            string inputs:edf.connect = </materials/karmamtlxsubnet/mtlxuniform_edf.outputs:out>
            token outputs:out
        }

        def Shader "mtlxuniform_edf"
        {
            uniform token info:id = "ND_uniform_edf"
            color3f inputs:color.connect = </materials/karmamtlxsubnet/mtlx_constant.outputs:out>
            token outputs:out
        }

        def Shader "mtlx_constant"
        {
            uniform token info:id = "ND_constant_float"
            float outputs:out
        }
    }
}
Connections, like relationships and composition arcs, are encoded via List Editable Ops. These are a core USD concept that is crucial to understand (They are like fancy version of a Python list with rules how sub-lists are merged). Checkout our List Editable Ops section for more info.
Here is how connections are managed on the high and low API level. Note as mentioned above this doesn't do anything other than make the connection. USD doesn't drive attribute values through connections. So this example is just to demonstrate the API.
from pxr import Sdf, Usd
### High Level ###
# Has: 'HasAuthoredConnections',
# Get: 'GetConnections',
# Set: 'AddConnection', 'SetConnections'
# Clear:  'RemoveConnection', 'ClearConnections'
stage = Usd.Stage.CreateInMemory()
prim_path = Sdf.Path("/box")
prim = stage.DefinePrim(prim_path, "Cube")
width_attr = prim.CreateAttribute("width", Sdf.ValueTypeNames.Double)
height_attr = prim.CreateAttribute("height", Sdf.ValueTypeNames.Double)
depth_attr = prim.CreateAttribute("depth", Sdf.ValueTypeNames.Double)
width_attr.AddConnection(height_attr.GetPath(), Usd.ListPositionBackOfAppendList)
width_attr.AddConnection(depth_attr.GetPath(), Usd.ListPositionFrontOfAppendList)
print(width_attr.GetConnections())
# Returns: [Sdf.Path('/box.depth'), Sdf.Path('/box.height')]
width_attr.RemoveConnection(depth_attr.GetPath())
print(width_attr.GetConnections())
# Returns: [Sdf.Path('/box.height')]
### Low Level ###
# Connections are managed via the `connectionPathList` AttributeSpec attribute.
layer = Sdf.Layer.CreateAnonymous()
prim_path = Sdf.Path("/box")
prim_spec = Sdf.CreatePrimInLayer(layer, prim_path)
prim_spec.typeName = "Cube"
width_attr_spec = Sdf.AttributeSpec(prim_spec, "width", Sdf.ValueTypeNames.Double)
height_attr_spec = Sdf.AttributeSpec(prim_spec, "height", Sdf.ValueTypeNames.Double)
depth_attr_spec = Sdf.AttributeSpec(prim_spec, "depth", Sdf.ValueTypeNames.Double)
width_attr_spec.connectionPathList.Append(height_attr_spec.path)
width_attr_spec.connectionPathList.Append(depth_attr_spec.path)
print(width_attr_spec.connectionPathList.GetAddedOrExplicitItems())
# Returns: (Sdf.Path('/box.height'), Sdf.Path('/box.depth'))
width_attr_spec.connectionPathList.Erase(depth_attr_spec.path)
print(width_attr_spec.connectionPathList.GetAddedOrExplicitItems())
# Returns: (Sdf.Path('/box.height'),)
## This won't work as the connectionPathList attribute can only be edited in place
path_list = Sdf.PathListOp.Create(appendedItems=[height_attr_spec.path])
# width_attr_spec.connectionPathList = path_list
The primvars (primvars:) namespace
Attributes in the primvars namespace : are USD's way of marking attributes to be exported for rendering. These can then be used by materials and AOVs. Primvars can be written per attribute type (detail/prim/vertex/point), it is up to the render delegate to correctly access them.
Primvars that are written as detail (UsdGeom.Tokens.constant interpolation) attributes, get inherited down the hierarchy. This makes them ideal transport mechanism of assigning render geometry properties, like dicing settings or render ray visibility.
- An attribute with the
primvars:can be accessed at render time by your render delegate for things like settings, materials and AOVs detail(UsdGeom.Tokens.constant interpolation) primvars are inherited down the hierarchy, ideal to apply a constant value per USD prim, e.g. for render geometry settings or instance variation.
- The term
inheritedin conjunction withprimvarsrefers to a constant interpolation primvar being passed down to its children. It is not to be confused withinheritcomposition arcs.
To deal with primvars, the high level API has the UsdGeom.PrimvarsAPI (API Docs). In the low level, we need to do everything ourselves. This create UsdGeom.Primvar (API Docs) objects, that are similar Usd.Attribute objects, but with methods to edit primvars. To get the attribute call primvar.GetAttr().
## UsdGeom.PrimvarsAPI(prim)
# Has: 'HasPrimvar',
# Get: 'GetAuthoredPrimvars', 'GetPrimvar',
#      'GetPrimvars', 'GetPrimvarsWithAuthoredValues', 'GetPrimvarsWithValues',
# Set: 'CreatePrimvar', 'CreateIndexedPrimvar', 'CreateNonIndexedPrimvar',
# Clear: 'RemovePrimvar', 'BlockPrimvar',
## UsdGeom.Primvar(attribute)
# This is the same as Usd.Attribute, but exposes extra
# primvar related methods, mainly:
# Has/Is: 'IsIndexed', 'IsPrimvar'
# Get: 'GetPrimvarName', 'GetIndicesAttr', 'GetIndices'
# Set: 'CreateIndicesAttr', 'ComputeFlattened'
# Remove: 'BlockIndices'
from pxr import Sdf, Usd, UsdGeom, Vt
stage = Usd.Stage.CreateInMemory()
prim_path = Sdf.Path("/bicycle")
prim = stage.DefinePrim(prim_path, "Cube")
size_attr = prim.GetAttribute("size")
# Manually define primvar
attr = prim.CreateAttribute("width", Sdf.ValueTypeNames.Float)
print(UsdGeom.Primvar.IsPrimvar(attr)) # Returns: False
attr = prim.CreateAttribute("primvars:depth", Sdf.ValueTypeNames.Float)
print(UsdGeom.Primvar.IsPrimvar(attr)) # Returns: True
# Use primvar API
# This returns an instance of UsdGeom.Primvar
primvar_api = UsdGeom.PrimvarsAPI(prim)
primvar = primvar_api.CreatePrimvar("height", Sdf.ValueTypeNames.StringArray)
print(UsdGeom.Primvar.IsPrimvar(primvar))  # Returns: True
print(primvar.GetPrimvarName()) # Returns: "height"
primvar.Set(["testA", "testB"])
print(primvar.ComputeFlattened()) # Returns: ["testA", "testB"]
# In this case flattening does nothing, because it is not indexed.
# This will fail as it is expected to create indices on primvar creation.
primvar_indices = primvar.CreateIndicesAttr()
# So let's do that
values = ["testA", "testB"]
primvar = primvar_api.CreateIndexedPrimvar("height",
                                           Sdf.ValueTypeNames.StringArray,
                                           Vt.StringArray(values),
                                           Vt.IntArray([0,0,0, 1,1, 0]),
                                           UsdGeom.Tokens.constant,
                                           time=1001)
print(primvar.GetName(), primvar.GetIndicesAttr().GetName(), primvar.IsIndexed())
# Returns: primvars:height primvars:height:indices True
print(primvar.ComputeFlattened())
# Returns:
# ["testA", "testA", "testA", "testB", "testB", "testA"]
Reading inherited primvars
To speed up the lookup of inherited primvars see this guide API Docs. Below is an example how to self implement a high performant lookup, as we couldn't get the .FindIncrementallyInheritablePrimvars to work with Python as expected.
High performance primvars inheritance calculation | Click to expand code
## UsdGeom.PrimvarsAPI(prim)
# To detect inherited primvars, the primvars API offers helper methods:
# 'HasPossiblyInheritedPrimvar',
# 'FindIncrementallyInheritablePrimvars',
# 'FindInheritablePrimvars',
# 'FindPrimvarWithInheritance',
# 'FindPrimvarsWithInheritance',

from pxr import Sdf, Usd, UsdGeom
stage = Usd.Stage.CreateInMemory()
bicycle_prim = stage.DefinePrim(Sdf.Path("/set/garage/bicycle"), "Cube")
car_prim = stage.DefinePrim(Sdf.Path("/set/garage/car"), "Cube")
set_prim = stage.GetPrimAtPath("/set")
garage_prim = stage.GetPrimAtPath("/set/garage")
tractor_prim = stage.DefinePrim(Sdf.Path("/set/yard/tractor"), "Cube")
"""Hierarchy
/set
/set/garage
/set/garage/bicycle
/set/garage/car
/set/yard
/set/yard/tractor
"""

# Setup hierarchy primvars
primvar_api = UsdGeom.PrimvarsAPI(set_prim)
size_primvar = primvar_api.CreatePrimvar("size", Sdf.ValueTypeNames.Float)
size_primvar.Set(10)
primvar_api = UsdGeom.PrimvarsAPI(garage_prim)
size_primvar = primvar_api.CreatePrimvar("size", Sdf.ValueTypeNames.Float)
size_primvar.Set(5)
size_primvar = primvar_api.CreatePrimvar("point_scale", Sdf.ValueTypeNames.Float)
size_primvar.Set(9000)
primvar_api = UsdGeom.PrimvarsAPI(bicycle_prim)
size_primvar = primvar_api.CreatePrimvar("size", Sdf.ValueTypeNames.Float)
size_primvar.Set(2.5)

# Get (non-inherited) primvars on prim
primvar_api = UsdGeom.PrimvarsAPI(bicycle_prim)
print([p.GetAttr().GetPath() for p in primvar_api.GetPrimvars()])
# Returns:
# [Sdf.Path('/set/garage/bicycle.primvars:displayColor'),
#  Sdf.Path('/set/garage/bicycle.primvars:displayOpacity'),
#  Sdf.Path('/set/garage/bicycle.primvars:size')]
# Check for inherited primvar on prim
primvar_api = UsdGeom.PrimvarsAPI(bicycle_prim)
print(primvar_api.FindPrimvarWithInheritance("test").IsDefined())
# Returns: False

# Get inherited primvar
# This is expensive to compute, as prim prim where you call this,
# the ancestors have to be checked.
primvar_api = UsdGeom.PrimvarsAPI(bicycle_prim)
print([p.GetAttr().GetPath() for p in primvar_api.FindInheritablePrimvars()])
# Returns: [Sdf.Path('/set/garage/bicycle.primvars:size'), Sdf.Path('/set/garage.primvars:point_scale')]

# Instead we should populate our own stack:
# This is fast to compute!
print("----")
primvars_current = []
for prim in stage.Traverse():
    primvar_api = UsdGeom.PrimvarsAPI(prim)
    primvars_current = primvar_api.FindIncrementallyInheritablePrimvars(primvars_current)
    print(prim.GetPath(), [p.GetAttr().GetPath().pathString for p in primvars_current])
# Returns:
"""
/set ['/set.primvars:size']
/set/garage ['/set/garage.primvars:size', '/set/garage.primvars:point_scale']
/set/garage/bicycle ['/set/garage/bicycle.primvars:size', '/set/garage.primvars:point_scale']
/set/garage/car []
/set/yard []
/set/yard/traktor []
"""
print("----")
# This is wrong if you might have noticed!
# We should be seeing our '/set.primvars:size' primvar on the yard prims to!
# If we look at the docs, we see the intended use:
# FindIncrementallyInheritablePrimvars returns a new list if it gets re-populated.
# So the solution is to track the lists with pre/post visits.
primvar_stack = [[]]
iterator = iter(Usd.PrimRange.PreAndPostVisit(stage.GetPseudoRoot()))
for prim in iterator:
    primvar_api = UsdGeom.PrimvarsAPI(prim)
    if not iterator.IsPostVisit():
        before = hex(id(primvar_stack[-1]))
        primvars_iter = primvar_api.FindIncrementallyInheritablePrimvars(primvar_stack[-1])
        primvar_stack.append(primvars_iter)
        print(before, hex(id(primvars_iter)), prim.GetPath(), [p.GetAttr().GetPath().pathString for p in primvars_iter], len(primvar_stack))
    else:
        primvar_stack.pop(-1)
# This also doesn't work as it seems to clear the memory address for some reason (Or do I have a logic error?)
# Let's write it ourselves:
primvar_stack = [{}]
iterator = iter(Usd.PrimRange.PreAndPostVisit(stage.GetPseudoRoot()))
for prim in iterator:
    primvar_api = UsdGeom.PrimvarsAPI(prim)
    if not iterator.IsPostVisit():
        before_hash = hex(id(primvar_stack[-1]))
        parent_primvars = primvar_stack[-1]
        authored_primvars = {p.GetPrimvarName(): p for p in primvar_api.GetPrimvarsWithAuthoredValues()}
        if authored_primvars and parent_primvars:
            combined_primvars = {name: p for name, p in parent_primvars.items()}
            combined_primvars.update(authored_primvars)
            primvar_stack.append(combined_primvars)
        elif authored_primvars:
            primvar_stack.append(authored_primvars)
        else:
            primvar_stack.append(parent_primvars)
        after_hash = hex(id(primvar_stack[-1]))
        print(before_hash, after_hash, prim.GetPath(), [p.GetAttr().GetPath().pathString for p in primvar_stack[-1].values()], len(primvar_stack))
    else:
        primvar_stack.pop(-1)
# Returns:
""" This works :)
0x7fea12b349c0 0x7fea12b349c0 / [] 2
0x7fea12b349c0 0x7fea12b349c0 /HoudiniLayerInfo [] 3
0x7fea12b349c0 0x7fea12bfe980 /set ['/set.primvars:size'] 3
0x7fea12bfe980 0x7fea12a89600 /set/garage ['/set/garage.primvars:size', '/set/garage.primvars:point_scale'] 4
0x7fea12a89600 0x7fea367b87c0 /set/garage/bicycle ['/set/garage/bicycle.primvars:size', '/set/garage.primvars:point_scale'] 5
0x7fea12a89600 0x7fea12a89600 /set/garage/car ['/set/garage.primvars:size', '/set/garage.primvars:point_scale'] 5
0x7fea12bfe980 0x7fea12bfe980 /set/yard ['/set.primvars:size'] 4
0x7fea12bfe980 0x7fea12bfe980 /set/yard/tractor ['/set.primvars:size'] 5
"""
Indexed primvars
Primvars can optionally be encoded via an index table. Let's explain via an example:
Here we store it without an index table, as you can see we have a lot of duplicates in our string list. This increases the file size when saving the attribute to disk.
...
        string[] primvars:test = ["test_0", "test_0", "test_0", "test_0",
                                  "test_1", "test_1", "test_1", "test_1",
                                  "test_2", "test_2", "test_2", "test_2",
                                  "test_3", "test_3", "test_3", "test_3"] (
            interpolation = "uniform"
        )
        int[] primvars:test:indices = None
...
Instead we can encode it as a indexed primvar:
...
        string[] primvars:test = ["test_0", "test_1", "test_2", "test_3"] (interpolation = "uniform")
        int[] primvars:test:indices = [0, 0, 0, 0, 1, 1, 1, 1, 2, 2, 2, 2, 3, 3, 3, 3] ()
...
We can also flatten the index, when looking up the values. It should be preferred to keep the index, if you intend on updating the primvar.
from pxr import Sdf, Usd, UsdGeom, Vt
stage = Usd.Stage.CreateInMemory()
prim_path = Sdf.Path("/bicycle")
prim = stage.DefinePrim(prim_path, "Cube")
# So let's do that
value_set = ["testA", "testB"]
value_indices = [0,0,0, 1,1, 0]
primvar = primvar_api.CreateIndexedPrimvar("height",
                                           Sdf.ValueTypeNames.StringArray,
                                           Vt.StringArray(value_set),
                                           Vt.IntArray(value_indices),
                                           UsdGeom.Tokens.constant,
                                           time=1001)
print(primvar.ComputeFlattened())
# Returns:
# ["testA", "testA", "testA", "testB", "testB", "testA"]
If you are a Houdini user you might know this method, as this is how Houdini's internals also store string attributes. You can find more info in the USD Docs
Common Attributes
Now that we got the basics down, let's have a look at some common attributes (and their schemas to access them).
Purpose
The purpose is a special USD attribute that:
- Affects certain scene traversal methods (e.g. bounding box or xform cache lookups can be limited to a specific purpose).
- Is a mechanism for Hydra (USD's render abstraction interface) to only pull in data with a specific purpose. Since any rendering (viewport or final image) is run via Hydra, this allows users to load in only prims tagged with a specific purpose. For example, the
pxr.UsdGeom.Tokens.previewpurpose is used for scene navigation and previewing only, while theUsdGeom.Tokens.renderpurpose is used for final frame rendering. - It is inherited (like primvars) down the hierarchy. You won't see this in UIs unlike with primvars.
As a best practice you should build your hierarchies in such a way that you don't have to write a purpose value per prim.
A typical setup is to have a <asset root>/GEO, <asset root>/PROXY, ... hierarchy, where you can then tag the GEO, PROXY, ... prims with the purpose. That way all child prims receive the purpose and you have a single point where you can override the purpose.
This is useful, if you for example want to load a whole scene in proxy purpose and a specific asset in render purpose. You then just have to edit a single prim to make it work.
The purpose is provided by the UsdGeom.Imageable (renderable) typed non-concrete schema, and is therefore on anything that is renderable.

There are 4 different purposes:
UsdGeom.Tokens.default_: The default purpose. This is the fallback purpose, when no purpose is explicitly defined. It means that this prim should be traversed/visible to any purpose.UsdGeom.Tokens.render: Tag any (parent) prim with this to mark it suitable for final frame rendering.UsdGeom.Tokens.proxy: Tag any (parent) prim with this to mark it suitable for low resolution previewing. We usually tag prims with this that can be loaded very quickly.UsdGeom.Tokens.guide: Tag any (parent) prim with this to mark it suitable for displaying guide indicators like rig controls or other useful scene visualizers.
### High Level ###
from pxr import Sdf, Usd, UsdGeom
stage = Usd.Stage.CreateInMemory()
cube_prim = stage.DefinePrim(Sdf.Path("/bicycle/RENDER/cube"), "Cube")
render_prim = cube_prim.GetParent()
render_prim.SetTypeName("Xform")
UsdGeom.Imageable(render_prim).GetPurposeAttr().Set(UsdGeom.Tokens.render)
sphere_prim = stage.DefinePrim(Sdf.Path("/bicycle/PROXY/sphere"), "Sphere")
proxy_prim = sphere_prim.GetParent()
proxy_prim.SetTypeName("Xform")
UsdGeom.Imageable(proxy_prim).GetPurposeAttr().Set(UsdGeom.Tokens.proxy)
# We can also query the inherited purpose:
imageable_api = UsdGeom.Imageable(cube_prim)
print(imageable_api.ComputePurpose()) # Returns: 'render'

### Low Level ###
from pxr import Sdf, UsdGeom
layer = Sdf.Layer.CreateAnonymous()
prim_path = Sdf.Path("/bicycle")
prim_spec = Sdf.CreatePrimInLayer(layer, prim_path)
prim_spec.specifier = Sdf.SpecifierDef
prim_spec.typeName = "Cube"
attr_spec = Sdf.AttributeSpec(prim_spec, "purpose", Sdf.ValueTypeNames.Token)
attr_spec.default = UsdGeom.Tokens.render
Visibility
The visibility attribute controls if the prim and its children are visible to Hydra or not. Unlike the active metadata, it does not prune the child prims, they are still reachable for inspection and traversal. Since it is an attribute, we can also animate it. Here we only cover how to set/compute the attribute, for more info checkout our Loading mechansims section
The attribute data type is Sdf.Token and can have two values:
- UsdGeom.Tokens.inherited
- UsdGeom.Tokens.invisible
### High Level ###
# UsdGeom.Imageable()
# Get: 'ComputeVisibility'
# Set: 'MakeVisible', 'MakeInvisible'
from pxr import Sdf, Usd, UsdGeom
stage = Usd.Stage.CreateInMemory()
cube_prim = stage.DefinePrim(Sdf.Path("/set/yard/bicycle"), "Cube")
sphere_prim = stage.DefinePrim(Sdf.Path("/set/garage/bicycle"), "Sphere")
set_prim = cube_prim.GetParent().GetParent()
set_prim.SetTypeName("Xform")
cube_prim.GetParent().SetTypeName("Xform")
sphere_prim.GetParent().SetTypeName("Xform")
UsdGeom.Imageable(set_prim).GetVisibilityAttr().Set(UsdGeom.Tokens.invisible)
# We can also query the inherited visibility:
# ComputeEffectiveVisibility -> This handles per purpose visibility
imageable_api = UsdGeom.Imageable(cube_prim)
print(imageable_api.ComputeVisibility()) # Returns: 'invisible'
# Make only the cube visible. Notice how this automatically sparsely
# selects only the needed parent prims (garage) and makes them invisible.
# How cool is that!
imageable_api.MakeVisible()

### Low Level ###
from pxr import Sdf, UsdGeom
layer = Sdf.Layer.CreateAnonymous()
bicycle_prim_path = Sdf.Path("/set/bicycle")
bicycle_prim_spec = Sdf.CreatePrimInLayer(layer, prim_path)
bicycle_prim_spec.specifier = Sdf.SpecifierDef
bicycle_prim_spec.typeName = "Cube"
bicycle_vis_attr_spec = Sdf.AttributeSpec(prim_spec, "visibility", Sdf.ValueTypeNames.Token)
bicycle_vis_attr_spec.default = UsdGeom.Tokens.inherited
In the near future visibility can be set per purpose (It is already possible, just not widely used). Be aware that this might incur further API changes.
Extents Hint vs Extent
In order for Hydra delegates but also stage bounding box queries to not have to compute the bounding box of each individual boundable prim, we can write an extent attribute.
This attribute is mandatory for all boundable prims. The data format is:
Vt.Vec3fArray(2, (Gf.Vec3f(<min_x>, <min_y>, <min_z>), Gf.Vec3f(<max_x>, <max_y>, <max_z>)))
E.g.: Vt.Vec3fArray(2, (Gf.Vec3f(-5.0, 0.0, -5.0), Gf.Vec3f(5.0, 0.0, 5.0)))
Here are all boundable prims (prims that have a bounding box).

Since boundable prims are leaf prims (they have (or at least should have) no children), a prim higher in the hierarchy can easily compute an accurate bounding box representation, by iterating over all leaf prims and reading the extent attribute. This way, if a single leaf prim changes, the parent prims can reflect the update without having to do expensive per prim point position attribute lookups.
We cover how to use the a bounding box cache in detail in our stage API query caches for optimized bounding box calculation and extent writing.
### High Level ###
# UsdGeom.Boundable()
# Get: 'GetExtentAttr', 'CreateExtentAttr'
# Set: 'ComputeExtent '
from pxr import Sdf, Usd, UsdGeom
stage = Usd.Stage.CreateInMemory()
cube_prim = stage.DefinePrim(Sdf.Path("/bicycle/cube"), "Cube")
bicycle_prim = cube_prim.GetParent()
bicycle_prim.SetTypeName("Xform")
# If we change the size, we have to re-compute the bounds
cube_prim.GetAttribute("size").Set(10)
boundable_api = UsdGeom.Boundable(cube_prim)
print(boundable_api.GetExtentAttr().Get()) # Returns:  [(-1, -1, -1), (1, 1, 1)]
extent = boundable_api.ComputeExtent(Usd.TimeCode.Default())
boundable_api.GetExtentAttr().Set(extent)
print(boundable_api.GetExtentAttr().Get()) # Returns: [(-5, -5, -5), (5, 5, 5)]
# Author extentsHint
# The bbox cache has to be specified with what frame and purpose to query
bbox_cache = UsdGeom.BBoxCache(1001, [UsdGeom.Tokens.default_, UsdGeom.Tokens.render])
model_api = UsdGeom.ModelAPI(bicycle_prim)
extentsHint = model_api.ComputeExtentsHint(bbox_cache)
model_api.SetExtentsHint(extentsHint)
# Or model_api.SetExtentsHint(extentsHint, <frame>)
### Low Level ###
from pxr import Sdf, UsdGeom, Vt
layer = Sdf.Layer.CreateAnonymous()
cube_prim_path = Sdf.Path("/bicycle/cube")
cube_prim_spec = Sdf.CreatePrimInLayer(layer, cube_prim_path)
cube_prim_spec.specifier = Sdf.SpecifierDef
cube_prim_spec.typeName = "Cube"
bicycle_prim_path = Sdf.Path("/bicycle")
bicycle_prim_spec = Sdf.CreatePrimInLayer(layer, cube_prim_path)
bicycle_prim_spec.specifier = Sdf.SpecifierDef
bicycle_prim_spec.typeName = "Xform"
# The querying should be done via the high level API.
extent_attr_spec = Sdf.AttributeSpec(cube_prim_spec, "extent", Sdf.ValueTypeNames.Vector3fArray)
extent_attr_spec.default = Vt.Vec3fArray([(-1, -1, -1), (1, 1, 1)])
site_attr_spec = Sdf.AttributeSpec(cube_prim_spec, "size", Sdf.ValueTypeNames.Float)
site_attr_spec.default = 10
extent_attr_spec.default = Vt.Vec3fArray([(-5, -5, -5), (5, 5, 5)])
# Author extentsHint
extents_hint_attr_spec = Sdf.AttributeSpec(bicycle_prim_spec, "extentsHint", Sdf.ValueTypeNames.Vector3fArray)
extents_hint_attr_spec.default = Vt.Vec3fArray([(-5, -5, -5), (5, 5, 5)])
There is also an extentsHint attribute we can create on non-boundable prims. This attribute can be consulted by bounding box lookups too and it is another optimization level on top of the extent attribute.
We usually write it on asset root prims, so that when we unload payloads, it can be used to give a correct bbox representation.
The extentsHint has a different data format: It can store the extent hint per purpose or just for the default purpose.
For just the default purpose it looks like:
Vt.Vec3fArray(2, (Gf.Vec3f(<min_x>, <min_y>, <min_z>), Gf.Vec3f(<max_x>, <max_y>, <max_z>)))
For the default and proxy purpose (without render):
Vt.Vec3fArray(6, (Gf.Vec3f(<min_x>, <min_y>, <min_z>), Gf.Vec3f(<max_x>, <max_y>, <max_z>), Gf.Vec3f(0, 0, 0), Gf.Vec3f(0, 0, 0), Gf.Vec3f(<proxy_min_x>, <proxy_min_y>, <proxy_min_z>), Gf.Vec3f(<proxy_max_x>, <proxy_max_y>, <proxy_max_z>)))
As you can see the order is UsdGeom.Tokens.default_, UsdGeom.Tokens.render,UsdGeom.Tokens.proxy, UsdGeom.Tokens.guide. It a purpose is not authored, it will be sliced off (it it is at the end of the array).
Xform (Transform) Ops
Per prim transforms are also encoded via attributes. As this is a bigger topic, we have a dedicated Transforms section for it.
Relationships
Relationships in USD are used to encode prim path to prim path connections.
They can be in the form of single -> single prim path or single -> multiple primpaths.
Technically relationships can also target properties (because they encode Sdf.Path objects), I'm not aware of it being used other than to target other collection properties. The paths must always be absolute (we'll get an error otherwise).
Relationships are list-editable, this is often not used, as a more explicit behavior is favoured.
When we start looking at composition (aka loading nested USD files), you'll notice that relationships that where written in a different file are mapped into the hierarchy where it is being loaded. That way every path still targets the correct destination path. (Don't worry, we'll look at some examples in our Composition and Houdini sections.
### High Level ###
# Get: 'GetForwardedTargets', 'GetTargets',
# Set: 'AddTarget', 'SetTargets'
# Clear: 'RemoveTarget', 'ClearTargets'
from pxr import Sdf, Usd, UsdGeom
stage = Usd.Stage.CreateInMemory()
cube_prim = stage.DefinePrim(Sdf.Path("/cube_prim"), "Cube")
sphere_prim = stage.DefinePrim(Sdf.Path("/sphere_prim"), "Sphere")
myFavoriteSphere_rel = cube_prim.CreateRelationship("myFavoriteSphere")
myFavoriteSphere_rel.AddTarget(sphere_prim.GetPath())
print(myFavoriteSphere_rel.GetForwardedTargets()) # Returns:[Sdf.Path('/sphere_prim')]
# myFavoriteSphere_rel.ClearTargets()
# We can also forward relationships to other relationships.
cylinder_prim = stage.DefinePrim(Sdf.Path("/sphere_prim"), "Cylinder")
myFavoriteSphereForward_rel = cylinder_prim.CreateRelationship("myFavoriteSphereForward")
myFavoriteSphereForward_rel.AddTarget(myFavoriteSphere_rel.GetPath())
# GetForwardedTargets: This gives us the final fowarded paths. We'll use this most of the time.
# GetTargets: Gives us the paths set on the relationship, forwarded paths are not baked down.
print(myFavoriteSphereForward_rel.GetForwardedTargets()) # Returns:[Sdf.Path('/sphere_prim')]
print(myFavoriteSphereForward_rel.GetTargets()) # Returns: [Sdf.Path('/cube_prim.myFavoriteSphere')]

### Low Level ###
from pxr import Sdf, UsdGeom
layer = Sdf.Layer.CreateAnonymous()
cube_prim_spec = Sdf.CreatePrimInLayer(layer, Sdf.Path("/cube_prim"))
cube_prim_spec.specifier = Sdf.SpecifierDef
cube_prim_spec.typeName = "Cube"
sphere_prim_spec = Sdf.CreatePrimInLayer(layer, Sdf.Path("/sphere_prim"))
sphere_prim_spec.specifier = Sdf.SpecifierDef
sphere_prim_spec.typeName = "Cube"
rel_spec = Sdf.RelationshipSpec(cube_prim_spec, "proxyPrim")
rel_spec.targetPathList.Append(sphere_prim_spec.path)
# The targetPathList is a list editable Sdf.PathListOp.
# Forwarded rels can only be calculated via the high level API.
Material Binding
One of the most common use cases of relationships is encoding the material binding. Here we simply link from any imageable (renderable) prim to a UsdShade.Material (Material) prim.
As this is a topic in itself, we have a dedicated materials section for it.
Collections
Collections are USD's concept for storing a set of prim paths. We can nest/forward collections to other collections and relationships, which allows for powerful workflows. For example we can forward multiple collections to a light linking relationship or forwarding material binding relationships to a single collection on the asset root prim, which then in return forwards to the material prim.
As this is a bigger topic, we have a dedicated collections section for it.
Relationship Forwarding
Relationships can also point to other relations ships. This is called Relationship Forwarding.
We cover this topic in detail in our Advanced Topics section.
Proxy Prim
The proxyPrim is a relationship from a prim with the UsdGeom.Token.render purpose to a prim with the UsdGeom.Token.proxy purpose. It can be used by DCCs/USD consumers to find a preview representation of a render prim. A good use case example is when we need to simulate rigid body dynamics and need to find a low resolution representation of an asset.
The relation can also be used by clients to redirect edits back from the proxy prim to the render prim, for example transform edits or material assignments. Since the relation is from render to proxy and not the other way around, it can come with a high cost to relay this info, because we first need to find the correct prims. Therefore it is more common to just edit a mutual parent instead of redirecting what UI manipulators do on the preview prim to the render prim.
One of the biggest bottlenecks in USD is creating enormous hierarchies as you then have a lot of prims that need to be considered as value sources. When creating proxy purpose prims/meshes, we should try to keep it as low-res as possible. Best case we only have a single proxy prim per asset.
To edit and query the proxyPrim, we use the UsdGeom.Imageable schema class.
### High Level ###
from pxr import Sdf, Usd, UsdGeom
stage = Usd.Stage.CreateInMemory()
render_prim = stage.DefinePrim(Sdf.Path("/bicycle/RENDER/render"), "Cube")
proxy_prim = stage.DefinePrim(Sdf.Path("/bicycle/PROXY/proxy"), "Sphere")
bicycle_prim = render_prim.GetParent().GetParent()
bicycle_prim.SetTypeName("Xform")
render_prim.GetParent().SetTypeName("Xform")
proxy_prim.GetParent().SetTypeName("Xform")
imageable_api = UsdGeom.Imageable(render_prim)
imageable_api.SetProxyPrim(proxy_prim)
# Query the proxy prim
print(imageable_api.ComputeProxyPrim()) # Returns: None
# Why does this not work? We have to set the purpose!
UsdGeom.Imageable(render_prim).GetPurposeAttr().Set(UsdGeom.Tokens.render)
UsdGeom.Imageable(proxy_prim).GetPurposeAttr().Set(UsdGeom.Tokens.proxy)
print(imageable_api.ComputeProxyPrim()) # Returns: (Usd.Prim(</bicycle/PROXY/proxy>), Usd.Prim(</bicycle/RENDER/render>))

### Low Level ###
from pxr import Sdf, UsdGeom
layer = Sdf.Layer.CreateAnonymous()
render_prim_spec = Sdf.CreatePrimInLayer(layer, Sdf.Path("/render"))
render_prim_spec.specifier = Sdf.SpecifierDef
render_prim_spec.typeName = "Cube"
proxy_prim_spec = Sdf.CreatePrimInLayer(layer, Sdf.Path("/proxy"))
proxy_prim_spec.specifier = Sdf.SpecifierDef
proxy_prim_spec.typeName = "Cube"
proxyPrim_rel_spec = Sdf.RelationshipSpec(render_prim_spec, "proxyPrim")
proxyPrim_rel_spec.targetPathList.Append(Sdf.Path("/proxy"))
Schemas
Schemas are like OOP classes in USD, we cover them in detail here. Once applied to a prim, they provide different metadata and properties with fallback values. They also expose convenience methods to edit these.
We have used a few so far in our examples, for a list of the most usefull ones see our Common Schemas in Production section.
Data Types/Roles
Table of Contents
TL;DR - Metadata In-A-Nutshell
When reading and writing data in USD, all data is of a specific data type. USD extends the standard base types (float, int) with computer graphics related classes (e.g. Gf.Matrix3d, Gf.Vec3h) that make it easy to perform common 3d math operations and Usd related types (e.g. Sdf.Asset). To give a hint about how a data type should be used, we also have the concept of data roles (Position, Normal, Color). All data value type names are stored in the Sdf.ValueTypeNames registry, from these we can get the base classes stored in Gf (math related classes), Sdf(USD related classes) and Vt (array classes that carry Gf data types).
The constructors for arrays allow us to input tuples/lists instead of the explicit base classes.
# Explicit
pxr.Vt.Vec3dArray([Gf.Vec3d(1,2,3)])
# Implicit
pxr.Vt.Vec3dArray([(1,2,3)])
Instead of searching for the corresponding Gf or Vt array class, we can get it from the type name and instantiate it:
vec3h_array = Sdf.ValueTypeNames.Point3hArray.type.pythonClass([(0,1,2)])
# Or: Usd.Attribute.GetTypeName().type.pythonClass([(0,1,2)]) / Sdf.AttributeSpec.typeName.type.pythonClass([(0,1,2)])
print(type(vec3h_array)) # Returns: <class 'pxr.Vt.Vec3hArray'>
As Vt.Array support the buffer protocol, we can map the arrays to numpy without data duplication and perform high performance
value editing.
from pxr import Vt
import numpy as np
from array import array
# Python Arrays
vt_array = Vt.Vec3hArray.FromBuffer(array("f", [1,2,3,4,5,6])) # Returns: Vt.Vec3hArray(2, (Gf.Vec3h(1.0, 2.0, 3.0),Gf.Vec3h(4.0, 5.0, 6.0),))
# From Numpy Arrays
Vt.Vec3hArray.FromNumpy(np.ones((10, 3)))
Vt.Vec3hArray.FromBuffer(np.ones((10, 3)))
# To Numpy arrays
np.array(vt_array)
What should I use it for?
When creating attributes we always have to specify a Sdf.ValueTypeName, which defines the data type & role.
USD ships with great computer graphics related classes in the Gf module, which we can use for calculations.
The Vt.Array wrapper around the Gf data base classes implements the buffer protocol, so we can easily map these arrays to Numpy arrays and perform high performance value edits. This is great for adjusting geometry related attributes.
Resources
Overview
When reading and writing data in USD, all data is of a specific data type. USD extends the standard base types (float, int) with computer graphics related classes (Gf.Matrix3d, Gf.Vec3h) that make it easy to perform common 3d math operations. To give a hint about how a data type should be used, we also have the concept of data roles.
Data Types
Let's first talk about data types. These are the base data classes all data is USD is stored in.
To access the base data classes there are three modules:
Sdf(Scene Description Foundations): Here you'll 99% of the time only be usingSdf.AssetPath,Sdf.AssetPathArrayand the list editable ops that have the naming convention<Type>ListOpe.g.Sdf.PathListOp,Sdf.ReferenceListOp,Sdf.ReferenceListOp,PayloadListOp,StringListOp,TokenListOpGf(Graphics Foundations): TheGfmodule is basically USD's math module. Here we have all the math related data classes that are made up of the base types (base types beingfloat,int,double, etc.). Commonly used classes/types areGf.Matrix4d,Gf.Quath(Quaternions),Gf.Vec2f,Gf.Vec3f,Gf.Vec4f. Most classes are available in different precisions, noted by the suffixh(half),f(float),d(double).Vt(Value Types): Here we can find all theArray(list) classes that capture the base classes from theGfmodule in arrays. For exampleVt.Matrix4dArray. TheVtarrays implement the buffer protocol, so we can convert to Numpy/Python without data duplication. This allows for some very efficient array editing via Python. Checkout our Houdini Particles section for a practical example. The value types module also houses wrapped base types (Float,Int, etc.), we don't use these though, as with Python everything is auto converted for us.
The Vt.Type registry also handles all on run-time registered types, so not only data types, but also custom types like Sdf.Spec,SdfReference, etc. that is registered by plugins.
##### Types - pxr.Vt.Type Registry #####
# All registered types (including other plugin types, so not limited to data types)
# for type_def in Tf.Type.GetRoot().derivedTypes:
#    print(type_def)
type_def = Tf.Type.FindByName(Sdf.ValueTypeNames.TexCoord2fArray.cppTypeName)
print(type_def.typeName) # Returns: VtArray<GfVec2f> # The same as value_type_name.cppTypeName
# Root/Base/Derived Types
type_def.GetRoot(), type_def.baseTypes, type_def.derivedTypes
Data Roles
Next let's explain what data roles are. Data roles extend the base data types by adding an hint about how the data should be interpreted. For example Color3his just Vec3h but with the role that it should be treated as a color, in other words it should not be transformed by xforms ops, unlike Point3h, which is also Vec3h. Having roles is not something USD invented, you can find something similar in any 3d application.
Working with data classes in Python
You can find all values roles (and types) in the Sdf.ValueTypeNames module, this is where USD keeps the value type name registry.
The Sdf.ValueTypeName class gives us the following properties/methods:
aliasesAsStrings: Any name aliases e.g.texCoord2f[]role: The role (intent hint), e.g. "Color", "Normal", "Point"type: The actual Tf.Type definition. From the type definition we can retrieve the actual Python data type class e.g.Gf.Vec3hand instantiate it.cppTypeName: The C++ data type class name, e.gGfVec2f. This is the same asSdf.ValueTypeNames.TexCoord2f.type.typeNamedefaultUnit: The default unit. As USD is unitless (at least per when it comes to storing the data), this isSdf.DimensionlessUnitDefaultmost of the time.defaultValue: The default value, e.g.Gf.Vec2f(0.0, 0.0). For arrays this is just an empty Vt.Array. We can use.scalarType.type.pythonClassor.scalarType.defaultValueto get a valid value for a single element.- Check/Convert scalar <-> array value type names:
isArray: Check if the type is an array.arrayType: Get the vector type, e.g.Sdf.ValueTypeNames.AssetArray.arrayTypegives usSdf.ValueTypeNames.AssetArrayisScalar: Check if the type is scalar.scalarType: Get the scalar type, e.g.Sdf.ValueTypeNames.AssetArray.scalarTypegives usSdf.ValueTypeNames.Asset
We can also search based on the string representation or aliases of the value type name, e.g. Sdf.ValueTypeNames.Find("normal3h").
The constructors for arrays allow us to input tuples/lists instead of the explicit base classes.
# Explicit
pxr.Vt.Vec3dArray([Gf.Vec3d(1,2,3)])
# Implicit
pxr.Vt.Vec3dArray([(1,2,3)])
Instead of searching for the corresponding Gf or Vt array class, we can get it from the type name:
vec3h_array =  Sdf.ValueTypeNames.Point3hArray.type.pythonClass((0,1,2))
print(type(vec3h_array)) # Returns: <class 'pxr.Vt.Vec3hArray'>
We won't be looking at specific data classes on this page, instead we'll have a look at how to access the data types from value types and vice versa as usually the data is generated by the DCC we use and our job is to validate the data type/role or e.g. create attributes with the same type when copying values.
Let's look at this in practice:
from pxr import Sdf, Vt
##### Value Type Names - pxr.Sdf.ValueTypeNames #####
### Looking at TexCoord2fArray as an example
value_type_name = Sdf.ValueTypeNames.TexCoord2fArray
print("Value Type Name", value_type_name) # Returns: Sdf.ValueTypeName("texCoord2f[]")
## Aliases and cpp names
print("Value Type Name Alias", value_type_name.aliasesAsStrings)    # ['texCoord2f[]']
print("Value Type Name Cpp Type Name", value_type_name.cppTypeName) # 'VtArray<GfVec2f>'
print("Value Type Name Role", value_type_name.role)                 # Returns: 'TextureCoordinate'
## Array vs Scalar (Single Value)
print("Value Type Name IsArray", value_type_name.isArray)          # Returns: True
print("Value Type Name IsScalar", value_type_name.isScalar)         # Returns: False
## Convert type between Scalar <-> Array
print("Value Type Name -> Get Array Type", value_type_name.arrayType)   # Returns: Sdf.ValueTypeName("texCoord2f[]") (Same as type_name in this case)
print("Value Type Name -> Get Scalar Type", value_type_name.scalarType) # Returns: Sdf.ValueTypeName("texCoord2f")
### Type (Actual type definiton, holds data about container format
### like C++ type name and the Python class
value_type = value_type_name.type
print(value_type) # Returns: Tf.Type.FindByName('VtArray<GfVec2f>')
### Get the Python Class
cls = value_type.pythonClass
# Or (for base types like float, int)
default_value = value_type_name.defaultValue
cls = default_value.__class__
instance = cls()

##### Types - pxr.Vt.Type Registry #####
from pxr import Vt
# For Python usage, the only thing of interest for data types in the Vt.Type module are the `*Array`ending classes.
# You will only use these array types to handle the auto conversion
# form buffer protocol arrays like numpy arrays, the rest is auto converted and you don't need
# to worry about it. Normal Python lists do not support the buffer protocol.
from array import array
Vt.Vec3hArray.FromBuffer(array("f", [1,2,3]))
# Returns:
# Vt.Vec3hArray(1, (Gf.Vec3h(1.0, 2.0, 3.0),))
# From Numpy
import numpy as np
vt_array = Vt.Vec3hArray.FromNumpy(np.ones((10, 3)))
Vt.Vec3hArray.FromBuffer(np.ones((10, 3))) # Numpy also supports the buffer protocol.
# Returns:
"""
Vt.Vec3hArray(10, (Gf.Vec3h(1.0, 1.0, 1.0), Gf.Vec3h(1.0, 1.0, 1.0), Gf.Vec3h(1.0, 1.0, 1.0), Gf.Vec3h(1.0, 1.
0, 1.0), Gf.Vec3h(1.0, 1.0, 1.0), Gf.Vec3h(1.0, 1.0, 1.0), Gf.Vec3h(1.0, 1.0, 1.0), Gf.Vec3h(1.0, 1.0, 1.0), G
f.Vec3h(1.0, 1.0, 1.0), Gf.Vec3h(1.0, 1.0, 1.0)))
"""
# We can also go the other way:
np.array(vt_array)
Schemas
Schemas are to USD what classes are to object orient programming. Let's explain schemas with that analogy in mind:
- Schemas are templates that define default properties and methods. You can think of each prim in your hierarchy being an instance of a class.
- Each prim must (or rather should, technically it is not enforced) have a type name set (see our prim section). The type name defines the primary class your prim is an instance of. To dynamically subclass your primary classes with additional classes, USD has the concept of API schemas. These then provide extra metadata/properties or methods that can manipulate your prim data.
The examples on this page only talk about how to apply/remove schemas and how to inspect them. In our production and Houdini section we'll look into the most used ones and run through some production examples.
Table of Contents
- API Overview In-A-Nutshell
- What should I use it for?
- Resources
- Overview
- Creating/Using schemas in your code
- Prim Definition
- Prim Type Info
- Schema Classes
TL;DR - Metadata In-A-Nutshell
- Schemas are like classes in OOP that each prim in your hierarchy then instances. They provide properties (with fallback values) and metadata as well as methods (
Get<PropertName>/Set<PropertName>/Utility functions) to manipulate your prim data. - There are two different base schema types (See the overview section for more info):
- Typed Schemas:
- Define prim type name (OOP: The main class of your prim), like
Cube/Mesh/Xform - Provide metadata/properties and methods to edit these
- Checkable via
prim.IsA(<SchemaClassName>)
- Define prim type name (OOP: The main class of your prim), like
- API Schemas (Class Naming Convention
<SchemaClassName>API):- Do not define prim type name (OOP: A subclass that inherits to your main class)
- Is divided in:
- Non-Applied API schemas:
- Add convenience methods to manipulate common prim data like properties and core metadata (like
kind/clips).
- Add convenience methods to manipulate common prim data like properties and core metadata (like
- Applied API schemas:
- Supplement typed schemas by adding additional metadata/properties and methods to edit these
- Checkable via
prim.HasAPI(<SchemaClassName>)
- Non-Applied API schemas:
- Typed Schemas:
- A prims composed schema definition can be accessed via
prim.GetPrimDefinition(). This defines a prim's full type signature, similar to how you can inherit from multiple classes in OOPclass (<TypedSchemaClass>, <AppliedAPISchemaA>, <AppliedAPISchemaA>). - You can generate your own as described in our plugin schemas section.
What should I use it for?
We'll be using schema classes a lot in production, so we recommend familiarizing yourself with the below examples.
They are the main interface for your prims in the high level API that gives you getters/setters for all the standard properties that ship with Usd.
### Typed Schemas ###
# From type name
prim_type_name = prim.GetTypeName()
prim_typed_schema = Usd.SchemaRegistry.GetTypeFromName(prim_type_name).pythonClass(prim)
# From prim type info
prim_typed_schema = prim.GetPrimTypeInfo().GetSchemaType().pythonClass(prim)

### API Schemas ###
# Non-Applied API Schemas
non_applied_api_schema = Usd.ModelAPI(prim)
# Applied API Schemas
applied_api_schema = UsdGeom.MotionAPI.Apply(prim)
The schema classes then give you access to all of the schemas Get/Set methods and utility functions.
Resources
Overview
Here is a flow chart of how the schema inheritance is setup:
flowchart TD
    schemaBase(["Usd.SchemaBase"])
    schemaTyped(["Typed Schemas (Usd.Typed) | Checkable via prim.IsA()"])
    schemaTypedNonConcrete(["Non-Concrete Schemas (Abstract Classes)"])
    schemaTypedConcrete(["Concrete Schemas (Define Prim Type Name)"])
    schemaAPI(["API Schemas (Usd.APISchemaBase )"])
    schemaAPINonApplied([Non-Applied])
    schemaAPIApplied(["Applied | Checkable via prim.HasAPI()"])
    schemaAPIAppliedSingle([Single Applied])
    schemaAPIAppliedMulti([Multi Applied])
    style schemaTypedNonConcrete fill:#57ff5f
    style schemaTypedConcrete fill:#63beff
    style schemaAPINonApplied fill:#63beff
    style schemaAPIAppliedSingle fill:#63beff
    style schemaAPIAppliedMulti fill:#63beff

    schemaBase --> schemaTyped
    schemaTyped --> schemaTypedNonConcrete
    schemaTypedNonConcrete --> schemaTypedConcrete
    schemaBase --> schemaAPI
    schemaAPI --> schemaAPINonApplied
    schemaAPI --> schemaAPIApplied
    schemaAPIApplied --> schemaAPIAppliedSingle
    schemaAPIApplied --> schemaAPIAppliedMulti
All the blue colored endpoints are the ones you'll set/apply/use via code, the green one you won't instantiate directly, but you can use it to check for inheritance.
Typed Schemas (Usd.Typed):- The base class for all schemas that define prim types, hence the name
Typed Schemas - Defines properties and metadata that is attached to prims that have this type.
- We can check if it is applied to a prim via
prim.IsA(<className>) - Accessible via
SchemaClass(prim)e.g.UsdGeom.Imageable(prim)(Non-concrete),UsdGeom.Xform(prim)(concrete), to get access to the methods. To actually apply the schema, we have to set the type name as described below. Accessing a typed schema on a prim with a different type name will result in errors once you try to get/set data. To actually not guess what the typed Python class is we can runprim.GetPrimTypeInfo().GetSchemaType().pythonClass(prim).
- The base class for all schemas that define prim types, hence the name
Typed Schemas (Usd.Typed)->Non-Concrete Schemas:- The non-concrete schemas are like abstract classes in OOP. They are schemas that concrete schemas can inherit from. The purpose of these is to define common properties/metadata that a certain type of typed schemas need. (For example lights all share a non-concrete schema for the essential properties.)
- Do not define a type name (hence non-concrete).
Typed Schemas (Usd.Typed)->Non-Concrete Schemas->Concrete Schemas:- Defines a type name
- In OOP terms you can think of it as the primary base class that your prim is instancing.
- Applied via
Prim.SetTypeName(<typeName>)/PrimSpec.typeName="<typeName>"/SchemaClass.Define(stage, Sdf.Path("/path"))
Here is an example of the inheritance graph of the UsdGeom.Imageable typed non-concrete schema:
API Schemas (Usd.APISchemaBase)- The base class for all API Schemas, subclasses must end with
API - In OOP terms, API schemas are classes that your primary (typed) class can inherit from to gain access to convenience methods, but also additional metadata/properties.
- The base class for all API Schemas, subclasses must end with
API Schemas (Usd.APISchemaBase)->Non-Applied API Schemas:- Provide only methods to manipulate existing prim data like properties and core metadata (like
kind/clips). Their common usage is to add convenience methods to manipulate common prim data. - They do not define any metadata/properties.
- The schema name is not written to the
apiSchemasmetadata, it therefore does not contribute to the prim definition. - Code: Applied via
SchemaClassAPI(prim)e.g.Usd.ClipsAPI(prim)
- Provide only methods to manipulate existing prim data like properties and core metadata (like
API Schemas (Usd.APISchemaBase)->Applied API Schemas:- Adds additional metadata/properties to prim and provides methods to manipulate these.
- The schema name is added to the
apiSchemasmetadata, it contributes to the prim definition. - We can check if it is applied to a prim via
prim.HasAPI(<APISchemaType>) - Applied via
SchemaClassAPI.Apply(prim)e.g.UsdGeom.ModelAPI.Apply(prim)/prim_spec.SetInfo("apiSchemas", Sdf.TokenListOp.Create(prependedItems=["GeomModelAPI"]))
API Schemas (Usd.APISchemaBase)->Applied API Schemas->Single Apply API Schemas:- Can only be applied once per prim
API Schemas (Usd.APISchemaBase)->Applied API Schemas->Multi Apply API Schemas:- Can be applied multiple times with a different instance name, properties are namespaced with the instance name.
If you want to see a list of off the schema classes that ship with USD by default check out the Usd.SchemaBase API docs page, it has a full inheritance diagram.
As covered in our prim section, Usd has a PrimDefinition/PrimTypeInfo classes we can use to inspect all properties and metadata given through applied and typed schemas on a given prim. This prim definition/type info carry the full type signature of a given prim.
Creating/Using schemas in production
Let's first look at typed schemas:
To get the class from the prim, we can run:
# From type name
prim_type_name = prim.GetTypeName()
prim_typed_schema = Usd.SchemaRegistry.GetTypeFromName(prim_type_name).pythonClass(prim)
# From prim type info
prim_typed_schema = prim.GetPrimTypeInfo().GetSchemaType().pythonClass(prim)
This way we don't have to find and import the right class ourselves.
To summarize the below code:
### Typed Schemas ###
# From type name
prim_type_name = prim.GetTypeName()
prim_typed_schema = Usd.SchemaRegistry.GetTypeFromName(prim_type_name).pythonClass(prim)
# From prim type info
prim_typed_schema = prim.GetPrimTypeInfo().GetSchemaType().pythonClass(prim)

### API Schemas ###
# Non-Applied API Schemas
non_applied_api_schema = Usd.ModelAPI(prim)
# Applied API Schemas
applied_api_schema = UsdGeom.MotionAPI.Apply(prim)
###### Typed Schemas ######
### High Level ###
# Has: 'IsA',
# Get: 'GetTypeName'
# Set: 'SetTypeName'
# Clear: 'ClearTypeName'
from pxr import Sdf, Usd, UsdGeom
stage = Usd.Stage.CreateInMemory()

# Define prim via stage
prim_path = Sdf.Path("/bicycleA")
prim = stage.DefinePrim(prim_path, "Cube")
# Define prim via typed schema
prim_path = Sdf.Path("/bicycleB")
prim_typed_schema = UsdGeom.Cube.Define(stage, prim_path)
# Returns the schema class object, so we have to get the prim
prim = prim_typed_schema.GetPrim()
# Since the "Cube" schema is a subclass of the
# non.concrete typed UsdGeom.Boundable schema, we can check:
print(prim.IsA(UsdGeom.Cube)) # Returns: True
print(prim.IsA(UsdGeom.Boundable)) # Returns: True
# To remove the type, we can call:
# prim.ClearTypeName()
# To access the schema class methods, we give our prim to the
# class constructor:
prim_typed_schema = UsdGeom.Cube(prim)
# The typed Cube schema for example has a Get/Set method for the schema's size attribute.
prim_typed_schema.GetSizeAttr().Set(5)
# Or we let Usd gives us the Python class
prim_typed_schema = prim.GetPrimTypeInfo().GetSchemaType().pythonClass(prim)
prim_typed_schema.GetSizeAttr().Set(10)
# Or we get it from the type name
prim_typed_schema = Usd.SchemaRegistry.GetTypeFromName(prim.GetTypeName()).pythonClass(prim)

### Low Level ###
# To set typed schemas via the low level API, we just
# need to set the PrimSpec.typeName = "<SchemaName>"
from pxr import Sdf
layer = Sdf.Layer.CreateAnonymous()
prim_path = Sdf.Path("/bicycle")
prim_spec = Sdf.CreatePrimInLayer(layer, prim_path)
prim_spec.typeName = "Cube"
The 'IsA' check is a very valuable check to see if something is an instance of a (base) class. It is similar to Python's isinstance method.
And the API schemas:
###### API Schemas ######
### High Level ###
# Has: 'HasAPI', 'CanApplyAPI'
# Get: 'GetAppliedSchemas'
# Set: 'AddAppliedSchema', 'ApplyAPI'
# Clear: 'RemoveAppliedSchema', 'RemoveAPI'
from pxr import Sdf, Usd, UsdGeom
stage = Usd.Stage.CreateInMemory()

### Applied Schemas ###
# Define prim via stage
prim_path = Sdf.Path("/bicycleA")
prim = stage.DefinePrim(prim_path, "Cube")
# Check if it can be applied
print(UsdGeom.MotionAPI.CanApply(prim)) # Returns True
# Apply API schema (in active layer),
prim.ApplyAPI("GeomModelAPI") # Returns: True, older USD versions: prim.ApplyAPI("UsdGeomModelAPI")
# Add applied schema
# This does not check if the schema actually exists,
# you have to use this for codeless schemas.
prim.AddAppliedSchema("SkelBindingAPI") # Returns: True #
# Apply and get the schema class (preferred usage)
applied_api_schema = UsdGeom.MotionAPI.Apply(prim)
# Remove applied schema (in active layer)
# prim.RemoveAppliedSchema("SkelBindingAPI")
# prim.RemoveAPI("GeomModelAPI")
# For multi-apply schemas, we can feed in our custom name,
# for example for collections it drives the collection name.
prim.ApplyAPI("UsdCollectionAPI", "myCoolCollectionName")
applied_multi_api_schema = Usd.CollectionAPI.Apply(prim, "myCoolCollectionName")
### Non-Applied Schemas ###
# Non-Applied schemas do not have an `Apply` method
# (who would have guessed that?)
non_applied_api_schema = Usd.ModelAPI(prim)

### Low Level ###
# To set applied API schemas via the low level API, we just
# need to set the `apiSchemas` key to a Token Listeditable Op.
from pxr import Sdf
layer = Sdf.Layer.CreateAnonymous()
prim_path = Sdf.Path("/bicycle")
prim_spec = Sdf.CreatePrimInLayer(layer, prim_path)
schemas = Sdf.TokenListOp.Create(
    prependedItems=["SkelBindingAPI", "UsdGeomModelAPI"]
)
prim_spec.SetInfo("apiSchemas", schemas)
# We don't have nice access the the schema class as in the high level API
Prim Definition
With the prim definition we can inspect what the schemas provide. Basically you are inspecting the class (as to the prim being the instance, if we compare it to OOP paradigms). In production, you won't be using this a lot, it is good to be aware of it though. If you change things here, you are actually on run-time modifying the base class, which might cause some weird issues.
from pxr import Sdf, Tf, Usd, UsdGeom
stage = Usd.Stage.CreateInMemory()
prim_path = Sdf.Path("/bicycle")
prim = stage.DefinePrim(prim_path, "Xform")
prim.ApplyAPI("GeomModelAPI") # Older USD versions: prim.ApplyAPI("UsdGeomModelAPI")
prim_def = prim.GetPrimDefinition()
print(prim_def.GetAppliedAPISchemas()) # Returns: ['GeomModelAPI']
print(prim_def.GetPropertyNames())
# Returns: All properties that come from the type name schema and applied schemas
"""
['model:drawModeColor', 'model:cardTextureZPos', 'model:drawMode', 'model:cardTextureZNeg',
'model:cardTextureYPos', 'model:cardTextureYNeg', 'model:cardTextureXPos', 'model:cardTextur
eXNeg', 'model:cardGeometry', 'model:applyDrawMode', 'proxyPrim', 'visibility', 'xformOpOrde
r', 'purpose']
"""
# You can also bake down the prim definition, this won't flatten custom properties though.
dst_prim = stage.DefinePrim("/flattenedExample")
dst_prim = prim_def.FlattenTo(dst_prim)
# This will also flatten all metadata (docs etc.), this should only be used, if you need to export
# a custom schema to an external vendor. (Not sure if this the "official" way to do it, I'm sure
# there are better ones.)
Prim Type Info
The prim type info holds the composed type info of a prim. You can think of it as as the class that answers Python type() like queries for Usd. It caches the results of type name and applied API schema names, so that prim.IsA(<typeName>) checks can be used to see if the prim matches a given type.
from pxr import Sdf, Tf, Usd, UsdGeom
stage = Usd.Stage.CreateInMemory()
prim_path = Sdf.Path("/bicycle")
prim = stage.DefinePrim(prim_path, "Xform")
prim.ApplyAPI("GeomModelAPI")
print(prim.IsA(UsdGeom.Xform)) # Returns: True
print(prim.IsA(Tf.Type.FindByName('UsdGeomXform'))) # Returns: True
prim_type_info = prim.GetPrimTypeInfo()
print(prim_type_info.GetAppliedAPISchemas()) # Returns: ['GeomModelAPI']
print(prim_type_info.GetSchemaType()) # Returns: Tf.Type.FindByName('UsdGeomXform')
print(prim_type_info.GetSchemaTypeName()) # Returns: Xform
Schema Classes
We can lookup all registered schemas via the plugin registry as well as find out what plugin provided a schema.
Before we do that let's clarify some terminology:
Schema Type Name: The name of the schema class, e.g.Cube,Imageable,SkelBindingAPITf.Type.typeNameregistry name: The full registered type nameUsdGeomCube,UsdGeomImageable,UsdSkelBindingAPI
We can map from schema type name to Tf.Type.typeName via:
registry = Usd.SchemaRegistry()
registry.GetTypeFromName("Cube").typeName # Returns: "UsdGeomCube"
We can map from Tf.Type.typeName to schema type name via:
registry = Usd.SchemaRegistry()
registry.GetSchemaTypeName("UsdGeomCube") # Returns: "Cube"
Schema Registry
Let's list all the schemas:
from pxr import Plug, Tf, Usd
registry = Plug.Registry()
print(">>>>>", "Typed Schemas")
for type_name in registry.GetAllDerivedTypes(Usd.Typed):
    print(type_name)
print(">>>>>", "API Schemas")
for type_name in registry.GetAllDerivedTypes(Usd.APISchemaBase):
    print(type_name)

# For example to lookup where the "Cube" type is registered from,
# we can run:
print(">>>>>", "Cube Schema Plugin Source")
plugin = registry.GetPluginForType(Tf.Type.FindByName("UsdGeomCube"))
print(plugin.name)
print(plugin.path)
print(plugin.resourcePath)
print(plugin.metadata)
This allows us to also look up the Tf.Type from schema (type) names,
which we can then use in IsA() checks.
from pxr import Plug, Sdf, Tf, Usd
registry = Usd.SchemaRegistry()

## Get Tf.Type registry entry (which allows us to get the Python class)
## The result can also be used to run IsA checks for typed schemas.
stage = Usd.Stage.CreateInMemory()
prim_path = Sdf.Path("/bicycleA")
prim = stage.DefinePrim(prim_path, "Cube")
print(prim.IsA(registry.GetTypeFromName("UsdGeomImageable"))) # Returns: True
print(prim.IsA(registry.GetTypeFromName("UsdGeomImageable").pythonClass)) # Returns: True


# GetTypeFromName allows prim type names and the Tf.Type.typeName.
print(registry.GetTypeFromName("UsdGeomCube"))      # Returns: Tf.Type("UsdGeomCube")
print(registry.GetTypeFromName("Cube"))             # Returns: Tf.Type("UsdGeomCube")
# For typed schemas we can also use:
print(registry.GetTypeFromSchemaTypeName("Imageable")) # Returns: Tf.Type('UsdGeomImageable') -> Tf.Type.typeName gives us 'UsdGeomImageable'
print(registry.GetTypeFromSchemaTypeName("Cube"))      # Returns: Tf.Type("UsdGeomCube") -> Tf.Type.typeName gives us 'UsdGeomCube'
print(registry.GetSchemaTypeName("UsdGeomImageable"))  # Returns: "Imageable"
print(registry.GetSchemaTypeName("UsdGeomCube"))       # Returns: "Cube"
# For concrete typed schemas:
print(registry.GetConcreteSchemaTypeName("UsdGeomCube"))  # Returns: "Cube"
print(registry.GetConcreteTypeFromSchemaTypeName("Cube")) # Returns: Tf.Type("UsdGeomCube")
# For API schemas:
print(registry.GetAPISchemaTypeName("UsdSkelBindingAPI"))  # Returns: "SkelBindingAPI"
print(registry.GetAPITypeFromSchemaTypeName("SkelBindingAPI")) # Returns: Tf.Type("UsdSkelBindingAPI")
A practical use case of looking thru the registry, is that we can grab the prim definitions. We can use these to inspect what properties a schema creates. We can use this to for example builds UIs that list all the schema attributes.
from pxr import Usd
registry = Usd.SchemaRegistry()
## Useful inspection lookups ##
# Find API schemas. This uses the `Schema Type Name` syntax:
cube_def = registry.FindConcretePrimDefinition("Cube")
print(cube_def.GetPropertyNames())
# Returns:
"""
['doubleSided', 'extent', 'orientation', 'primvars:displayColor',
 'primvars:displayOpacity', 'purpose', 'size', 'visibility',
 'xformOpOrder', 'proxyPrim']
"""
skel_bind_def = registry.FindAppliedAPIPrimDefinition("SkelBindingAPI")
print(skel_bind_def.GetPropertyNames())
# Returns:
"""
['primvars:skel:geomBindTransform', 'primvars:skel:jointIndices',
 'primvars:skel:jointWeights', 'skel:blendShapes', 'skel:joints',
 'skel:animationSource', 'skel:blendShapeTargets', 'skel:skeleton']
"""
Schema Kind
We can also inspect the schema kind. The kind defines (if we look at our inheritance tree in overview) what kind of schema it is.
The kind can be one of:
- Usd.SchemaKind.AbstractBase
- Usd.SchemaKind.AbstractTyped
- Usd.SchemaKind.ConcreteTyped
- Usd.SchemaKind.NonAppliedAPI
- Usd.SchemaKind.SingleApplyAPI
- Usd.SchemaKind.MultipleApplyAPI
from pxr import Plug, Sdf, Tf, Usd
### Check schema types ###
registry = Usd.SchemaRegistry()
## Typed Schemas ##
print(registry.IsTyped(UsdGeom.Cube))         # Returns: True
print(registry.IsTyped(UsdGeom.Imageable))    # Returns: True
print(registry.IsAbstract(UsdGeom.Imageable)) # Returns: True
print(registry.IsAbstract(UsdGeom.Cube))      # Returns: False
print(registry.IsConcrete(UsdGeom.Imageable)) # Returns: False
print(registry.IsConcrete(UsdGeom.Cube))      # Returns: True
# Also works with type name strings
print(registry.IsTyped("UsdGeomImageable"))   # Returns: True
print(registry.IsTyped("UsdGeomCube"))        # Returns: True
## API Schemas ##
print(registry.IsAppliedAPISchema("SkelBindingAPI"))      # Returns: True
print(registry.IsMultipleApplyAPISchema("CollectionAPI")) # Returns: True
## We can also ask by schema type name
print(registry.GetSchemaKind("Cube")) # Returns: pxr.Usd.SchemaKind.ConcreteTyped
print(registry.GetSchemaKind("Imageable")) # Returns: pxr.Usd.SchemaKind.AbstractTyped
Metadata
Metadata is the smallest building block in Usd. It is part of the base class from which prims and properties inherit from and possesses a slightly different feature set than other parts of Usd.
Table of Contents
- API Overview In-A-Nutshell
- What should I use it for?
- Resources
- Overview
- Composition/Value resolution
- Working with metadata in your stages
- Basics (High level API)
- Validation of dict content
- Nested key path syntax
- Creating custom metadata fields via plugins
- Reading metadata documentation strings (High level API)
- Authored vs fallback metadata values (High level API)
- Reading/writing metadata via prim/property specs(Low level API)
- Special metadata fields for prims
- Special metadata fields for properties
- Special metadata fields for layers and stages
TL;DR - Metadata In-A-Nutshell
- Metadata attaches additional non-animatable data to prims/properties/layers via a dictionary
- Composition arcs and core data (specifiers/type names) is added via metadata
assetInfoandcustomDataare predefined keys for prim metadata you can track asset/custom data with- To write to other keys, they must be registered via schemas.
What should I use it for?
In production, you'll use the assetInfo/customData prim metadata fields to track any production related data.
You can also use metadata to edit composition arcs, though the high level API offers nice class wrappers that wrap this for you.
from pxr import Sdf, Usd
stage = Usd.Stage.CreateInMemory()
prim_path = Sdf.Path("/bicycle")
prim = stage.DefinePrim(prim_path, "Xform")
prim.SetMetadata("assetInfo", {"version": "1"})
prim.SetAssetInfoByKey("identifier", Sdf.AssetPath("bicycler.usd"))
prim.SetMetadata("customData", {"sizeUnit": "meter"})
prim.SetCustomDataByKey("nested:shape", "round")
Resources
Overview
Here is the class structure for the different API levels:
High Level API
flowchart TD
    usdObject(["Usd.Object (Includes Metadata API)"]) --> usdPrim([Usd.Prim])
    usdObject --> usdProperty([Usd.Property])
    usdProperty --> usdAttribute([Usd.Attribute])
    usdProperty --> usdRelationship([Usd.Relationship])
    usdStage(["Usd.Stage (Includes Metadata API)"])
Low Level API
flowchart TD
    sdfSpec(["Sdf.Spec (Includes Metadata API)"]) --> sdfPropertySpec([Sdf.Property])
    sdfSpec --> sdfPrimSpec([Sdf.PrimSpec])
    sdfSpec --> sdfVariantSetSpec([Sdf.VariantSetSpec])
    sdfSpec --> sdfVariantSpec([Sdf.VariantSpec])
    sdfPropertySpec --> sdfAttributeSpec([Sdf.AttributeSpec])
    sdfPropertySpec --> sdfRelationshipSpec([Sdf.RelationshipSpec])
    sdfLayer(["Sdf.Layer (Includes Metadata API)"])
Metadata is different in that it:
- Is the smallest building block in Usd (There are no subclasses) and its data is stored as a dictionary.
- Is extremely fast to access
- Can't be time varying:
- Composition arcs are written into metadata fields on prims, so you can't animate composition.
- Metadata stored in value clip files is ignored
- Is strongly typed via schemas, so you need to register a custom schema if you want custom keys. This way we can ensure fallback values/documentation per key/value and avoid random data flying through your pipelines. For example all your mesh attributes have metadata for exactly what type/role they must match.
- There are two special metadata keys for prims:
assetInfo: Here you should dump asset related data. This is just a predefined standardized location all vendors/companies should adhere to when writing asset data that should be tracked.customData: Here you can dump any data you want, a kind of scratch space, so you don't need to add your own schema. If you catch yourself misusing it too much, you should probably generate your own schema.
We go into more detail over in the schema section on how to create or lookup registered schemas.
Composition/Value resolution
Metadata is slightly different when it comes to value resolution. (As a reminder: value resolution is just a fancy word for "what layer has the winning value out of all your layers where the data will be loaded from"):
- Nested dictionaries are combined
- Attribute metadata behaves by the same rules as attribute value resolution
- Core metadata (Metadata that affects composition/prim definitions):
- Composition metadata is composed via Listeditable-Ops. See our section here for more details. Be sure to understand these to save your self a lot of head-aches why composition works the way it does.
- Specific prim metadata has its own rule set (E.g. prim specifiers).
Working with metadata in your stages
Let's look at some actual code examples on how to modify metadata.
Basics (High level API)
"""
### General
# Has:   'HasAuthoredMetadata'/'HasAuthoredMetadataDictKey'/'HasMetadata'/'HasMetadataDictKey'
# Get:   'GetAllAuthoredMetadata'/'GetAllMetadata'/'GetMetadata'/'GetMetadataByDictKey'
# Set:   'SetMetadata'/'SetMetadataByDictKey',
# Clear: 'ClearMetadata'/'ClearMetadataByDictKey'
### Asset Info (Prims only)
# Has: 'HasAssetInfo'/'HasAssetInfoKey'/'HasAuthoredAssetInfo'/'HasAuthoredAssetInfoKey'
# Get: 'GetAssetInfo'/'GetAssetInfoByKey'
# Set: 'SetAssetInfo'/'SetAssetInfoByKey',
# Clear: 'ClearAssetInfo'/'ClearAssetInfoByKey'
### Custom Data (Prims, Properties(Attributes/Relationships), Layers)
# Has: 'HasCustomData'/'HasCustomDataKey'/'HasAuthoredCustomData'/'HasAuthoredCustomDataKey'
# Get: 'GetCustomData'/'GetCustomDataByKey'
# Set: 'SetCustomData'/'SetCustomDataByKey',
# Clear: 'ClearCustomData'/'ClearCustomDataByKey'
"""
from pxr import Usd, Sdf

stage = Usd.Stage.CreateInMemory()
prim_path = Sdf.Path("/bicycle")
prim = stage.DefinePrim(prim_path, "Xform")
prim.SetAssetInfoByKey("identifier", Sdf.AssetPath("bicycler.usd"))
prim.SetAssetInfoByKey("nested", {"assetPath": Sdf.AssetPath("bicycler.usd"), "version": "1"})
prim.SetMetadataByDictKey("assetInfo", "nested:color", "blue")
attr = prim.CreateAttribute("tire:size", Sdf.ValueTypeNames.Float)
attr.SetMetadata("customData", {"sizeUnit": "meter"})
attr.SetCustomDataByKey("nested:shape", "round")

print(prim.HasAuthoredMetadata("assetInfo")) # Returns: True
print(prim.HasAuthoredMetadataDictKey("assetInfo", "identifier")) # Returns: True
print(prim.HasMetadata("assetInfo")) # Returns: True
print(prim.HasMetadataDictKey("assetInfo", "nested:color")) # Returns: True
# prim.ClearMetadata("assetInfo") # Remove all assetInfo in the current layer.
Validation of dict content
To create a valid metadata compatible dict, you can validate it:
data = {"myCustomKey": 1}
success_state, metadata, error_message = Sdf.ConvertToValidMetadataDictionary(data)
Nested key path syntax
To access nested dict keys, we use the : symbol as the path separator.
from pxr import Usd, Sdf
stage = Usd.Stage.CreateInMemory()
prim_path = Sdf.Path("/bicycle")
prim = stage.DefinePrim(prim_path, "Xform")
prim.SetAssetInfoByKey("nested:color", "blue")
print(prim.GetAssetInfo()) # Returns: {'nested': {'color': 'blue'}}
print(prim.GetAssetInfoByKey("nested:color")) # Returns: "blue"
The Get/Set methods without the ByKey/ByDictKey allow you to set root dict keys, e.g. SetMetadata("typeName", "Xform")
The ByKey/ByDictKey take a root key and a key path (with : if nested), e.g. SetMetadataByDictKey('assetInfo', "data:version", 1) which will result in {"assetInfo": {"data": "version": 1}}
Creating custom metadata fields via plugins
We can easily extend metadata fields via plugins. We cover this in detail in out metadata plugin section.
Reading metadata documentation strings (High level API)
This is quite useful if you need to expose docs in UIs.
from pxr import Usd, Sdf
stage = Usd.Stage.CreateInMemory()
prim_path = Sdf.Path("/bicycle")
prim = stage.DefinePrim(prim_path, "Cube")
# Shortcut to get the docs metadata
# Has: 'HasAuthoredDocumentation'
# Get: 'GetDocumentation'
# Set: 'SetDocumentation'
# Clear: 'ClearDocumentation'
print(prim.GetDocumentation())
for attr in prim.GetAttributes():
    print(attr.GetName(), attr.GetDocumentation())
    # Or
    # print(attr.GetMetadata("documentation"))
Click here to view the result
"""
Defines a primitive rectilinear cube centered at the origin.
    The fallback values for Cube, Sphere, Cone, and Cylinder are set so that
    they all pack into the same volume/bounds.
doubleSided Although some renderers treat all parametric or polygonal
        surfaces as if they were effectively laminae with outward-facing
        normals on both sides, some renderers derive significant optimizations
        by considering these surfaces to have only a single outward side,
        typically determined by control-point winding order and/or
        orientation.  By doing so they can perform "backface culling" to
        avoid drawing the many polygons of most closed surfaces that face away
        from the viewer.

        However, it is often advantageous to model thin objects such as paper
        and cloth as single, open surfaces that must be viewable from both
        sides, always.  Setting a gprim's doubleSided attribute to
        \c true instructs all renderers to disable optimizations such as
        backface culling for the gprim, and attempt (not all renderers are able
        to do so, but the USD reference GL renderer always will) to provide
        forward-facing normals on each side of the surface for lighting
        calculations.
extent Extent is re-defined on Cube only to provide a fallback value.
        \sa UsdGeomGprim::GetExtentAttr().
orientation Orientation specifies whether the gprim's surface normal
        should be computed using the right hand rule, or the left hand rule.
        Please see for a deeper explanation and
        generalization of orientation to composed scenes with transformation
        hierarchies.
primvars:displayColor It is useful to have an "official" colorSet that can be used
        as a display or modeling color, even in the absence of any specified
        shader for a gprim.  DisplayColor serves this role; because it is a
        UsdGeomPrimvar, it can also be used as a gprim override for any shader
        that consumes a displayColor parameter.
primvars:displayOpacity Companion to displayColor that specifies opacity, broken
        out as an independent attribute rather than an rgba color, both so that
        each can be independently overridden, and because shaders rarely consume
        rgba parameters.
purpose Purpose is a classification of geometry into categories that
        can each be independently included or excluded from traversals of prims
        on a stage, such as rendering or bounding-box computation traversals.

        See for more detail about how
        purpose is computed and used.
size Indicates the length of each edge of the cube.  If you
        author size you must also author extent.

visibility Visibility is meant to be the simplest form of "pruning"
        visibility that is supported by most DCC apps.  Visibility is
        animatable, allowing a sub-tree of geometry to be present for some
        segment of a shot, and absent from others; unlike the action of
        deactivating geometry prims, invisible geometry is still
        available for inspection, for positioning, for defining volumes, etc.
xformOpOrder Encodes the sequence of transformation operations in the
        order in which they should be pushed onto a transform stack while
        visiting a UsdStage's prims in a graph traversal that will effect
        the desired positioning for this prim and its descendant prims.

        You should rarely, if ever, need to manipulate this attribute directly.
        It is managed by the AddXformOp(), SetResetXformStack(), and
        SetXformOpOrder(), and consulted by GetOrderedXformOps() and
        GetLocalTransformation().
"""
Authored vs fallback metadata values (High level API)
The getters offer the distinction between retrieving authored or fallback values provided by the schemas that registered the metadata.
from pxr import Usd, Sdf
stage = Usd.Stage.CreateInMemory()
prim_path = Sdf.Path("/bicycle")
prim = stage.DefinePrim(prim_path, "Xform")
prim.SetAssetInfoByKey("identifier", "bicycle.usd")
# The difference between "authored" and non "authored" methods is
# that "authored" methods don't return fallback values that come from schemas.
print(prim.GetAllAuthoredMetadata())
# Returns:
# {'assetInfo': {'identifier': 'bicycle.usd'},
#  'specifier': Sdf.SpecifierDef,
#  'typeName': 'Xform'}
print(prim.GetAllMetadata())
# Returns:
#{'assetInfo': {'identifier': 'bicycle.usd'},
# 'documentation': 'Concrete prim schema for a transform, which implements Xformable ',
# 'specifier': Sdf.SpecifierDef,
# 'typeName': 'Xform'}
Reading/writing metadata via prim/property specs(Low level API)
Same as with the layer customData, the lower level APIs on prim/property specs expose it to Python via lower camel case syntax in combination with direct assignment, instead of offer getter and setters.
from pxr import Sdf
layer = Sdf.Layer.CreateAnonymous()
### Prims ###
prim_spec = Sdf.CreatePrimInLayer(layer, "/bicycle")
prim_spec.specifier = Sdf.SpecifierDef
# Asset Info and Custom Data
prim_spec.assetInfo = {"identifier": Sdf.AssetPath("bicycle.usd")}
prim_spec.customData = {"myCoolData": "myCoolValue"}
# General metadata
# Has: 'HasInfo'
# Get: 'ListInfoKeys', 'GetMetaDataInfoKeys', 'GetInfo', 'GetFallbackForInfo', 'GetMetaDataDisplayGroup'
# Set: 'SetInfo', 'SetInfoDictionaryValue'
# Clear: 'ClearInfo'
print(prim_spec.ListInfoKeys()) # Returns: ['assetInfo', 'customData', 'specifier']
# To get all registered schema keys run:
print(prim_spec.GetMetaDataInfoKeys())
"""Returns: ['payloadAssetDependencies', 'payload', 'kind', 'suffix', 'inactiveIds', 'clipSets',
'HDAKeepEngineOpen', 'permission', 'displayGroupOrder', 'assetInfo', 'HDAParms', 'instanceable',
'symmetryFunction', 'HDATimeCacheMode', 'clips', 'HDAAssetName', 'active', 'HDATimeCacheEnd',
'customData', 'HDAOptions', 'prefix', 'apiSchemas', 'suffixSubstitutions', 'symmetryArguments',
'hidden', 'HDATimeCacheStart', 'sdrMetadata', 'typeName', 'HDATimeCacheInterval', 'documentation',
'prefixSubstitutions', 'symmetricPeer']"""
# For the fallback values and UI grouping hint you can use
# 'GetFallbackForInfo' and 'GetMetaDataDisplayGroup'.
# Prim spec core data is actually also just metadata info
prim_spec.SetInfo("specifier", Sdf.SpecifierDef)
prim_spec.SetInfo("typeName", "Xform")
# Is the same as:
prim_spec.specifier = Sdf.SpecifierDef
prim_spec.typeName = "Xform"

### Properties ###
attr_spec = Sdf.AttributeSpec(prim_spec, "tire:size", Sdf.ValueTypeNames.Float)
# Custom Data
attr_spec.customData = {"myCoolData": "myCoolValue"}
# We can actually use the attr_spec.customData assignment here too,
# doesn't make that much sense though
# General metadata
# Has: 'HasInfo'
# Get: 'ListInfoKeys', 'GetMetaDataInfoKeys', 'GetInfo', 'GetFallbackForInfo', 'GetMetaDataDisplayGroup'
# Set: 'SetInfo', 'SetInfoDictionaryValue'
# Clear: 'ClearInfo'
# The API here is the same as for the prim_spec, as it all inherits from Sdf.Spec
# To get all registered schema keys run:
print(attr_spec.GetMetaDataInfoKeys())
"""Returns: ['unauthoredValuesIndex', 'interpolation', 'displayGroup', 'faceIndexPrimvar',
'suffix', 'constraintTargetIdentifier', 'permission', 'assetInfo', 'symmetryFunction', 'uvPrimvar',
'elementSize', 'allowedTokens', 'customData', 'prefix', 'renderType', 'symmetryArguments',
'hidden', 'displayName', 'sdrMetadata', 'faceOffsetPrimvar', 'weight', 'documentation',
'colorSpace', 'symmetricPeer', 'connectability']
"""
Special metadata fields for prims
Here are the most common prim metadata keys we'll be working with.
Active/Activation
The active metadata controls if the prim and its children are loaded or not.
We only cover here how to set the metadata, for more info checkout our Loading mechansims section. Since it is a metadata entry, it can not be animated. For animated pruning we must use visibility.
from pxr import Sdf, Usd
### High Level ###
stage = Usd.Stage.CreateInMemory()
prim_path = Sdf.Path("/bicycle")
prim = stage.DefinePrim(prim_path, "Xform")
prim.SetActive(False)

### Low Level ###
layer = Sdf.Layer.CreateAnonymous()
prim_path = Sdf.Path("/cube")
prim_spec = Sdf.CreatePrimInLayer(layer, prim_path)
prim_spec.active = False
# Or
prim_spec.SetInfo(prim_spec.ActiveKey, True)
Asset Info
The assetInfo metadata carries asset related data. This is just a predefined standardized location all vendors/companies should adhere to when writing asset data that should be tracked.
There are currently four standardized keys:
identifier(Sdf.AssetPath): The asset identifier (that the asset resolver can resolve)name(str): The name of the asset.version(str): The version of the asset.payloadAssetDependencies(Sdf.AssetPathArray()): This is typically attached to the prim where you attach payloads to that when you unloaded payloads, you can still see what is in the file without traversing the actual layer content. It is up to you to manage the content of this list to be synced with the actual payload(s) content.
from pxr import Sdf, Usd
### High Level ###
stage = Usd.Stage.CreateInMemory()
prim_path = Sdf.Path("/bicycle")
prim = stage.DefinePrim(prim_path, "Xform")
prim.SetMetadata("assetInfo", {"identifier": Sdf.AssetPath("bicycler.usd")})
prim.SetAssetInfoByKey("name", "bicycle")
prim.SetAssetInfoByKey("version", "v001")
prim.SetAssetInfoByKey("payloadAssetDependencies", Sdf.AssetPathArray(["assetIndentifierA", "assetIndentifierA"]))
# Sdf.AssetPathArray([]) auto-casts all elements to Sdf.AssetPath objects.

### Low Level ###
layer = Sdf.Layer.CreateAnonymous()
prim_path = Sdf.Path("/cube")
prim_spec = Sdf.CreatePrimInLayer(layer, prim_path)
prim_spec.assetInfo = {"identifier": Sdf.AssetPath("bicycle.usd")}
prim_spec.assetInfo["name"] = "bicycle"
prim_spec.assetInfo["version"] = "v001"
prim_spec.assetInfo["payloadAssetDependencies"] = Sdf.AssetPathArray(["assetIndentifierA", "assetIndentifierA"])
# Sdf.AssetPathArray([]) auto-casts all elements to Sdf.AssetPath objects.
Custom Data
The customData field can be for any data you want, a kind of scratch space, so you don't need to add your own schema. If you catch yourself misusing it too much, you should probably generate your own schema.
from pxr import Sdf, Usd
### High Level ###
stage = Usd.Stage.CreateInMemory()
prim_path = Sdf.Path("/bicycle")
prim = stage.DefinePrim(prim_path, "Xform")
prim.SetMetadata("customData", {"sizeUnit": "meter"})
prim.SetCustomDataByKey("nested:shape", "round")

### Low Level ###
layer = Sdf.Layer.CreateAnonymous()
prim_path = Sdf.Path("/cube")
prim_spec = Sdf.CreatePrimInLayer(layer, prim_path)
prim_spec.customData = {"myCoolData": "myCoolValue"}
Comments
There is also a special key to track user comments:
from pxr import Sdf, Usd
### High Level ###
stage = Usd.Stage.CreateInMemory()
prim_path = Sdf.Path("/bicycle")
prim = stage.DefinePrim(prim_path, "Xform")
prim.SetMetadata("comment", "This is a cool prim!")

### Low Level ###
layer = Sdf.Layer.CreateAnonymous()
prim_path = Sdf.Path("/cube")
prim_spec = Sdf.CreatePrimInLayer(layer, prim_path)
prim_spec.SetInfo("comment", "This is a cool prim spec!")
Icon (UI)
You can also write an icon key into the customData dict, which UI applications can then optionally use to draw the prim icon with.
from pxr import Sdf, Usd
### High Level ###
stage = Usd.Stage.CreateInMemory()
prim_path = Sdf.Path("/bicycle")
prim = stage.DefinePrim(prim_path, "Xform")
prim.SetMetadata("comment", "This is a cool prim!")

### Low Level ###
layer = Sdf.Layer.CreateAnonymous()
prim_path = Sdf.Path("/cube")
prim_spec = Sdf.CreatePrimInLayer(layer, prim_path)
prim_spec.SetInfo("comment", "This is a cool prim spec!")
Hidden (UI)
There is also a special key hidden key that is a UI hint that can be used by applications to hide the prim in views. It is up to the application to implement.
This also exists for properties, but is not read by most UIs in apps/DCCs.
from pxr import Sdf, Usd
### High Level ###
stage = Usd.Stage.CreateInMemory()
prim_path = Sdf.Path("/bicycle")
prim = stage.DefinePrim(prim_path, "Xform")
prim.SetHidden(True)

### Low Level ###
layer = Sdf.Layer.CreateAnonymous()
prim_path = Sdf.Path("/cube")
prim_spec = Sdf.CreatePrimInLayer(layer, prim_path)
prim_spec.SetInfo("hidden", True)
Special metadata fields for properties
Setting metadata works the same for properties, but they do have a different set of default core metadata. Here we cover the most important ones.
Support for animation (USD speak variability)
The term variability in USD just means if a property can have animation (time samples) or not. There are two values:
Sdf.VariabilityUniform(No animation/time samples)Sdf.VariabilityVarying(Supports time samples)
The variability actually only declares the intent of time capabilities of the property. You can still write time samples for uniform variability attributes, there are chances though that something else somewhere in the API/Hydra won't work then though. So as a best practice don't write animated attributes to Sdf.VariabilityUniform declared schema attributes. Relationships always have the Sdf.VariabilityUniform intent as they can't be animated.
from pxr import Sdf, Usd
### High Level ###
stage = Usd.Stage.CreateInMemory()
prim_path = Sdf.Path("/box")
prim = stage.DefinePrim(prim_path, "Cube")
attr = prim.CreateAttribute("height", Sdf.ValueTypeNames.Double)
attr.SetMetadata("variability", Sdf.VariabilityUniform)
### Low Level ###
layer = Sdf.Layer.CreateAnonymous()
prim_path = Sdf.Path("/box")
prim_spec = Sdf.CreatePrimInLayer(layer, prim_path)
prim_spec.typeName = "Cube"
attr_spec = Sdf.AttributeSpec(prim_spec, "height", Sdf.ValueTypeNames.Double)
attr_spec.SetInfo("variability", Sdf.VariabilityVarying)
Custom vs schema defined properties
All properties that are not registered via a schema are marked as custom.
This is one of the examples where we can clearly see the benefit of the high level API:
It automatically checks if a property is in the assigned schemas and marks it as custom if necessary.
With the lower level API, we have to mark it ourselves.
from pxr import Sdf, Usd
### High Level ###
stage = Usd.Stage.CreateInMemory()
prim_path = Sdf.Path("/box")
prim = stage.DefinePrim(prim_path, "Cube")
attr = prim.CreateAttribute("height", Sdf.ValueTypeNames.Double)
# This is not necessary to do explicitly as
# the high level API does this for us.
attr.SetMetadata("custom", True)
# Or
print(attr.IsCustom())
attr.SetCustom(True)
### Low Level ###
layer = Sdf.Layer.CreateAnonymous()
prim_path = Sdf.Path("/box")
prim_spec = Sdf.CreatePrimInLayer(layer, prim_path)
prim_spec.typeName = "Cube"
attr_spec = Sdf.AttributeSpec(prim_spec, "height", Sdf.ValueTypeNames.Double)
attr_spec.SetInfo("custom", True)
Special metadata fields for layers and stages
For stages (root layer/session layer) and layers, we can also write a few special fields as covered below.
Stage/Root Layer Default Render Settings (High/Low level API)
We can supply a default render settings prim path on our root layer. This will be used in DCCs as the default render settings to drive Hydra rendering.
### High Level ###
from pxr import Usd

stage = Usd.Stage.CreateInMemory()
stage.GetRootLayer().pseudoRoot.SetInfo(
    "renderSettingsPrimPath", "/Render/rendersettings"
)
### Low Level ###
from pxr import Sdf

layer = Sdf.Layer.CreateAnonymous()
layer.pseudoRoot.SetInfo("renderSettingsPrimPath", "/Render/rendersettings")
For example in Houdini we can then see it marked with the "Default" prefix in our viewport display options.
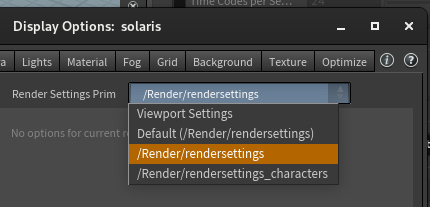
Stage and layer metrics (FPS/Scene Unit Scale/Up Axis) (High/Low level API)
For more info about the FPS, see our animation section.
We can supply an up axis and scene scale hint in the layer metadata, but this does not seem to be used by most DCCs or in fact Hydra itself when rendering the geo. So if you have a mixed values, you'll have to counter correct via transforms yourself.
The default scene metersPerUnit value is centimeters (0.01) and the default upAxis is Y.
See Scene Up Axis API Docs and Scene Unit API Docs for more info.
from pxr import Sdf, Usd, UsdGeom

### High Level ###
stage = Usd.Stage.CreateInMemory()
prim_path = Sdf.Path("/bicycle")
prim = stage.DefinePrim(prim_path, "Cone")
size_attr = prim.GetAttribute("radius")
for frame in range(1001, 1006):
    time_code = Usd.TimeCode(frame)
    size_attr.Set(frame - 1000, time_code)
# FPS Metadata
time_samples = Sdf.Layer.ListAllTimeSamples(layer)
stage.SetTimeCodesPerSecond(25)
stage.SetFramesPerSecond(25)
stage.SetStartTimeCode(time_samples[0])
stage.SetEndTimeCode(time_samples[-1])
# Scene Unit Scale
UsdGeom.SetStageMetersPerUnit(stage, UsdGeom.LinearUnits.centimeters)
# To map 24 fps (default) to 25 fps we have scale by 24/25 when loading the layer in the Sdf.LayerOffset
# Scene Up Axis
UsdGeom.SetStageUpAxis(stage, UsdGeom.Tokens.y)  # Or  UsdGeom.Tokens.z

### Low Level ###
from pxr import Sdf

layer = Sdf.Layer.CreateAnonymous()
prim_path = Sdf.Path("/bicycle")
prim_spec = Sdf.CreatePrimInLayer(layer, prim_path)
prim_spec.specifier = Sdf.SpecifierDef
prim_spec.typeName = "Cube"
attr_spec = Sdf.AttributeSpec(prim_spec, "size", Sdf.ValueTypeNames.Double)
for frame in range(1001, 1006):
    value = float(frame - 1000)
    layer.SetTimeSample(attr_spec.path, frame, value)
# FPS Metadata
layer.timeCodesPerSecond = 25
layer.framesPerSecond = 25
layer.startTimeCode = time_samples[0]
layer.endTimeCode = time_samples[-1]
# Scene Unit Scale
layer.pseudoRoot.SetInfo(UsdGeom.Tokens.metersPerUnit, UsdGeom.LinearUnits.centimeters)
# Scene Up Axis
layer.pseudoRoot.SetInfo(
    UsdGeom.Tokens.upAxis, UsdGeom.Tokens.y
)  # Or  UsdGeom.Tokens.z
Stage and layer customData metadata (High/Low level API)
This is often used to track pipeline relevant data in DCCs. For node based DCCs, this is a convenient way to pass general data down through the node network. For layer based DCCs, this can be used to tag layers (for example to anonymous layers that carry specific pipeline data).
Layer metadata, like some other classes in the low level API, uses the lower camel case syntax in combination with direct assignment, instead of offer getter and setters. Here we can just use the standard Python dict methods.
from pxr import Usd, Sdf
layer = Sdf.Layer.CreateAnonymous()
layer.customLayerData = {"myCustomPipelineKey": "myCoolValue"}
As we are operating on the layer (lower level API), we do not see any composed metadata and instead only the data in the layer we are looking at. The Usd.Stage class also offers the metadata methods, it follows a different logic though:
It writes the metadata to the session or root layer. So you won't see any composed metadata of individual layers, only those of the session/root layer (depending on the edit target according to the docs
from pxr import Usd, Sdf
stage = Usd.Stage.CreateInMemory()
stage.SetMetadata("customLayerData", {"myCustomStageData": 1})
# Is the same as:
layer = stage.GetRootLayer()
metadata = layer.customLayerData
metadata["myCustomRootData"] = 1
layer.customLayerData = metadata
# Or:
layer = stage.GetSessionLayer()
metadata = layer.customLayerData
metadata["myCustomSessionData"] = 1
layer.customLayerData = metadata
# To get the value from the session/root layer depending on the edit target:
stage.GetMetadata("customLayerData")
Layers & Stages
Layers and stages are the main entry point to accessing our data stored in USD.
Table of Contents
TL;DR - Layers & Stages In-A-Nutshell
Layers
- Layers are managed via a singleton pattern: Each layer is only opened once in memory and is identified by the layer identifier. When stages load a layer, they point to the same data in memory.
- Layers identifiers can have two different formats:
- Standard identifiers:
Sdf.Layer.CreateNew("/file/path/or/URI/identifier.<ext(.usd/.usdc/.usda)>"), these layers are backed by a file on disk - Anonymous identifiers:
Sdf.Find('anon:<someHash(MemoryLocation)>:<customName>', these are in-memory only layers
- Standard identifiers:
Stages
- A stage is a view of a set of composed layers. You can think of it as the viewer in a view--model design. Each layer that the stage opens is a data source to the data model. When "asking" the stage for data, we ask the view for the combined (composed) data, which then queries into the layers based on the value source found by our composition rules.
- When creating a stage we have two layers by default:
- Session Layer: This is a temp layer that doesn't get applied on disk save. Here we usually put things like viewport overrides.
- Root Layer: This is the base layer all edits target by default. We can add sublayers based on what we need to it. When calling
stage.Save(), all sublayers that are dirty and not anonymous, will be saved.
What should I use it for?
Resources
Overview
This section will focus on what the Sdf.Layer and Usd.Stage classes have to offer. For an explanation of how layers work together, please see our compsition section.
There are also utility methods available, that are not in the Sdf.Layer/Usd.Stage namespace.
We cover these in our advanced concepts in production section.
Layers
flowchart LR
    layerSingleton(Layer Singleton/Registry) --> layer1([Layer])
    layer1([Layer]) --> prim1([Property])
    prim1([Prim]) --> property([Property])
    property --> attribute([Attribute])
    property --> relationship([Relationship])
    layerSingleton --> layer2([Layer])
    layer2([Layer]) --> prim2([...])
Layers are the data container for our prim specs and properties, they are the part of USD that actually holds and import/exports the data.
- Layers are managed via a singleton pattern: Each layer is only opened once in memory and is identified by the layer identifier.
- Layers identifiers can have two different formats:
- Standard identifiers:
Sdf.Layer.CreateNew("/file/path/or/URI/identifier.<ext(.usd/.usdc/.usda)>") - Anonymous identifiers:
Sdf.Find('anon:<someHash(MemoryLocation)>:<customName>'
- Standard identifiers:
- Layers store our prim and property specs, they are the data container for all USD data that gets persistently written to file. When we want to edit layers directly, we have to use the low-level API, the high level API edits the stage, which in return forwards the edits to the layer that is set by the active edit target.
- The
Sdf.FileFormatplugin interface allows us to implement plugins that convert the content of (custom) file format's to the USD's prim/property/metadata data model. This is how USD manages the USD crate (binary), alembic and vdb formats. - USD's crate (binary) format allows layers to be lazily read and written to. Calling
layer.Save()multiple times, flushes the in-memory content to disk by appending it to the .usd file, which allows us to efficiently write large layer files. This format can also read in hierarchy data without loading property value data. This way we have low IO when opening files, as the property data gets lazy loaded on demand. This is similar to how we can parse image metadata without reading the image content.
Layer Singleton
Layers in USD are managed by a singleton design pattern. This means that each layer, identified by its layer identifier, can only be opened once. Each stage that makes use of a layer, uses the same layer. That means if we make an edit on a layer in one stage, all other stages will get changed notifications and update accordingly.
We get all opened layers via the Sdf.Layer.GetLoadedLayers() method.
for layer in Sdf.Layer.GetLoadedLayers():
    print(layer.identifier)
# Skip anonymous layers
for layer in Sdf.Layer.GetLoadedLayers():
    if layer.anonymous:
        continue
    print(layer.identifier)
If a layer is no longer used in a stage and goes out of scope in our code, it will be deleted. If we still have access to the Python object, we can check whether it points to a valid layer using the layer.expired property.
As also mentioned in the next section, the layer identifier is made up of the URI(Unique Resource Identifier) and optional arguments. The layer identifier includes the optional args. This is on purpose, because different args can potentially mean a different file.
To demonstrate the singleton behavior let's try changing a layers content in Houdini and then view the layer through two different unrelated stages. (In Houdini every LOPs node is a separate stage):
The snippet from the video:
from pxr import Sdf
flippy_layer = Sdf.Layer.FindOrOpen("/opt/hfs19.5/houdini/usd/assets/rubbertoy/geo.usdc")
pig_layer = Sdf.Layer.FindOrOpen("/opt/hfs19.5/houdini/usd/assets/pig/geo.usdc")
flippy_layer.TransferContent(pig_layer)
"No flippyyyy, where did you go?" Luckily all of our edits were just in memory, so if we just call layer.Reload() or refresh the layer via the reference node, all is good again.
Should you ever use this in production as a way to broadcast an edit of a nested layer? We wouldn't recommend it, as it breaks the WYSIWYG paradigm. A better approach would be to rebuild the layer stack (this is what Houdini's "Edit Target Layer" node does) or we remap it via our asset resolver. In Houdini you should never use this method, as it can cause very strange stage caching issues.
(Anonymous) Layer Identifiers
Layer identifiers come in two styles:
- Standard identifiers:
Sdf.Layer.CreateNew("URI.<ext(.usd/.usdc/.usda)>") - Anonymous identifiers:
Sdf.Find('anon:<someHash(MemoryLocation)>:<customName>'
We can optionally add file format args: Sdf.Layer.CreateNew("URI.<ext>:SDF_FORMAT_ARGS:<ArgNameA>=<ArgValueA>&<ArgNameB>=<ArgValueB>")
Anonymous layers have these special features:
- They are in-memory layers that have no real path or asset information fields.
- We can additionally give a custom name suffix, so that we can identify the layer better visually
- The identifier is not run through the asset resolver (Edit: I have to verify this again, but I'm fairly certain)
- They cannot be saved via
layer.Save(), it will return an error - We can convert them to "normal" layers, by assigning a non-anonymous identifier (
layer.identifier="/file/path/myIdentifier.usd"), this also removes the save permission lock.
When using standard identifiers, we use the URI not the absolute resolved path. The URI is then resolved by our asset resolver. We often need to compare the URI, when doing so be sure to call layer_uri, layer_args = layer.SplitIdentifier(layer.identifier) to strip out the optional args or compare using the resolve URI layer.realPath.
The layer identifier includes the optional args. This is on purpose, because different args can potentially mean a different file.
If we write our own file format plugin, we can also pass in these args via attributes, but only non animated.
# Add code to modify the stage.
# Use drop down menu to select examples.
#### Low Level ####
# Get: 'identifier', 'resolvedPath', 'realPath', 'fileExtension'
# Set: 'identifier'
## Helper functions:
# Get: 'GetFileFormat', 'GetFileFormatArguments', 'ComputeAbsolutePath'
# Create: 'CreateIdentifier', 'SplitIdentifier'
### Anoymous identifiers
# Get: 'anonymous'
## Helper functions:
# Get: 'IsAnonymousLayerIdentifier'
import os
from pxr import Sdf
## Anonymous layers
layer = Sdf.Layer.CreateAnonymous()
print(layer.identifier) # Returns: anon:0x7f8a1040ba80
layer = Sdf.Layer.CreateAnonymous("myCustomAnonLayer")
print(layer.identifier) # Returns: anon:0x7f8a10498500:myCustomAnonLayer
print(layer.anonymous, layer.resolvedPath or "-", layer.realPath or "-", layer.fileExtension) # Returns: True, "-", "-", "sdf"
print(Sdf.Layer.IsAnonymousLayerIdentifier(layer.identifier)) # Returns True
## Standard layers
layer.identifier = "/my/cool/file/path/example.usd"
print(layer.anonymous, layer.resolvedPath or "-", layer.realPath or "-", layer.fileExtension)
# Returns: False, "/my/cool/file/path/example.usd", "/my/cool/file/path/example.usd", "usd"
# When accesing an identifier string, we should always split it for args to get the URI
layer_uri, layer_args = layer.SplitIdentifier(layer.identifier)
print(layer_uri, layer_args) # Returns: "/my/cool/file/path/example.usd", {}
layer_identifier = layer.CreateIdentifier("/dir/file.usd", {"argA": "1", "argB": "test"})
print(layer_identifier) # Returns: "/dir/file.usd:SDF_FORMAT_ARGS:argA=1&argB=test"
layer_uri, layer_args = layer.SplitIdentifier(layer_identifier)
print(layer_uri, layer_args) # Returns: "/dir/file.usd", {'argA': '1', 'argB': 'test'}
# CreateNew requires the file path to be writable
layer_file_path = os.path.expanduser("~/Desktop/layer_identifier_example.usd")
layer = Sdf.Layer.CreateNew(layer_file_path, {"myCoolArg": "test"})
print(layer.GetFileFormat()) # Returns: Instance of Sdf.FileFormat
print(layer.GetFileFormatArguments()) # Returns: {'myCoolArg': 'test'}
# Get the actuall resolved path (from our asset resolver):
print(layer.identifier, layer.realPath, layer.fileExtension) # Returns: "~/Desktop/layer_identifier_example.usd" "~/Desktop/layer_identifier_example.usd" "usd"
# This is the same as:
print(layer.identifier, layer.resolvedPath.GetPathString())
# Compute a file relative to the directory of the layer identifier
print(layer.ComputeAbsolutePath("./some/other/file.usd")) # Returns: ~/Desktop/some/other/file.usd
Layers Creation/Import/Export
Here is an overview of how we can create layers:
- We can call layer.Save() multiple times with the USD binary format (.usd/.usdc). This will then dump the content from memory to disk in "append" mode. This avoids building up huge memory footprints when creating large layers.
- Calling
layer.Reload()on anonymous layers clears their content (destructively). So make sure you can really dispose of it as there is no undo method. - To reload all (composition) related layers, we can use
stage.Reload(). This callslayer.Reload()on all used stage layers. - Calling
layer.Reload()consults the result oflayer.GetExternalAssetDependencies(). These return non USD/composition related external files, that influence the layer. This is only relevant when using non USD file formats.
### Low Level ###
# Create: 'New', 'CreateNew', 'CreateAnonymous',
# Get: 'Find','FindOrOpen', 'OpenAsAnonymous',  'FindOrOpenRelativeToLayer', 'FindRelativeToLayer',
# Set: 'Save', 'TransferContent', 'Import', 'ImportFromString', 'Export', 'ExportToString'
# Clear: 'Clear', 'Reload', 'ReloadLayers'
# See all open layers: 'GetLoadedLayers'
from pxr import Sdf
import os
layer = Sdf.Layer.CreateAnonymous()
## The .CreateNew command will check if the layer is saveable at the file location and create an empty file.
layer_file_path = os.path.expanduser("~/Desktop/layer_identifier_example.usd")
layer = Sdf.Layer.CreateNew(layer_file_path)
print(layer.dirty) # Returns: False
## Our layers are marked as "dirty" (edited) as soon as we make an edit.
prim_spec = Sdf.CreatePrimInLayer(layer, Sdf.Path("/pig"))
print(layer.dirty) # Returns: True
layer.Save()
# Only edited (dirty) layers are saved, when layer.Save() is called
# Only edited (dirty) layers are reloaded, when layer.Reload(force=False) is called.
# Our layer.Save() and layer.Reload() methods also take an optional "force" arg.
# This forces the layer to be saved. We can also call layer.Save() multiple times,
# with the USD binary format (.usd/.usdc). This will then dump the content from memory
# to disk in "append" mode. This avoids building up huge memory footprints when
# creating large layers.
## We can also transfer layer contents:
other_layer = Sdf.Layer.CreateAnonymous()
layer.TransferContent(other_layer)
# Or we import the content from another layer
layer.Import(layer_file_path)
# This is the same as:
layer.TransferContent(layer.FindOrOpen((layer_file_path)))
# We can also import/export to USD ascii representations,
# this is quite usefull for debugging and inspecting the active layer.
# layer.ImportFromString(other_layer.ExportAsString())
layer = Sdf.Layer.CreateAnonymous()
prim_spec = Sdf.CreatePrimInLayer(layer, Sdf.Path("/pig"))
print(layer.ExportToString())
# Returns:
"""
#sdf 1.4.32
over "pig"
{
}
"""
# We can also remove all prims that don't have properties/metadata
# layer.RemoveInertSceneDescription()
Dependencies
We can also query the layer dependencies of a layer.
The most important methods are:
layer.GetCompositionAssetDependencies(): This gets layer identifiers of sublayer/reference/payload composition arcs. This is only for the active layer, it does not run recursively.layer.UpdateCompositionAssetDependency("oldIdentifier", "newIdentifier"): The allows us to remap any sublayer/reference/payload identifier in the active layer, without having to edit the list-editable ops ourselves. Callinglayer.UpdateCompositionAssetDependency("oldIdentifier", "")removes a layer.
In our example below, we assume that the code is run in Houdini.
### Low Level ###
# Get: 'GetCompositionAssetDependencies', 'GetAssetInfo', 'GetAssetName', 'GetExternalAssetDependencies',
# Set: 'UpdateCompositionAssetDependency', 'UpdateExternalReference', 'UpdateAssetInfo'
import os
from pxr import Sdf
HFS_env = os.environ["HFS"]
layer = Sdf.Layer.FindOrOpen(os.path.join(HFS_env, "houdini","usd","assets","pig","payload.usdc"))
# Get all sublayer, reference and payload files (These are the only arcs that can load files)
print(layer.GetCompositionAssetDependencies()) # Returns: ['./geo.usdc', './mtl.usdc']
# print(layer.GetExternalReferences(), layer.externalReferences) # The same thing, deprecated method.
# Get external dependencies for non USD file formats. We don't use this with USD files.
print(layer.GetExternalAssetDependencies()) # Returns: []
# Get layer asset info. Our asset resolver has to custom implement this.
# A common use case might be to return database related side car data.
print(layer.GetAssetName()) # Returns: None
print(layer.GetAssetInfo()) # Returns: None
layer.UpdateAssetInfo() # Re-resolve/refresh the asset info. This just force requeries our asset resolver query.
# The perhaps most powerful method for dependencies is:
layer.UpdateCompositionAssetDependency("oldIdentifier", "newIdentifier")
# This allows us to repath any composition arc (sublayer/reference/payload) to a new file in the active layer.
# Calling layer.UpdateCompositionAssetDependency("oldIdentifier", ""), will remove the identifier from the
# list-editable composition arc ops.
Now there are also utility functions available in the UsdUtils module (USD Docs):
- UsdUtils.ExtractExternalReferences: This is similar to
layer.GetCompositionAssetDependencies(), except that it returns three lists:[<sublayers>], [<references>], [<payloads>]. It also consults the assetInfo metadata, so result might be more "inclusive" thanlayer.GetCompositionAssetDependencies(). - UsdUtils.ComputeAllDependencies: This recursively calls
layer.GetCompositionAssetDependencies()and gives us the aggregated result. - UsdUtils.ModifyAssetPaths: This is similar to Houdini's output processors. We provide a function that gets the input path and returns a (modified) output path.
Layer Metrics
We can also set animation/time related metrics, these are stored via metadata entries on the layer itself.
(
    timeCodesPerSecond = 24
    framesPerSecond = 24
    startTimeCode = 1
    endTimeCode = 240
    metersPerUnit = 0.01
    upAxis = "Z"
)
As this is handled via metadata, we cover it in detail our Animation (Time related metrics), Scene Unit Scale/UpAxis - FAQ and Metadata sections.
The metersPerUnit and upAxis are only intent hints, it is up to the application/end user to correctly interpret the data and change it accordingly.
The time related metrics should be written into all layers, as we can then use them to quickly inspect time related data in the file without having to fully parse it.
Permissions
We can lock a layer to not allow editing or save permissions. Depending on the DCC, this is automatically done for you depending on how you access the stage. However, some applications leave this up to the user.
Anonymous layers can't be saved to disk, therefore for them layer.permissionToSave is always False.
### Low Level ###
# Get: 'permissionToEdit', 'SetPermissionToEdit'
# Set: 'permissionToSave', 'SetPermissionToSave'
import os
from pxr import Sdf
layer = Sdf.Layer.CreateAnonymous()
print("Can edit layer", layer.permissionToEdit) # Returns: True
Sdf.CreatePrimInLayer(layer, Sdf.Path("/bicycle"))
# Edit permission
layer.SetPermissionToEdit(False)
try:
    # This will now raise an error
    Sdf.CreatePrimInLayer(layer, Sdf.Path("/car"))
except Exception as e:
    print(e)
layer.SetPermissionToEdit(True)
# Save permission
print("Can save layer", layer.permissionToSave) # Returns: False
try:
    # This fails as we can't save anoymous layers
    layer.Save()
except Exception as e:
    print(e)
# Changing this on anoymous layers doesn't work
layer.SetPermissionToSave(True)
print("Can save layer", layer.permissionToSave) # Returns: False
# If we change the identifer to not be an anonymous identifer, we can save it.
layer.identifier = os.path.expanduser("~/Desktop/layerPermission.usd")
print("Can save layer", layer.permissionToSave) # Returns: True
Muting
Muting layers can be done globally on the layer itself or per stage via stage.MuteLayer(layer.identifier)/stage.UnmuteLayer(layer.identifier).
When doing it globally on the layer, it affects all stages that use the layer. This is also why the mute method is not exposed on a layer instance, instead we call it on the Sdf.Layer class, as we modify muting on the singleton.
More info on this topic in our loading data section.
### Low Level ###
# Get: 'IsMuted', 'GetMutedLayers'
# Set: 'AddToMutedLayers', 'RemoveFromMutedLayers'
from pxr import Sdf
layer = Sdf.Layer.CreateAnonymous()
print(Sdf.Layer.IsMuted(layer)) # Returns: False
Sdf.Layer.AddToMutedLayers(layer.identifier)
print(Sdf.Layer.GetMutedLayers()) # Returns: ['anon:0x7f8a1098f100']
print(Sdf.Layer.IsMuted(layer)) # Returns: True
Sdf.Layer.RemoveFromMutedLayers(layer.identifier)
print(Sdf.Layer.IsMuted(layer)) # Returns: False
Composition
All composition arcs, excepts sublayers, are created on prim(specs). Here is how we edit sublayers (and their Sdf.LayerOffsets) on Sdf.Layers:
# For sublayering we modify the .subLayerPaths attribute on a layer.
# This is the same for both the high and low level API.
### High Level & Low Level ###
from pxr import Sdf, Usd
stage = Usd.Stage.CreateInMemory()
# Layer onto root layer
layer_a = Sdf.Layer.CreateAnonymous()
layer_b = Sdf.Layer.CreateAnonymous()
root_layer = stage.GetRootLayer()
# Here we pass in the file paths (=layer identifiers).
root_layer.subLayerPaths.append(layer_a.identifier)
root_layer.subLayerPaths.append(layer_b.identifier)
# Once we have added the sublayers, we can also access their layer offsets:
print(root_layer.subLayerOffsets) # Returns: [Sdf.LayerOffset(), Sdf.LayerOffset()]
# Since layer offsets are read only copies, we need to assign a newly created
# layer offset if we want to modify them. We also can't replace the whole list, as
# it needs to keep a pointer to the array.
layer_offset_a = root_layer.subLayerOffsets[0]
root_layer.subLayerOffsets[0] = Sdf.LayerOffset(offset=layer_offset_a.offset + 10,
                                                scale=layer_offset_a.scale * 2)
layer_offset_b = root_layer.subLayerOffsets[1]
root_layer.subLayerOffsets[1] = Sdf.LayerOffset(offset=layer_offset_b.offset - 10,
                                                scale=layer_offset_b.scale * 0.5)
print(root_layer.subLayerOffsets) # Returns: [Sdf.LayerOffset(10, 2), Sdf.LayerOffset(-10, 0.5)]

# If we want to sublayer on the active layer, we just add it there.
layer_c = Sdf.Layer.CreateAnonymous()
active_layer = stage.GetEditTarget().GetLayer()
active_layer.subLayerPaths.append(layer_c.identifier)
For more info on composition arcs (especially the sublayer arc) see our Composition section.
Default Prim
As discussed in more detail in our composition section, the default prim specifies the default root prim to import via reference and payload arcs. If it is not specified, the first prim in the layer is used, that is not abstract (not a prim with a class specifier) and that is defined (has a Sdf.SpecifierDef define specifier), unless we specify them explicitly. We cannot specify nested prim paths, the path must be in the root (Sdf.Path("/example").IsRootPrimPath() must return True). Setting an invalid path will not cause an error, but it will not work when referencing or payloading the file.
We typically use this in asset layers to specify the root prim that is the asset.
### Low Level ###
# Has: 'HasDefaultPrim'
# Get: 'defaultPrim'
# Set: 'defaultPrim'
# Clear: 'ClearDefaultPrim'
from pxr import Sdf
layer = Sdf.Layer.CreateAnonymous()
print(layer.defaultPrim) # Returns ""
layer.defaultPrim = "example"
# While we can set it to "/example/path",
# references and payloads won't use it.
Traversal and Prim/Property Access
Traversing and accessing prims/properties works a tad different:
- The
layer.Get<SpecType>AtPathmethods returnSdf.Specobjects (Sdf.PrimSpec,Sdf.AttributeSpec,Sdf.RelationshipSpec) and not USD high level objects. - The traverse method doesn't return an iterable range, instead it is "kernel" like. We pass it a function that each path in the layer gets run through.
### Low Level ###
# Properties: 'pseudoRoot', 'rootPrims', 'empty'
# Get: 'GetObjectAtPath', 'GetPrimAtPath', 'GetPropertyAtPath', 'GetAttributeAtPath', 'GetRelationshipAtPath',
# Traversal: 'Traverse',
from pxr import Sdf
layer = Sdf.Layer.CreateAnonymous()
# Check if a layer actually has any content:
print(layer.empty) # Returns: True
print(layer.pseudoRoot) # The same as layer.GetPrimAtPath("/")
# Define prims
bicycle_prim_spec = Sdf.CreatePrimInLayer(layer, Sdf.Path("/set/yard/bicycle"))
person_prim_spec = Sdf.CreatePrimInLayer(layer, Sdf.Path("/characters/mike"))
print(layer.rootPrims) # Returns: {'set': Sdf.Find('anon:0x7ff9f8ad7980', '/set'),
                       #           'characters': Sdf.Find('anon:0x7ff9f8ad7980', '/characters')}
# The GetObjectAtPath method gives us prim/attribute/relationship specs, based on what is at the path
attr_spec = Sdf.AttributeSpec(bicycle_prim_spec, "tire:size", Sdf.ValueTypeNames.Float)
attr_spec.default = 10
rel_sec = Sdf.RelationshipSpec(person_prim_spec, "vehicle")
rel_sec.targetPathList.Append(Sdf.Path(bicycle_prim_spec.path))
print(type(layer.GetObjectAtPath(attr_spec.path))) # Returns: <class 'pxr.Sdf.AttributeSpec'>
print(type(layer.GetObjectAtPath(rel_sec.path))) # Returns: <class 'pxr.Sdf.RelationshipSpec'>
# Traversals work differently compared to stages.
def traversal_kernel(path):
    print(path)
layer.Traverse(layer.pseudoRoot.path, traversal_kernel)
print("---")
# Returns:
"""
/set/yard/bicycle.tire:size
/set/yard/bicycle
/set/yard
/set
/characters/mike.vehicle[/set/yard/bicycle]
/characters/mike.vehicle
/characters/mike
/characters
/
"""
# As we can see, it traverses all path related fields, even relationships, as these map Sdf.Paths.
# The Sdf.Path object is used as a "filter", rather than the Usd.Prim object.
def traversal_kernel(path):
    if path.IsPrimPath():
        print(path)
layer.Traverse(layer.pseudoRoot.path, traversal_kernel)
print("---")
""" Returns:
/set/yard/bicycle
/set/yard
/set
/characters/mike
/characters
"""
def traversal_kernel(path):
    if path.IsPrimPropertyPath():
        print(path)
layer.Traverse(layer.pseudoRoot.path, traversal_kernel)
print("---")
""" Returns:
/set/yard/bicycle.tire:size
/characters/mike.vehicle
"""
tire_size_attr_spec = attr_spec
tire_diameter_attr_spec = Sdf.AttributeSpec(bicycle_prim_spec, "tire:diameter", Sdf.ValueTypeNames.Float)
tire_diameter_attr_spec.connectionPathList.explicitItems = [tire_size_attr_spec.path]
def traversal_kernel(path):
    if path.IsTargetPath():
        print("IsTargetPath", path)
layer.Traverse(layer.pseudoRoot.path, traversal_kernel)
""" Returns:
IsTargetPath /set/yard/bicycle.tire:diameter[/set/yard/bicycle.tire:size]
IsTargetPath /characters/mike.vehicle[/set/yard/bicycle]
"""
Time Samples
In the high level API, reading and writing time samples is handled via the attribute.Get()/Set() methods. In the lower level API, we use the methods exposed on the layer.
### Low Level ###
# Get: 'QueryTimeSample', 'ListAllTimeSamples', 'ListTimeSamplesForPath', 'GetNumTimeSamplesForPath',
#      'GetBracketingTimeSamples', 'GetBracketingTimeSamplesForPath',
# Set: 'SetTimeSample',
# Clear: 'EraseTimeSample',
from pxr import Sdf
layer = Sdf.Layer.CreateAnonymous()
prim_path = Sdf.Path("/bicycle")
prim_spec = Sdf.CreatePrimInLayer(layer, prim_path)
attr_spec = Sdf.AttributeSpec(prim_spec, "size", Sdf.ValueTypeNames.Double)
for frame in range(1001, 1005):
    value = float(frame - 1001)
    # .SetTimeSample() takes args in the .SetTimeSample(<path>, <frame>, <value>) format
    layer.SetTimeSample(attr_spec.path, frame, value)
print(layer.QueryTimeSample(attr_spec.path, 1005)) # Returns: 4
print(layer.ListTimeSamplesForPath(attr_spec.path)) # Returns: [1001.0, 1002.0, 1003.0, 1004.0]
attr_spec = Sdf.AttributeSpec(prim_spec, "width", Sdf.ValueTypeNames.Float)
layer.SetTimeSample(attr_spec.path, 50, 150)
print(layer.ListAllTimeSamples()) # Returns: [50.0, 1001.0, 1002.0, 1003.0, 1004.0]
# A typicall thing we can do is set the layer time metrics:
time_samples = layer.ListAllTimeSamples()
layer.startTimeCode = time_samples[0]
layer.endTimeCode = time_samples[-1]
See our animation section for more info about how to deal with time samples.
Metadata
Layers, like prims and properties, can store metadata. Apart from the above mentioned layer metrics, we can store custom metadata in the customLayerData key or create custom metadata root keys as discussed in our metadata plugin section. This can be used to track important pipeline related data without storing it on a prim.
from pxr import Usd, Sdf
layer = Sdf.Layer.CreateAnonymous()
layer.customLayerData = {"myCustomPipelineKey": "myCoolValue"}
See our Metadata section for detailed examples for layer and stage metadata.
Stages
Stages offer a view on a set of composed layers. We cover composition in its on section, as it is a complicated topic.
flowchart LR
    stage(Stage) --> layerRoot(Root Layer)
    layerRoot -- Sublayer --> layer1([Layer])
    layer1 -- Payload --> layer1Layer1([Layer])
    layer1 -- Sublayer--> layer1Layer2([Layer])
    layerRoot -- Sublayer --> layer2([Layer])
    layer2 -- Reference --> layer2Layer1([Layer])
    layer2Layer1 -- Payload --> layer2Layer1Layer1([Layer])
    layer2 -- Payload --> layer2Layer2([Layer])
    layerRoot -- Composition Arc --> layer3([...])
    layer3 -- Composition Arc --> layer3Layer1([...])
Unlike layers, stages are not managed via a singleton. There is the Usd.StageCache class though, that would provide a similar mechanism. We usually don't use this though, as our DCCs manage the lifetime cycle of our stages.
If a stage goes out of scope in our code, it will be deleted. Should we still have access the to Python object, we can check if it actually points to a valid layer via the stage.expired property.
When creating a stage we have two layers by default:
- Session Layer: This is a temp layer that doesn't get applied on disk save. Here we usually put things like viewport overrides.
- Root Layer: This is the base layer all edits target by default. We can add sublayers based on what we need to it. When calling
stage.Save(), all sublayers that are dirty and not anonymous, will be saved.
Configuration
Let's first look at some configuration related options we can set on the stage.
Asset Resolver
The stage can be opened with a asset resolver context. The context needs to be passed in on stage open, it can be refreshed afterwards (if implemented in the resolver). The resolver context object itself is bound to the runtime of the the stage though. The asset resolver context is just a very simple class, that our custom asset resolver can attach data to to help with path resolution.
In terms of asset resolution there are only two methods exposed on the stage class:
stage.GetPathResolverContext(): Get the resolver context object.stage.ResolveIdentifierToEditTarget(): Resolve an asset identifier using the stage's resolver context.
We cover how to use these in our asset resolver section, where we also showcase asset resolver reference implementations that ship with this guide.
Stage Metrics
As discussed in the above layer metrics section, we can set animation/time related metrics. The stage class also exposes methods to do this, which just set the metadata entries on the root layer of the stage.
The time related metrics should be written into all layers, as we can then use them to quickly inspect time related data in the file without having to fully parse it.
We cover it in detail our Animation (Time related metrics), Scene Unit Scale/UpAxis - FAQ and Metadata sections.
Stage Time Sample Interpolation
We can set how time samples are interplated per stage.
The possible stage interpolation types are:
- Usd.InterpolationTypeLinear: Interpolate linearly (if array length doesn't change and data type allows it))
- Usd.InterpolationTypeHeld: Hold until the next time sample
from pxr import Usd
stage = Usd.Stage.CreateInMemory()
print(stage.GetInterpolationType()) # Returns: Usd.InterpolationTypeLinear
stage.SetInterpolationType(Usd.InterpolationTypeHeld)
Checkout our animation section for more info on how animation and time samples are treated in USD.
Variant/Prim Type Fallbacks
We can also provide fallback values for:
- Variant selections: If no explicit variant selection is written, we can define a default fallback.
- Concrete typed prims: If a prim definition is not found, we can provide a fallback to be used instead. See the official docs for more info.
Color Management
This sub-section is still under development, it is subject to change and needs extra validation.
# Get: 'GetColorConfiguration', 'GetColorManagementSystem', 'GetColorConfigFallbacks'
# Set: 'SetColorConfiguration', 'SetColorManagementSystem', 'SetColorConfigFallbacks'
Default Render Settings
We can supply a render settings prim path on our root layer that can be used as a default by applications.
See our Metadata section for more information.
Metadata
Setting metadata on the stage, redirects the edits to the root layer. We discuss this in detail in our metadata section.
from pxr import Usd, Sdf
stage = Usd.Stage.CreateInMemory()
bicycle_prim = stage.DefinePrim("/bicycle")
stage.SetMetadata("customLayerData", {"myCustomStageData": 1})
# Is the same as:
layer = stage.GetRootLayer()
metadata = layer.customLayerData
metadata["myCustomRootData"] = 1
layer.customLayerData = metadata
# As with layers, we can also set the default prim
stage.SetDefaultPrim(bicycle_prim)
# Is the same as:
layer.defaultPrim = "bicycle"
Composition
We cover in detail how to inspect composition in our composition section.
Stages offer access to the Prim Cache Population cache via stage._GetPcpCache(). We almost never interact with it this way, instead we use the methods dicussed in our inspecting composition section.
We also have access to our instanced prototypes, for more info on what these are and how they can be inspected/used see our composition instanceable prims section.
Lastly we control the edit target via the stage. The edit target defines, what layer all calls in the high level API should write to.
When starting out with USD, you'll mostly be using it in the form of:
stage.SetEditTarget(layer)
# We can also explicitly create the edit target:
# Or
stage.SetEditTarget(Usd.EditTarget(layer))
# Or
stage.SetEditTarget(stage.GetEditTargetForLocalLayer(layer))
# These all have the same effect.
In Houdini we don't have to manage this, it is always the highest layer in the active layer stack. Houdini gives it to us via hou.node.activeLayer() or node.editableLayerin python LOP nodes.
More info about edit targets in our composition fundamentals section.
Loading mechanisms
Stages are the controller of how our Prim Cache Population (PCP) cache loads our composed layers. We cover this in detail in our Traversing/Loading Data section. Technically the stage just exposes the PCP cache in a nice API, that forwards its requests to its PCP cache stage._GetPcpCache(), similar how all Usd ops are wrappers around Sdf calls.
Stages control:
- Layer Muting: This controls what layers are allowd to contribute to the composition result.
- Prim Population Mask: This controls what prim paths to consider for loading at all.
- Payload Loading: This controls what prim paths, that have payloads, to load.
Stage Layer Management (Creation/Save/Export)
When creating a stage we have two layers by default:
- Session Layer: This is a temp layer that doesn't get applied on disk save. Here we usually put things like viewport overrides.
- Root Layer: This is the base layer all edits target by default. We can add sublayers based on what we need to it. When calling
stage.Save(), all sublayers that are dirty and not anonymous, will be saved.
Let's first look at layer access, there are two methods of special interest to us:
stage.GetLayerStack(): Get all the layers in the active layer stackstage.GetUsedLayers(includeClipLayers=True): Get all layers that are currently used by the stage. We can optionally exclude value clip layers. This is only a snapshot, as layers might be "varianted" away or in the case of value clips, we only get the active chunk file.
The following example is run in Houdini:
import os
from pxr import Sdf, Usd, UsdUtils
stage = Usd.Stage.CreateInMemory()
root_layer = stage.GetRootLayer()
# Create sublayers with references
bottom_layer_file_path = os.path.expanduser("~/Desktop/layer_bottom.usda")
bottom_layer = Sdf.Layer.CreateNew(bottom_layer_file_path)
top_layer_file_path = os.path.expanduser("~/Desktop/layer_top.usda")
top_layer = Sdf.Layer.CreateNew(top_layer_file_path)
root_layer.subLayerPaths.append(top_layer_file_path)
top_layer.subLayerPaths.append(bottom_layer_file_path)
stage.SetEditTarget(top_layer)
prim = stage.DefinePrim(Sdf.Path("/pig_1"), "Xform")
prim.GetReferences().AddReference("/opt/hfs19.5/houdini/usd/assets/pig/pig.usd", "/pig")
stage.SetEditTarget(bottom_layer)
prim = stage.DefinePrim(Sdf.Path("/pig_1"), "Xform")
prim.GetReferences().AddReference("/opt/hfs19.5/houdini/usd/assets/rubbertoy/rubbertoy.usd", "/rubbertoy")
# Save
stage.Save()
# Layer stack
print(stage.GetLayerStack(includeSessionLayers=False))
""" Returns:
[Sdf.Find('anon:0x7ff9f47b9600:tmp.usda'),
Sdf.Find('/home/lucsch/Desktop/layer_top.usda'),
Sdf.Find('/home/lucsch/Desktop/layer_bottom.usda')]
"""
layers = set()
for layer in stage.GetLayerStack(includeSessionLayers=False):
    layers.add(layer)
    layers.update([Sdf.Layer.FindOrOpen(i) for i in layer.GetCompositionAssetDependencies()])
print(list(layers))
""" Returns:
[Sdf.Find('/opt/hfs19.5/houdini/usd/assets/rubbertoy/rubbertoy.usd'),
Sdf.Find('/home/lucsch/Desktop/layer_top.usda'),
Sdf.Find('anon:0x7ff9f5677180:tmp.usda'),
Sdf.Find('/opt/hfs19.5/houdini/usd/assets/pig/pig.usd'),
Sdf.Find('/home/lucsch/Desktop/layer_bottom.usda')]
"""
As you might have noticed, when calling stage.GetLayerStack(), we didn't get the pig reference. Let's have a look how we can get all composition arc layers of the active layer stack:
import os
from pxr import Sdf, Usd, UsdUtils
stage = Usd.Stage.CreateInMemory()
root_layer = stage.GetRootLayer()
# Create sublayers with references
bottom_layer_file_path = os.path.expanduser("~/Desktop/layer_bottom.usda")
bottom_layer = Sdf.Layer.CreateNew(bottom_layer_file_path)
top_layer_file_path = os.path.expanduser("~/Desktop/layer_top.usda")
top_layer = Sdf.Layer.CreateNew(top_layer_file_path)
root_layer.subLayerPaths.append(top_layer_file_path)
top_layer.subLayerPaths.append(bottom_layer_file_path)
stage.SetEditTarget(top_layer)
prim = stage.DefinePrim(Sdf.Path("/pig_1"), "Xform")
prim.GetReferences().AddReference("/opt/hfs19.5/houdini/usd/assets/pig/pig.usd", "/pig")
stage.SetEditTarget(bottom_layer)
prim = stage.DefinePrim(Sdf.Path("/pig_1"), "Xform")
prim.GetReferences().AddReference("/opt/hfs19.5/houdini/usd/assets/rubbertoy/rubbertoy.usd", "/rubbertoy")
# Save
stage.Save()
# Layer stack
print(stage.GetLayerStack(includeSessionLayers=False))
""" Returns:
[Sdf.Find('anon:0x7ff9f47b9600:tmp.usda'),
Sdf.Find('/home/lucsch/Desktop/layer_top.usda'),
Sdf.Find('/home/lucsch/Desktop/layer_bottom.usda')]
"""
layers = set()
for layer in stage.GetLayerStack(includeSessionLayers=False):
    layers.add(layer)
    layers.update([Sdf.Layer.FindOrOpen(i) for i in layer.GetCompositionAssetDependencies()])
print(list(layers))
""" Returns:
[Sdf.Find('/opt/hfs19.5/houdini/usd/assets/rubbertoy/rubbertoy.usd'),
Sdf.Find('/home/lucsch/Desktop/layer_top.usda'),
Sdf.Find('anon:0x7ff9f5677180:tmp.usda'),
Sdf.Find('/opt/hfs19.5/houdini/usd/assets/pig/pig.usd'),
Sdf.Find('/home/lucsch/Desktop/layer_bottom.usda')]
"""
If you are confused what a layer stack, check out our composition layer stack section for a detailed breakdown.
Let's have a look at stage creation and export:
### High Level ###
# Create: 'CreateNew', 'CreateInMemory', 'Open', 'IsSupportedFile',
# Set: 'Save', 'Export', 'Flatten', 'ExportToString', 'SaveSessionLayers',
# Clear: 'Reload'
import os
from pxr import Sdf, Usd
# The stage.CreateNew has multiple method signatures, these take:
# - stage root layer identifier: The stage.GetRootLayer().identifier, this is where your stage get's saved to.
# - session layer (optional): We can pass in an existing layer to use as an session layer.
# - asset resolver context (optional): We can pass in a resolver context to aid path resolution. If not given, it will call
#                                      ArResolver::CreateDefaultContextForAsset() on our registered resolvers.
# - The initial payload loading mode: Either Usd.Stage.LoadAll or Usd.Stage.LoadNone
stage_file_path = os.path.expanduser("~/Desktop/stage_identifier_example.usda")
stage = Usd.Stage.CreateNew(stage_file_path)
# The stage creation will create an empty USD file at the specified path.
print(stage.GetRootLayer().identifier) # Returns: /home/lucsch/Desktop/stage_identifier_example.usd
prim = stage.DefinePrim(Sdf.Path("/bicycle"), "Xform")
# We can also create a stage in memory, this is the same as Sdf.Layer.CreateAnonymous() and using it as a root layer
# stage = Usd.Stage.CreateInMemory("test")
# Or:
layer = Sdf.Layer.CreateAnonymous()
stage.Open(layer.identifier)
## Saving
# Calling stage.Save(), calls layer.Save() on all dirty layers that contribute to the stage.
stage.Save()
# The same as:
for layer in stage.GetLayerStack(includeSessionLayers=False):
    if not layer.anonymous and layer.dirty:
        layer.Save()
# Calling stage.SaveSessionLayers() will also save all session layers, that are not anonymous
## Flatten
# We can also flatten our layers of the stage. This merges all the data, so it should be used with care,
# as it will likely flood your RAM with large scenes. It removes all composition arcs and returns a single layer
# with the combined result
stage = Usd.Stage.CreateInMemory()
root_layer = stage.GetRootLayer()
prim = stage.DefinePrim(Sdf.Path("/bicycle"), "Xform")
sublayer = Sdf.Layer.CreateAnonymous()
root_layer.subLayerPaths.append(sublayer.identifier)
stage.SetEditTarget(sublayer)
prim = stage.DefinePrim(Sdf.Path("/car"), "Xform")
print(root_layer.ExportToString())
"""Returns:
#usda 1.0
(
    subLayers = [
        @anon:0x7ff9f5fed300@
    ]
)

def Xform "bicycle"
{
}
"""
flattened_result = stage.Flatten()
print(flattened_result.ExportToString())
"""Returns:
#usda 1.0
(
)

def Xform "car"
{
}

def Xform "bicycle"
{
}
"""
## Export:
# The export command calls the same thing we just did
# layer = stage.Flatten()
# layer.Export("/myFilePath.usd")
print(stage.ExportToString()) # Returns: The same thing as above
## Reload:
stage.Reload()
# The same as:
for layer in stage.GetUsedLayers():
    # !IMPORTANT! This does not check if the layer is anonymous,
    # so you will lose all your anon layer content.
    layer.Reload()
    # Here is a saver way:
    if not layer.anonymous:
        layer.Reload()
Traversal and Prim/Property Access
USD stage traversing and accessing prims/properties works via the high level API.
- The
stage.Get<SpecType>AtPathmethods returnUsd.Objectobjects (Usd.Prim,Usd.Attribute,Usd.Relationship). - The traverse method returns an iterable that goes through the prims in the stage.
We cover stage traversals in full detail in our Traversing/Loading Data (Purpose/Visibility/Activation/Population) section.
Here are the basics:
### High Level ###
# Get: 'GetPseudoRoot', 'GetObjectAtPath',
#      'GetPrimAtPath', 'GetPropertyAtPath','GetAttributeAtPath', 'GetRelationshipAtPath',
# Set: 'DefinePrim', 'OverridePrim', 'CreateClassPrim', 'RemovePrim'
# Traversal: 'Traverse','TraverseAll'
from pxr import Sdf, Usd, UsdUtils
stage = Usd.Stage.CreateInMemory()
# Define and change specifier
stage.DefinePrim("/changedSpecifier/definedCube", "Cube").SetSpecifier(Sdf.SpecifierDef)
stage.DefinePrim("/changedSpecifier/overCube", "Cube").SetSpecifier(Sdf.SpecifierOver)
stage.DefinePrim("/changedSpecifier/classCube", "Cube").SetSpecifier(Sdf.SpecifierClass)
# Or create with specifier
stage.DefinePrim("/createdSpecifier/definedCube", "Cube")
stage.OverridePrim("/createdSpecifier/overCube")
stage.CreateClassPrim("/createdSpecifier/classCube")
# Create attribute
prim = stage.DefinePrim("/bicycle")
prim.CreateAttribute("tire:size", Sdf.ValueTypeNames.Float)
# Get the pseudo root prim at "/"
pseudo_root_prim = stage.GetPseudoRoot()
# Or:
pseudo_root_prim = stage.GetPrimAtPath("/")
# Traverse:
for prim in stage.TraverseAll():
    print(prim)
""" Returns:
Usd.Prim(</changedSpecifier>)
Usd.Prim(</changedSpecifier/definedCube>)
Usd.Prim(</changedSpecifier/overCube>)
Usd.Prim(</changedSpecifier/classCube>)
Usd.Prim(</createdSpecifier>)
Usd.Prim(</createdSpecifier/definedCube>)
Usd.Prim(</createdSpecifier/overCube>)
Usd.Prim(</createdSpecifier/classCube>)
"""
# Get Prims/Properties
# The GetObjectAtPath returns the entity requested by the path (prim/attribute/relationship)
prim = stage.GetObjectAtPath(Sdf.Path("/createdSpecifier"))
prim = stage.GetPrimAtPath(Sdf.Path("/changedSpecifier"))
attr = stage.GetObjectAtPath(Sdf.Path("/bicycle.tire:size"))
attr = stage.GetAttributeAtPath(Sdf.Path("/bicycle.tire:size"))
Loading & Traversing Data
Table of Contents
- Traversing & Loading Data In-A-Nutshell
- What should I use it for?
- Resources
- Overview
- Loading Mechanisms
- Traversing Data
TL;DR - Loading & Traversing Data In-A-Nutshell
Loading Mechanisms
When loading large scenes, we can selectively disabling loading via the following loading mechanisms: There are three ways to influence the data load, from lowest to highest granularity .
- Layer Muting: This controls what layers are allowed to contribute to the composition result.
- Prim Population Mask: This controls what prim paths to consider for loading at all.
- Payload Loading: This controls what prim paths, that have payloads, to load.
- GeomModelAPI->Draw Mode: This controls per prim how it should be drawn by delegates. It can be one of "Full Geometry"/"Origin Axes"/"Bounding Box"/"Texture Cards". It requires the kind to be set on the prim and all its ancestors. Therefore it is "limited" to (asset-) root prims and ancestors.
- Activation: Control per prim whether load itself and its child hierarchy. This is more an artist facing mechanism, as we end up writing the data to the stage, which we don't do with the other methods.
Traversing/Iterating over our stage/layer
To inspect our stage, we can iterate (traverse) over it:
When traversing, we try to pre-filter our prims as much as we can, via our prim metadata and USD core features(metadata), before inspecting their properties. This keeps our traversals fast even with hierarchies with millions of prims. We recommend first filtering based on metadata, as this is a lot faster than trying to access attributes and their values.
We also have a thing called predicate, which just defines what core metadata to consult for pre-filtering the result.
Another important feature is stopping traversal into child hierarchies. This can be done by calling `ìterator.PruneChildren()
# Standard
start_prim = stage.GetPrimAtPath("/") # Or stage.GetPseudoRoot(), this is the same as stage.Traverse()
iterator = iter(Usd.PrimRange(start_prim))
for prim in iterator:
    if prim.IsA(UsdGeom.Imageable): # Some condition as listed above or custom property/metadata checks
        # Don't traverse into the child prims
        iterator.PruneChildren()
# Pre and post visit:
start_prim = stage.GetPrimAtPath("/") # Or stage.GetPseudoRoot(), this is the same as stage.Traverse()
iterator = iter(Usd.PrimRange.PreAndPostVisit(start_prim))
for prim in iterator:
    if not iterator.IsPostVisit():
        if prim.IsA(UsdGeom.Imageable): # Some condition as listed above or custom property/metadata checks
            # Don't traverse into the child prims
            iterator.PruneChildren()
# Custom Predicate
predicate = Usd.PrimIsActive & Usd.PrimIsLoaded # All prims, even class and over prims.
start_prim = stage.GetPrimAtPath("/") # Or stage.GetPseudoRoot(), this is the same as stage.Traverse()
iterator = iter(Usd.PrimRange.PrimRange(start_prim, predicate=predicate))
for prim in iterator:
    if not iterator.IsPostVisit():
        if prim.IsA(UsdGeom.Imageable): # Some condition as listed above or custom property/metadata checks
            # Don't traverse into the child prims
            iterator.PruneChildren()
Layer traversal is a bit different. Instead of iterating, we provide a function, that gets called with each Sdf.Path representable object in the active layer. So we also see all properties, relationship targets and variants.
prim_paths = []
variant_prim_paths = []
property_paths = [] # The Sdf.Path class doesn't distinguish between attributes and relationships
property_relationship_target_paths = []
def traversal_kernel(path):
    print(path)
    if path.IsPrimPath():
        prim_paths.append(path)
    elif path.IsPrimVariantSelectionPath():
        variant_prim_paths.append(path)
    elif path.IsPropertyPath():
        property_paths.append(path)
    elif path.IsTargetPath():
        property_relationship_target_paths.append(path)
layer.Traverse(layer.pseudoRoot.path, traversal_kernel)
What should I use it for?
We'll be using loading mechanisms to optimize loading only what is relevant for the current task at hand.
Resources
- Prim Cache Population (Pcp)
- Stage Payload Loading
- Pcp.Cache
- Usd.StagePopulationMask
- Usd.StageLoadRules
Loading Mechanisms
Let's look at load mechanisms that USD offers to make the loading of our hierarchies faster.
Before we proceed, it is important to note, that USD is highly performant in loading hierarchies. When USD loads .usd/.usdc binary crate files, it sparsely loads the content: It can read in the hierarchy without loading in the attributes. This allows it to, instead of loading terabytes of data, to only read the important bits in the file and lazy load on demand the heavy data when requested by API queries or a hydra delegate.
When loading stages/layers per code only, we often therefore don't need to resort to using these mechanisms.
There are three ways to influence the data load, from lowest to highest granularity .
- Layer Muting: This controls what layers are allowed to contribute to the composition result.
- Prim Population Mask: This controls what prim paths to consider for loading at all.
- Payload Loading: This controls what prim paths, that have payloads, to load.
- GeomModelAPI->Draw Mode: This controls per prim how it should be drawn by delegates. It can be one of "Full Geometry"/"Origin Axes"/"Bounding Box"/"Texture Cards". It requires the kind to be set on the prim and all its ancestors. Therefore it is "limited" to (asset-) root prims and ancestors.
- Activation: Control per prim whether load itself and its child hierarchy. This is more an artist facing mechanism, as we end up writing the data to the stage, which we don't do with the other methods.
Stages are the controller of how our Prim Cache Population (PCP) cache loads our composed layers. Technically the stage just exposes the PCP cache in a nice API, that forwards its requests to its PCP cache stage._GetPcpCache(), similar how all Usd ops are wrappers around Sdf calls.
Houdini exposes all three in two different ways:
- Configue Stage LOP node: This is the same as setting it per code via the stage.
- Scene Graph Tree panel: In Houdini, that stage that gets rendered, is actually not the stage of your node (at least what we gather from reverse engineering). Instead it is a duplicate, that has overrides in the session layer and loading mechanisms listed above.
More Houdini specific information can be found in our Houdini - Performance Optimizations section.
Layer Muting
We can "mute" (disable) layers either globally or per stage.
Globally muting layers is done via the singleton, this mutes it on all stages that use the layer.
from pxr import Sdf
layer = Sdf.Layer.FindOrOpen("/my/layer/identifier")
Sdf.Layer.AddToMutedLayers(layer.identifier)
Sdf.Layer.RemoveFromMutedLayers(layer.identifier)
Muting layers per stage is done via the Usd.Stage object, all function signatures work with the layer identifier string. If the layer is muted globally, the stage will not override the muting and it stays muted.
### High Level ###
from pxr import Sdf, Usd
stage = Usd.Stage.CreateInMemory()
layer_A = Sdf.Layer.CreateAnonymous("Layer_A")
layer_B = Sdf.Layer.CreateAnonymous("Layer_B")
layer_C = Sdf.Layer.CreateAnonymous("Layer_C")
stage.GetRootLayer().subLayerPaths.append(layer_A.identifier)
stage.GetRootLayer().subLayerPaths.append(layer_B.identifier)
stage.GetRootLayer().subLayerPaths.append(layer_C.identifier)
# Mute layer
stage.MuteLayer(layer_A.identifier)
# Unmute layer
stage.UnmuteLayer(layer_A.identifier)
# Or both MuteAndUnmuteLayers([<layers to mute>], [<layers to unmute>])
stage.MuteAndUnmuteLayers([layer_A.identifier, layer_B.identifier], [layer_C.identifier])
# Check what layers are muted
print(stage.GetMutedLayers()) # Returns: [layerA.identifier, layerB.identifier]
print(stage.IsLayerMuted(layer_C.identifier)) # Returns: False
We use layer muting in production for two things:
- Artists can opt-in to load layers that are relevant to them. For example in a shot, a animator doesn't have to load the background set or fx layers.
- Pipeline-wise we have to ensure that artists add shot layers in a specific order (For example: lighting > fx > animation > layout >). Let's say a layout artist is working in a shot, we only want to display the layout and camera layers. All the other layers can (should) be muted, because A. performance, B. there might be edits in higher layers, that the layout artist is not interested in seeing yet. If we were to display them, some of these edits might block ours, because they are higher in the layer stack.
Here is an example of global layer muting:
We have to re-cook the node for it to take effect, due to how Houdini caches stages.
Prim Path Loading Mask (USD speak: Prim Population Mask)
Similar to prim activation, the prim population mask controls what prims (and their child prims) are even considered for being loaded into the stage. Unlike activation, the prim population mask does not get stored in a USD layer. It is therefore a pre-filtering mechanism, rather than an artist facing "what do I want to hide from my scene" mechanism.
One difference to activation is that not only the child hierarchy is stripped away for traversing, but also the prim itself, if it is not included in the mask.
The population mask is managed via the Usd.StagePopulationMask class.
## Stage
# Create: 'OpenMasked',
# Get: 'GetPopulationMask',
# Set: 'SetPopulationMask', 'ExpandPopulationMask'
## Population Mask
# Usd.StagePopulationMask()
# Has: 'IsEmpty',  'Includes', 'IncludesSubtree'
# Get: 'GetIncludedChildNames', 'GetIntersection', 'GetPaths', 'GetUnion'
# Set:  'Add', 'Intersection',  'Union'
# Constants: 'All'
from pxr import Sdf, Usd
stage = Usd.Stage.CreateInMemory()
# Create hierarchy
prim_paths = [
    "/set/yard/biycle",
    "/set/yard/shed/shovel",
    "/set/yard/shed/flower_pot",
    "/set/yard/shed/lawnmower",
    "/set/yard/shed/soil",
    "/set/yard/shed/wood",
    "/set/garage/car",
    "/set/garage/tractor",
    "/set/garage/helicopter",
    "/set/garage/boat",
    "/set/garage/key_box",
    "/set/garage/key_box/red",
    "/set/garage/key_box/blue",
    "/set/garage/key_box/green",
    "/set/people/mike",
    "/set/people/charolotte"
]
for prim_path in prim_paths:
    prim = stage.DefinePrim(prim_path, "Cube")

population_mask = Usd.StagePopulationMask()
print(population_mask.GetPaths())
print(population_mask.All()) # Same as: Usd.StagePopulationMask([Sdf.Path("/")])
# Or stage.GetPopulationMask()
population_mask.Add(Sdf.Path("/set/yard/shed/lawnmower"))
population_mask.Add(Sdf.Path("/set/garage/key_box"))
stage.SetPopulationMask(population_mask)
print("<< hierarchy >>")
for prim in stage.Traverse():
    print(prim.GetPath())
"""Returns:
/set
/set/yard
/set/yard/shed
/set/yard/shed/lawnmower
/set/garage
/set/garage/key_box
/set/garage/key_box/red
/set/garage/key_box/blue
/set/garage/key_box/green
"""
# Intersections tests
print(population_mask.Includes("/set/yard/shed")) # Returns: True
print(population_mask.IncludesSubtree("/set/yard/shed")) # Returns: False (As not all child prims are included)
print(population_mask.IncludesSubtree("/set/garage/key_box")) # Returns: True (As all child prims are included)
What's also really cool, is that we can populate the mask by relationships/attribute connections.
stage.ExpandPopulationMask(relationshipPredicate=lambda r: r.GetName() == 'material:binding',
                           attributePredicate=lambda a: False)
Payload Loading
Payloads are USD's mechanism of disabling the load of heavy data and instead leaving us with a bounding box representation (or texture card representation, if you set it up). We can configure our stages to not load payloads at all or to only load payloads at specific prims.
What might be confusing here is the naming convention: USD refers to this as "loading", which sounds pretty generic. Whenever we are looking at stages and talking about loading, know that we are talking about payloads.
You can find more details in the API docs.
## Stage
# Has: 'FindLoadable',
# Get: 'GetLoadRules', 'GetLoadSet'
# Set: 'Load', 'Unload', 'LoadAndUnload', 'LoadAll', 'LoadNone', 'SetLoadRules'
# Constants: 'InitialLoadSet.LoadAll', 'InitialLoadSet.LoadNone'
## Stage Load Rules
# Has: 'IsLoaded', 'IsLoadedWithAllDescendants', 'IsLoadedWithNoDescendants'
# Get: 'GetRules', 'GetEffectiveRuleForPath',
# Set: 'LoadWithDescendants', 'LoadWithoutDescendants'
#      'LoadAll',  'LoadNone', 'Unload', 'LoadAndUnload', 'AddRule',  'SetRules'
# Clear: 'Minimize'
# Constants: StageLoadRules.AllRule, StageLoadRules.OnlyRule, StageLoadRules.NoneRule
from pxr import Sdf, Usd
# Spawn example data, this would be a file on disk
layer = Sdf.Layer.CreateAnonymous()
prim_path = Sdf.Path("/bicycle")
prim_spec = Sdf.CreatePrimInLayer(layer, prim_path)
prim_spec.specifier = Sdf.SpecifierDef
prim_spec.typeName = "Cube"
attr_spec = Sdf.AttributeSpec(prim_spec, "size", Sdf.ValueTypeNames.Double)
for frame in range(1001, 1010):
    value = float(frame - 1001)
    layer.SetTimeSample(attr_spec.path, frame, value)
# Payload data
stage = Usd.Stage.CreateInMemory()
ref = Sdf.Payload(layer.identifier, "/bicycle")
prim_path = Sdf.Path("/set/yard/bicycle")
prim = stage.DefinePrim(prim_path)
ref_api = prim.GetPayloads()
ref_api.AddPayload(ref)
# Check for what can be payloaded
print(stage.FindLoadable()) # Returns: [Sdf.Path('/set/yard/bicycle')]
# Check what prim paths are payloaded
print(stage.GetLoadSet()) # Returns: [Sdf.Path('/set/yard/bicycle')]
# Unload payload
stage.Unload(prim_path)
print(stage.GetLoadSet()) # Returns: []
# Please consult the official docs for how the rule system works.
# Basically we can flag primpaths to recursively load their nested child payloads or to only load the top most payload.
GeomModelAPI->Draw Mode
The draw mode can be used to tell our Hydra render delegates to not render a prim and its child hierarchy. Instead it will only display a preview representation.
The preview representation can be one of:
- Full Geometry
- Origin Axes
- Bounding Box
- Texture Cards
Like visibility, the draw mode is inherited downwards to its child prims. We can also set a draw mode color, to better differentiate the non full geometry draw modes, this is not inherited though and must be set per prim.
In order for the draw mode to work, the prim and all its ancestors, must have a kind defined. Therefore it is "limited" to (asset-)root prims and its ancestors. See the official docs for more info.
Here is how we can set it via Python, it is part of the UsdGeomModelAPI:
from pxr import Gf, Sdf, Usd, UsdGeom, UsdShade
stage = Usd.Stage.CreateInMemory()
cone_prim = stage.DefinePrim(Sdf.Path("/set/yard/cone"), "Cone")
cone_prim.GetAttribute("radius").Set(4)
Usd.ModelAPI(cone_prim).SetKind("component")
sphere_prim = stage.DefinePrim(Sdf.Path("/set/yard/sphere"), "Sphere")
Usd.ModelAPI(sphere_prim).SetKind("component")
for ancestor_prim_path in sphere_prim.GetParent().GetPath().GetAncestorsRange():
    ancestor_prim = stage.GetPrimAtPath(ancestor_prim_path)
    ancestor_prim.SetTypeName("Xform")
    Usd.ModelAPI(ancestor_prim).SetKind("group")
# Enable on parent
set_prim = stage.GetPrimAtPath("/set")
set_geom_model_API = UsdGeom.ModelAPI.Apply(set_prim)
set_geom_model_API.GetModelDrawModeAttr().Set(UsdGeom.Tokens.bounds)
set_geom_model_API.GetModelDrawModeColorAttr().Set(Gf.Vec3h([1,0,0]))
# If we enable "apply" on the parent, children will not be drawn anymore,
# instead just a single combined bbox is drawn for all child prims.
# set_geom_model_API.GetModelApplyDrawModeAttr().Set(1)
# Enable on child
sphere_geom_model_API = UsdGeom.ModelAPI.Apply(sphere_prim)
# sphere_geom_model_API.GetModelDrawModeAttr().Set(UsdGeom.Tokens.default_)
sphere_geom_model_API.GetModelDrawModeAttr().Set(UsdGeom.Tokens.cards)
sphere_geom_model_API.GetModelDrawModeColorAttr().Set(Gf.Vec3h([0,1,0]))
# For "component" (sub-)kinds, this is True by default
# sphere_geom_model_API.GetModelApplyDrawModeAttr().Set(0)
Traversing Data
When traversing (iterating) through our hierarchy, we commonly use these metadata and property entries on prims to pre-filter what we want to access:
- .IsA Typed Schemas (Metadata)
- Type Name (Metadata)
- Specifier (Metadata)
- Activation (Metadata)
- Kind (Metadata)
- Purpose (Attribute)
- Visibility (Attribute)
When traversing, using the above "filters" to narrow down your selection well help keep your traversals fast, even with hierarchies with millions of prims. We recommend first filtering based on metadata, as this is a lot faster than trying to access attributes and their values.
Another important feature is stopping traversal into child hierarchies. This can be done by calling ìterator.PruneChildren():
from pxr import Sdf, UsdShade
root_prim = stage.GetPseudoRoot()
# We have to cast it as an iterator to gain access to the .PruneChildren() method.
iterator = iter(Usd.PrimRange(root_prim))
for prim in iterator:
    if prim.IsA(UsdShade.Material):
        # Don't traverse into the shader network prims
        iterator.PruneChildren()
Traversing Stages
Traversing stages works via the Usd.PrimRange class. The stage.Traverse/stage.TraverseAll/prim.GetFilteredChildren methods all use this as the base class, so let's checkout how it works:
We have two traversal modes:
- Default: Iterate over child prims
- PreAndPostVisit: Iterate over the hierarchy and visit each prim twice, once when first encountering it, and then again when "exiting" the child hierarchy. See our primvars query section for a hands-on example why this can be useful.
We also have a thing called "predicate"(Predicate Overview), which just defines what core metadata to consult for pre-filtering the result:
- Usd.PrimIsActive: Usd.Prim.IsActive() - If the "active" metadata is True
- Usd.PrimIsLoaded: Usd.Prim.IsLoaded() - If the (ancestor) payload is loaded
- Usd.PrimIsModel: Usd.Prim.IsModel() - If the kind is a sub kind of
Kind.Tokens.model - Usd.PrimIsGroup: Usd.Prim.IsGroup() - If the kind is
Kind.Tokens.group - Usd.PrimIsAbstract: Usd.Prim.IsAbstract() - If the prim specifier is
Sdf.SpecifierClass - Usd.PrimIsDefined: Usd.Prim.IsDefined() - If the prim specifier is
Sdf.SpecifierDef - Usd.PrimIsInstance: Usd.Prim.IsInstance() - If prim is an instance root (This is false for prims in instances)
Presets:
- Usd.PrimDefaultPredicate:
Usd.PrimIsActive & Usd.PrimIsDefined & Usd.PrimIsLoaded & ~Usd.PrimIsAbstract - Usd.PrimAllPrimsPredicate: Shortcut for selecting all filters (basically ignoring the prefilter).
By default the Usd.PrimDefaultPredicate is used, if we don't specify one.
Here is the most common syntax you'll be using:
# Standard
start_prim = stage.GetPrimAtPath("/") # Or stage.GetPseudoRoot(), this is the same as stage.Traverse()
iterator = iter(Usd.PrimRange(start_prim))
for prim in iterator:
    if prim.IsA(UsdGeom.Imageable): # Some condition as listed above or custom property/metadata checks
        # Don't traverse into the child prims
        iterator.PruneChildren()
# Pre and post visit:
start_prim = stage.GetPrimAtPath("/") # Or stage.GetPseudoRoot(), this is the same as stage.Traverse()
iterator = iter(Usd.PrimRange.PreAndPostVisit(start_prim))
for prim in iterator:
    if not iterator.IsPostVisit():
        if prim.IsA(UsdGeom.Imageable): # Some condition as listed above or custom property/metadata checks
            # Don't traverse into the child prims
            iterator.PruneChildren()
# Custom Predicate
predicate = Usd.PrimIsActive & Usd.PrimIsLoaded # All prims, even class and over prims.
start_prim = stage.GetPrimAtPath("/") # Or stage.GetPseudoRoot(), this is the same as stage.Traverse()
iterator = iter(Usd.PrimRange.PrimRange(start_prim, predicate=predicate))
for prim in iterator:
    if not iterator.IsPostVisit():
        if prim.IsA(UsdGeom.Imageable): # Some condition as listed above or custom property/metadata checks
            # Don't traverse into the child prims
            iterator.PruneChildren()
The default traversal also doesn't go into instanceable prims.
To enable it we can either run pxr.Usd.TraverseInstanceProxies(<existingPredicate>) or predicate.TraverseInstanceProxies(True)
Within instances we can get the prototype as follows, for more info see our instanceable section:
# Check if the active prim is marked as instanceable:
# The prim.IsInstance() checks if it is actually instanced, this
# just checks if the 'instanceable' metadata is set.
prim.IsInstanceable()
# Check if the active prim is an instanced prim:
prim.IsInstance()
# Check if we are inside an instanceable prim:
prim.IsInstanceProxy()
# Check if the active prim is a prototype root prim with the following format /__Prototype_<idx>
prim.IsPrototype()
# For these type of prototype root prims, we can get the instances via:
prim.GetInstances()
# From each instance we can get back to the prototype via
prim.GetPrototype()
# Check if we are in the /__Prototype_<idx> prim:
prim.IsInPrototype()

# When we are within an instance, we can get the prototype via:
if prim.IsInstanceProxy():
    for ancestor_prim_path in prim.GetAncestorsRange():
        ancestor_prim = stage.GetPrimAtPath(ancestor_prim_path)
        if ancestor_prim.IsInstance():
            prototype = ancestor_prim.GetPrototype()
            print(list(prototype.GetInstances()))
            break
Let's look at some traversal examples:
Stage/Prim Traversal | Click to expand
from pxr import Sdf, Usd
stage = Usd.Stage.CreateInMemory()
# Create hierarchy
prim_paths = [
    "/set/yard/biycle",
    "/set/yard/shed/shovel",
    "/set/yard/shed/flower_pot",
    "/set/yard/shed/lawnmower",
    "/set/yard/shed/soil",
    "/set/yard/shed/wood",
    "/set/garage/car",
    "/set/garage/tractor",
    "/set/garage/helicopter",
    "/set/garage/boat",
    "/set/garage/key_box",
    "/set/garage/key_box/red",
    "/set/garage/key_box/blue",
    "/set/garage/key_box/green",
    "/set/people/mike",
    "/set/people/charolotte"
]
for prim_path in prim_paths:
    prim = stage.DefinePrim(prim_path, "Cube")

root_prim = stage.GetPseudoRoot()
# Standard Traversal
# We have to cast it as an iterator to gain access to the .PruneChildren()/.IsPostVisit method.
iterator = iter(Usd.PrimRange(root_prim))
for prim in iterator:
    if prim.GetPath() == Sdf.Path("/set/garage/key_box"):
        # Skip traversing key_box hierarchy
        iterator.PruneChildren()
    print(prim.GetPath().pathString)
"""Returns:
/
/set
/set/yard
/set/yard/biycle
/set/yard/shed
/set/yard/shed/shovel
/set/yard/shed/flower_pot
/set/yard/shed/lawnmower
/set/yard/shed/soil
/set/yard/shed/wood
/set/garage
/set/garage/car
/set/garage/tractor
/set/garage/helicopter
/set/garage/boat
/set/garage/key_box
/set/people
/set/people/mike
/set/people/charolotte
"""
# PreAndPostVisitTraversal
iterator = iter(Usd.PrimRange.PreAndPostVisit(root_prim))
for prim in iterator:
    print("Is Post Visit: {:<2} | Path: {}".format(iterator.IsPostVisit(), prim.GetPath().pathString))
"""Returns:
Is Post Visit: 0  | Path: /
Is Post Visit: 0  | Path: /set
Is Post Visit: 0  | Path: /set/yard
Is Post Visit: 0  | Path: /set/yard/biycle
Is Post Visit: 1  | Path: /set/yard/biycle
Is Post Visit: 0  | Path: /set/yard/shed
Is Post Visit: 0  | Path: /set/yard/shed/shovel
Is Post Visit: 1  | Path: /set/yard/shed/shovel
Is Post Visit: 0  | Path: /set/yard/shed/flower_pot
Is Post Visit: 1  | Path: /set/yard/shed/flower_pot
Is Post Visit: 0  | Path: /set/yard/shed/lawnmower
Is Post Visit: 1  | Path: /set/yard/shed/lawnmower
Is Post Visit: 0  | Path: /set/yard/shed/soil
Is Post Visit: 1  | Path: /set/yard/shed/soil
Is Post Visit: 0  | Path: /set/yard/shed/wood
Is Post Visit: 1  | Path: /set/yard/shed/wood
Is Post Visit: 1  | Path: /set/yard/shed
Is Post Visit: 1  | Path: /set/yard
Is Post Visit: 0  | Path: /set/garage
Is Post Visit: 0  | Path: /set/garage/car
Is Post Visit: 1  | Path: /set/garage/car
Is Post Visit: 0  | Path: /set/garage/tractor
Is Post Visit: 1  | Path: /set/garage/tractor
Is Post Visit: 0  | Path: /set/garage/helicopter
Is Post Visit: 1  | Path: /set/garage/helicopter
Is Post Visit: 0  | Path: /set/garage/boat
Is Post Visit: 1  | Path: /set/garage/boat
Is Post Visit: 0  | Path: /set/garage/key_box
Is Post Visit: 0  | Path: /set/garage/key_box/red
Is Post Visit: 1  | Path: /set/garage/key_box/red
Is Post Visit: 0  | Path: /set/garage/key_box/blue
Is Post Visit: 1  | Path: /set/garage/key_box/blue
Is Post Visit: 0  | Path: /set/garage/key_box/green
Is Post Visit: 1  | Path: /set/garage/key_box/green
Is Post Visit: 1  | Path: /set/garage/key_box
Is Post Visit: 1  | Path: /set/garage
Is Post Visit: 0  | Path: /set/people
Is Post Visit: 0  | Path: /set/people/mike
Is Post Visit: 1  | Path: /set/people/mike
Is Post Visit: 0  | Path: /set/people/charolotte
Is Post Visit: 1  | Path: /set/people/charolotte
Is Post Visit: 1  | Path: /set/people
Is Post Visit: 1  | Path: /set
Is Post Visit: 1  | Path: /
"""
Traversing Layers
Layer traversal is different, it only looks at the active layer and traverses everything that is representable via an Sdf.Path object.
This means, it ignores activation and it traverses into variants and relationship targets. This can be quite useful, when we need to rename something or check for data in the active layer.
We cover it in detail with examples over in our layer and stages section.
The traversal for layers works differently. Instead of an iterator, we have to provide a
"kernel" like function, that gets an Sdf.Path as an input.
Here is the most common syntax you'll be using:
prim_paths = []
variant_prim_paths = []
property_paths = [] # The Sdf.Path class doesn't distinguish between attributes and relationships
property_relationship_target_paths = []
def traversal_kernel(path):
    print(path)
    if path.IsPrimPath():
        prim_paths.append(path)
    elif path.IsPrimVariantSelectionPath():
        variant_prim_paths.append(path)
    elif path.IsPropertyPath():
        property_paths.append(path)
    elif path.IsTargetPath():
        property_relationship_target_paths.append(path)
layer.Traverse(layer.pseudoRoot.path, traversal_kernel)
Traverse Sample Data/Profiling
To test profiling, we can setup a example hierarchy. The below code spawns a nested prim hierarchy.
You can adjust the create_hierarchy(layer, prim_path, <level>), be aware this is exponential, so a value of 10 and higher will already generate huge hierarchies.
The output will be something like this:

import random
from pxr import Sdf, Usd, UsdGeom,UsdShade, Tf
stage = Usd.Stage.CreateInMemory()
layer = stage.GetEditTarget().GetLayer()

leaf_prim_types = ("Cube", "Cylinder", "Sphere", "Mesh", "Points", "RectLight", "Camera")
leaf_prim_types_count = len(leaf_prim_types)

def create_hierarchy(layer, root_prim_path, max_levels):
    def generate_hierarchy(layer, root_prim_path, leaf_prim_counter, max_levels):
        levels = random.randint(1, max_levels)
        for level in range(levels):
            level_depth = root_prim_path.pathElementCount + 1
            prim_path = root_prim_path.AppendChild(f"level_{level_depth}_child_{level}")
            prim_spec = Sdf.CreatePrimInLayer(layer, prim_path)
            prim_spec.specifier = Sdf.SpecifierDef
            # Type
            prim_spec.typeName = "Xform"
            # Kind
            prim_spec.SetInfo("kind", "group")
            # Seed parent prim specs
            hiearchy_seed_state = random.getstate()
            # Active
            random.seed(level_depth)
            if random.random() < 0.1:
                prim_spec.SetInfo("active", False)
            random.setstate(hiearchy_seed_state)
            if levels == 1:
                # Parent prim
                # Kind
                prim_spec.nameParent.SetInfo("kind", "component")
                # Purpose
                purpose_attr_spec = Sdf.AttributeSpec(prim_spec.nameParent, "purpose", Sdf.ValueTypeNames.Token)
                if random.random() < .9:
                    purpose_attr_spec.default = UsdGeom.Tokens.render
                else:
                    purpose_attr_spec.default = UsdGeom.Tokens.proxy
                # Seed leaf prim specs
                leaf_prim_counter[0] += 1
                hiearchy_seed_state = random.getstate()
                random.seed(leaf_prim_counter[0])
                # Custom Leaf Prim attribute
                prim_spec.typeName = leaf_prim_types[random.randint(0, leaf_prim_types_count -1)]
                prim_spec.assetInfo["is_leaf"] = True
                prim_spec.ClearInfo("kind")
                is_leaf_attr_spec = Sdf.AttributeSpec(prim_spec, "is_leaf", Sdf.ValueTypeNames.Bool)
                is_leaf_attr_spec.default = True
                # Active
                if random.random() < 0.1:
                    prim_spec.SetInfo("active", False)
                # Visibility
                visibility_attr_spec = Sdf.AttributeSpec(prim_spec, "visibility", Sdf.ValueTypeNames.Token)
                if random.random() < .5:
                    visibility_attr_spec.default = UsdGeom.Tokens.inherited
                else:
                    visibility_attr_spec.default = UsdGeom.Tokens.invisible

                random.setstate(hiearchy_seed_state)
            else:
                generate_hierarchy(layer, prim_path, leaf_prim_counter, max_levels -1)
    random.seed(0)
    leaf_prim_counter = [0] # Make sure this is a pointer
    generate_hierarchy(layer, root_prim_path, leaf_prim_counter, max_levels)

with Sdf.ChangeBlock():
    prim_path = Sdf.Path("/profiling_grp")
    prim_spec = Sdf.CreatePrimInLayer(layer, prim_path)
    prim_spec.specifier = Sdf.SpecifierDef
    prim_spec.typeName = "Xform"
    prim_spec.SetInfo("kind", "group")
    create_hierarchy(layer, prim_path, 9)
Here is how we can run profiling (this is kept very simple, check out our profiling section how to properly trace the stats) on the sample data:
# We assume we are running on the stage from the previous example.
root_prim = stage.GetPrimAtPath("/profiling_grp")
leaf_prim_types = ("Cube", "Cylinder", "Sphere", "Mesh", "Points", "RectLight", "Camera")

def profile(func, label, root_prim):
    # The changeblock doesn't do much here as we are only querying data, but
    # let's keep it in there anyway.
    with Sdf.ChangeBlock():
        runs = 3
        sw = Tf.Stopwatch()
        time_delta = 0.0
        for run in range(runs):
            sw.Reset()
            sw.Start()
            matched_prims = []
            for prim in iter(Usd.PrimRange(root_prim)):
                if func(prim):
                    matched_prims.append(prim)
            sw.Stop()
            time_delta += sw.seconds
        print("{:.5f} Seconds | {} | Match {}".format(time_delta / runs, label, len(matched_prims)))

print("----")

def profile_boundable(prim):
    return prim.IsA(UsdGeom.Boundable)

profile(profile_boundable, "IsA(Boundable)", root_prim)

def profile_GetTypeName(prim):
    return prim.GetTypeName() in leaf_prim_types

profile(profile_GetTypeName, "GetTypeName", root_prim)

def profile_kind(prim):
    model_api = Usd.ModelAPI(prim)
    return model_api.GetKind() != Kind.Tokens.group

profile(profile_kind, "Kind", root_prim)

def profile_assetInfo_is_leaf(prim):
    asset_info = prim.GetAssetInfo()
    return asset_info.get("is_leaf", False)

profile(profile_assetInfo_is_leaf, "IsLeaf AssetInfo ", root_prim)

def profile_attribute_has_is_leaf(prim):
    if prim.HasAttribute("is_leaf"):
        return True
    return False

profile(profile_attribute_has_is_leaf, "IsLeaf Attribute Has", root_prim)

def profile_attribute_is_leaf(prim):
    is_leaf_attr = prim.GetAttribute("is_leaf")
    if is_leaf_attr:
        if is_leaf_attr.Get():
            return True
    return False

profile(profile_attribute_is_leaf, "IsLeaf Attribute ", root_prim)

def profile_attribute_extra_validation_is_leaf(prim):
    if prim.HasAttribute("is_leaf"):
        is_leaf_attr = prim.GetAttribute("is_leaf")
        if is_leaf_attr.Get():
            return True
    return False

profile(profile_attribute_extra_validation_is_leaf, "IsLeaf Attribute (Validation)", root_prim)
Here is a sample output, we recommend running each traversal multiple times and then averaging the results. As we can see running attribute checks against attributes can be twice as expensive than checking metadata or the type name. (Surprisingly kind checks take a long time, even though it is also a metadata check)
0.17678 Seconds | IsA(Boundable) | Match 38166
0.17222 Seconds | GetTypeName | Match 44294
0.42160 Seconds | Kind | Match 93298
0.38575 Seconds | IsLeaf AssetInfo  | Match 44294
0.27142 Seconds | IsLeaf Attribute Has | Match 44294
0.38036 Seconds | IsLeaf Attribute  | Match 44294
0.37459 Seconds | IsLeaf Attribute (Validation) | Match 44294
Animation/Time Varying Data
Usd encodes time related data in a very simple format:
{
    <frame>: <value>
}
Table of Contents
- Animation/Time Varying Data In-A-Nutshell
- What should I use it for?
- Resources
- Overview
- Time Code
- Layer Offset (A Non-Animateable Time Offset/Scale for Composition Arcs)
- Reading & Writing default values, time samples and value blocks
- Time Metrics (Frames Per Second & Frame Range)
- Motionblur - Computing Velocities and Accelerations
- Stitching/Combining time samples
- Value Clips (Loading time samples from multiple files)
TL;DR - Animation/Time Varying Data In-A-Nutshell
- Terminology: A single time/value pair is called
time sample, if an attribute doesn't have time samples, it hasdefaultvalue (Which just means it has a single static value). - Time samples are encoded in a simple {<time(frame)>: <value>} dict.
- If a frame is requested where no time samples exist, it will be interpolated if the data type allows it and non changing array lengths in neighbour time samples exist. Value queries before/after the first/last time sample will be clamped to these time samples.
- Time samples are encoded unitless/per frame and not in time units. This means they have to be shifted depending on the current frames per second.
- Only attributes can carry time sample data. (So composition arcs can not be time animated, only offset/scaled (see the LayerOffset section on this page)).
Reading and writing is quite straight forward:
from pxr import Sdf, Usd
### High Level ###
stage = Usd.Stage.CreateInMemory()
prim_path = Sdf.Path("/bicycle")
prim = stage.DefinePrim(prim_path, "Cube")
size_attr = prim.GetAttribute("size")
for frame in range(1001, 1005):
    time_code = Usd.TimeCode(float(frame - 1001))
    # .Set() takes args in the .Set(<value>, <frame>) format
    size_attr.Set(frame, time_code)
print(size_attr.Get(1005)) # Returns: 4

### Low Level ###
from pxr import Sdf
layer = Sdf.Layer.CreateAnonymous()
prim_path = Sdf.Path("/bicycle")
prim_spec = Sdf.CreatePrimInLayer(layer, prim_path)
prim_spec.specifier = Sdf.SpecifierDef
prim_spec.typeName = "Cube"
attr_spec = Sdf.AttributeSpec(prim_spec, "size", Sdf.ValueTypeNames.Double)
for frame in range(1001, 1005):
    value = float(frame - 1001)
    # .SetTimeSample() takes args in the .SetTimeSample(<path>, <frame>, <value>) format
    layer.SetTimeSample(attr_spec.path, frame, value)
print(layer.QueryTimeSample(attr_spec.path, 1005)) # Returns: 4
What should I use it for?
Anything that has time varying data will be written as time samples. Usually DCCs handle the time sample creation for you, but there are situations where we need to write them ourselves. For example if you want to efficiently combine time samples from two different value sources or if we want to turn a time sample into a default sampled value (a value without animation).
Resources
Overview
A single frame(time)/value pair is called time sample, if an attribute doesn't have time samples, it has default value (Which just means it has a single static value). The time value is the active frame where data is being exported on. It is not time/FPS based. This means that depending on frames per second set on the stage, different time samples are read. This means if you have a cache that was written in 25 FPS, you'll have to shift/scale the time samples if you want to use the cache in 24 FPS and you want to have the same result. More about this in the examples below.
Currently USD has no concept of animation curves or multi time value interpolation other than linear. This means that in DCCs you'll have to grab the time data around your frame and have the DCCs re-interpolate the data. In Houdini this can be easily done via a Retime SOP node.
The possible stage interpolation types are:
Usd.InterpolationTypeLinear(Interpolate linearly (if array length doesn't change and data type allows it))Usd.InterpolationTypeHeld(Hold until the next time sample)
These can be set via stage.SetInterpolationType(<Token>). Value queries before/after the first/last time sample will be clamped to these time samples.
Render delegates access the time samples within the shutter open close values when motion blur is enabled. When they request a value from Usd and a time sample is not found at the exact time/frame that is requested, it will be linearly interpolated if the array length doesn't change and the data type allows it.
Since value lookups in USD can only have one value source, you cannot combine time samples from different layers at run time, instead you'll have to re-write the combined values across the whole frame range. This may seem unnecessary, but since USD is a cache based format and to keep USD performant, value source lookup is only done once and then querying the data is fast. This is the mechanism what makes USD able to expand and load large hierarchies with ease.
For example:
# We usually want to write time samples in the shutter open/close range of the camera times the sample count of deform/xform motion blur.
double size.timeSamples = {
    1001: 2,
    1002: 2.274348497390747,
    1003: 3.0096023082733154,
    1004: 4.0740742683410645,
    1005: 5.336076736450195,
    1006: 6.663923263549805,
    1007: 7.9259257316589355,
    1008: 8.990397453308105,
    1009: 9.725651741027832,
    1010: 10,
}
# If we omit time samples, value requests for frames in between will get a linearly interpolated result.
double scale.timeSamples = {
    1001: 2,
    1005: 5.336076736450195,
    1010: 10,
}
Since an attribute can only have a single value source, we can't have a default value from layer A and time samples from layer B. We can however have default and time samples values from the same value source.
For example:
def Cube "Cube" (
)
{
    double size = 15
    double size.timeSamples = {
        1001: 1,
        1010: 10,
    }
}
If we now request the value without a frame, it will return 15, if we request it with a time, then it will linearly interpolate or given the time sample if it exists on the frame.
...
size_attr.Get() # Returns: 15.0
size_attr.Get(1008) # Returns: 8.0
...
Usually we'll only have one or the other, it is quite common to run into this at some point though. So when you query data, you should always use .Get(<frame>) as this also works when you don't have time samples. It will then just return the default value. Or you check for time samples, which in some cases can be quite expensive. We'll look at some more examples on this, especially with Houdini and causing node time dependencies in our Houdini section.
Time Code
The Usd.TimeCode class is a small wrapper class for handling time encoding. Currently it does nothing more than storing if it is a default time code or a time/frame time code with a specific frame. In the future it may get the concept of encoding in time instead of frame, so to future proof your code, you should always use this class instead of setting a time value directly.
from pxr import Sdf, Usd
stage = Usd.Stage.CreateInMemory()
prim_path = Sdf.Path("/bicycle")
prim = stage.DefinePrim(prim_path, "Cube")
size_attr = prim.GetAttribute("size")
## Set default value
time_code = Usd.TimeCode.Default()
size_attr.Set(10, time_code)
# Or:
size_attr.Set(10) # The default is to set `default` (non-per-frame) data.
## Set per frame value
for frame in range(1001, 1005):
    time_code = Usd.TimeCode(frame)
    size_attr.Set(frame, time_code)
# Or
# As with Sdf.Path implicit casting from strings in a lot of places in the USD API,
# the time code is implicitly casted from a Python float.
# It is recommended to do the above, to be more future proof of
# potentially encoding time unit based samples.
for frame in range(1001, 1005):
    size_attr.Set(frame, frame)
## Other than that the TimeCode class only has a via Is/Get methods of interest:
size_attr.IsDefault() # Returns: True if no time value was given
size_attr.IsNumeric() # Returns: True if not IsDefault()
size_attr.GetValue() # Returns: The time value (if not IsDefault()
Layer Offset (A Non-Animateable Time Offset/Scale for Composition Arcs)
The Sdf.LayerOffset is used for encoding a time offset and scale for composition arcs.
Following composition arcs can use it:
- Sublayers
- Payloads
- References (Internal & file based)
The Python exposed LayerOffsets are always read-only copies, so you can't modify them in-place. Instead you have to create new ones and re-write the arc/assign the new layer offset.
from pxr import Sdf, Usd
# The Sdf.LayerOffset(<offset>, <scale>) class has
# no attributes/methods other than LayerOffset.offset & LayerOffset.scale.
stage = Usd.Stage.CreateInMemory()
prim_path = Sdf.Path("/animal")
root_layer = stage.GetRootLayer()
## For sublayering via Python, we first need to sublayer, then edit offset.
# In Houdini we can't due this directly due to Houdini's stage handling system.
file_path = "/opt/hfs19.5/houdini/usd/assets/pig/pig.usd"
root_layer.subLayerPaths.append(file_path)
print(root_layer.subLayerPaths)
print(root_layer.subLayerOffsets)
# Since layer offsets are read only, we need to assign it to a new one in-place.
# !DANGER! Due to how it is exposed to Python, we can't assign a whole array with the
# new offsets, instead we can only swap individual elements in the array, so that the
# array pointer is kept intact.
root_layer.subLayerOffsets[0] = Sdf.LayerOffset(25, 1)
## For references
ref = Sdf.Reference(file_path, "/pig", Sdf.LayerOffset(25, 1))
prim = stage.DefinePrim(prim_path)
ref_API = prim.GetReferences()
ref_API.AddReference(ref)
ref = Sdf.Reference("", "/animal", Sdf.LayerOffset(50, 1))
internal_prim = stage.DefinePrim(prim_path.ReplaceName("internal"))
ref_API = internal_prim.GetReferences()
ref_API.AddReference(ref)
## For payloads
payload = Sdf.Payload(file_path, "/pig", Sdf.LayerOffset(25, 1))
prim = stage.DefinePrim(prim_path)
payload_API = prim.GetPayloads()
payload_API.AddPayload(payload)
If you are interested on how to author composition in the low level API, checkout our composition section.
Reading & Writing default values, time samples and value blocks
Writing data
Here are the high and low level APIs to write data.
from pxr import Sdf, Usd
### High Level ###
stage = Usd.Stage.CreateInMemory()
prim_path = Sdf.Path("/bicycle")
prim = stage.DefinePrim(prim_path, "Cube")
size_attr = prim.GetAttribute("size")
## Set default value
time_code = Usd.TimeCode.Default()
size_attr.Set(10, time_code)
# Or:
size_attr.Set(10) # The default is to set `default` (non-per-frame) data.
## Set per frame value
for frame in range(1001, 1005):
    value = float(frame - 1001)
    time_code = Usd.TimeCode(frame)
    size_attr.Set(value, time_code)
# Clear default value
size_attr.ClearDefault(1001)
# Remove a time sample
size_attr.ClearAtTime(1001)

### Low Level ###
from pxr import Sdf
layer = Sdf.Layer.CreateAnonymous()
prim_path = Sdf.Path("/bicycle")
prim_spec = Sdf.CreatePrimInLayer(layer, prim_path)
prim_spec.specifier = Sdf.SpecifierDef
prim_spec.typeName = "Cube"
attr_spec = Sdf.AttributeSpec(prim_spec, "size", Sdf.ValueTypeNames.Double)
## Set default value
attr_spec.default = 10
## Set per frame value
for frame in range(1001, 1005):
    value = float(frame - 1001)
    layer.SetTimeSample(attr_spec.path, frame, value)
# Clear default value
attr_spec.ClearDefaultValue()
# Remove a time sample
layer.EraseTimeSample(attr_spec.path, 1001)
If you are not sure if a schema attribute can have time samples, you can get the variability hint. This is only a hint, it is up to you to not write time samples. In some parts of Usd things will fail or not work as exepcted if you write time samples for a non varying attribute.
attr.GetMetadata("variability") == Sdf.VariabilityVarying
attr.GetMetadata("variability") == Sdf.VariabilityUniform
Reading data
To read data we recommend using the high level API. That way you can also request data from value clipped (per frame loaded Usd) files. The only case where reading directly in the low level API make sense is when you need to open a on disk layer and need to tweak the time samples. Check out our FX Houdini section for a practical example.
If you need to check if an attribute is time sampled, run the following:
# !Danger! For value clipped (per frame loaded layers),
# this will look into all layers, which is quite expensive.
print(size_attr.GetNumTimeSamples())
# You should rather use:
# This does a check for time sample found > 2.
# So it stops looking for more samples after the second sample.
print(size_attr.ValueMightBeTimeVarying())
If you know the whole layer is in memory, then running GetNumTimeSamples() is fine, as it doesn't have t open any files.
from pxr import Gf, Sdf, Usd
### High Level ###
stage = Usd.Stage.CreateInMemory()
prim_path = Sdf.Path("/bicycle")
prim = stage.DefinePrim(prim_path, "Cube")
size_attr = prim.GetAttribute("size")
size_attr.Set(10)
for frame in range(1001, 1005):
    time_code = Usd.TimeCode(frame)
    size_attr.Set(frame-1001, time_code)
# Query the default value (must be same value source aka layer as the time samples).
print(size_attr.Get()) # Returns: 10
# Query the animation time samples
for time_sample in size_attr.GetTimeSamples():
    print(size_attr.Get(time_sample))
# Returns:
"""
0.0, 1.0, 2.0, 3.0
"""
# Other important time sample methods:
# !Danger! For value clipped (per frame loaded layers),
# this will look into all layers, which is quite expensive.
print(size_attr.GetNumTimeSamples()) # Returns: 4
# You should rather use:
# This does a check for time sample found > 2.
# So it stops looking for more samples after the second sample.
print(size_attr.ValueMightBeTimeVarying()) # Returns: True
## We can also query what the closest time sample to a frame:
print(size_attr.GetBracketingTimeSamples(1003.3))
# Returns: (<Found sample>, <lower closest sample>, <upper closest sample>)
(True, 1003.0, 1004.0)
## We can also query time samples in a range. This is useful if we only want to lookup and copy
# a certain range, for example in a pre-render script.
print(size_attr.GetTimeSamplesInInterval(Gf.Interval(1001, 1003)))
# Returns: [1001.0, 1002.0, 1003.0]


### Low Level ###
from pxr import Sdf
layer = Sdf.Layer.CreateAnonymous()
prim_path = Sdf.Path("/bicycle")
prim_spec = Sdf.CreatePrimInLayer(layer, prim_path)
prim_spec.specifier = Sdf.SpecifierDef
prim_spec.typeName = "Cube"
attr_spec = Sdf.AttributeSpec(prim_spec, "size", Sdf.ValueTypeNames.Double)
attr_spec.default = 10
for frame in range(1001, 1005):
    value = float(frame - 1001)
    layer.SetTimeSample(attr_spec.path, frame, value)
# Query the default value
print(attr_spec.default) # Returns: 10
# Query the animation time samples
time_sample_count = layer.GetNumTimeSamplesForPath(attr_spec.path)
for time_sample in layer.ListTimeSamplesForPath(attr_spec.path):
    print(layer.QueryTimeSample(attr_spec.path, time_sample))
# Returns:
"""
0.0, 1.0, 2.0, 3.0
"""
## We can also query what the closest time sample is to a frame:
print(layer.GetBracketingTimeSamplesForPath(attr_spec.path, 1003.3))
# Returns: (<Found sample>, <lower closest sample>, <upper closest sample>)
(True, 1003.0, 1004.0)
Special Values
You can also tell a time sample to block a value. Blocking means that the attribute at that frame will act as if it doesn't have any value written ("Not authored" in USD speak) to stage queries and render delegates.
from pxr import Sdf, Usd
### High Level ###
stage = Usd.Stage.CreateInMemory()
prim_path = Sdf.Path("/bicycle")
prim = stage.DefinePrim(prim_path, "Cube")
size_attr = prim.GetAttribute("size")
for frame in range(1001, 1005):
    time_code = Usd.TimeCode(frame)
    size_attr.Set(frame - 1001, time_code)
## Value Blocking
size_attr.Set(1001, Sdf.ValueBlock())

### Low Level ###
from pxr import Sdf
layer = Sdf.Layer.CreateAnonymous()
prim_path = Sdf.Path("/bicycle")
prim_spec = Sdf.CreatePrimInLayer(layer, prim_path)
prim_spec.specifier = Sdf.SpecifierDef
prim_spec.typeName = "Cube"
attr_spec = Sdf.AttributeSpec(prim_spec, "size", Sdf.ValueTypeNames.Double)
for frame in range(1001, 1005):
    value = float(frame - 1001)
    layer.SetTimeSample(attr_spec.path, frame, value)

## Value Blocking
layer.SetTimeSample(attr_spec.path, 1001, Sdf.ValueBlock())
Time Metrics (Frames Per Second & Frame Range)
With what FPS the samples are interpreted is defined by the timeCodesPerSecond/framesPerSecond metadata.
When working with stages, we have the following loading order of FPS:
- timeCodesPerSecond from session layer
- timeCodesPerSecond from root layer
- framesPerSecond from session layer
- framesPerSecond from root layer
- fallback value of 24
These should match the FPS settings of your DCC. The 'framesPerSecond' is intended to be a hint for playback engines (e.g. your DCC/Usdview etc.) to set the FPS to when reading your file. The 'timeCodesPerSecond' describes the actual time sample intent. With the fallback behavior we can also only specify the 'framesPerSecond' to keep both metadata entries in sync.
When working with layers, we have the following loading order of FPS:
- timeCodesPerSecond of layer
- framesPerSecond of layer
- fallback value of 24
When loading samples from a sublayered/referenced or payloaded file, USD automatically uses the above mentioned metadata in the layer as a frame of reference of how to bring in the time samples. If the FPS settings mismatch it will automatically scale the time samples to match our stage FPS settings as mentioned above.
Therefore when writing layers, we should always write these layer metrics, so that we know what the original intended FPS were and our caches work FPS independently.
In VFX we often work starting from 1001 regardless of the FPS as it is easier for certain departments like FX to have pre-cache frames to init their sims as well as it also makes it easier to write frame based expressions. That means that when working with both 25 and 24 FPS caches, we have to adjust the offset of the incoming cache.
Let's say we have an anim in 25 FPS starting off at 1001 that we want to bring into a 24 FPS scene. USD as mentioned above handles the scaling for us based on the metadata, but since we still want to start at 1001, we have to offset based on "frame_start * (stage_fps/layer_fps) - frame_start". See the below commented out code for a live example. That way we now have the same 25 FPS cache running in 24 FPS from the same "starting pivot" frame. If we work fully time based, we don't have this problem, as animation in the 25 FPS cache would have its time samples written at larger frames than the 24 FPS cache and USD's scaling would auto correct it.
(
    timeCodesPerSecond = 24
    framesPerSecond = 24
    metersPerUnit = 1
    startTimeCode = 1001
    endTimeCode = 1010
)
The startTimeCode and endTimeCode entries give intent hints on what the (useful) frame range of the USD file is. Applications can use this to automatically set the frame range of the stage when opening a USD file or use it as the scaling pivot when calculating time offsets or creating loop-able caches via value clips.
from pxr import Sdf, Usd
### High Level ###
stage = Usd.Stage.CreateInMemory()
prim_path = Sdf.Path("/bicycle")
prim = stage.DefinePrim(prim_path, "Cube")
size_attr = prim.GetAttribute("size")
for frame in range(1001, 1005):
    time_code = Usd.TimeCode(frame)
    size_attr.Set(frame - 1001, time_code)
# FPS Metadata
stage.SetTimeCodesPerSecond(25)
stage.SetFramesPerSecond(25)
stage.SetStartTimeCode(1001)
stage.SetEndTimeCode(1005)

### Low Level ###
from pxr import Sdf
layer = Sdf.Layer.CreateAnonymous()
prim_path = Sdf.Path("/bicycle")
prim_spec = Sdf.CreatePrimInLayer(layer, prim_path)
prim_spec.specifier = Sdf.SpecifierDef
prim_spec.typeName = "Cube"
attr_spec = Sdf.AttributeSpec(prim_spec, "size", Sdf.ValueTypeNames.Double)
for frame in range(1001, 1005):
    value = float(frame - 1001)
    layer.SetTimeSample(attr_spec.path, frame, value)
# FPS Metadata
time_samples = Sdf.Layer.ListAllTimeSamples(layer)
layer.timeCodesPerSecond = 25
layer.framesPerSecond = 25
layer.startTimeCode = time_samples[0]
layer.endTimeCode = time_samples[-1]

###### Stage vs Layer TimeSample Scaling ######
from pxr import Sdf, Usd

layer_fps = 25
layer_identifier = "ref_layer.usd"
stage_fps = 24
stage_identifier = "root_layer.usd"
frame_start = 1001
frame_end = 1025

# Create layer
reference_layer = Sdf.Layer.CreateAnonymous()
prim_path = Sdf.Path("/bicycle")
prim_spec = Sdf.CreatePrimInLayer(reference_layer, prim_path)
prim_spec.specifier = Sdf.SpecifierDef
prim_spec.typeName = "Cube"
attr_spec = Sdf.AttributeSpec(prim_spec, "size", Sdf.ValueTypeNames.Double)
for frame in range(frame_start, frame_end + 1):
    value = float(frame - frame_start) + 1
    # If we work correctly in seconds everything works as expected.
    reference_layer.SetTimeSample(attr_spec.path, frame * (layer_fps/stage_fps), value)
    # In VFX we often work frame based starting of at 1001 regardless of the FPS.
    # If we then load the 25 FPS in 24 FPS, USD applies the correct scaling, but we have
    # to apply the correct offset to our "custom" start frame.
    # reference_layer.SetTimeSample(attr_spec.path, frame, value)
# FPS Metadata
time_samples = Sdf.Layer.ListAllTimeSamples(reference_layer)
reference_layer.timeCodesPerSecond = layer_fps
reference_layer.framesPerSecond = layer_fps
reference_layer.startTimeCode = time_samples[0]
reference_layer.endTimeCode = time_samples[-1]
# reference_layer.Export(layer_identifier)

# Create stage
stage = Usd.Stage.CreateInMemory()
# If we work correctly in seconds everything works as expected.
reference_layer_offset = Sdf.LayerOffset(0, 1)
# In VFX we often work frame based starting of at 1001.
# If we then load the 25 FPS in 24 FPS, USD applies the correct scaling, but we have
# to apply the correct offset to our "custom" start frame.
# reference_layer_offset = Sdf.LayerOffset(frame_start * (stage_fps/layer_fps) - frame_start, 1)
reference = Sdf.Reference(reference_layer.identifier, "/bicycle", reference_layer_offset)
bicycle_prim_path = Sdf.Path("/bicycle")
bicycle_prim = stage.DefinePrim(bicycle_prim_path)
references_api = bicycle_prim.GetReferences()
references_api.AddReference(reference, position=Usd.ListPositionFrontOfAppendList)
# FPS Metadata (In Houdini we can't set this via python, use a 'configure layer' node instead.)
stage.SetTimeCodesPerSecond(stage_fps)
stage.SetFramesPerSecond(stage_fps)
stage.SetStartTimeCode(1001)
stage.SetEndTimeCode(1005)
# stage.Export(stage_identifier)
Motion Blur - Computing Velocities and Accelerations
Motion blur is computed by the hydra delegate of your choice using either the interpolated position data or by making use of velocity/acceleration data. Depending on the image-able schema, the attribute namings slightly differ, e.g. for meshes the names are 'UsdGeom.Tokens.points', 'UsdGeom.Tokens.velocities', 'UsdGeom.Tokens.accelerations'. Check the specific schema for the property names.
Depending on the delegate, you will likely have to set specific primvars that control the sample rate of the position/acceleration data.
We can also easily derive velocities/accelerations from position data, if our point count doesn't change:
import numpy as np

from pxr import Sdf, Usd, UsdGeom


MOTION_ATTRIBUTE_NAMES_BY_TYPE_NAME = {
    UsdGeom.Tokens.Mesh: (UsdGeom.Tokens.points, UsdGeom.Tokens.velocities, UsdGeom.Tokens.accelerations),
    UsdGeom.Tokens.Points: (UsdGeom.Tokens.points, UsdGeom.Tokens.velocities, UsdGeom.Tokens.accelerations),
    UsdGeom.Tokens.BasisCurves: (UsdGeom.Tokens.points, UsdGeom.Tokens.velocities, UsdGeom.Tokens.accelerations),
    UsdGeom.Tokens.PointInstancer: (UsdGeom.Tokens.positions, UsdGeom.Tokens.velocities, UsdGeom.Tokens.accelerations)
}
# To lookup schema specific names
# schema_registry = Usd.SchemaRegistry()
# schema = schema_registry.FindConcretePrimDefinition("Mesh")
# print(schema.GetPropertyNames())

def compute_time_derivative(layer, prim_spec, attr_name, ref_attr_name, time_code_inc, multiplier=1.0):
    ref_attr_spec = prim_spec.attributes.get(ref_attr_name)
    if not ref_attr_spec:
        return
    attr_spec = prim_spec.attributes.get(attr_name)
    if attr_spec:
        return
    time_codes = layer.ListTimeSamplesForPath(ref_attr_spec.path)
    if len(time_codes) == 1:
        return
    center_time_codes = {idx: t for idx, t in enumerate(time_codes) if int(t) == t}
    if not center_time_codes:
        return
    attr_spec = Sdf.AttributeSpec(prim_spec, attr_name, Sdf.ValueTypeNames.Vector3fArray)
    time_code_count = len(time_codes)
    for time_code_idx, time_code in center_time_codes.items():
        if time_code_idx == 0:
            time_code_prev = time_code
            time_code_next = time_codes[time_code_idx+1]
        elif time_code_idx == time_code_count - 1:
            time_code_prev = time_codes[time_code_idx-1]
            time_code_next = time_code
        else:
            time_code_prev = time_codes[time_code_idx-1]
            time_code_next = time_codes[time_code_idx+1]
        time_interval_scale = 1.0/(time_code_next - time_code_prev)
        ref_prev = layer.QueryTimeSample(ref_attr_spec.path, time_code_prev)
        ref_next = layer.QueryTimeSample(ref_attr_spec.path, time_code_next)
        if not ref_prev or not ref_next:
            continue
        if len(ref_prev) != len(ref_next):
            continue
        ref_prev = np.array(ref_prev)
        ref_next = np.array(ref_next)
        value = ((ref_next - ref_prev) * time_interval_scale) / (time_code_inc * 2.0)
        layer.SetTimeSample(attr_spec.path, time_code, value * multiplier)

def compute_velocities(layer, prim_spec, time_code_fps, multiplier=1.0):
    # Time Code
    time_code_inc = 1.0/time_code_fps
    prim_type_name = prim_spec.typeName
    if prim_type_name:
        # Defined prim type name
        attr_type_names = MOTION_ATTRIBUTE_NAMES_BY_TYPE_NAME.get(prim_type_name)
        if not attr_type_names:
            return
        pos_attr_name, vel_attr_name, _ = attr_type_names
    else:
        # Fallback
        pos_attr_name, vel_attr_name, _ = MOTION_ATTRIBUTE_NAMES_BY_TYPE_NAME[UsdGeom.Tokens.Mesh]
    pos_attr_spec = prim_spec.attributes.get(pos_attr_name)
    if not pos_attr_spec:
        return
    # Velocities
    compute_time_derivative(layer,
                            prim_spec,
                            vel_attr_name,
                            pos_attr_name,
                            time_code_inc,
                            multiplier)

def compute_accelerations(layer, prim_spec, time_code_fps, multiplier=1.0):
    # Time Code
    time_code_inc = 1.0/time_code_fps
    prim_type_name = prim_spec.typeName
    if prim_type_name:
        # Defined prim type name
        attr_type_names = MOTION_ATTRIBUTE_NAMES_BY_TYPE_NAME.get(prim_type_name)
        if not attr_type_names:
            return
        _, vel_attr_name, accel_attr_name = attr_type_names
    else:
        # Fallback
        _, vel_attr_name, accel_attr_name = MOTION_ATTRIBUTE_NAMES_BY_TYPE_NAME[UsdGeom.Tokens.Mesh]
    vel_attr_spec = prim_spec.attributes.get(vel_attr_name)
    if not vel_attr_spec:
        return
    # Acceleration
    compute_time_derivative(layer,
                            prim_spec,
                            accel_attr_name,
                            vel_attr_name,
                            time_code_inc,
                            multiplier)

### Run this on a layer with time samples ###
layer = Sdf.Layer.CreateAnonymous()
time_code_fps = layer.timeCodesPerSecond or 24.0
multiplier = 5

def traversal_kernel(path):
    if not path.IsPrimPath():
        return
    prim_spec = layer.GetPrimAtPath(path)
    compute_velocities(layer, prim_spec, time_code_fps, multiplier)
    compute_accelerations(layer, prim_spec, time_code_fps, multiplier)

with Sdf.ChangeBlock():
    layer.Traverse(layer.pseudoRoot.path, traversal_kernel)
You can find a interactive Houdini demo of this in our Houdini - Motion Blur section.
Stitching/Combining time samples
When working with Usd in DCCs, we often have a large amount of data that needs to be exported per frame. To speed this up, a common practice is to have a render farm, where multiple machines render out different frame ranges of scene. The result then needs to be combined into a single file or loaded via value clips for heavy data (as described in the next section below).
Stitching multiple files to a single file is usually used for small per frame USD files. If you have large (1 GB > ) files per frame, then we recommend using values clips. During stitching all data has to be loaded into memory, so your RAM specs have to be high enough to handle all the files combined.
A typical production use case we use it for, is rendering out the render USD files per frame and then stitching these, as these are usually a few mb per frame at most.
When working with collections, make sure that they are not too big, by selecting parent prims where possible. Currently USD stitches target path lists a bit inefficiently, which will result in your stitching either not going through at all or taking forever. See our collections section for more details.
USD ships with a standalone usdstitch commandline tool, which is a small Python wrapper around the UsdUtils.StitchLayers() function. You can read more it in our standalone tools section.
In Houdini you can find it in the $HFS/binfolder, e.g. /opt/hfs19.5/bin.
Here is an excerpt:
...
openedFiles = [Sdf.Layer.FindOrOpen(fname) for fname in results.usdFiles]
...
# the extra computation and fail more gracefully
try:
    for usdFile in openedFiles:
        UsdUtils.StitchLayers(outLayer, usdFile)
        outLayer.Save()
# if something in the authoring fails, remove the output file
except Exception as e:
    print('Failed to complete stitching, removing output file %s' % results.out)
    print(e)
    os.remove(results.out)
...
More about layer stitching/flattening/copying in our layer section.
Value Clips (Loading time samples from multiple files)
We only cover value clips in a rough overview here, we might extend this a bit more in the future, if there is interest. We recommend checking out the official docs page as it is well written and worth the read!
USD value clips are USD's mechanism of loading in data per frame from different files. It has a special rule set, that we'll go over now below.
Composition wise, value clips (or the layer that specifies the value clip metadata) is right under the local arc strength and over inherit arcs.
Here are some examples from USD's official docs:
def "Prim" (
    clips = {
        dictionary clip_set_1 = {
            double2[] active = [(101, 0), (102, 1), (103, 2)]
            asset[] assetPaths = [@./clip1.usda@, @./clip2.usda@, @./clip3.usda@]
            asset manifestAssetPath = @./clipset1.manifest.usda@
            string primPath = "/ClipSet1"
            double2[] times = [(101, 101), (102, 102), (103, 103)]
        }
    }
    clipSets = ["clip_set_1"]
)
{
}
There is also the possibility to encode the value clip metadata via a file wild card syntax (The metadata keys start with template). We recommend sticking to the the above format as it is more flexible and more explicit.
Click here to expand contents
def "Prim" (
    clips = {
        dictionary clip_set_2 = {
            string templateAssetPath = "clipset2.#.usd"
            double templateStartTime = 101
            double templateEndTime = 103
            double templateStride = 1
            asset manifestAssetPath = @./clipset2.manifest.usda@
            string primPath = "/ClipSet2"
        }
    }
    clipSets = ["clip_set_2"]
)
{
}
As you can see it is pretty straight forward to implement clips with a few key metadata entries:
primPath: Will substitute the current prim path with this path, when looking in the clipped files. This is similar to how you can specify a path when creating references (when not using thedefaultPrimmetadata set in the layer metadata).manifestAssetPath: A asset path to a file containing a hierarchy of attributes that have time samples without any default or time sample data.assetPaths: A list of asset paths that should be used for the clip.active: A list of (<stage time>, <asset path list index>) pairs, that specify on what frame what clip is active.times: A list of (<stage time>, <asset path time>) pairs, that map how the current time should be mapped into the time that should be looked up in the active asset path file.interpolateMissingClipValues(Optional): Boolean that activates interpolation of time samples from surrounding clip files, should the active file not have any data on the currently requested time.
The content of individual clip files must be the raw data, in other words anything that is loaded in via composition arcs is ignored.
The other files that are needed to make clips work are:
- The
manifestfile: A file containing a hierarchy of attributes that have time samples without any default or time sample data. - The
topologyfile: A file containing all the attributes that only have staticdefaultdata.
Here is how you can generate them:
USD ships with a usdstitchclips commandline tool that auto-converts multiple clip (per frame) files to a value clipped main file for you. This works great if you only have a single root prim you want to load clipped data on.
Unfortunately this is often not the case in production, so this is where the value clip API comes into play. The usdstitchclips tool is a small Python wrapper around that API, so you can also check out the Python code there.
Here are the basics, the main modules we will be using are pxr.Usd.ClipsAPI and pxr.UsdUtils:
Technically you can remove all default attributes from the per frame files after running the topology layer generation. This can save a lot of disk space,but you can't partially re-render specific frames of the cache though. So only do this if you know the cache is "done".
from pxr import Sdf, UsdUtils

clip_time_code_start = 1001
clip_time_code_end = 1003
clip_set_name = "cacheClip"
clip_prim_path = "/prim"
clip_interpolate_missing = False
time_sample_files = ["/cache/value_clips/time_sample.1001.usd",
                     "/cache/value_clips/time_sample.1002.usd",
                     "/cache/value_clips/time_sample.1003.usd"]
topology_file_path = "/cache/value_clips/topology.usd"
manifest_file_path = "/cache/value_clips/manifest.usd"
cache_file_path = "/cache/cache.usd"

# We can also use:
# topology_file_path = UsdUtils.GenerateClipTopologyName(cache_file_path)
# Returns: "/cache/cache.topology.usd"
# manifest_file_path = UsdUtils.GenerateClipManifestName(cache_file_path)
# Returns: "/cache/cache.manifest.usd"

topology_layer = Sdf.Layer.CreateNew(topology_file_path)
manifest_layer = Sdf.Layer.CreateNew(manifest_file_path)
cache_layer = Sdf.Layer.CreateNew(cache_file_path)

UsdUtils.StitchClipsTopology(topology_layer, time_sample_files)
UsdUtils.StitchClipsManifest(manifest_layer, topology_layer,
                             time_sample_files, clip_prim_path)

UsdUtils.StitchClips(cache_layer,
                     time_sample_files,
                     clip_prim_path,
                     clip_time_code_start,
                     clip_time_code_end,
                     clip_interpolate_missing,
                     clip_set_name)
cache_layer.Save()

# Result in "/cache/cache.usd"
"""
(
    framesPerSecond = 24
    metersPerUnit = 1
    subLayers = [
        @./value_clips/topology.usd@
    ]
    timeCodesPerSecond = 24
)

def "prim" (
    clips = {
        dictionary cacheClip = {
            double2[] active = [(1001, 0), (1002, 1), (1003, 2)]
            asset[] assetPaths = [@./value_clips/time_sample.1001.usd@, @./value_clips/time_sample.1002.usd@, @./value_clips/time_sample.1003.usd@]
            asset manifestAssetPath = @./value_clips/manifest.usd@
            string primPath = "/prim"
            double2[] times = [(1001, 1001), (1002, 1002), (1003, 1003)]
        }
    }
    clipSets = ["cacheClip"]
)
{
}
"""

## API Overview
UsdUtils
# Generate topology and manifest files based USD preferred naming convention.
UsdUtils.GenerateClipTopologyName("/cache_file.usd") # Returns: "/cache_file.topology.usd"
UsdUtils.GenerateClipManifestName("/cache_file.usd") # Returns: "/cache_file.manifest.usd"
# Open layers
topology_layer = Sdf.Layer.CreateNew(topology_file_path)
manifest_layer = Sdf.Layer.CreateNew(manifest_file_path)
cache_layer = Sdf.Layer.CreateNew(cache_file_path)
## Create topology and manifest. This is the heavy part of creating value clips
## as it has to open all layers.
# Generate topology layer, this opens all the time sample layers and copies all
# attributes that don't have time samples and relationships into the topology_layer.
UsdUtils.StitchClipsTopology(topology_layer, time_sample_files)
# Generate manifest layer, this opens all the time sample layers and creates a
# hierarchy without values of all attributes that have time samples. This is the inverse
# of the topology layer except it doesn't create values. The hierarchy is then used to
# determine what a clip should load as animation.
UsdUtils.StitchClipsManifest(manifest_layer, topology_layer,
                             time_sample_files, clip_prim_path)
# Generate cache layer, this creates the metadata that links to the above created files.
UsdUtils.StitchClips(cache_layer,
                     time_sample_files,
                     clip_prim_path,
                     clip_time_code_start,
                     clip_time_code_end,
                     clip_interpolate_missing,
                     clip_set_name)
Since in production (see the next section), we usually want to put the metadata at the asset roots, we'll usually only want to run
UsdUtils.StitchClipsTopology(topology_layer, time_sample_files)UsdUtils.StitchClipsManifest(manifest_layer, topology_layer, time_sample_files, clip_prim_path)
And then create the clip metadata in the cache_layer ourselves:
from pxr import Sdf, Usd, UsdUtils

time_sample_files = ["/cache/value_clips/time_sample.1001.usd",
                     "/cache/value_clips/time_sample.1002.usd",
                     "/cache/value_clips/time_sample.1003.usd"]
time_sample_asset_paths = Sdf.AssetPathArray(time_sample_files)
topology_file_path = "/cache/value_clips/topology.usd"
manifest_file_path = "/cache/value_clips/manifest.usd"
cache_file_path = "/cache/cache.usd"

topology_layer = Sdf.Layer.CreateNew(topology_file_path)
manifest_layer = Sdf.Layer.CreateNew(manifest_file_path)
cache_layer = Sdf.Layer.CreateNew(cache_file_path)

UsdUtils.StitchClipsTopology(topology_layer, time_sample_files)
UsdUtils.StitchClipsManifest(manifest_layer, topology_layer,
                             time_sample_files, clip_prim_path)

clip_set_name = "cacheClip"
clip_prim_path = "/prim"
clip_interpolate_missing = False

# For simplicity in this example we already know where the asset roots are.
# If you need to check where they are, you can traverse the topology layer,
# as it contains the full hierarchy of the per frame files.
prim = stage.DefinePrim("/valueClippedPrim", "Xform")
# The clips API is a small wrapper around setting metadata fields.
clips_API = Usd.ClipsAPI(prim)
# Most function signatures work via the following args:
# clips_API.<method>(<methodArg>, <clipSetName>)
# We'll only be looking at non-template value clips related methods here.
## We have Get<MethodName>/Set<MethodName> for all metadata keys:
# clips_API.Get/SetClipPrimPath
# clips_API.Get/SetClipAssetPaths
# clips_API.Get/SetClipManifestAssetPath
# clips_API.Get/SetClipActive
# clips_API.Get/SetClipTimes
# clips_API.Get/SetInterpolateMissingClipValues
## To get/set the whole clips metadata dict, we can run:
# clips_API.Get/SetClips()
## To get/set what clips are active:
# clips_API.Get/SetClipSets

## Convenience methods for generating a manifest based on the
# clips set by clips_API.SetClipAssetPaths
# clips_API.GenerateClipManifest
## Or from a user specified list. This is similar to UsdUtils.StitchClipsManifest()
# clips_API.GenerateClipManifestFromLayers

## Get the resolved asset paths in 'assetPaths' metadata.
# clips_API.ComputeClipAssetPaths

prim = stage.DefinePrim("/valueClippedPrim", "Xform")
clips_API = Usd.ClipsAPI(prim)
clips_API.SetClipPrimPath(clip_prim_path, clip_set_name)
clips_API.SetClipAssetPaths(time_sample_asset_paths, clip_set_name)
clips_API.SetClipActive([(1001, 0), (1002, 1), (1003, 2)], clip_set_name)
clips_API.SetClipTimes([(1001, 1001), (1002, 1001), (1003, 1001)], clip_set_name)
clips_API.SetInterpolateMissingClipValues(clip_interpolate_missing, clip_set_name)
# We can also print all clip metadata
print(clips_API.GetClips())
# Enable the clip
clip_sets_active = Sdf.StringListOp.CreateExplicit([clip_set_name])
clips_API.SetClipSets(clip_sets_active)
#Returns:
"""
{'cacheClip':
    {
        'primPath': '/prim',
        'interpolateMissingClipValues': False,
        'active': Vt.Vec2dArray(3, (Gf.Vec2d(1001.0, 0.0), Gf.Vec2d(1002.0, 1.0), Gf.Vec2d(1003.0, 2.0))),
        'assetPaths': Sdf.AssetPathArray(3, (Sdf.AssetPath('/cache/value_clips/time_sample.1001.usd'),
                                            Sdf.AssetPath('/cache/value_clips/time_sample.1002.usd'),
                                            Sdf.AssetPath('/cache/value_clips/time_sample.1003.usd'))),
        'times': Vt.Vec2dArray(3, (Gf.Vec2d(1001.0, 1001.0), Gf.Vec2d(1002.0, 1001.0), Gf.Vec2d(1003.0, 1001.0)))
    }
}
"""
How will I use it in production?
Value clips are the go-to mechanism when loading heavy data, especially for animation and fx. They are also the only USD mechanism for looping data.
As discussed in more detail in our composition section, caches are usually attached to asset root prim. As you can see above, the metadata must always specify a single root prim to load the clip on, this is usually your asset root prim. You could also load it on a prim higher up in the hierarchy, this makes your scene incredibly hard to debug though and is not recommended.
This means that if you are writing an fx cache with a hierarchy that has multiple asset roots, you'll be attaching the metadata to each individual asset root. This way you can have a single value clipped cache, that is loaded in multiple parts of you scene. You can then payload/reference in this main file, with the value clip metadata per asset root prim, per asset root prim, which allows you to partially load/unload your hierarchy as usual.
Your file structure will look as follows:
- Per frame(s) files with time sample data:
- /cache/value_clips/time_sample.1001.usd
- /cache/value_clips/time_sample.1002.usd
- /cache/value_clips/time_sample.1003.usd
- Manifest file (A lightweight Usd file with attributes without values that specifies that these are attributes are with animation in clip files):
- /cache/value_clips/manifest.usd
- Topology file (A USD file that has all attributes with default values):
- /cache/value_clips/topology.usd
- Value clipped file (It sublayers the topology.usd file and writes the value clip metadata (per asset root prim)):
- /cache/cache.usd
Typically your shot or asset layer USD files will then payload or reference in the individual asset root prims from the cache.usd file.
Since we attach the value clips to asset root prims, our value clipped caches can't have values above asset root prims.
If this all sounds a bit confusing don't worry about it for now, we have a hands-on example in our composition section.
For more info on how value clips affect instancing, check out our composition section. There you will also find an example with multiple asset roots re-using the same value clipped cache.
How does it affect attribute time samples and queries?
When working with time samples in value clips there are two important things to keep in mind:
Subframes
The active and times metadata entries need to have sub-frames encoded. Let's look at our example:
Three per frame files, with each file having samples around the centered frame:
- /cache/value_clips/time_sample.1001.usd": (1000.75, 1001, 1001.25)
- /cache/value_clips/time_sample.1002.usd": (1001.75, 1002, 1002.25)
- /cache/value_clips/time_sample.1003.usd": (1002.75, 1003, 1003.25)
They must be written as follows in order for subframe time sample to be read.
double2[] active = [(1000.5, 0), (1001.75, 1), (1002.75, 2)]
double2[] times = [(1000.5, 1000.5), (1001.75, 1001.75), (1002.75, 1003)]
As you may have noticed, we don't need to specify the centred or .25 frame, these will be interpolated linearly to the next entry in the list.
Queries
When we call attribute.GetTimeSamples(), we will get the interval that is specified with the times metadata.
For the example above this would return:
(1000.75, 1001, 1001.25, 1001.75, 1002, 1002.25, 1002.75, 1003, 1003.25)
If we would only write the metadata on the main frames:
double2[] active = [(1001, 0), (1002, 1), (1003, 2)]
double2[] times = [(1001, 1001), (1002, 1002), (1003, 1003)]
It will return:
(1001, 1001.25, 1002, 1002.25, 1003, 1003.25)
With value clips it can be very expensive to call attribute.GetTimesamples() as this will open all layers to get the samples in the interval that is specified in the metadata. It does not only read the value clip metadata. If possible use attribute.GetTimeSamplesInInterval() as this only opens the layers in the interested interval range.
Materials
Materials in USD are exposed via the UsdShade module.
Shader networks are encoded via the UsdShade.ConnectableAPI. So we have full access to the node graph as it is fully represented as USD prims. This allows for flexible editing, as it is as simple as editing attributes and connections on your individual material node prims.
USD has support for encoding MaterialX node graphs, which allows for render engine agnostic shader creation.
Table of Contents
TL;DR - Metadata In-A-Nutshell
- USD can encode material node graphs as prims. It supports writing MaterialX node graphs, which are renderer agnostic material descriptions.
- We can bind materials either directly or via collections.
What should I use it for?
Materials themselves are usually generated by the DCC you are working in, so we usually don't have to create them ourselves. What we do use the UsdShade module for is editing material bindings and overriding individual nodes and their connections in a material node graph.
Resources
Overview
This section still needs some more love, we'll likely expand it more in the near future.
Material binding
One of the most common use cases of relationships is encoding the material binding. Here we simply link from any imageable (renderable) prim to a UsdShade.Material (Material) prim.
Material bindings are a special kind of relationship. Here are a few important things to know:
- When looking up material bindings, USD also looks at parent prims if it can't find a written binding on the prim directly. This means you can create the binding on any parent prim and just as with primvars, it will be inherited downwards to its children.
- The "binding strength" can be adjusted, so that a child prim assignment can also be override from a binding higher up the hierarchy.
- Material bindings can also be written per purpose, if not then they bind to all purposes. (Technically it is not called purpose, the token names are
UsdShade.MaterialBindingAPI.GetMaterialPurposes() -> ['', 'preview', 'full']). The 'preview' is usually bound to the 'UsdGeom.Tokens.proxy' purpose, the 'full' to the 'UsdGeom.Tokens.render' purpose. - The material binding can be written in two ways:
- Direct Binding: A relationship that points directly to a material prim
- Collection Based Binding: A relationship that points to another collection, that then stores the actual binding paths) and to a material prim to bind.
Here is an example of a direct binding:
over "asset"
{
    over "GEO"(
        prepend apiSchemas = ["MaterialBindingAPI"]
    )
    {
        rel material:binding = </materials/metal>
        over "plastic_mesh" (
            prepend apiSchemas = ["MaterialBindingAPI"]
        )
        {
            rel material:binding = </asset/materials/plastic>
        }
    }
}
And here is an example of a collection based binding. As you can see it is very easy to exclude a certain prim from a single control point, whereas with the direct binding we have to author it on the prim itself.
def "asset" (
    prepend apiSchemas = ["MaterialBindingAPI", "CollectionAPI:material_metal"]
)
{
    rel material:binding:collection:material_metal = [
        </shaderball.collection:material_metal>,
        </materials/metal>,
    ]

    uniform token collection:material_metal:expansionRule = "expandPrims"
    rel collection:material_metal:includes = </asset>
    rel collection:material_metal:excludes = </asset/GEO/plastic_mesh>
}
For creating bindings in the high level API, we use the UsdShade.MaterialBindingAPI schema.
Here is the link to the official API docs.
For more info about the load order (how collection based bindings win over direct bindings), you can read the "Bound Material Resolution" section on the API docs page.
## UsdShade.MaterialBindingAPI(<boundable prim>)
# This handles all the binding get and setting
## These classes can inspect an existing binding
# UsdShade.MaterialBindingAPI.DirectBinding()
# UsdShade.MaterialBindingAPI.CollectionBinding()
### High Level ###
from pxr import Sdf, Usd, UsdGeom, UsdShade
stage = Usd.Stage.CreateInMemory()
render_prim = stage.DefinePrim(Sdf.Path("/bicycle/RENDER/render"), "Cube")
material_prim = stage.DefinePrim(Sdf.Path("/bicycle/MATERIALS/example_material"), "Material")
bicycle_prim = render_prim.GetParent().GetParent()
bicycle_prim.SetTypeName("Xform")
render_prim.GetParent().SetTypeName("Xform")
material_prim.GetParent().SetTypeName("Xform")
# Bind materials via direct binding
material = UsdShade.Material(material_prim)
mat_bind_api = UsdShade.MaterialBindingAPI.Apply(render_prim)
mat_bind_api.Bind(material)
# Unbind all
mat_bind_api.UnbindAllBindings()
# Bind via collection
collection_name = "material_example"
collection_api = Usd.CollectionAPI.Apply(bicycle_prim, collection_name)
collection_api.GetIncludesRel().AddTarget(material_prim.GetPath())
collection_api.GetExpansionRuleAttr().Set(Usd.Tokens.expandPrims)
mat_bind_api.Bind(collection_api, material, "material_example")

### Low Level ###
from pxr import Sdf, UsdGeom
layer = Sdf.Layer.CreateAnonymous()
render_prim_spec = Sdf.CreatePrimInLayer(layer, Sdf.Path("/render"))
render_prim_spec.specifier = Sdf.SpecifierDef
render_prim_spec.typeName = "Cube"
material_prim_spec = Sdf.CreatePrimInLayer(layer, Sdf.Path("/material"))
material_prim_spec.specifier = Sdf.SpecifierDef
material_prim_spec.typeName = "Material"
## Direct binding
material_bind_rel_spec = Sdf.RelationshipSpec(render_prim_spec, "material:binding")
material_bind_rel_spec.targetPathList.Append(Sdf.Path("/render"))
# Applied Schemas
schemas = Sdf.TokenListOp.Create(
    prependedItems=["MaterialBindingAPI"]
)
render_prim_spec.SetInfo("apiSchemas", schemas)
Node graph encoding via attribute to attribute connections
Attributes can also encode relationship-like paths to other attributes. These connections are encoded directly on the attribute. It is up to Usd/Hydra to evaluate these "attribute graphs", if you simply connect two attributes, it will not forward attribute value A to connected attribute B (USD does not have a concept for a mechanism like that (yet)).
Here is an example of how a material network is encoded.
def Scope "materials"
{
    def Material "karmamtlxsubnet" (
    )
    {
        token outputs:mtlx:surface.connect = </materials/karmamtlxsubnet/mtlxsurface.outputs:out>

        def Shader "mtlxsurface" ()
        {
            uniform token info:id = "ND_surface"
            string inputs:edf.connect = </materials/karmamtlxsubnet/mtlxuniform_edf.outputs:out>
            token outputs:out
        }

        def Shader "mtlxuniform_edf"
        {
            uniform token info:id = "ND_uniform_edf"
            color3f inputs:color.connect = </materials/karmamtlxsubnet/mtlx_constant.outputs:out>
            token outputs:out
        }

        def Shader "mtlx_constant"
        {
            uniform token info:id = "ND_constant_float"
            float outputs:out
        }
    }
}
In our property section we cover the basics how to connect different attributes. For material node graphs USD ships with the UsdShade.ConnectableAPI. It should be used/preferred instead of using the Usd.Attribute.AddConnection method, as it does extra validation as well as offer convenience functions for iterating over connections.
Transforms
This section still needs some more love, we'll likely expand it more in the near future.
Table of Contents
TL;DR - Transforms In-A-Nutshell
Transforms are encoded via the following naming scheme and attributes:
- xformOpOrder: This (non-animatable) attribute controls what xformOp: namespaced attributes affect the prims local space transform.
- xfromOp:: Xform ops are namespaced with this namespace and can be considered by the "xformOpOrder" attribute. We can add any number of xform ops for xformable prims, the final world transform is then computed based on a prims local transform and that of all its ancestors.
What should I use it for?
We rarely write the initial transforms ourselves, this is something our DCCs excel at. We do query transforms though for different scenarios:
- We can bake down the transform to a single prim. This can then be referenced or inherited and used as a parent constraint like mechanism.
- When merging hierarchies, we often want to preserve the world transform of leaf prims. Let's say we have two stages: We can simply get the parent xform of stage A and then apply it in inverse to our leaf prim in stage B. That way the leaf prim in stage B is now in local space and merging the stages returns the expected result. We show an example of this below.
Resources
Overview
Creating xforms is usually handled by our DCCS. Let's go over the basics how USD encodes them to understand what we are working with.
All shown examples can be found in the xforms .hip file in our GitHub repo.
Creating and animating transforms
USD evaluates xform attributes on all sub types of the xformable schema.
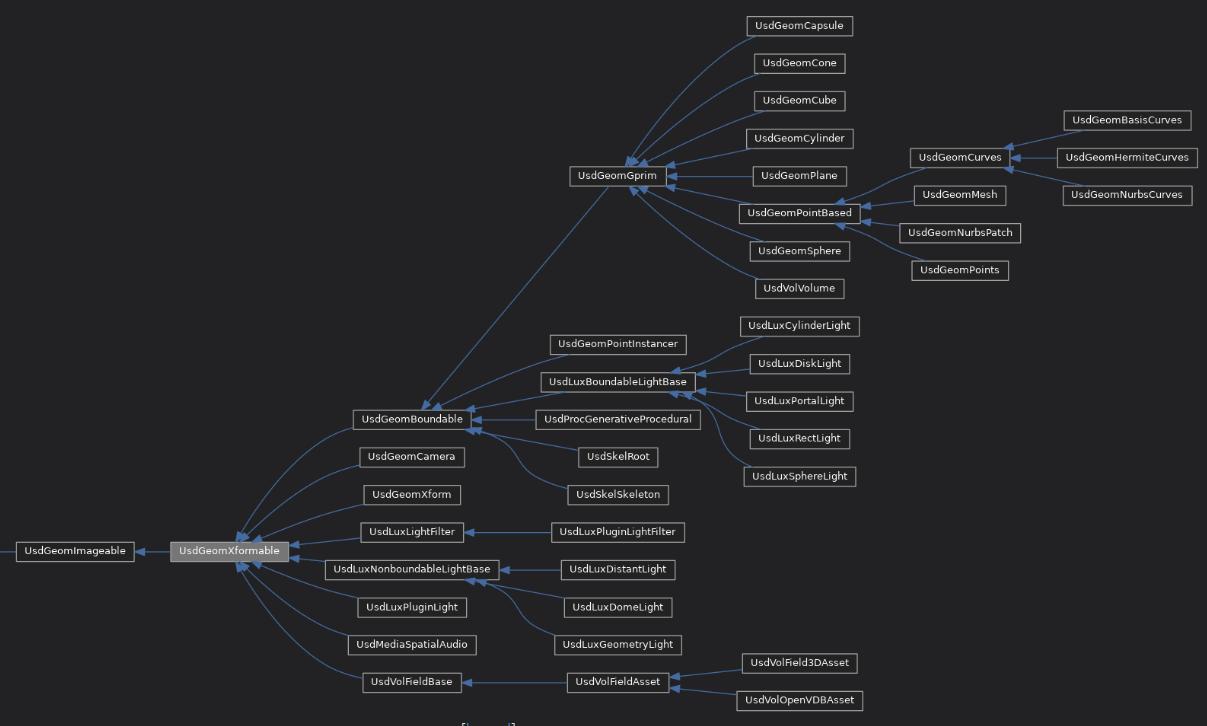
Transforms are encoded via the following naming scheme and attributes:
- xformOpOrder: This (non-animatable) attribute controls what xformOp: namespaced attributes affect the prims local space transform.
- xfromOp:: Xform ops are namespaced with this namespace and can be considered by the "xformOpOrder" attribute.
- We can add any number of xform ops to xformable prims.
- Any xform op can be suffixed with a custom name, e.g. xformOp:translate:myCoolTranslate
- Available xform Ops are:
- xformOp:translate
- xformOp:orient
- xformOp:rotateXYZ, xformOp:rotateXZY, xformOp:rotateYXZ, xformOp:rotateYZX, xformOp:rotateZXY, xformOp:rotateZYX
- xformOp:rotateX, xformOp:rotateY, xformOp:rotateZ
- xformOp:scale
- xformOp:transform
The final world transform is computed based on a prims local transform and that of all its ancestors.
## Xformable Class
# This is class is a wrapper around creating attributes that start with "xformOp".
# When we run one of its "Add<XformOpName>Op" methods, it automatically adds
# it to the "xformOpOrder" attribute. This attribute controls, what attributes
# contribute to the xform of a prim.
# Has: 'TransformMightBeTimeVarying',
# Get: 'GetOrderedXformOps',  'GetXformOpOrderAttr', 'GetResetXformStack',
# Add: 'AddTranslateOp', 'AddOrientOp', 'AddRotate<XYZ>op', 'AddScaleOp', 'AddTransformOp', 'AddXformOp',
# Set: 'CreateXformOpOrderAttr', 'SetXformOpOrder', 'SetResetXformStack', 'MakeMatrixXform',
# Clear: 'ClearXformOpOrder',
## For querying we can use the following. For large queries we should resort to UsdGeom.XformCache/UsdGeom.BBoxCache
# Get Xform: 'GetLocalTransformation', 'ComputeLocalToWorldTransform', 'ComputeParentToWorldTransform',
# Get Bounds: 'ComputeLocalBound', 'ComputeUntransformedBound', 'ComputeWorldBound',
import math
from pxr import Gf,  Sdf, Usd, UsdGeom
stage = Usd.Stage.CreateInMemory()
root_prim_path = Sdf.Path("/root")
root_prim = stage.DefinePrim(root_prim_path, "Xform")
cone_prim_path = Sdf.Path("/root/cone")
cone_prim = stage.DefinePrim(cone_prim_path, "Cone")

# Set local transform of leaf prim
cone_xformable = UsdGeom.Xformable(cone_prim)
cone_translate_op = cone_xformable.AddTranslateOp(opSuffix="upAndDown")
cone_rotate_op = cone_xformable.AddRotateXYZOp(opSuffix= "spinMeRound")
for frame in range(1, 100):
    cone_translate_op.Set(Gf.Vec3h([5, math.sin(frame * 0.1) * 3, 0]), frame)
    #cone_rotate_op.Set(Gf.Vec3h([0, frame * 5, 0]), frame)
# By clearing the xformOpOrder attribute, we keep the transforms, but don't apply it.
cone_xformOpOrder_attr = cone_xformable.GetXformOpOrderAttr()
cone_xformOpOrder_value = cone_xformOpOrder_attr.Get()
#cone_xformable.ClearXformOpOrder()
# Reverse the transform order
#cone_xformOpOrder_attr.Set(cone_xformOpOrder_value[::-1])

# A transform is combined with its parent prims' transforms
root_xformable = UsdGeom.Xformable(root_prim)
root_translate_op = root_xformable.AddTranslateOp(opSuffix="upAndDown")
root_rotate_op = root_xformable.AddRotateZOp(opSuffix= "spinMeRound")
for frame in range(1, 100):
    # root_translate_op.Set(Gf.Vec3h([5, math.sin(frame * 0.5), 0]), frame)
    root_rotate_op.Set(frame * 15, frame)
Here is the snippet in action:
Ignoring parent transforms by resetting the xform stack
We can also set the special '!resetXformStack!' value in our "xformOpOrder" attribute to reset the transform stack. This means all parent transforms will be ignored, as well as any attribute before the '!resetXformStack!' in the xformOp order list.
Resetting the xform stack is often not the right way to go, as we loose any parent hierarchy updates. We also have to make sure that we write our reset-ed xform with the correct sub-frame time samples, so that motion blur works correctly.
This should only be used as a last resort to enforce a prim to have a specific transform. We should rather re-write leaf prim xform in local space, see Merging hierarchy transforms for more info.
import math
from pxr import Gf,  Sdf, Usd, UsdGeom
stage = Usd.Stage.CreateInMemory()
root_prim_path = Sdf.Path("/root")
root_prim = stage.DefinePrim(root_prim_path, "Xform")
cone_prim_path = Sdf.Path("/root/cone")
cone_prim = stage.DefinePrim(cone_prim_path, "Cone")
# Set local transform of leaf prim
cone_xformable = UsdGeom.Xformable(cone_prim)
cone_translate_op = cone_xformable.AddTranslateOp(opSuffix="upAndDown")
for frame in range(1, 100):
    cone_translate_op.Set(Gf.Vec3h([5, math.sin(frame * 0.1) * 3, 0]), frame)
# A transform is combined with its parent prims' transforms
root_xformable = UsdGeom.Xformable(root_prim)
root_rotate_op = root_xformable.AddRotateZOp(opSuffix= "spinMeRound")
for frame in range(1, 100):
    root_rotate_op.Set(frame * 15, frame)
# If we only want the local stack transform, we can add the special
# '!resetXformStack!' attribute to our xformOpOrder attribute.
# We can add it anywhere in the list, any xformOps before it and on ancestor prims
# will be ignored.
cone_xformable.SetResetXformStack(True)
Querying transforms
We can query xforms via UsdGeom.Xformable API or via the UsdGeom.XformCache cache.
The preferred way should always be the xform cache, as it re-uses ancestor xforms in its cache, when querying nested xforms. Only when querying a single leaf transform, we should go with the Xformable API.
import math
from pxr import Gf,  Sdf, Usd, UsdGeom
stage = Usd.Stage.CreateInMemory()
root_prim_path = Sdf.Path("/root")
root_prim = stage.DefinePrim(root_prim_path, "Xform")
cone_prim_path = Sdf.Path("/root/cone")
cone_prim = stage.DefinePrim(cone_prim_path, "Cone")
# Set local transform of leaf prim
cone_xformable = UsdGeom.Xformable(cone_prim)
cone_translate_op = cone_xformable.AddTranslateOp(opSuffix="upAndDown")
for frame in range(1, 100):
    cone_translate_op.Set(Gf.Vec3h([5, math.sin(frame * 0.1) * 3, 0]), frame)
# A transform is combined with its parent prims' transforms
root_xformable = UsdGeom.Xformable(root_prim)
root_rotate_op = root_xformable.AddRotateZOp(opSuffix= "spinMeRound")
for frame in range(1, 100):
    root_rotate_op.Set(frame * 15, frame)
# For single queries we can use the xformable API
print(cone_xformable.ComputeLocalToWorldTransform(Usd.TimeCode(15)))

## Xform Cache
# Get: 'GetTime', 'ComputeRelativeTransform', 'GetLocalToWorldTransform', 'GetLocalTransformation', 'GetParentToWorldTransform'
# Set: 'SetTime'
# Clear: 'Clear'
xform_cache = UsdGeom.XformCache(Usd.TimeCode(1))
for prim in stage.Traverse():
    print(xform_cache.GetLocalToWorldTransform(prim))
"""Returns:
( (0.9659258262890683, 0.25881904510252074, 0, 0), (-0.25881904510252074, 0.9659258262890683, 0, 0), (0, 0, 1, 0), (0, 0, 0, 1) )
( (0.9659258262890683, 0.25881904510252074, 0, 0), (-0.25881904510252074, 0.9659258262890683, 0, 0), (0, 0, 1, 0), (4.7520971567527654, 1.5834484942764433, 0, 1) )
"""
xform_cache = UsdGeom.XformCache(Usd.TimeCode(1))
for prim in stage.Traverse():
    print(xform_cache.GetLocalTransformation(prim))
"""Returns:
(Gf.Matrix4d(0.9659258262890683, 0.25881904510252074, 0.0, 0.0,
            -0.25881904510252074, 0.9659258262890683, 0.0, 0.0,
            0.0, 0.0, 1.0, 0.0,
            0.0, 0.0, 0.0, 1.0), False)
(Gf.Matrix4d(1.0, 0.0, 0.0, 0.0,
            0.0, 1.0, 0.0, 0.0,
            0.0, 0.0, 1.0, 0.0,
            5.0, 0.299560546875, 0.0, 1.0), False)
"""
Transforms in production
Let's have a look at some production related xform setups.
Merging hierarchy transforms
In production we often need to merge different layers with different transforms at different hierarchy levels. For example when we have a cache in world space and we want to merge it into an existing hierarchy.
Here's how we can achieve that (This example is a bit abstract, we'll add something more visual in the near future).
import math
from pxr import Gf,  Sdf, Usd, UsdGeom, UsdUtils

# Stage A: A car animated in world space
stage_a = Usd.Stage.CreateInMemory()
#stage_a = stage
car_prim_path = Sdf.Path("/set/stret/car")
car_prim = stage_a.DefinePrim(car_prim_path, "Xform")
car_body_prim_path = Sdf.Path("/set/stret/car/body/hull")
car_body_prim = stage_a.DefinePrim(car_body_prim_path, "Cube")
car_xformable = UsdGeom.Xformable(car_prim)
car_translate_op = car_xformable.AddTranslateOp(opSuffix="carDrivingDownStreet")
for frame in range(1, 100):
    car_translate_op.Set(Gf.Vec3h([frame, 0, 0]), frame)

# Stage A: A person animated in world space
stage_b = Usd.Stage.CreateInMemory()
#stage_b = stage
mike_prim_path = Sdf.Path("/set/stret/car/person/mike")
mike_prim = stage_b.DefinePrim(mike_prim_path, "Sphere")
mike_xformable = UsdGeom.Xformable(mike_prim)
mike_translate_op = mike_xformable.AddTranslateOp(opSuffix="mikeInWorldSpace")
mike_xform_op = mike_xformable.AddTransformOp(opSuffix="mikeInLocalSpace")
# Let's disable the transform op for now
mike_xformable.GetXformOpOrderAttr().Set([mike_translate_op.GetOpName()])
for frame in range(1, 100):
    mike_translate_op.Set(Gf.Vec3h([frame, 1, 0]), frame)

# How do we merge these?
stage_a_xform_cache = UsdGeom.XformCache(0)
stage_b_xform_cache = UsdGeom.XformCache(0)
for frame in range(1, 100):
    stage_a_xform_cache.SetTime(frame)
    car_xform = stage_a_xform_cache.GetLocalToWorldTransform(car_prim)
    stage_b_xform_cache.SetTime(frame)
    mike_xform = stage_b_xform_cache.GetLocalToWorldTransform(mike_prim)
    mike_xform = mike_xform * car_xform.GetInverse()
    mike_xform_op.Set(mike_xform, frame)
# Let's enable the transform op now and disable the translate op
mike_xformable.GetXformOpOrderAttr().Set([mike_xform_op.GetOpName()])
stage_c = Usd.Stage.CreateInMemory()

# Combine stages
stage_c = Usd.Stage.CreateInMemory()
layer_a = stage_a.GetRootLayer()
layer_b = stage_b.GetRootLayer()
UsdUtils.StitchLayers(layer_a, layer_b)
stage_c.GetEditTarget().GetLayer().TransferContent(layer_a)
Baking transforms for constraint like behavior
If we want a parent constraint like behavior, we have to bake down the transform to a single prim. We can then inherit/internal reference/specialize this xform to "parent constrain" something.
from pxr import Gf,  Sdf, Usd, UsdGeom
stage = Usd.Stage.CreateInMemory()

# Scene
car_prim_path = Sdf.Path("/set/stret/car")
car_prim = stage.DefinePrim(car_prim_path, "Xform")
car_body_prim_path = Sdf.Path("/set/stret/car/body/hull")
car_body_prim = stage.DefinePrim(car_body_prim_path, "Cube")
car_xformable = UsdGeom.Xformable(car_prim)
car_translate_op = car_xformable.AddTranslateOp(opSuffix="carDrivingDownStreet")
for frame in range(1, 100):
    car_translate_op.Set(Gf.Vec3h([frame, 0, 0]), frame)

# Constraint Targets
constraint_prim_path = Sdf.Path("/constraints/car")
constraint_prim = stage.DefinePrim(constraint_prim_path)
constraint_xformable = UsdGeom.Xformable(constraint_prim)
constraint_xformable.SetResetXformStack(True)
constraint_translate_op = constraint_xformable.AddTranslateOp(opSuffix="moveUp")
constraint_translate_op.Set(Gf.Vec3h([0,5,0]))
constraint_transform_op = constraint_xformable.AddTransformOp(opSuffix="constraint")
xform_cache = UsdGeom.XformCache(Usd.TimeCode(0))
for frame in range(1, 100):
    xform_cache.SetTime(Usd.TimeCode(frame))
    xform = xform_cache.GetLocalToWorldTransform(car_body_prim)
    constraint_transform_op.Set(xform, frame)

# Constrain
balloon_prim_path = Sdf.Path("/objects/balloon")
balloon_prim = stage.DefinePrim(balloon_prim_path, "Sphere")
balloon_prim.GetAttribute("radius").Set(2)
balloon_prim.GetReferences().AddInternalReference(constraint_prim_path)
Reading Xforms in Shaders
To read composed xforms in shaders, USD ships with the Coordinate Systems mechanism.
It allows us to add a relationship on prims, that targets to an xform prim. This xform can then be queried in shaders e.g. for projections or other transform related needs.
See these links for more information: UsdShade.CoordSys Houdini CoordSys in Shaders
Collections
Collections are USD's mechanism of storing a set of prim paths. We can nest/forward collections to other collections and relationships, which allows for powerful workflows. For example we can forward multiple collections to a light linking relationship or forwarding material binding relationships to a single collection on the asset root prim, which then in return forwards to the material prim.
Table of Contents
TL;DR - Metadata In-A-Nutshell
- Collections are encoded via a set of properties. A prim can store any number of collections.
collection:<collectionName>:includesrelationship: A list of targetSdf.Paths to include, we can als target other collections.collection:<collectionName>:excludesrelationship: A list of targetSdf.Paths to exclude. These must be below the include paths.collection:<collectionName>:expansionRuleattribute: Controls how collections are computed, either by runningincludes-excludes(modeexplicitOnly) or by expanding all child prims and then doingincludes-excludes(modeexpandPrims).
- Collections can link to other collections, which gives us a powerful mechanism of forwarding hierarchy structure information.
- Collections can easily be accessed and queried via the Usd.CollectionAPI. The query can be limited via USD filter predicates, e.g. to defined prims only.
- To help speed up collection creation, USD also ships with util functions:
- Collection creation:
UsdUtils.AuthorCollection(<collectionName>, prim, [<includePathList>], [<excludePathList>]) - Re-writing a collection to be as sparse as possible:
include_paths, exclude_paths = UsdUtils.ComputeCollectionIncludesAndExcludes(target_paths, stage)
- Collection creation:
What should I use it for?
We use collections for multiple things:
- Creating a group of target paths, that are of interest to other departments, e.g. mark prims that are useful for FX/layout/lighting selections (for example character vs. background). Another common thing to use them for is storing render layer selections, that then get applied in our final render USD file.
- Faster navigation of hierarchies by isolating to collections that interest us.
- As collections can contain other collections, they are a powerful mechanism of forwarding and aggregating selections.
Resources
Overview
Collections are made up of relationships and attributes:
collection:<collectionName>:includesrelationship: A list of targetSdf.Paths to include, we can als target other collections.collection:<collectionName>:excludesrelationship: A list of targetSdf.Paths to exclude. These must be below the include paths. Excluding another collection does not work.collection:<collectionName>:expansionRuleattribute: This controls how collections are expanded:explicitOnly: Do not expand to any child prims, instead just do an explicit diff between include and exclude paths. This is like a Pythonset().difference().expandPrims: Expand the include paths to all children and subtract the exclude paths.expandPrimsAndProperties: Same asexpandPrims, but expand properties too. (Not used by anything at the moment).
- (Optional)
collection:<collectionName>:includeRootattribute: When usingexpandPrims/expandPrimsAndPropertiesthis bool attribute enables the includes to target the/pseudo root prim.
Make sure that you write your collections as sparsely as possible, as otherwise they can take a long time to combine when stitching multiple files, when writing per frame USD files.
Creating & querying collections
We interact with them via the Usd.CollectionAPI class API Docs. The collection api is a multi-apply API schema, so we can add multiple collections to any prim.
Here are the UsdUtils.ComputeCollectionIncludesAndExcludes API docs.
# Usd.CollectionAPI.Apply(prim, collection_name)
# collection_api = Usd.CollectionAPI(prim, collection_nam)
# collection_query = collection_api.ComputeMembershipQuery()
### High Level ###
from pxr import Sdf, Usd, UsdUtils
stage = Usd.Stage.CreateInMemory()
bicycle_prim = stage.DefinePrim(Sdf.Path("/set/yard/biycle"), "Cube")
car_prim = stage.DefinePrim(Sdf.Path("/set/garage/car"), "Sphere")
tractor_prim = stage.DefinePrim(Sdf.Path("/set/garage/tractor"), "Cylinder")
helicopter_prim = stage.DefinePrim(Sdf.Path("/set/garage/helicopter"), "Cube")
boat_prim = stage.DefinePrim(Sdf.Path("/set/garage/boat"), "Cube")
set_prim = bicycle_prim.GetParent().GetParent()
set_prim.SetTypeName("Xform")
bicycle_prim.GetParent().SetTypeName("Xform")
car_prim.GetParent().SetTypeName("Xform")
# Create collection
collection_name = "vehicles"
collection_api = Usd.CollectionAPI.Apply(set_prim, collection_name)
collection_api.GetIncludesRel().AddTarget(set_prim.GetPath())
collection_api.GetExcludesRel().AddTarget(bicycle_prim.GetPath())
collection_api.GetExpansionRuleAttr().Set(Usd.Tokens.expandPrims)
print(Usd.CollectionAPI.GetAllCollections(set_prim)) # Returns: [Usd.CollectionAPI(Usd.Prim(</set>), 'vehicles')]
print(Usd.CollectionAPI.GetCollection(set_prim, "vehicles")) # Returns: Usd.CollectionAPI(Usd.Prim(</set>), 'vehicles')
collection_query = collection_api.ComputeMembershipQuery()
print(collection_api.ComputeIncludedPaths(collection_query, stage))
# Returns:
# [Sdf.Path('/set'), Sdf.Path('/set/garage'), Sdf.Path('/set/garage/boat'),
#  Sdf.Path('/set/garage/car'), Sdf.Path('/set/garage/helicopter'),
#  Sdf.Path('/set/garage/tractor'), Sdf.Path('/set/yard')]
# Set it to explicit only
collection_api.GetExpansionRuleAttr().Set(Usd.Tokens.explicitOnly)
collection_query = collection_api.ComputeMembershipQuery()
print(collection_api.ComputeIncludedPaths(collection_query, stage))
# Returns: [Sdf.Path('/set')]

# To help speed up collection creation, USD also ships with util functions:
# UsdUtils.AuthorCollection(<collectionName>, prim, [<includePathList>], [<excludePathList>])
collection_api = UsdUtils.AuthorCollection("two_wheels", set_prim, [set_prim.GetPath()], [car_prim.GetPath()])
collection_query = collection_api.ComputeMembershipQuery()
print(collection_api.ComputeIncludedPaths(collection_query, stage))
# Returns:
# [Sdf.Path('/set'), Sdf.Path('/set/garage'), Sdf.Path('/set/yard'), Sdf.Path('/set/yard/biycle')]
# UsdUtils.ComputeCollectionIncludesAndExcludes() gives us the possibility to author
# collections more sparse, that the include to exclude ratio is kept at an optimal size.
# The Python signature differs from the C++ signature:
"""
include_paths, exclude_paths = UsdUtils.ComputeCollectionIncludesAndExcludes(
    target_paths,
    stage,
    minInclusionRatio = 0.75,
    maxNumExcludesBelowInclude = 5,
	minIncludeExcludeCollectionSize = 3,
    pathsToIgnore = [] # This ignores paths from computation (this is not the exclude list)
)
"""
target_paths = [tractor_prim.GetPath(), car_prim.GetPath(), helicopter_prim.GetPrimPath()]
include_paths, exclude_paths = UsdUtils.ComputeCollectionIncludesAndExcludes(target_paths,stage, minInclusionRatio=.9)
print(include_paths, exclude_paths)
# Returns:
# [Sdf.Path('/set/garage/car'), Sdf.Path('/set/garage/tractor'), Sdf.Path('/set/garage/helicopter')] []
include_paths, exclude_paths = UsdUtils.ComputeCollectionIncludesAndExcludes(target_paths,stage, minInclusionRatio=.1)
print(include_paths, exclude_paths)
# Returns: [Sdf.Path('/set/garage')] [Sdf.Path('/set/garage/boat')]
# Create a collection from the result
collection_api = UsdUtils.AuthorCollection("optimized", set_prim, include_paths, exclude_paths)
Inverting a collection
When we want to isolate a certain part of the hierarchy (for example to pick what to render), a typical thing to do, is to give users a "render" collection which then gets applied by setting all prims not included to be inactive. Here is an example of how to iterate a stage by pruning (skipping the child traversal) and deactivating anything that is not in the specific collection.
This is very fast and "sparse" as we don't edit leaf prims, instead we find the highest parent and deactivate it, if no children are part of the target collection.
from pxr import Sdf, Usd, UsdUtils
stage = Usd.Stage.CreateInMemory()
# Create hierarchy
prim_paths = [
    "/set/yard/biycle",
    "/set/yard/shed/shovel",
    "/set/yard/shed/flower_pot",
    "/set/yard/shed/lawnmower",
    "/set/yard/shed/soil",
    "/set/yard/shed/wood",
    "/set/garage/car",
    "/set/garage/tractor",
    "/set/garage/helicopter",
    "/set/garage/boat",
    "/set/garage/key_box",
    "/set/garage/key_box/red",
    "/set/garage/key_box/blue",
    "/set/garage/key_box/green",
    "/set/people/mike",
    "/set/people/charolotte"
]
for prim_path in prim_paths:
    prim = stage.DefinePrim(prim_path, "Cube")
print("<< hierarchy >>")
for prim in stage.Traverse():
    print(prim.GetPath())
    parent_prim = prim.GetParent()
    while True:
        if parent_prim.IsPseudoRoot():
            break
        parent_prim.SetTypeName("Xform")
        parent_prim = parent_prim.GetParent()
# Returns:
"""
<< hierarchy >>
/HoudiniLayerInfo
/set
/set/yard
/set/yard/biycle
/set/yard/shed
/set/yard/shed/shovel
/set/yard/shed/flower_pot
/set/yard/shed/lawnmower
/set/yard/shed/soil
/set/yard/shed/wood
/set/garage
/set/garage/car
/set/garage/tractor
/set/garage/helicopter
/set/garage/boat
/set/garage/key_box
/set/garage/key_box/red
/set/garage/key_box/blue
/set/garage/key_box/green
/set/people
/set/people/mike
/set/people/charolotte
"""
# Collections
collection_prim = stage.DefinePrim("/collections")
storage_include_prim_paths = ["/set/garage/key_box", "/set/yard/shed"]
storage_exclude_prim_paths = ["/set/yard/shed/flower_pot"]
collection_api = UsdUtils.AuthorCollection("storage", collection_prim, storage_include_prim_paths, storage_exclude_prim_paths)
collection_query = collection_api.ComputeMembershipQuery()
included_paths = collection_api.ComputeIncludedPaths(collection_query, stage)
# print(included_paths)
# Prune inverse:
print("<< hierarchy pruned >>")
iterator = iter(Usd.PrimRange(stage.GetPseudoRoot()))
for prim in iterator:
    if prim.IsPseudoRoot():
        continue
    if prim.GetPath() not in included_paths and not len(prim.GetAllChildrenNames()):
        iterator.PruneChildren()
        prim.SetActive(False)
    else:
        print(prim.GetPath())
# Returns:
"""
<< hierarchy pruned >>
/set
/set/yard
/set/yard/shed
/set/yard/shed/shovel
/set/yard/shed/lawnmower
/set/yard/shed/soil
/set/yard/shed/wood
/set/garage
/set/garage/key_box
/set/garage/key_box/red
/set/garage/key_box/blue
/set/garage/key_box/green
/set/people
"""
Notices/Event Listeners
Usd's event system is exposed via the Notice class. It can be used to subscribe to different stage events or custom events to get notified about changes.
A common case for using it with Python is sending update notifications to UIs.
TL;DR - Notice/Event Listeners In-A-Nutshell
- The event system is uni-directional: The listeners subscribe to senders, but can't send information back to the senders. The senders are also not aware of the listeners, senders just send the event and the event system distributes it to the senders.
- The listeners are called synchronously in a random order (per thread where the listener was created), so make sure your listeners action is fast or forwards its execution into a separate thread.
What should I use it for?
In production, the mose common use case you'll use the notification system for is changes in the stage. You can use these notifications to track user interaction and to trigger UI refreshes.
Resources
Notice code examples
Register/Revoke notice
from pxr import Tf, Usd
def callback(notice, sender):
    print(notice, sender)
# Add
# Global
listener = Tf.Notice.RegisterGlobally(Usd.Notice.StageContentsChanged, callback)
# Per Stage
listener = Tf.Notice.Register(Usd.Notice.StageContentsChanged, callback, stage)
# Remove
listener.Revoke()
Overview of built-in standard notices for stage change events
from pxr import Usd, Plug
# Generic (Do not send what stage they are from)
notice = Usd.Notice.StageContentsChanged
notice = Usd.Notice.StageEditTargetChanged
# Layer Muting
notice = Usd.Notice.LayerMutingChanged
# In the callback you can get the changed layers by calling:
# notice.GetMutedLayers()
# notice.GetUnmutedLayers()
# Object Changed
notice = Usd.Notice.ObjectsChanged
# In the callback you can get the following info by calling:
# notice.GetResyncedPaths()          # Changed Paths (Composition or Creation/Rename/Removal)
# notice.GetChangedInfoOnlyPaths()   # Attribute/Metadata value changes
# With these methods you can test if a Usd object
# (UsdObject==BaseClass for Prims/Properties/Metadata) has been affected.
# notice.AffectedObject(UsdObject) (Generic)
# notice.ResyncedObject(UsdObject) (Composition Change)
# notice.ChangedInfoOnly(UsdObject) (Value Change)
# notice.HasChangedFields(UsdObject/SdfPath)
# notice.GetChangedFields(UsdObject/SdfPath)
# Plugin registered
notice = Plug.Notice.DidRegisterPlugins
# notice.GetNewPlugins() # Get new plugins
If we run this on a simple example stage, we get the following results:
from pxr import Tf, Usd, Sdf

def ObjectsChanged_callback(notice, sender):
    stage = notice.GetStage()
    print("---")
    print(">", notice, sender)
    print(">> (notice.GetResyncedPaths) - Updated paths", notice.GetResyncedPaths())
    print(">> (notice.GetChangedInfoOnlyPaths) - Attribute/Metadata value changes", notice.GetChangedInfoOnlyPaths())

    prim = stage.GetPrimAtPath("/bicycle")
    if prim:
        # Check if a specific UsdObject was affected
        print(">> (notice.AffectedObject) - Something changed for", prim.GetPath(), notice.AffectedObject(prim))
        print(">> (notice.ResyncedObject) - Updated path for", prim.GetPath(), notice.ResyncedObject(prim))
        print(">> (notice.ChangedInfoOnly) - Attribute/Metadata ChangedInfoOnly", prim.GetPath(), notice.ChangedInfoOnly(prim))
        print(">> (notice.HasChangedFields) - Attribute/Metadata HasChanges", prim.GetPath(), notice.HasChangedFields(prim))
        print(">> (notice.GetChangedFields) - Attribute/Metadata ChangedFields", prim.GetPath(), notice.GetChangedFields(prim))

    attr = stage.GetAttributeAtPath("/bicycle.tire:size")
    if attr:
        # Check if a specific UsdObject was affected
        print(">> (notice.AffectedObject) - Something changed for", attr.GetPath(), notice.AffectedObject(attr))
        print(">> (notice.ResyncedObject) - Updated path for", attr.GetPath(), notice.ResyncedObject(attr))
        print(">> (notice.ChangedInfoOnly) - Attribute/Metadata ChangedInfoOnly", attr.GetPath(), notice.ChangedInfoOnly(attr))
        print(">> (notice.HasChangedFields) - Attribute/Metadata HasChanges", attr.GetPath(), notice.HasChangedFields(attr))
        print(">> (notice.GetChangedFields) - Attribute/Metadata ChangedFields", attr.GetPath(), notice.GetChangedFields(attr))

# Add
listener = Tf.Notice.RegisterGlobally(Usd.Notice.ObjectsChanged, ObjectsChanged_callback)
# Edit
stage = Usd.Stage.CreateInMemory()
# Create Prim
prim = stage.DefinePrim("/bicycle")
# Results:
# >> <pxr.Usd.ObjectsChanged object at 0x7f071d58e820> Usd.Stage.Open(rootLayer=Sdf.Find('anon:0x7f06927ccc00:tmp.usda'), sessionLayer=Sdf.Find('anon:0x7f06927cdb00:tmp-session.usda'))
# >> (notice.GetResyncedPaths) - Updated paths [Sdf.Path('/bicycle')]
# >> (notice.GetChangedInfoOnlyPaths) - Attribute/Metadata value changes []
# >> (notice.AffectedObject) - Something changed for /bicycle True
# >> (notice.ResyncedObject) - Updated path for /bicycle True
# >> (notice.ChangedInfoOnly) - Attribute/Metadata ChangedFieldsOnly /bicycle False
# >> (notice.HasChangedFields) - Attribute/Metadata HasChanges /bicycle True
# >> (notice.GetChangedFields) - Attribute/Metadata ChangedFields /bicycle ['specifier']
# Create Attribute
attr = prim.CreateAttribute("tire:size", Sdf.ValueTypeNames.Float)
# Results:
# >> <pxr.Usd.ObjectsChanged object at 0x7f071d58e820> Usd.Stage.Open(rootLayer=Sdf.Find('anon:0x7f06927ccc00:tmp.usda'), sessionLayer=Sdf.Find('anon:0x7f06927cdb00:tmp-session.usda'))
# >> (notice.GetResyncedPaths) - Updated paths [Sdf.Path('/bicycle.tire:size')]
# >> (notice.GetChangedInfoOnlyPaths) - Attribute/Metadata value changes []
# >> (notice.AffectedObject) - Something changed for /bicycle False
# >> (notice.ResyncedObject) - Updated path for /bicycle False
# >> (notice.ChangedInfoOnly) - Attribute/Metadata ChangedInfoOnly /bicycle False
# >> (notice.HasChangedFields) - Attribute/Metadata HasChanges /bicycle False
# >> (notice.GetChangedFields) - Attribute/Metadata ChangedFields /bicycle []
# >> (notice.AffectedObject) - Something changed for /bicycle.tire:size True
# >> (notice.ResyncedObject) - Updated path for /bicycle.tire:size True
# >> (notice.ChangedInfoOnly) - Attribute/Metadata ChangedInfoOnly /bicycle.tire:size False
# >> (notice.HasChangedFields) - Attribute/Metadata HasChanges /bicycle.tire:size True
# >> (notice.GetChangedFields) - Attribute/Metadata ChangedFields /bicycle.tire:size ['custom']
# Remove
listener.Revoke()
Plugin Register Notice
The plugin system sends a notice whenever a new plugin was registered.
from pxr import Tf, Usd, Plug

def DidRegisterPlugins_callback(notice):
    print(notice, notice.GetNewPlugins())

listener = Tf.Notice.RegisterGlobally(Plug.Notice.DidRegisterPlugins, DidRegisterPlugins_callback)
listener.Revoke()
Setup a custom notice:
from pxr import Tf, Usd
# Create notice callback
def callback(notice, sender):
    print(notice, sender)
# Create a new notice type
class CustomNotice(Tf.Notice):
    '''My custom notice'''
# Get fully qualified domain name
CustomNotice_FQN = "{}.{}".format(CustomNotice.__module__, CustomNotice.__name__)
# Register notice
# Important: If you overwrite the CustomNotice Class in the same Python session
# (for example when running this snippet twice in a DCC Python session), you
# cannot send anymore notifications as the defined type will have lost the pointer
# to the class, but you can't re-define it because of how the type definition works.
if not Tf.Type.FindByName(CustomNotice_FQN):
    Tf.Type.Define(CustomNotice)
# Register notice listeners
# Globally
listener = Tf.Notice.RegisterGlobally(CustomNotice, callback)
# For a specific stage
sender = Usd.Stage.CreateInMemory()
listener = Tf.Notice.Register(CustomNotice, callback, sender)
# Send notice
CustomNotice().SendGlobally()
CustomNotice().Send(sender)
# Remove listener
listener.Revoke()
Standalone Utilities
Usd ships with a small set of commandline utilities. Below you find a short summary of the most important ones:
TL;DR - Commandline Utilites In-A-Nutshell
The following are a must have for anyone using Usd in production:
- usdmanager: Your go-to Usd ascii editing app
- usdview: Your go-to standalone Usd 3d viewing/debugging app
- TheGrill/Grill: A Usd View plugin to view composition arcs
Resources
- Commandline Utilities
- External Tools:
- usdmanager: A Usd ascii editing app
- TheGrill/Grill: A Usd View plugin to view composition arcs
Overview
The most notable ones are:
- usdstitch: Combine multiple files into a single file. This combines the data, with the first file getting the highest strength and so forth. A typical use case is when you are exporting a layer per frame from a DCC and then need to combine it to a single file.
- usdstitchclips: Create a file that links to multiple files for a certain time range (for example per frame). Unlike 'usdstitch' this does not combine the data, instead it creates a file (and few sidecar files to increase data lookup performance) that has a mapping what file to load per frame/a certain time range.
- usddiff: Opens the diff editor of your choice with the difference between two .usd files. This is super useful to debug for example render .usd files with huge hierarchies, where a visual 3d diff is to expensive or where looking for a specific attribute would take to long, because you don't know where to start.
- usdGenSchema: This commandline tool helps us generate our own schemas (Usd speak for classes) without having to code them ourselves in C++. Head over to our schema section for a hands on example.
- usdrecord: A simple hydra to OpenGL proof of concept implementation. If you are interested in the the high level render API, this is good starting point to get a simple overview.
- usdview: A 3d viewer for Usd stages. If you are interested in the high level render API of Usd/Hydra, feel free to dive into the source code, as the Usd View exposes 99% of the functionality of the high level api. It is a great 'example' to learn and a good starting point if you want to integrate it into your apps with a handful of Qt widgets ready to use.
Most of these tools actually are small python scripts, so you can dive in and inspect them!
There are also a few very useful tools from external vendors:
- usdmanager: A Usd text editor from DreamWorksAnimation that allows you to interactively browse your Usd files. This is a must have of anyone using Usd!
- TheGrill/Grill: A super useful Usd View plugin that allows you to visualize the layer stack/composition arcs. A must have when trying to debug complicated value resolution issues. For a visual overview check out this link.
Composition (Combining layers)
Composition is the "art" of combining layers in USD. (Yes "art" as everyone does it a bit differently 😉)
Composition requires some base knowledge that we cover in our fundamentals section. You can also skip it, as it is a bit of a deep dive, but we highly recommend it, as the subsequent pages refer to it quite often.
- Composition Fundamentals: Here we cover the basic terminology and principles behind composition.
- Composition Arcs: Here we look at how to create composition arcs via code.
- Composition Strength Ordering (LIVRPS): Here we discuss each arc's usage and give tips and tricks on how to best utilize it in production.
- List Editable Ops: Here we look at list editable ops. These are used to give every arc a specific load order. We also take a look at other aspects of USD that use these.
- Inspecting Composition (Prim Cache Population (PCP)): Here we take a look at how to debug and inspect composition.
This is probably USD's most dreaded topic, as it is also the most complex. But don't worry, we'll start slow and explain everything with a lot of examples, so that you'll feel comfortable with the topic in no time!
Composition Fundamentals
In this section will talk about fundamental concepts that we need to know before we look at individual composition arcs.
As composition is USD's most complicated topic, this section will be enhanced with more examples in the future. If you detect an error or have useful production examples, please submit a ticket, so we can improve the guide!
Table of Contents
- Composition Fundamentals In-A-Nutshell
- Why should I understand the editing fundamentals?
- Resources
- Overview
- Terminology
- Composition Editing Principles - What do we need to know before we start?
TL;DR - Composition Fundamentals In-A-Nutshell
- Composition editing works in the active layer stack via list editable ops.
- When loading a layer (stack) from disk via
ReferenceandPayloadarcs, the contained composition structure is immutable (USD speak encapsulated). This means you can't remove the arcs within the loaded files. As for what the arcs can use for value resolution: TheInheritandSpecializearcs still target the "live" composed stage and therefore still reflect changes on top of the encapsulated arcs, while theReferencearc is limited to seeing the encapsulated layer stack.
Why should I understand the editing fundamentals?
This section houses terminology essentials and a detailed explanation of how the underlying mechanism of editing/composing arcs works. Some may consider it a deep dive topic, we'd recommend starting out with it first though, as it saves time later on when you don't understand why something might not work.
Resources
Overview
Before we start looking at the actual composition arcs and their strength ordering rules, let's first look at how composition editing works.
Terminology
USD's mechanism of linking different USD files with each other is called composition. Let's first clarify some terminology before we start, so that we are all on the same page:
- Opinion: A written value in a layer for a metadata field or property.
- Layer: A layer is an USD file on disk with prims & properties. (Technically it can also be in memory, but for simplicity on this page, let's think of it as a file on disk). More info in our layer section.
- Layer Stack: A stack of layers (Hehe 😉). We'll explain it more in detail below, just remember it is talking about all the loaded layers that use the
sublayercomposition arc. - Composition Arc: A method of linking (pointing to) another layer or another part of the scene hierarchy. USD has different kinds of composition arcs, each with a specific behavior.
- Prim Index: Once USD has processed all of our composition arcs, it builds a
prim indexthat tracks where values can come from. We can think of theprim indexas something that outputs an ordered list of[(<layer (stack)>, <hierarchy path>), (<layer (stack)>, <hierarchy path>)]ordered by the composition rules. - Composed Value: When looking up a value of a property, USD then checks each location of the
prim indexfor a value and moves on to the next one if it can't find one. If no value was found, it uses a schema fallback (if the property came from a schema), other wise it falls back to not having a value (USD speak: not beingauthored).
Composition is "easy" to explain in theory, but hard to master in production. It also a topic that keeps on giving and makes you question if you really understand USD. So don't worry if you don't fully understand the concepts of this page, they can take a long time to master. To be honest, it's one of those topics that you have to read yourself back into every time you plan on making larger changes to your pipeline.
We recommend really playing through as much scenarios as possible before you start using USD in production. Houdini is one of the best tools on the market that let's you easily concept and play around with composition. Therefore we will use it in our examples below.
Composition Editing Fundamentals - What do we need to know before we start?
Now before we talk about individual composition arcs, let's first focus on these different base principles composition runs on.
These principles build on each other, so make sure you work through them in order they are listed below.
List-Editable Operations (Ops)
USD has the concept of list editable operations. Instead of having a "flat" array ([Sdf.Path("/cube"), Sdf.Path("/sphere")]) that stores what files/hierarchy paths we want to point to, we have wrapper array class that stores multiple sub-arrays. When flattening the list op, USD removes duplicates, so that the end result is like an ordered Python set().
To make it even more confusing, composition arc list editable ops run on a different logic than "normal" list editable ops when looking at the final composed value.
We take a closer look at "normal" list editable ops in our List Editable Ops section, on this page we'll stay focused on the composition ones.
Alright, let's have a quick primer on how these work. There are three sub-classes for composition related list editable ops:
Sdf.ReferenceListOp: The list op for thereferencecomposition arc, storesSdf.Referenceobjects.Sdf.PayloadListOp: The list op for thepayloadcomposition arc, storesSdf.Referenceobjects.Sdf.PathListOp: The list op forinheritandspecializecomposition arcs, as these arcs target another part of the hierarchy (hencepath) and not a layer. It storesSdf.Pathobjects.
These are 100% identical in terms of list ordering functionality, the only difference is what items they can store (as noted above). Let's start of simple with looking at the basics:
from pxr import Sdf
# Sdf.ReferenceListOp, Sdf.PayloadListOp, Sdf.PathListOp,
path_list_op = Sdf.PathListOp()
# There are multiple sub-lists, which are just normal Python lists.
# 'prependedItems', 'appendedItems', 'deletedItems', 'explicitItems',
# Legacy sub-lists (do not use these anymore): 'addedItems', 'orderedItems'
# Currently the way these are exposed to Python, you have to re-assign the list, instead of editing it in place.
# So this won't work:
path_list_op.prependedItems.append(Sdf.Path("/cube"))
path_list_op.appendedItems.append(Sdf.Path("/sphere"))
# Instead do this:
path_list_op.prependedItems = [Sdf.Path("/cube")]
path_list_op.appendedItems = [Sdf.Path("/sphere")]
# To clear the list op:
print(path_list_op) # Returns: SdfPathListOp(Prepended Items: [/cube], Appended Items: [/sphere])
path_list_op.Clear()
print(path_list_op) # Returns: SdfPathListOp()
# Repopulate via constructor
path_list_op = Sdf.PathListOp.Create(prependedItems = [Sdf.Path("/cube")], appendedItems = [Sdf.Path("/sphere")])
print(path_list_op) # Returns: SdfPathListOp(Prepended Items: [/cube], Appended Items: [/sphere])
# Add remove items
path_list_op.deletedItems = [Sdf.Path("/sphere")]
print(path_list_op) # Returns: SdfPathListOp(Deleted Items: [/sphere], Prepended Items: [/cube], Appended Items: [/sphere])
# Notice how it just stores lists, it doesn't actually apply them. We'll have a look at that next.

# In the high level API, all the function signatures that work on list-editable ops
# usually take a position kwarg which corresponds to what list to edit and the position (front/back)
Usd.ListPositionFrontOfAppendList
Usd.ListPositionBackOfAppendList
Usd.ListPositionFrontOfPrependList
Usd.ListPositionBackOfPrependList
# We cover how to use this is our 'Composition Arcs' section.
So far so good? Now let's look at how multiple of these list editable ops are combined. If you remember our layer section, each layer stores our prim specs and property specs. The composition list editable ops are stored as metadata on the prim specs. When USD composes the stage, it combines these and then starts building the composition based on the composed result of these metadata fields.
Let's mock how USD does this without layers:
from pxr import Sdf
### Merging basics ###
path_list_op_layer_top = Sdf.PathListOp.Create(deletedItems = [Sdf.Path("/cube")])
path_list_op_layer_middle = Sdf.PathListOp.Create(prependedItems = [Sdf.Path("/disc"), Sdf.Path("/cone")])
path_list_op_layer_bottom = Sdf.PathListOp.Create(prependedItems = [Sdf.Path("/cube")], appendedItems = [Sdf.Path("/cone"),Sdf.Path("/sphere")])

result = Sdf.PathListOp()
result = result.ApplyOperations(path_list_op_layer_top)
result = result.ApplyOperations(path_list_op_layer_middle)
result = result.ApplyOperations(path_list_op_layer_bottom)
# Notice how on merge it makes sure that each sublist does not have the values of the other sublists, just like a Python set()
print(result) # Returns: SdfPathListOp(Deleted Items: [/cube], Prepended Items: [/disc, /cone], Appended Items: [/sphere])
# Get the flattened result. This does not apply the deleteItems, only ApplyOperations does that.
print(result.GetAddedOrExplicitItems()) # Returns: [Sdf.Path('/disc'), Sdf.Path('/cone'), Sdf.Path('/sphere')]

### Deleted and added items ###
path_list_op_layer_top = Sdf.PathListOp.Create(appendedItems=[Sdf.Path("/disc"), Sdf.Path("/cube")])
path_list_op_layer_middle = Sdf.PathListOp.Create(deletedItems = [Sdf.Path("/cube")])
path_list_op_layer_bottom = Sdf.PathListOp.Create(prependedItems = [Sdf.Path("/cube")], appendedItems = [Sdf.Path("/sphere")])

result = Sdf.PathListOp()
result = result.ApplyOperations(path_list_op_layer_top)
result = result.ApplyOperations(path_list_op_layer_middle)
result = result.ApplyOperations(path_list_op_layer_bottom)
print(result) # Returns: SdfPathListOp(Appended Items: [/sphere, /disc, /cube])
# Since it now was in the explicit list, it got removed.

### Explicit mode ###
# There is also an "explicit" mode. This clears all previous values on merge and marks the list as explicit.
# Once explicit and can't be un-explicited. An explicit list is like a reset, it
# doesn't know anything about the previous values anymore. All lists that are merged
# after combine the result to be explicit.
path_list_op_layer_top = Sdf.PathListOp.Create(deletedItems = [Sdf.Path("/cube")])
path_list_op_layer_middle = Sdf.PathListOp.CreateExplicit([Sdf.Path("/disc")])
path_list_op_layer_bottom = Sdf.PathListOp.Create(prependedItems = [Sdf.Path("/cube")], appendedItems = [Sdf.Path("/sphere")])

result = Sdf.PathListOp()
result = result.ApplyOperations(path_list_op_layer_top)
result = result.ApplyOperations(path_list_op_layer_middle)
result = result.ApplyOperations(path_list_op_layer_bottom)
print(result, result.isExplicit) # Returns: SdfPathListOp(Explicit Items: [/disc]), True
# Notice how the deletedItems had no effect, as "/cube" is not in the explicit list.

path_list_op_layer_top = Sdf.PathListOp.Create(deletedItems = [Sdf.Path("/cube")])
path_list_op_layer_middle = Sdf.PathListOp.CreateExplicit([Sdf.Path("/disc"), Sdf.Path("/cube")])
path_list_op_layer_bottom = Sdf.PathListOp.Create(prependedItems = [Sdf.Path("/cube")], appendedItems = [Sdf.Path("/sphere")])

result = Sdf.PathListOp()
result = result.ApplyOperations(path_list_op_layer_top)
result = result.ApplyOperations(path_list_op_layer_middle)
result = result.ApplyOperations(path_list_op_layer_bottom)
print(result, result.isExplicit) # Returns: SdfPathListOp(Explicit Items: [/disc]), True
# Since it now was in the explicit list, it got removed.
When working with multiple layers, each layer can have list editable ops data in the composition metadata fields. It then gets merged, as mocked above. The result is a single flattened list, without duplicates, that then gets fed to the composition engine.
Here comes the fun part:
When looking at the metadata of a prim via UIs (USD View/Houdini) or getting it via the Usd.Prim.GetMetadata() method, you will only see the list editable op of the last layer that edited the metadata, NOT the composed result.
This is probably the most confusing part of USD in my opinion when first starting out. To inspect the full composition result, we actually have to consult the PCP cache or run a Usd.PrimCompositionQuery. There is another caveat though too, as you'll see in the next section: Composition is encapsulated. This means our edits to list editable ops only work in the active layer stack. More info below!
In Houdini the list editable ops are exposed on the reference node. The "Reference Operation" parm sets what sub-array (prepend,append,delete) to use, the "Pre-Operation" sets it to .Clear() in Clear Reference Edits in active layer mode and to .ClearAndMakeExplicit() in "Clear All References" mode.
Here is how Houdini (but also the USD view) displays the references metadata field with different layers, as this is how the stage sees it.
You can see, as soon as we have our reference list editable op on different layers, the metadata only show the top most layer. To inspect all the references that are being loaded, we therefore need to look at the layer stack (the "Scene Graph Layers" panel) or perform a compsition query.
Also a hint on terminology: In the USD docs/glossary the Reference arc often refers to all composition arcs other than sublayer, I guess this is a relic, as this was probably the first arc. That's why Houdini uses a similar terminology.
Encapsulation
When you start digging through the API docs, you'll read the word "encapsulation" a few times. Here is what it means and why it is crucial to understand.
To make USD composition fast and more understandable, the content of what is loaded from an external file via the Reference and Payload composition arcs, is composition locked or as USD calls it encapsulated. This means that you can't remove any of the composition arcs in the layer stack, that is being loaded, via the list editable ops deletedItems list or via the explicitItems.
The only way to get rid of a payload/reference is by putting it behind a variant in the first place and then changing the variant selection. This can have some unwanted side effects though. You can find a detailed explanation with an example here: USD FAQ - When can you delete a reference?
You might be wondering now, if encapsulation forces the content of Reference/Payload to be self contained, in the sense that the composition arcs within that file do not "look" outside the file. The answer is: It depends on the composition arc.
For Inherits and Specializes the arcs still evaluate relative to the composed scene. E.g. that means if you have an inherit somewhere in a referenced in layer stack, that inherit will still be live. So if you edit a property in the active stage, that gets inherited somewhere in the file, it will still propagate all the changes from the inherit source to all the inherit targets. The only thing that is "locked" is the composition arcs structure, not the way the composition arc evaluates. This extra "live" lookup has a performance penalty, so be careful with using Inherits and Specializes when nesting layers stacks via References and Payloads.
For Internal References this does not work though. They can only see the encapsulated layer stack and not the "live" composed stage. This makes composition faster for internal references.
We show some interactive examples in Houdini in our LIVRPS section, as this is hard to describe in words.
Layer Stack
What is the layer stack, that we keep mentioning, you might ask yourself? To quote from the USD Glossary
The ordered set of layers resulting from the recursive gathering of all SubLayers of a Layer, plus the layer itself as first and strongest.
So to summarize, all (sub)-layers in the stage that were not loaded by Reference and Payload arcs.
Now you might be thinking, isn't that the same thing as when we open a Usd file via Usd.Stage.Open? Well kind of, yes. When opening a stage, the USD file you open and its sublayers are the layer stack. USD actually calls this the Root Layer Stack (it also includes the sessions layers). So one could say, editing a stage is process of editing a layer stack. To extend that analogy, we could call a stage, that was written to disk and is being loaded via Reference and Payload arcs, an encapsulated layer stack.
These are the important things to understand (as also mentioned in the glossary):
- Composition arcs target the layer stack, not individual layers. They recursively target the composed result (aka the result of all layers combined via the composition arc rules) of each layer they load in.
- We can only list edit composition arcs via list editable ops in the active layer stack. The active layer stack is usually the active stage (unless when we "hack" around it via edit targets, which you 99% of the time don't do).
So to make it clear again (as this is very important when we setup our asset/shot composition structure): We can only update Reference and Payload arcs in the active layer stack. Once the active layer stack has been loaded via Reference and Payload arcs into another layer stack, it is encapsulated and we can't change the composition structure.
This means to keep our pipeline flexible, we usually have "only" three kind of layer stacks:
- Asset Layer Stack: When building assets, we build a packaged asset element. The end result is a (nested) layer stack that loads in different aspects of the asset (model/materials/fx/etc.). Here the main "asset.usd" file, that at the end we reference into our shots, is in control of "final" asset layer stack. We usually don't have any encapsulation issue scenarios, as the different assets layers are usually self contained or our asset composition structure is usually developed to sidestep encapsulation problems via variants.
- Shot Layer Stack: The shot layer stack is the one that sublayers in all of your different shot layers that come from different departments. That's right, since we sublayer everything, we still have access to list editable ops on everything that is loaded in via composition arcs that are generated in individual shot layers. This keeps the shot pipeline flexible, as we don't run into the encapsulation problem.
- Set/Environment/Assembly Layer Stack (Optional): We can also reference in multiple assets to an assembly type of asset, that then gets referenced into our shots. This is where you might run into encapsulation problems. For example, if we want to remove a reference from the set from our shot stage, we can't as it is baked into the composition structure. The usual way around it is to: 1. Write the assembly with variants, so we can variant away unwanted assets. 2. Deactivate the asset reference 3. Write the asset reference with variants and then switch to a variant that is empty.
Edit Target
To sum up edit targets in once sentence:
A edit target defines, what layer all calls in the high level API should write to.
Let's take a look what that means:
An edit target's job is to map from one namespace to another, we mainly use them for writing to layers in the active layer stack (though we could target any layer) and to write variants, as these are written "inline" and therefore need an extra name space injection.
Setting the edit target is done on the stage, as this is our "controller" of layers in the high level API:
stage.SetEditTarget(layer)
# We can also explicitly create the edit target:
# Or
stage.SetEditTarget(Usd.EditTarget(layer))
# Or
stage.SetEditTarget(stage.GetEditTargetForLocalLayer(layer))
# These all have the same effect.
from pxr import Sdf, Usd
## Standard way of using edit targets
stage = Usd.Stage.CreateInMemory()
root_layer = stage.GetRootLayer()
a_layer = Sdf.Layer.CreateAnonymous("LayerA")
b_layer = Sdf.Layer.CreateAnonymous("LayerB")
root_layer.subLayerPaths.append(a_layer.identifier)
root_layer.subLayerPaths.append(b_layer.identifier)
# Direct edits to different layers
stage.SetEditTarget(Usd.EditTarget(a_layer))
bicycle_prim = stage.DefinePrim(Sdf.Path("/bicycle"), "Xform")
stage.SetEditTarget(Usd.EditTarget(b_layer))
car_prim = stage.DefinePrim(Sdf.Path("/car"), "Xform")
print(b_layer.ExportToString())
"""Returns:
#sdf 1.4.32
def Xform "car"
{
}
"""
## Reference/Payload Edit Targets
asset_stage = Usd.Stage.CreateInMemory()
cube_prim = asset_stage.DefinePrim(Sdf.Path("/root/RENDER/cube"), "Xform")
asset_layer = asset_stage.GetRootLayer()
shot_stage = Usd.Stage.CreateInMemory()
car_prim = shot_stage.DefinePrim(Sdf.Path("/set/garage/car"), "Xform")
car_prim.GetReferences().AddReference(asset_layer.identifier, Sdf.Path("/root"), Sdf.LayerOffset(10))
# We can't construct edit targets to layers that are not sublayers in the active layer stack.
# Is this a bug? According to the docs https://openusd.org/dev/api/class_usd_edit_target.html it should work.
# shot_stage.SetEditTarget(Usd.EditTarget(asset_layer))
## Variant Edit Targets
from pxr import Sdf, Usd
stage = Usd.Stage.CreateInMemory()
bicycle_prim_path = Sdf.Path("/bicycle")
bicycle_prim = stage.DefinePrim(bicycle_prim_path, "Xform")
variant_sets_api = bicycle_prim.GetVariantSets()
variant_set_api = variant_sets_api.AddVariantSet("color", position=Usd.ListPositionBackOfPrependList)
variant_set_api.AddVariant("colorA")
variant_set_api.SetVariantSelection("colorA")
with variant_set_api.GetVariantEditContext():
    # Anything we write in this edit target context, goes into the variant.
    cube_prim_path = bicycle_prim_path.AppendChild("cube")
    cube_prim = stage.DefinePrim(cube_prim_path, "Cube")
print(stage.GetEditTarget().GetLayer().ExportToString())
"""Returns:
#usda 1.0

def Xform "bicycle" (
    variants = {
        string color = "colorA"
    }
    prepend variantSets = "color"
)
{
    variantSet "color" = {
        "colorA" {
            def Cube "cube"
            {
            }

        }
    }
}
"""
For convenience, USD also offers a context manager for variants, so that we don't have to revert to the previous edit target once we are done:
from pxr import Sdf, Usd
stage = Usd.Stage.CreateInMemory()
root_layer = stage.GetRootLayer()
a_layer = Sdf.Layer.CreateAnonymous("LayerA")
b_layer = Sdf.Layer.CreateAnonymous("LayerB")
root_layer.subLayerPaths.append(a_layer.identifier)
root_layer.subLayerPaths.append(b_layer.identifier)
# Set edit target to a_layer
stage.SetEditTarget(a_layer)
bicycle_prim_path = Sdf.Path("/bicycle")
bicycle_prim = stage.DefinePrim(bicycle_prim_path, "Xform")
edit_target = Usd.EditTarget(b_layer)
with Usd.EditContext(stage, edit_target):
    print("Edit Target Layer:", stage.GetEditTarget().GetLayer()) # Edit Target Layer: Sdf.Find('anon:0x7ff9f4391580:LayerB')
    car_prim_path = Sdf.Path("/car")
    car_prim = stage.DefinePrim(car_prim_path, "Xform")
print("Edit Target Layer:", stage.GetEditTarget().GetLayer()) # Edit Target Layer: Sdf.Find('anon:0x7ff9f4391580:LayerA')
# Verify result
print(a_layer.ExportToString())
"""Returns:
#sdf 1.4.32
def Xform "bicycle"
{
}
"""
print(b_layer.ExportToString())
"""Returns:
#sdf 1.4.32
def Xform "car"
{
}
"""
Composition Arcs
In this section we'll cover how to create composition arcs via code. To check our how composition arcs interact with each other, check out our Composition Strength Ordering (LIVRPS) section.
Please read out fundamentals section as we often refer to it on this page.
Table of Contents
TL;DR - Composition Arcs In-A-Nutshell
- Creating composition arcs is straight forward, the high level API wraps the low level list editable ops with a thin wrappers. We can access the high level API via the
Usd.Prim.Get<ArcName>syntax. - Editing via the low level API is often just as easy, if not easier, especially when creating (nested) variants. The list editable ops can be set via
Sdf.PrimSpec.SetInfo(<arcType>, <listEditableOp>)or via the properties e.g.Sdf.PrimSpec.<arcType>List.
What should I use it for?
Resources
- Sdf.Layer
- Sdf.LayerOffset
- Sdf.<Arc>ListOp
- Usd.Inherits
- Usd.VariantSets
- Usd.VariantSet
- Usd.References
- Sdf.VariantSetSpec
- Sdf.VariantSpec
- Sdf.Reference
- Usd.Payloads
- Sdf.Reference
- Usd.Specializes
Overview
This section will focus on how to create each composition arc via the high and low level API.
Composition Arcs
All arcs that make use of list-editable ops, take of of these tokens as an optional position keyword argument via the high level API.
Usd.ListPositionFrontOfAppendList: Prepend to append list, the same asSdf.<Type>ListOp.appendedItems.insert(0, item)Usd.ListPositionBackOfAppendList: Append to append list, the same asSdf.<Type>ListOp.appendedItems.append(item)Usd.ListPositionFrontOfPrependList: Prepend to prepend list, the same asSdf.<Type>ListOp.appendedItems.insert(0, item)Usd.ListPositionBackOfPrependList: Append to prepend list, the same asSdf.<Type>ListOp.appendedItems.append(item)
As we can see, all arc APIs, except for sublayers, in the high level API, are thin wrappers around the list editable op of the arc.
Sublayers / Local Opinions
In our Composition Strength Ordering (LIVRPS) section we cover in detail, with production related examples, what the sublayer arc is used for.
# For sublayering we modify the .subLayerPaths attribute on a layer.
# This is the same for both the high and low level API.
### High Level & Low Level ###
from pxr import Sdf, Usd
stage = Usd.Stage.CreateInMemory()
# Layer onto root layer
layer_a = Sdf.Layer.CreateAnonymous()
layer_b = Sdf.Layer.CreateAnonymous()
root_layer = stage.GetRootLayer()
# Here we pass in the file paths (=layer identifiers).
root_layer.subLayerPaths.append(layer_a.identifier)
root_layer.subLayerPaths.append(layer_b.identifier)
# Once we have added the sublayers, we can also access their layer offsets:
print(root_layer.subLayerOffsets) # Returns: [Sdf.LayerOffset(), Sdf.LayerOffset()]
# Since layer offsets are read only copies, we need to assign a newly created
# layer offset if we want to modify them. We also can't replace the whole list, as
# it needs to keep a pointer to the array.
layer_offset_a = root_layer.subLayerOffsets[0]
root_layer.subLayerOffsets[0] = Sdf.LayerOffset(offset=layer_offset_a.offset + 10,
                                                scale=layer_offset_a.scale * 2)
layer_offset_b = root_layer.subLayerOffsets[1]
root_layer.subLayerOffsets[1] = Sdf.LayerOffset(offset=layer_offset_b.offset - 10,
                                                scale=layer_offset_b.scale * 0.5)
print(root_layer.subLayerOffsets) # Returns: [Sdf.LayerOffset(10, 2), Sdf.LayerOffset(-10, 0.5)]

# If we want to sublayer on the active layer, we just add it there.
layer_c = Sdf.Layer.CreateAnonymous()
active_layer = stage.GetEditTarget().GetLayer()
active_layer.subLayerPaths.append(layer_c.identifier)
When working in Houdini, we can't directly sublayer onto the root layer as with native USD, due to Houdini's layer caching mechanism, that makes node based stage editing possible. Layering on the active layer works as usual though.
### High Level & Low Level ###
import loputils
from pxr import Sdf
# Hou LOP Node https://www.sidefx.com/docs/houdini/hom/hou/LopNode.html
# See $HFS/houdini/python3.9libs/loputils.py
"""
def createPythonLayer(node, savepath=None):
    # Tag the layer as "LOP" so we know it was created by LOPs.
    layer = Sdf.Layer.CreateAnonymous('LOP')
    # Add a Houdini Layer Info prim where we can put the save path.
    p = Sdf.CreatePrimInLayer(layer, '/HoudiniLayerInfo')
    p.specifier = Sdf.SpecifierDef
    p.typeName = 'HoudiniLayerInfo'/stage/list_editable_ops/pythonscript6
    if savepath:
        p.customData['HoudiniSavePath'] = hou.text.expandString(savepath)
        p.customData['HoudiniSaveControl'] = 'Explicit'
    # Let everyone know what node created this layer.
    p.customData['HoudiniCreatorNode'] = node.sessionId()
    p.customData['HoudiniEditorNodes'] = Vt.IntArray([node.sessionId()])
    node.addHeldLayer(layer.identifier)
    return layer
"""
# Sublayer onto root layer via Python LOP node
node = hou.pwd()
stage = node.editableStage()
layer = loputils.createPythonLayer(node, '$HIP/myfile.usda')
node.addSubLayer(layer.identifier)
# This doesn't seem to work at the moment, as Houdini does some custom root layer handeling
# print(root_layer.subLayerPaths) # Our added layer does not show up. So we have to use the `sublayer` node.
# root_layer = stage.GetRootLayer()
# root_layer.subLayerOffsets[0] = Sdf.LayerOffset(offset=10, scale=1)

# Sublayer onto active layer via Python LOP node, here we can do the usual.
node = hou.pwd()
layer = node.editableLayer()
layer_a = loputils.createPythonLayer(node, '$HIP/myfile.usda')
layer.subLayerPaths.append(layer_a.identifier)
layer.subLayerOffsets[0] = Sdf.LayerOffset(offset=10, scale=1)

# Since layers are automatically garbage collected once they go out of scope,
# we can tag them to keep them persistently in memory for the active session.
layer_b = Sdf.Layer.CreateAnonymous()
node.addHeldLayer(layer_b.identifier)
# This can then be re-used via the standard anywhere in Houdini.
layer_b = Sdf.Layer.FindOrOpen(layer_b.identifier)
Here is the result:

Value Clips
In our Composition Strength Ordering (LIVRPS) section we cover in detail, with production related examples, what value clips are used for.
We cover value clips in our animation section. Their opinion strength is lower than direct (sublayer) opinions, but higher than anything else.
The write them via metadata entries as covered here in our value clips section.
Inherits
In our Composition Strength Ordering (LIVRPS) section we cover in detail, with production related examples, what the inherit arc is used for.
Inherits, like specializes, don't have a object representation, they directly edit the list-editable op list.
### High Level ###
from pxr import Sdf, Usd
stage = Usd.Stage.CreateInMemory()
bicycle_prim_path = Sdf.Path("/bicycle")
bicycle_prim = stage.DefinePrim(bicycle_prim_path)
cube_prim_path = Sdf.Path("/cube")
cube_prim = stage.DefinePrim(cube_prim_path, "Cube")
inherits_api = bicycle_prim.GetInherits()
inherits_api.AddInherit(cube_prim_path, position=Usd.ListPositionFrontOfAppendList)
# inherits_api.SetInherits() # Clears the list editable ops and authors an Sdf.PathListOp.CreateExplicit([])
# inherits_api.RemoveInherit(cube_prim_path)
# inherits_api.ClearInherits() # Sdf.PathListOp.Clear()
# inherits_api.GetAllDirectInherits() # Returns all inherits generated in the active layer stack
### Low Level ###
from pxr import Sdf
layer = Sdf.Layer.CreateAnonymous()
bicycle_prim_path = Sdf.Path("/bicycle")
bicycle_prim_spec = Sdf.CreatePrimInLayer(layer, bicycle_prim_path)
bicycle_prim_spec.specifier = Sdf.SpecifierDef
cube_prim_path = Sdf.Path("/cube")
cube_prim_spec = Sdf.CreatePrimInLayer(layer, cube_prim_path)
cube_prim_spec.specifier = Sdf.SpecifierDef
cube_prim_spec.typeName = "Cube"
bicycle_prim_spec.inheritPathList.appendedItems = [cube_prim_path]
Variants
In our Composition Strength Ordering (LIVRPS) section we cover in detail, with production related examples, what the variant arc is used for.
Variant sets (the variant set->variant name mapping) are also managed via list editable ops.
The actual variant set data is not though. It is written "in-line" into the prim spec via the Sdf.VariantSetSpec/Sdf.VariantSpec specs, so that's why we have dedicated specs.
This means we can add variant data, but hide it by not adding the variant set name to the variantSetsmetadata.
For example here we added it:
def Xform "car" (
    variants = {
        string color = "colorA"
    }
    prepend variantSets = "color"
)
{
    variantSet "color" = {
        "colorA" {
            def Cube "cube"
            {
            }
        }
        "colorB" {
            def Sphere "sphere"
            {
            }
        }
    }
}
Here we skipped it, by commenting out the:
car_prim_spec.SetInfo("variantSetNames", Sdf.StringListOp.Create(prependedItems=["color"])) line in the below code.
This will make it not appear in UIs for variant selections.
def Xform "car" (
    variants = {
        string color = "colorA"
    }
)
{
    variantSet "color" = {
        "colorA" {
            def Cube "cube"
            {
            }
        }
        "colorB" {
            def Sphere "sphere"
            {
            }
        }
    }
}
### High Level ###
from pxr import Sdf, Usd
stage = Usd.Stage.CreateInMemory()

bicycle_prim_path = Sdf.Path("/bicycle")
bicycle_prim = stage.DefinePrim(bicycle_prim_path, "Xform")
## Methods of Usd.VariantSets
# Has: 'HasVariantSet'
# Get: 'GetNames', 'GetVariantSet', 'GetVariantSelection', 'GetAllVariantSelections'
# Set: 'AddVariantSet', 'SetSelection'
variant_sets_api = bicycle_prim.GetVariantSets()
## Methods of Usd.VariantSet
# Has: 'HasAuthoredVariant', 'HasAuthoredVariantSelection'
# Get: 'GetName', 'GetVariantNames', 'GetVariantSelection', 'GetVariantEditContext', 'GetVariantEditTarget'
# Set: 'AddVariant', 'SetVariantSelection'
# Clear: 'BlockVariantSelection', 'ClearVariantSelection'
variant_set_api = variant_sets_api.AddVariantSet("color", position=Usd.ListPositionBackOfPrependList)
variant_set_api.AddVariant("colorA")
# If we want to author on the selected variant, we have to select it first
variant_set_api.SetVariantSelection("colorA")
with variant_set_api.GetVariantEditContext():
    # Anything we write in the context, goes into the variant (prims and properties)
    cube_prim_path = bicycle_prim_path.AppendChild("cube")
    cube_prim = stage.DefinePrim(cube_prim_path, "Cube")
# We can also generate the edit target ourselves, but we still need to set the
# variant selection, seems like a bug. Changing variants is a heavy op ...
variant_set_api.AddVariant("colorB")
variant_set_api.SetVariantSelection("colorB")
variant_prim_path = bicycle_prim_path.AppendVariantSelection("color", "colorB")
layer = stage.GetEditTarget().GetLayer()
edit_target = Usd.EditTarget.ForLocalDirectVariant(layer, variant_prim_path)
# Or
edit_target = variant_set_api.GetVariantEditTarget()
edit_context = Usd.EditContext(stage, edit_target)
with edit_context as ctx:
    sphere_prim_path = bicycle_prim_path.AppendChild("sphere")
    sphere_prim = stage.DefinePrim("/bicycle/sphere", "Sphere")
### Low Level ###
from pxr import Sdf
layer = Sdf.Layer.CreateAnonymous()
bicycle_prim_path = Sdf.Path("/bicycle")
bicycle_prim_spec = Sdf.CreatePrimInLayer(layer, bicycle_prim_path)
bicycle_prim_spec.specifier = Sdf.SpecifierDef
bicycle_prim_spec.typeName = "Xform"
# Variants
cube_prim_path = bicycle_prim_path.AppendVariantSelection("color", "colorA").AppendChild("cube")
cube_prim_spec = Sdf.CreatePrimInLayer(layer, cube_prim_path)
cube_prim_spec.specifier = Sdf.SpecifierDef
cube_prim_spec.typeName = "Cube"
sphere_prim_path = bicycle_prim_path.AppendVariantSelection("color", "colorB").AppendChild("sphere")
sphere_prim_spec = Sdf.CreatePrimInLayer(layer, sphere_prim_path)
sphere_prim_spec.specifier = Sdf.SpecifierDef
sphere_prim_spec.typeName = "Sphere"
# Variant Selection
bicycle_prim_spec.variantSelections["color"] = "colorA"

# We can also author the variants via variant specs
layer = Sdf.Layer.CreateAnonymous()
car_prim_path = Sdf.Path("/car")
car_prim_spec = Sdf.CreatePrimInLayer(layer, car_prim_path)
car_prim_spec.specifier = Sdf.SpecifierDef
car_prim_spec.typeName = "Xform"
# Variants
variant_set_spec = Sdf.VariantSetSpec(car_prim_spec, "color")
variant_spec = Sdf.VariantSpec(variant_set_spec, "colorA")
cube_prim_spec = Sdf.PrimSpec(variant_spec.primSpec, "cube", Sdf.SpecifierDef)
cube_prim_spec.typeName = "Cube"
variant_spec = Sdf.VariantSpec(variant_set_spec, "colorB")
cube_prim_spec = Sdf.PrimSpec(variant_spec.primSpec, "sphere", Sdf.SpecifierDef)
cube_prim_spec.typeName = "Sphere"
# Ironically this does not setup the variant set names metadata, so we have to author it ourselves.
car_prim_spec.SetInfo("variantSetNames", Sdf.StringListOp.Create(prependedItems=["color"]))
# Variant Selection
car_prim_spec.variantSelections["color"] = "colorA"
When editing variants, we can also move layer content into a (nested) variant very easily via the Sdf.CopySpec command. This is a very powerful feature!
from pxr import Sdf
# Spawn other layer, this usually comes from other stages, that your DCC creates/owns.
some_other_layer = Sdf.Layer.CreateAnonymous()
root_prim_path = Sdf.Path("/root")
cube_prim_path = Sdf.Path("/root/cube")
cube_prim_spec = Sdf.CreatePrimInLayer(some_other_layer, cube_prim_path)
cube_prim_spec.specifier = Sdf.SpecifierDef
cube_prim_spec.typeName = "Cube"
# Create demo layer
bicycle_prim_path = Sdf.Path("/bicycle")
bicycle_prim_spec = Sdf.CreatePrimInLayer(layer, bicycle_prim_path)
bicycle_prim_spec.specifier = Sdf.SpecifierDef
bicycle_prim_spec.typeName = "Xform"
# Copy content into variant
variant_set_spec = Sdf.VariantSetSpec(bicycle_prim_spec, "color")
variant_spec = Sdf.VariantSpec(variant_set_spec, "colorA")
variant_prim_path = bicycle_prim_path.AppendVariantSelection("color", "colorA")
Sdf.CopySpec(some_other_layer, root_prim_path, layer, variant_prim_path)
# Variant selection
bicycle_prim_spec.SetInfo("variantSetNames", Sdf.StringListOp.Create(prependedItems=["color"]))
bicycle_prim_spec.variantSelections["color"] = "colorA"
Here is how we can created nested variant sets via the high level and low level API. As you can see it is quite a bit easier with the low level API.
### High Level ###
from pxr import Sdf, Usd
stage = Usd.Stage.CreateInMemory()

def variant_nested_edit_context(prim, variant_selections, position=Usd.ListPositionBackOfPrependList):
    """Author nested variants
    Args:
        prim (Usd.Prim): The prim to author on.
        variant_selections (list): A list of tuples with [('variant_set_name', 'variant_name')] data.
        position (Usd.ListPosition): The list position of the variant set.
    Returns:
        Usd.EditContext: An edit context manager.
    """

    if not variant_selections:
        raise Exception("No valid variant selections defined!")

    def _recursive_variant_context(prim, variant_selections, position):
        variant_sets_api = bicycle_prim.GetVariantSets()

        variant_selection = variant_selections.pop(-1)
        variant_set_name, variant_name = variant_selection

        variant_set_api = variant_sets_api.AddVariantSet(variant_set_name, position=position)
        variant_set_api.AddVariant(variant_name)
        # Be aware, this authors the selection in the variant
        # ToDo make this a context manager that cleans up the selection authoring.
        variant_set_api.SetVariantSelection(variant_name)

        if not variant_selections:
            return variant_set_api.GetVariantEditContext()
        else:
            with variant_set_api.GetVariantEditContext():
                return _recursive_variant_context(prim, variant_selections, position)

    variant_selections = variant_selections[::-1]
    return _recursive_variant_context(prim, variant_selections, position)

bicycle_prim_path = Sdf.Path("/bicycle")
bicycle_prim = stage.DefinePrim(bicycle_prim_path, "Xform")
# Variants
variant_selections = [("model", "old"), ("LOD", "lowRes")]
edit_context = variant_nested_edit_context(bicycle_prim, variant_selections)
with edit_context as ctx:
    sphere_prim_path = bicycle_prim_path.AppendChild("sphere")
    sphere_prim = stage.DefinePrim("/bicycle/sphere", "Sphere")
variant_selections = [("model", "old"), ("LOD", "highRes")]
edit_context = variant_nested_edit_context(bicycle_prim, variant_selections)
with edit_context as ctx:
    sphere_prim_path = bicycle_prim_path.AppendChild("cube")
    sphere_prim = stage.DefinePrim("/bicycle/cube", "Cube")
variant_selections = [("model", "new"), ("LOD", "lowRes")]
edit_context = variant_nested_edit_context(bicycle_prim, variant_selections)
with edit_context as ctx:
    sphere_prim_path = bicycle_prim_path.AppendChild("cylinder")
    sphere_prim = stage.DefinePrim("/bicycle/cube", "Cylinder")
# Variant selections
# Be sure to explicitly set the overall selection, otherwise if will derive from,
# the nested variant selections.
variant_sets_api = bicycle_prim.GetVariantSets()
variant_sets_api.SetSelection("model", "old")
variant_sets_api.SetSelection("LOD", "lowRes")

### Low Level ###
from pxr import Sdf
layer = Sdf.Layer.CreateAnonymous()
def variant_nested_prim_path(prim_path, variant_selections):
    variant_prim_path = prim_path
    for variant_set_name, variant_name in variant_selections:
        variant_prim_path = variant_prim_path.AppendVariantSelection(variant_set_name, variant_name)
    return variant_prim_path

def define_prim_spec(layer, prim_path, type_name):
    prim_spec = Sdf.CreatePrimInLayer(layer, prim_path)
    prim_spec.specifier = Sdf.SpecifierDef
    prim_spec.typeName = type_name

bicycle_prim_path = Sdf.Path("/bicycle")
bicycle_prim_spec = Sdf.CreatePrimInLayer(layer, bicycle_prim_path)
bicycle_prim_spec.specifier = Sdf.SpecifierDef
bicycle_prim_spec.typeName = "Xform"
# Variants
variant_selections = [("model", "old"), ("LOD", "lowRes")]
variant_prim_path = variant_nested_prim_path(bicycle_prim_path, variant_selections)
define_prim_spec(layer, variant_prim_path.AppendChild("sphere"), "Sphere")
variant_selections = [("model", "old"), ("LOD", "highRes")]
variant_prim_path = variant_nested_prim_path(bicycle_prim_path, variant_selections)
define_prim_spec(layer, variant_prim_path.AppendChild("cube"), "Cube")
variant_selections = [("model", "new"), ("LOD", "lowRes")]
variant_prim_path = variant_nested_prim_path(bicycle_prim_path, variant_selections)
define_prim_spec(layer, variant_prim_path.AppendChild("cylinder"), "Cylinder")
# Variant selections
# The low level API has the benefit of not setting variant selections
# in the nested variants.
bicycle_prim_spec.variantSelections["model"] = "old"
bicycle_prim_spec.variantSelections["LOD"] = "highRes"
References
In our Composition Strength Ordering (LIVRPS) section we cover in detail, with production related examples, what the reference arc is used for.
The Sdf.Reference class creates a read-only reference description object:
from pxr import Sdf
ref = Sdf.Reference("/file/path.usd", "/prim/path", Sdf.LayerOffset(offset=10, scale=1))
# The reference object is a read only instance.
print(ref.assetPath) # Returns: "/file/path.usd"
print(ref.primPath) # Returns: "/prim/path"
print(ref.layerOffset) # Returns: Sdf.LayerOffset(offset=10, scale=1)
try:
    ref.assetPath = "/some/other/file/path.usd"
except Exception:
    print("Read only Sdf.Reference!")
References File
Here is how we add external references (references that load data from other files):
### High Level ###
from pxr import Sdf, Usd
stage = Usd.Stage.CreateInMemory()
# Spawn temp layer
reference_layer = Sdf.Layer.CreateAnonymous("ReferenceExample")
reference_bicycle_prim_path = Sdf.Path("/bicycle")
reference_bicycle_prim_spec = Sdf.CreatePrimInLayer(reference_layer, reference_bicycle_prim_path)
reference_bicycle_prim_spec.specifier = Sdf.SpecifierDef
reference_bicycle_prim_spec.typeName = "Cube"
# Set the default prim to use when we specify no primpath. It can't be a prim path, it must be a root prim.
reference_layer.defaultPrim = reference_bicycle_prim_path.name
# Reference
reference_layer_offset = Sdf.LayerOffset(offset=10, scale=1)
reference = Sdf.Reference(reference_layer.identifier, reference_bicycle_prim_path, reference_layer_offset)
# Or: If we don't specify a prim, the default prim will get used, as set above
reference = Sdf.Reference(reference_layer.identifier, layerOffset=reference_layer_offset)
bicycle_prim_path = Sdf.Path("/bicycle")
bicycle_prim = stage.DefinePrim(bicycle_prim_path)
references_api = bicycle_prim.GetReferences()
references_api.AddReference(reference, position=Usd.ListPositionFrontOfAppendList)
# references_api.SetReferences() # Clears the list editable ops and authors an Sdf.ReferenceListOp.CreateExplicit([])
# references_api.RemoveReference(cube_prim_path)
# references_api.ClearReferences() # Sdf.ReferenceListOp.Clear()
### Low Level ###
from pxr import Sdf
# Spawn temp layer
reference_layer = Sdf.Layer.CreateAnonymous("ReferenceExample")
reference_bicycle_prim_path = Sdf.Path("/bicycle")
reference_bicycle_prim_spec = Sdf.CreatePrimInLayer(reference_layer, reference_bicycle_prim_path)
reference_bicycle_prim_spec.specifier = Sdf.SpecifierDef
reference_bicycle_prim_spec.typeName = "Cube"
reference_layer.defaultPrim = reference_bicycle_prim_path.name
# In Houdini add, otherwise the layer will be garbage collected.
# node.addHeldLayer(reference_layer.identifier)
# Reference
layer = Sdf.Layer.CreateAnonymous()
bicycle_prim_path = Sdf.Path("/bicycle")
bicycle_prim_spec = Sdf.CreatePrimInLayer(layer, bicycle_prim_path)
bicycle_prim_spec.specifier = Sdf.SpecifierDef
reference_layer_offset = Sdf.LayerOffset(offset=10, scale=1)
reference = Sdf.Reference(reference_layer.identifier, reference_bicycle_prim_path, reference_layer_offset)
# Or: If we don't specify a prim, the default prim will get used, as set above
reference = Sdf.Reference(reference_layer.identifier, layerOffset=reference_layer_offset)
bicycle_prim_spec.referenceList.appendedItems = [reference]
References Internal
Here is how we add internal references (references that load data from another part of the hierarchy) :
### High Level ###
from pxr import Sdf, Usd
stage = Usd.Stage.CreateInMemory()
# Spawn hierarchy
cube_prim_path = Sdf.Path("/cube")
cube_prim = stage.DefinePrim(cube_prim_path, "Cube")
bicycle_prim_path = Sdf.Path("/bicycle")
bicycle_prim = stage.DefinePrim(bicycle_prim_path)
# Reference
reference_layer_offset = Sdf.LayerOffset(offset=10, scale=1)
reference = Sdf.Reference("", cube_prim_path, reference_layer_offset)
references_api = bicycle_prim.GetReferences()
references_api.AddReference(reference, position=Usd.ListPositionFrontOfAppendList)
# Or:
references_api.AddInternalReference(cube_prim_path, reference_layer_offset, position=Usd.ListPositionFrontOfAppendList)
### Low Level ###
from pxr import Sdf
# Spawn hierarchy
layer = Sdf.Layer.CreateAnonymous()
cube_prim_path = Sdf.Path("/cube")
cube_prim_spec = Sdf.CreatePrimInLayer(layer, cube_prim_path)
cube_prim_spec.specifier = Sdf.SpecifierDef
cube_prim_spec.typeName = "Cube"
bicycle_prim_path = Sdf.Path("/bicycle")
bicycle_prim_spec = Sdf.CreatePrimInLayer(layer, bicycle_prim_path)
bicycle_prim_spec.specifier = Sdf.SpecifierDef
# Reference
reference_layer_offset = Sdf.LayerOffset(offset=10, scale=1)
reference = Sdf.Reference("", cube_prim_path, reference_layer_offset)
bicycle_prim_spec.referenceList.appendedItems = [reference]
Payloads
In our Composition Strength Ordering (LIVRPS) section we cover in detail, with production related examples, what the payload arc is used for.
The Sdf.Payload class creates a read-only payload description object:
from pxr import Sdf
payload = Sdf.Payload("/file/path.usd", "/prim/path", Sdf.LayerOffset(offset=10, scale=1))
# The reference object is a read only instance.
print(payload.assetPath) # Returns: "/file/path.usd"
print(payload.primPath) # Returns: "/prim/path"
print(payload.layerOffset) # Returns: Sdf.LayerOffset(offset=10, scale=1)
try:
    payload.assetPath = "/some/other/file/path.usd"
except Exception:
    print("Read only Sdf.Payload!")
Here is how we add payloads. Payloads always load data from other files:
### High Level ###
from pxr import Sdf, Usd
stage = Usd.Stage.CreateInMemory()
# Spawn temp layer
payload_layer = Sdf.Layer.CreateAnonymous("PayloadExample")
payload_bicycle_prim_path = Sdf.Path("/bicycle")
payload_bicycle_prim_spec = Sdf.CreatePrimInLayer(payload_layer, payload_bicycle_prim_path)
payload_bicycle_prim_spec.specifier = Sdf.SpecifierDef
payload_bicycle_prim_spec.typeName = "Cube"
# Set the default prim to use when we specify no primpath. It can't be a prim path, it must be a root prim.
payload_layer.defaultPrim = payload_bicycle_prim_path.name
# Payload
payload_layer_offset = Sdf.LayerOffset(offset=10, scale=1)
payload = Sdf.Payload(payload_layer.identifier, payload_bicycle_prim_path, payload_layer_offset)
# Or: If we don't specify a prim, the default prim will get used, as set above
payload = Sdf.Payload(payload_layer.identifier, layerOffset=payload_layer_offset)
bicycle_prim_path = Sdf.Path("/bicycle")
bicycle_prim = stage.DefinePrim(bicycle_prim_path)
payloads_api = bicycle_prim.GetPayloads()
payloads_api.AddPayload(payload, position=Usd.ListPositionFrontOfAppendList)
# payloads_api.SetPayloads() # Clears the list editable ops and authors an Sdf.PayloadListOp.CreateExplicit([])
# payloads_api.RemovePayload(cube_prim_path)
# payloads_api.ClearPayloads() # Sdf.PayloadListOp.Clear()
### Low Level ###
from pxr import Sdf
# Spawn temp layer
payload_layer = Sdf.Layer.CreateAnonymous("PayLoadExample")
payload_bicycle_prim_path = Sdf.Path("/bicycle")
payload_bicycle_prim_spec = Sdf.CreatePrimInLayer(payload_layer, payload_bicycle_prim_path)
payload_bicycle_prim_spec.specifier = Sdf.SpecifierDef
payload_bicycle_prim_spec.typeName = "Cube"
payload_layer.defaultPrim = payload_bicycle_prim_path.name
# In Houdini add, otherwise the layer will be garbage collected.
# node.addHeldLayer(payload_layer.identifier)
# Payload
layer = Sdf.Layer.CreateAnonymous()
bicycle_prim_path = Sdf.Path("/bicycle")
bicycle_prim_spec = Sdf.CreatePrimInLayer(layer, bicycle_prim_path)
bicycle_prim_spec.specifier = Sdf.SpecifierDef
payload_layer_offset = Sdf.LayerOffset(offset=10, scale=1)
payload = Sdf.Payload(payload_layer.identifier, payload_bicycle_prim_path, payload_layer_offset)
# Or: If we don't specify a prim, the default prim will get used, as set above
payload = Sdf.Payload(payload_layer.identifier, layerOffset=payload_layer_offset)
bicycle_prim_spec.payloadList.appendedItems = [payload]
Specializes
In our Composition Strength Ordering (LIVRPS) section we cover in detail, with production related examples, what the specialize arc is used for.
Specializes, like inherits, don't have a object representation, they directly edit the list-editable op list.
### High Level ###
from pxr import Sdf, Usd
stage = Usd.Stage.CreateInMemory()
bicycle_prim_path = Sdf.Path("/bicycle")
bicycle_prim = stage.DefinePrim(bicycle_prim_path)
cube_prim_path = Sdf.Path("/cube")
cube_prim = stage.DefinePrim(cube_prim_path, "Cube")
specializes_api = bicycle_prim.GetSpecializes()
specializes_api.AddSpecialize(cube_prim_path, position=Usd.ListPositionFrontOfAppendList)
# inherits_api.SetSpecializes() # Clears the list editable ops and authors an Sdf.PathListOp.CreateExplicit([])
# inherits_api.RemoveSpecialize(cube_prim_path)
# inherits_api.ClearSpecializes() # Sdf.PathListOp.Clear()
### Low Level ###
from pxr import Sdf
layer = Sdf.Layer.CreateAnonymous()
bicycle_prim_path = Sdf.Path("/bicycle")
bicycle_prim_spec = Sdf.CreatePrimInLayer(layer, bicycle_prim_path)
bicycle_prim_spec.specifier = Sdf.SpecifierDef
cube_prim_path = Sdf.Path("/cube")
cube_prim_spec = Sdf.CreatePrimInLayer(layer, cube_prim_path)
cube_prim_spec.specifier = Sdf.SpecifierDef
cube_prim_spec.typeName = "Cube"
bicycle_prim_spec.specializesList.appendedItems = [cube_prim_path]
Composition Strength Ordering (LIVRPS)
In this section we'll cover how composition arcs work and interact with each other. We cover how to create composition arcs via code in our composition arcs section. This section will also have code examples, but with the focus on practical usage instead of API structure.
We have a supplementary Houdini scene, that you can follow along with, available in this site's repository. All the examples below will walk through this file as it easier to prototype and showcase arcs in Houdini via nodes, than writing it all in code.
Table of Contents
- Composition Strength Ordering In-A-Nutshell
- What should I use it for?
- Resources
- Overview
- Composition Strength Ordering
- Composition Arc Categories
- Composition Arcs
- Instancing in USD
TL;DR - Composition Arcs In-A-Nutshell
Here are the arcs in their composition strength order and their main intent:
- Local Opinions/Sublayers**: The sublayer arc is used to build up your stage root layer stack. They can be time offset/scaled via a Sdf.LayerOffset, see our code examples.
- Inherits: The inherit arc is used to add overrides to existing (instanceable) prims. The typical use case is to apply an edit to a bunch of referenced in assets that were loaded as instanceable without losing instance-ability and without increasing the prototype count. It does not support adding a time offset via Sdf.LayerOffset.
- Variants: The variant arc is used to allow users to switch through different variations of sub-hierarchies. It does not support adding any time offsets via Sdf.LayerOffsets.
- References: The reference arc is one of the most used arcs. Its main purpose is to aggregate scene description data from other files or sub-hierarchies. It is the only arc that has both file loading and internal hierarchy linking/loading possibilities. It does support adding time offsets via Sdf.LayerOffsets.
- Payloads: The payload arc is also one of the most used arcs. Its main purpose is to load heavy data. This means it is the arc that you'll use when loading any type of renderable geometry. It does support adding time offsets via Sdf.LayerOffsets.
- Specializes: The specialize arc is used to supply "template" like values to your prim hierarchy. Any other arc can then overrides these. If we update the "template", all overrides from other arcs are kept. It does not support adding a time offset via Sdf.LayerOffset.
- (F) allback value: If no value is found, schemas can provide fallback values.
This is a very nuanced topic, therefore we recommend working through this section to fully understand it.
What should I use it for?
We'll be using composition arcs to load data from different files and hierarchy locations. This is the core mechanism that makes USD powerful, as we can layer/combine our layers in meaningful ways.
For USD to be able to scale well, we can also "lock" the composition on prims with the same arcs, so that they can use the same data source. This allows us to create instances, which keep our memory footprint low.
Resources
- USD Glossary - LIVRPS Composition Strength Ordering
- USD Glossary - Direct Opinions
- USD Glossary - Inherits
- USD Glossary - Variants
- USD Glossary - References
- USD Glossary - Payloads
- USD Glossary - Specializes
- USD Instancing
Overview
USD's composition arcs each fulfill a different purpose. As we can attach attach all arcs (except sublayers) to any part of the hierarchy other than the pseudo root prim. When loading our data, we have a pre-defined load order of how arcs prioritize against each other. Each prim (and property) in our hierarchy then gets resolved (see our Inspecting Compositon section) based on this order rule set and the outcome is a (or multiple) value sources, that answer data queries into our hierarchy.
All arcs, except the sublayer arc, target (load) a specific prim of a layer stack (NOT layer). This allows us to rename the prim, where the arc is created on, to something different, than what the arc's source hierarchy prim is named. An essential task that USD performs for us, is mapping paths from the target layer to the source layer (stack).
- Composition arcs target layer stacks, not individual layers. This just means that they recursively load what is in a layer.
- When arcs target a non root prim, they do not receive parent data that usually "flows" down the hierarchy. This means that primvars, material bindings or transforms from ancestor prims do not get "inherited" (we don't mean the inherited arc here). They do see the composition result though. So for example if your file reference targets a prim inside a variant, it can't change the variant as the variant is not in the stage it was referenced into to.
- Internal composition arcs (inherit/internal references/specialize) cannot target ancestor or child arcs. We can only target sibling prims or prims that are at/under a different "/" stage root prim.
- Composition arcs only look in the active layer stack and in "higher" layer stacks (layer stacks that reference/payload the active layer stack).
Composition Strength Ordering
To prioritize how different arcs evaluate against each other, we have composition strength ordering. This is a fancy word for "what layer (file) provides the actual value for my prim/property/metadata based on all available composition arcs". (I think we'll stick to using composition strength ordering 😉).
All arcs, except sublayers, make use of list editing, see our fundamentals for a detailed explanation. We highly recommend reading it first before continuing.
Let's look at the order:

All credits for this info graphic go to Remedy-Entertainment - Book Of USD. Check out their site, it is another great value source for USD.
USD refers to this with the acronym L(V)IVRPS(F):
- Local: Search for direct opinions in the active root layer stack.
- Value Clips: Search for direct opinions from value clips. These are weaker than direct opinions on layers.
- Inherits: Search for inherits affecting the path. This searches in the (nested) layer stack by recursively applying LIVRP (No specializes) evaluation.
- Variant Sets: Search for variants affecting the path. This searches in the (nested) layer stack by recursively applying LIVRP (No specializes) evaluation.
- References: Search for references affecting the path. This searches in the (nested) layer stack by recursively applying LIVRP (No specializes) evaluation.
- Payloads: Search for payloads affecting the path. This searches in the (nested) layer stack by recursively applying LIVRP (No specializes) evaluation.
- Specializes: Search for payloads affecting the path. This searches in the (nested) layer stack by recursively applying full LIVRPS evaluation. This causes the specialize opinions to always be last.
- (F) allback value: Look for schema fallbacks.
Now if you just didn't understand any of that, don't worry! We'll have a look where what arc is typically used in the examples below.
When resolving nested composition arcs and value clips, the arc/value clip metadata, that is authored on the closest ancestor parent prim or the prim itself, wins. In short to quote from the USD glossary “ancestral arcs” are weaker than “direct arcs”. To make our lives easier, we recommend having predefined locations where you author composition arcs. A typical location is your asset root prim and a set/assembly root prim.
Composition Arc Categories
Let's try looking at arcs from a use case perspective. Depending on what we want to achieve, we usually end up with a specific arc designed to fill our needs.
Composition Arc By Use Case
Here is a comparison between arcs by use case. Note that this is only a very "rough" overview, there are a few more things to pay attention to when picking the correct arc. It does help to first understand what the different arcs try to achieve though.
flowchart LR
    userRoot(["I want to load"])
    userExternal(["a file (with a time offset/scale)"])
    userExternalWholeLayer(["with the whole content (that is light weight and links to other files)"])
    userExternalHierarchyInLayer(["with only a specific part of its hierarchy (to a specific path in the stage)"])
    userExternalHierarchyInLayerHeavyData(["thats contains a lot of heavy data"])
    userExternalHierarchyInLayerLightData(["thats contains light weight data"])
    userInternal(["an existing sub-hierarchy in the active layer stack/stage"])
    userInternalTimeOffset(["into a new hierarchy location (with a time offset/scale)"])
    userInternalOverride(["to add overrides to multiple (instanced) prims"])
    userInternalBaseValues(["to act as the base-line values that can be overriden by higher layers and arcs"])
    userInternalVariation(["as a variation of the hierarchy"])

    compositionArcSublayer(["Sublayer"])
    compositionArcInherit(["Inherit"])
    compositionArcVariant(["Variant"])
    compositionArcReferenceFile(["Reference"])
    compositionArcReferenceInternal(["Reference"])
    compositionArcPayload(["Payload"])
    compositionArcSpecialize(["Specialize"])
    style compositionArcSublayer fill:#63beff
    style compositionArcInherit fill:#63beff
    style compositionArcVariant fill:#63beff
    style compositionArcReferenceFile fill:#63beff
    style compositionArcReferenceInternal fill:#63beff
    style compositionArcPayload fill:#63beff
    style compositionArcSpecialize fill:#63beff

    userRoot --> userExternal
    userExternal --> userExternalWholeLayer
    userExternal --> userExternalHierarchyInLayer
    userExternalWholeLayer --> compositionArcSublayer
    userExternalHierarchyInLayer --> userExternalHierarchyInLayerHeavyData
    userExternalHierarchyInLayer --> userExternalHierarchyInLayerLightData
    userExternalHierarchyInLayerLightData --> compositionArcReferenceFile
    userExternalHierarchyInLayerHeavyData --> compositionArcPayload
    userRoot --> userInternal
    userInternal --> userInternalTimeOffset
    userInternalTimeOffset --> compositionArcReferenceInternal
    userInternal --> userInternalOverride
    userInternalOverride --> compositionArcInherit
    userInternal --> userInternalBaseValues
    userInternalBaseValues --> compositionArcSpecialize
    userInternal --> userInternalVariation
    userInternalVariation --> compositionArcVariant
Composition Arc By Time Offset/Scale Capability
Some arcs can specify a time offset/scale via aSdf.LayerOffset.
flowchart LR
    userRoot(["I want to"])
    userRootTimeOffset(["time offset/scale my hierarchy (via a `Sdf.LayerOffset`)"])
    userRootNoTimeOffset(["not time offset/scale my hierarchy"])

    compositionArcSublayer(["Sublayer"])
    compositionArcInherit(["Inherit"])
    compositionArcVariant(["Variant"])
    compositionArcReference(["Reference (External/Internal)"])
    compositionArcPayload(["Payload"])
    compositionArcSpecialize(["Specialize"])
    style compositionArcSublayer fill:#63beff
    style compositionArcInherit fill:#63beff
    style compositionArcVariant fill:#63beff
    style compositionArcReference fill:#63beff
    style compositionArcPayload fill:#63beff
    style compositionArcSpecialize fill:#63beff

    userRoot --> userRootTimeOffset
    userRootTimeOffset --> compositionArcSublayer
    userRootTimeOffset --> compositionArcReference
    userRootTimeOffset --> compositionArcPayload
    userRoot --> userRootNoTimeOffset
    userRootNoTimeOffset --> compositionArcInherit
    userRootNoTimeOffset --> compositionArcVariant
    userRootNoTimeOffset --> compositionArcSpecialize
Composition Arc By Target Type (File/Hierarchy)
Here is a comparison between arcs that can target external layers (files) and arcs that target another part of the hierarchy.
flowchart TD
    compositionArcSublayer(["Sublayers (Direct Opinions)"])
    compositionArcValueClip(["Value Clips (Lower than Direct Opinions)"])
    compositionArcInherit(["Inherits"])
    compositionArcVariant(["Variants"])
    compositionArcReferenceFile(["References"])
    compositionArcReferenceInternal(["References"])
    compositionArcPayload(["Payloads"])
    compositionArcSpecialize(["Specialize"])
    compositionArcInternal(["Internal Arcs (Target Hierarchy)"])
    compositionArcExternal(["File Arcs (Target File (+ Hierarchy))"])
    style compositionArcSublayer fill:#63beff
    style compositionArcInherit fill:#63beff
    style compositionArcVariant fill:#63beff
    style compositionArcReferenceFile fill:#63beff
    style compositionArcReferenceInternal fill:#63beff
    style compositionArcPayload fill:#63beff
    style compositionArcSpecialize fill:#63beff

    compositionArcInternal --> compositionArcInherit
    compositionArcInternal --> compositionArcVariant
    compositionArcInternal --> compositionArcReferenceInternal
    compositionArcInternal --> compositionArcSpecialize
    compositionArcExternal --> compositionArcSublayer
    compositionArcExternal --> compositionArcReferenceFile
    compositionArcExternal --> compositionArcPayload
    compositionArcSublayer --> compositionArcValueClip
Composition Arcs
Let's gets practical! Below will go through every arc individually and highlight what is important.
We have a supplementary Houdini scene, that you can follow along with, available in this site's repository. All the examples below will walk through this file as it easier to prototype and showcase arcs in Houdini via nodes, than writing it all in code.
Sublayers / Local Direct Opinions
The sublayer arc is used to build up your stage root layer stack. They can be time offset/scaled via a Sdf.LayerOffset, see our code examples.
Typically we'll be using sublayers for mainly these things:
- As a mechanism to separate data when working in your DCCs. On file write we usually flatten layers to a single flattened output(s)(if you have multiple save paths set). Why not put everything on the same layer? We can use the layer order as a form of control to A. allow/block edits (or rather seeing them have an effect because of weaker opinion strength) B. Sort data from temporary data.
- To load in references and payloads. That way all the heavy lifting is not done (and should not be done) by the sublayer arc.
- In shot workflows to load different shot layers. Why don't we do this via references or payloads you might be asking yourself? As covered in our fundamentals section, anything your reference or payload in will be encapsulated. In shot workflows we want to keep having access to list editable ops. For example if we have a layout and a lighting layer, the lighting layer should still be able to remove a reference, that was created in the layout layer.
If you want to create/edit sublayer arcs via code, see our Composition Arc - Code API section.
Let's look at how sublayers are used in native USD:
When creating a stage we have two layers by default:
- Session Layer: This is a temp layer that doesn't get applied on disk save. Here we usually put things like viewport overrides.
- Root Layer: This is the base layer all edits target by default. We can add sublayers based on what we need to it. When calling
stage.Save(), all sublayers that are dirty and not anonymous, will be saved.
How are sublayers setup in Houdini?
In Houdini every node always edits the top most root layer sublayer (in USD speak the layer to edit is called the edit target). This way we don't have to worry about what our layer, we want to write to, is. In the scene graph panel the session layer is displayed under the root layer, it is actually over (higher) than the root layer.
To summarize how Houdini makes node editing a layer based system possible (at least from what we can gather from reverse engineering):
Every node stashes a copy of the top most layer (Houdini calls it the active layer), that way, when we switch from node to node, it transfers back the content as soon as it needs to be displayed/cooked. This does have a performance hit (as covered in our Houdini performance) section. It also spawns a new stage per node when necessary, for example when a python LOP node or python parm expression accesses the previous node's stage. This mechanism gives the user the control to spawn new layers when needed. By default your network is color coded by what the active layer is.
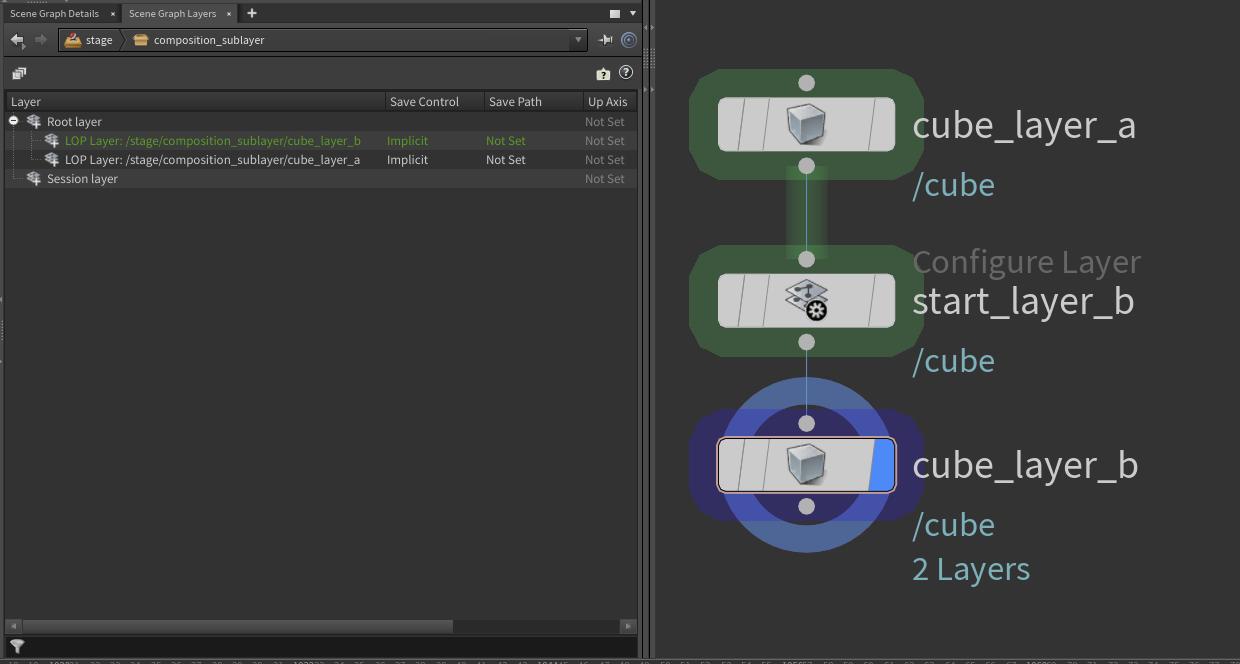
Houdini writes all your scene graph panel viewport overrides into session layer sublayers. By default these are not shown in the UI, you can view them by looking at the layer content though.
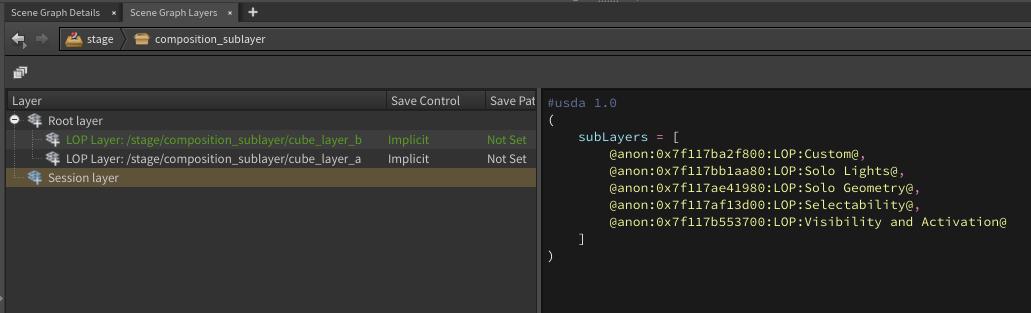
Instead of using layers non-anonymous save paths (layer identifiers) directly, all layers created in your session are anonymous layers (with Houdini specific metadata that tracks the save path). We're guessing that this is because all layers without a save path get merged into the next available layer with a save path on file save. If no layer has a save path, all content gets flattened into the layer file path you put on the USD rop.
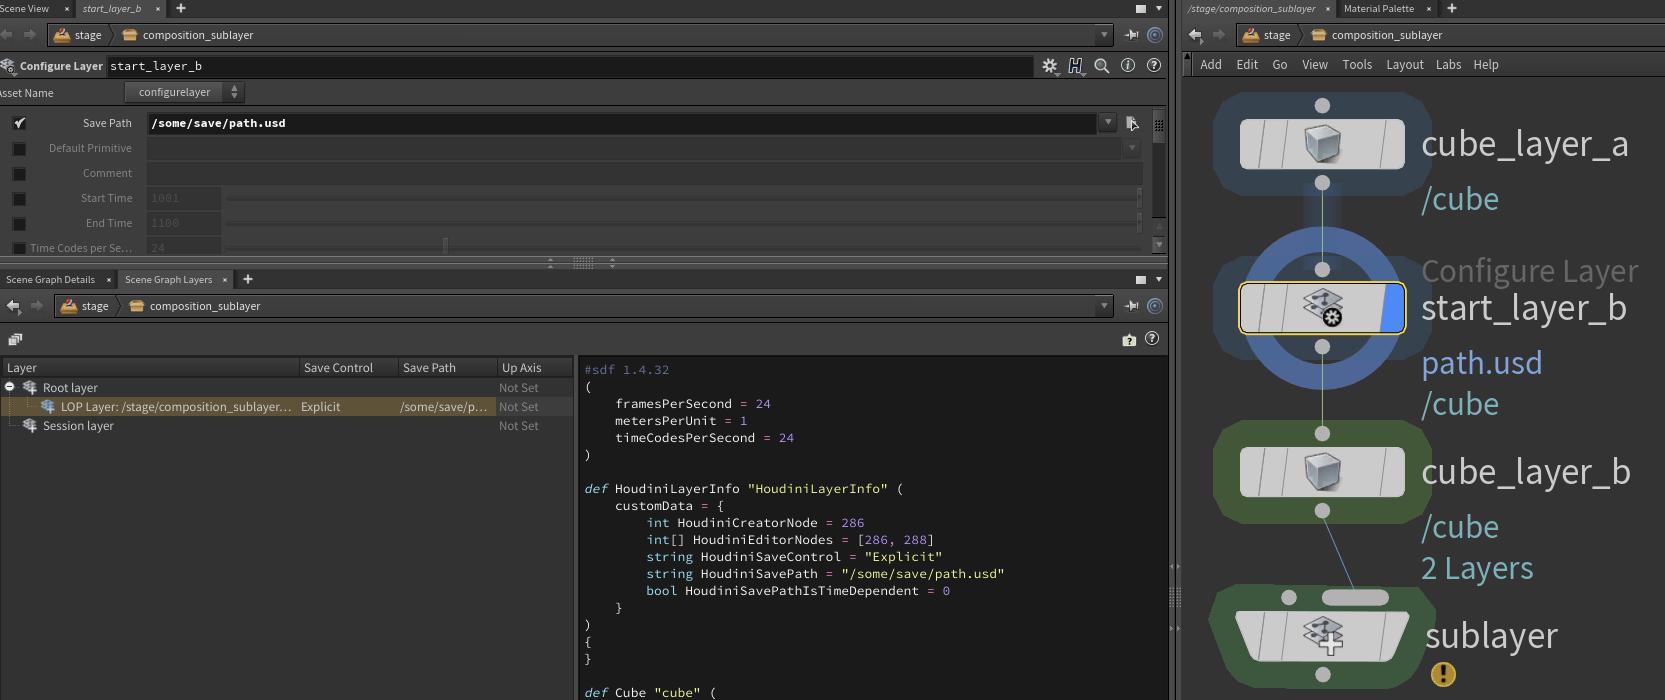
Value Clips
We cover value clips in our animation section. Value clips are USD's mechanism for loading per frame (or per chunk) files, so that we don't have a single gigantic file for large caches.
Their opinion strength is lower than direct (sublayer) opinions, but higher than anything else. This of course is only relevant if we author time samples and value clips in the same layer. If we have multiple layers, then it behaves as expected, so the highest layers wins.
Value clips are written via metadata entries on prims. If you want to create/edit value clips via code, see our value clips section.
Here is a comparison between a layer with value clip metadata and time samples vs separate layers with each.
Houdini's "Load Layer For Editing", simply does a active_layer.TransferContent(Sdf.Layer.FindOrOpen("/Disk/Layer.usd")), in case you are wondering, so it fakes it as if we created the value clip metadata in the active layer.
We cover a production based example of how to load value clips in our Composition for production section. Here are some import things to keep in mind:
- When making prims instanceable, the value clip metadata has to be under the instanceable prim, as the value clip metadata can't be read from outside of the instance (as it would then mean each instance could load different clips, which would defeat the purpose of instanceable prims).
- Value clip metadata can't be inherited/internally referenced/specialized in. It must reside on the prim as a direct opinion.
See the production examples for how to best load value clips.
Inherits
The inherit arc is used to add overrides to existing (instanceable) prims. The typical use case is to apply an edit to a bunch of referenced in assets that were loaded as instanceable without losing instance-ability and without increasing the prototype count. It does not support adding a time offset via Sdf.LayerOffset.
- We use inherit arcs as a "broadcast" operator for overrides: When we want to apply an edit to our hierarchy in multiple places, we typically create a class prim, whose child prims contain the properties we want to modify. After that we create an inherit arc on all prims that should receive the edit. As it is the second highest arc behind direct opinions, it will always have the highest composition strength, when applied to instanceable prims, as instanceable prims can't have direct opinions.
- The inherit arc lookup is never encapsulated, the inherit arc list-editable op is. This means that any layer stack, that re-creates the prims that that the inherit targets, gets used by the inherit. This does come at a performance cost, as the composition engine needs to check all layer stacks from where the arc was authored and higher for the hierarchy that the inherit targets.
- The inherit arc commonly gets used together with the class prim specifier. The class prim specifier is specifically there to get ignored by default traversals and to provide template hierarchies that can then get inherited (or internally referenced/specialized) to have a "single source to multiple targets" effect.
- Depending on if we are working on shots or assets are common practices:
- Assets: When creating assets, we can author a
/__CLASS__/<assetName>inherit. When we use the asset in shots, we can then easily add overrides to all assets of this type, by creating prims and properties under that specific class prim hierarchy. While this sounds great in theory, artists often want to only selectively apply an override to an asset. Therefore having the additional performance cost of this arc in assets is something might not worth doing. See the next bullet point. - Shots: This is where inherits shine! We usually create inherits to:
- Batch apply render geometry settings to (instanceable) prims. This is a great way of having a single control point to editing render settings per different areas of interest in your scene.
- Batch apply activation/visibility to instanceable prims. This way we don't increase the prototype count.
- Assets: When creating assets, we can author a
If you want to create/edit inherit arcs via code, see our Composition Arc - Code API section.
In the accompanying Houdini file you can find the inherit example from the USD Glossary - Inherit section.
Here is a typical code pattern we'll use when creating inherits:
from pxr import Sdf
...
# Inspect prototype and collect what to override
prototype = prim.GetPrototype()
...
# Create overrides
class_prim = stage.CreateClassPrim(Sdf.Path("/__CLASS__/myCoolIdentifier"))
edit_prim = stage.DefinePrim(class_prim.GetPath().AppendChild("leaf_prim"))
edit_prim.CreateAttribute("size", Sdf.ValueTypeNames.Float).Set(5)
...
# Add inherits
instance_prims = prototype.GetInstances()
for instance_prim in instance_prims:
    inherits_api = instance_prim.GetInherits()
    inherits_api.AddInherit(class_prim.GetPath(), position=Usd.ListPositionFrontOfAppendList)
Let's look at some more examples.
As mentioned above, an inherit "only" searches the active layer stack and layer stacks the reference/payload the active layer stack. That means if we create an inherit in a "final" stage (A stage that never gets referenced or payloaded), there is little performance cost to using inherits.
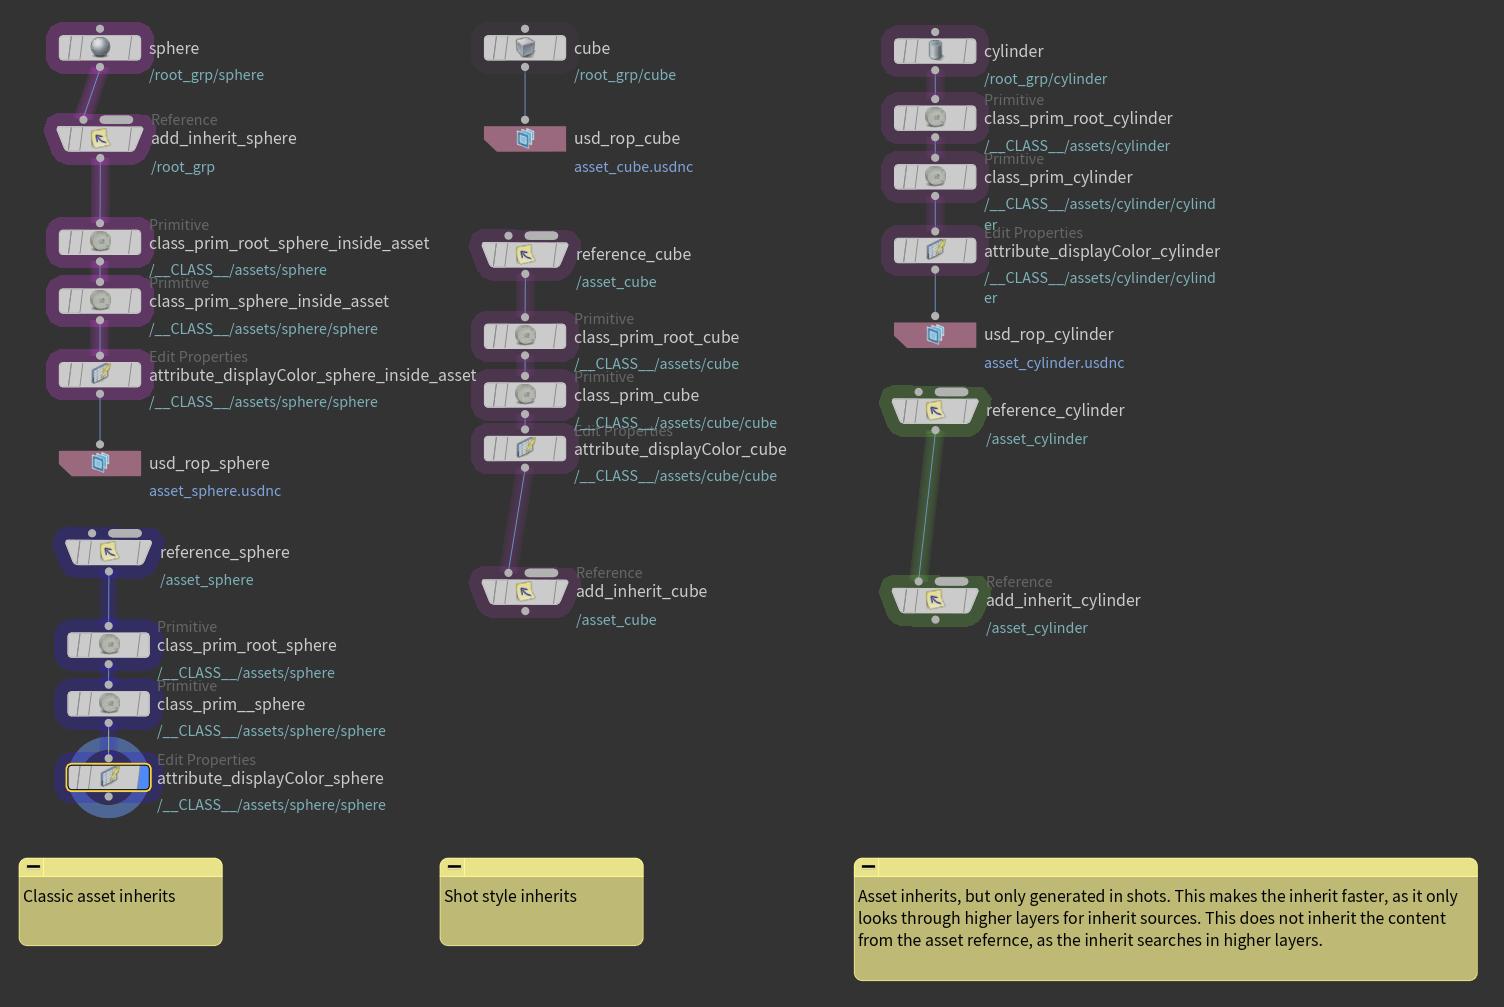
Here is the composition result for the left node stream. (For how to log this, see our Inspecting composition section).

Vs the right node stream:

If we actually switch to an reference arc for the "shot style" inherit stream, we won't see a difference. So why use inherits here? As inherits are higher than variants, you should prefer inherits, for these kind of "broadcast" operations. As inherits also don't support time offsetting, they are the "simplest" arc in this scenario that does the job 100% of the time.
When you've worked a while in USD, you sometimes wonder why we need all these different layering rules. Why can't life be simple for once?
Head over to our Composition in production section for a more production related view on composition. There we discuss how to get the best out of each arc, without making it overly complicated.
Variants
The variant arc is used to allow users to switch through different variations of sub-hierarchies. It does not support adding any time offsets via Sdf.LayerOffsets.
- We use it as a mechanism to swap between (wait for it ...) variations of a hierarchy. The main applications are:
- Assets: Instead of having multiple assets with variations based of off a single base asset, we can store one asset and add variants. That way it is cleaner to track throughout the pipeline.
- Shots: Variants in shots are typically used when a sequence based hierarchy needs to be replaced by a per shot variation. While you could also solve this by just deactivating the prims your need per shot or via sublayer ordering (if you overwrite the same prims), variants offer a cleaner workflow. This way we can keep the hierarchy at the same place and all our lighting department needs to do is target the same hierarchy, when picking what to render. Since variants swap out a whole sub section of a hierarchy, we also ensure that the geometry is not getting any unwanted attributes from other layers.
- We can have any number of nested variants. A typical example is having multiple model variants, which each in return have different LOD (level of detail) variants.
- We can also use it as a mechanism to share mesh data. For example if we have a car asset, we can write the car without a variant and then add all car accessories (which don't overlap hierarchy-wise with the car meshes) as variants. That way the artists can swap through what they need on top of the "base" model.
- We don't need to have a variant selection. If we block or unset the selection, no variant will be selected/loaded, which results in an empty hierarchy. Fallbacks for variant set selections can be configured via the USD API or a USD plugin (API Docs, search for 'Variant Management')
- How are variants structured? Variants are written "inline", unlike the inherit/reference/payload/specialize arcs, they do not point to another hierarchy path. Instead they are more similar to child prims (specs). We usually then write other arcs, like payloads, into the variants, that do the actual heavy data loading.
- We can also use variants as the mechanism to "variant away" arcs that have been encapsulated. More info in our fundamentals section.
If you want to create/edit variant arcs via code, see our Composition Arc - Code API section.
Let's talk about technical details:
Variant sets (the variant set to variant name mapping) is managed via list editable ops.
The actual variant data is not though. It is written "in-line" into the prim spec via the Sdf.VariantSetSpec/Sdf.VariantSpec specs, so that's why we have dedicated specs. This means we can add variant data, but hide it by not adding the variant set name to the variantSets metadata.
Let's first look at a simple variant.
def Xform "car" (
    variants = {
        string color = "colorA"
    }
    prepend variantSets = "color"
)
{
    variantSet "color" = {
        "colorA" {
            def Cube "cube"
            {
            }
        }
        "colorB" {
            def Sphere "sphere"
            {
            }
        }
    }
}
We can also block a selection, so that nothing gets loaded:
def Xform "car" (
    variants = {
        string color = ""
    }
    prepend variantSets = "color"
)
{
    variantSet "color" = {
        "colorA" {
            def Cube "cube"
            {
            }
        }
        "colorB" {
            def Sphere "sphere"
            {
            }
        }
    }
}
See our variant composition arc authoring section on how to create this via code.
Nested Variants
When we write nested variants, we can also write the selections into the nested variants. Here is an example, have a look at the variants = {string LOD = "lowRes"} dict.
When we have nested variants the selection is still driven through the highest layer that has a variant selection value (USD speak opinion) for each variant selection set. If we don't provide a selection, it will fallback to using the (nested) selection, if one is written. In the example below, if we remove the string LOD = "lowRes" entry on the bicycle prim, the selection will fallback to "highRes" as it will get the selection from the nested variant selection.
def Xform "bicycle" (
    variants = {
        string LOD = "lowRes"
        string model = "old"
    }
    prepend variantSets = "model"
)
{
    variantSet "model" = {
        "new" (
            variants = {
                string LOD = "lowRes"
            }
            prepend variantSets = "LOD"
        ) {
            variantSet "LOD" = {
                "lowRes" {
                    def Cylinder "cube"
                    {
                    }

                }
            }

        }
        "old" (
            variants = {
                string LOD = "highRes"
            }
            prepend variantSets = "LOD"
        ) {
            variantSet "LOD" = {
                "highRes" {
                    def Cube "cube"
                    {
                    }

                }
                "lowRes" {
                    def Sphere "sphere"
                    {
                    }

                }
            }

        }
    }
}
When working with nested variants in production, we recommend locking down the naming convention for the variant set names as well as the nested order. We also recommend not creating nested variants that only exists for a specific parent variant. This way, variant sets don't "randomly" come into existence based on other nested variant selections.
That way all your code knows where to look when authoring variants and authoring variants can be automated.
Variant Data Lofting
In production we usually create variants in our asset layer stack. The common practice is to put your whole asset content behind a single payload (or to load individual asset layers behind a payload) that contain the variants. When unloading payloads, we still want to be able to make variant selections (or at least see what is available). In order for us to do this, we can "loft" the payload structure to the asset prim. Lofting in this case means, re-creating all variants, but without content. That way UIs can still pick up on the variant composition, but not load any of the data.
One key problem of lofting the info is, that we have to dive into any nested variant to actually see the nested content. Since this is a one-off operation that can be done on publish, it is fine.
def Xform "root_grp" (
    prepend payload = @asset_data@</root_grp>
    variants = {
        string LOD = "highRes"
        string model = "old"
    }
    prepend variantSets = "model"
)
{
    variantSet "model" = {
        "new" (
            prepend variantSets = "LOD"
        ) {
            variantSet "LOD" = {
                "lowRes" {

                }
            }

        }
        "old" (
            prepend variantSets = "LOD"
        ) {
            variantSet "LOD" = {
                "highRes" {

                }
                "lowRes" {

                }
            }

        }
    }
}
Here is a comparison in Houdini with unloaded/loaded payloads with lofted variant data.
Sharing data among variants
To share data among variants, we can either payload/reference the same data into each variant. We can also write our data that should be shared outside of the variant and then only add hierarchy overrides/additions via the variants.
Here is how it can be setup in Houdini:
Efficiently re-writing existing data as variants
Via the low level API we can also copy or move content on a layer into a variant. This is super powerful to easily create variants from caches.
Here is how it can be setup in Houdini:
Here is the code for moving variants:
from pxr import Sdf, Usd
node = hou.pwd()
layer = node.editableLayer()
source_node = node.parm("spare_input0").evalAsNode()
source_stage = source_node.stage()
source_layer = source_node.activeLayer()
with Sdf.ChangeBlock():
edit = Sdf.BatchNamespaceEdit()
iterator = iter(Usd.PrimRange(source_stage.GetPseudoRoot()))
for prim in iterator:
if "GEO" not in prim.GetChildrenNames():
continue
iterator.PruneChildren()
prim_path = prim.GetPath()
prim_spec = layer.GetPrimAtPath(prim_path)
# Move content into variant
variant_set_spec = Sdf.VariantSetSpec(prim_spec, "model")
variant_spec = Sdf.VariantSpec(variant_set_spec, "myCoolVariant")
variant_prim_path = prim_path.AppendVariantSelection("model", "myCoolVariant")
edit.Add(prim_path.AppendChild("GEO"), variant_prim_path.AppendChild("GEO"))
# Variant selection
prim_spec.SetInfo("variantSetNames", Sdf.StringListOp.Create(prependedItems=["model"]))
prim_spec.variantSelections["model"] = "myCoolVariant"
if not layer.Apply(edit):
raise Exception("Failed to apply layer edit!")
And for copying:
from pxr import Sdf, Usd
node = hou.pwd()
layer = node.editableLayer()
source_node = node.parm("spare_input0").evalAsNode()
source_stage = source_node.stage()
source_layer = source_node.activeLayer()
with Sdf.ChangeBlock():
iterator = iter(Usd.PrimRange(source_stage.GetPseudoRoot()))
for prim in iterator:
if "GEO" not in prim.GetChildrenNames():
continue
iterator.PruneChildren()
prim_path = prim.GetPath()
prim_spec = Sdf.CreatePrimInLayer(layer, prim_path)
prim_spec.specifier = Sdf.SpecifierDef
prim_spec.typeName = "Xform"
parent_prim_spec = prim_spec.nameParent
while parent_prim_spec:
parent_prim_spec.specifier = Sdf.SpecifierDef
parent_prim_spec.typeName = "Xform"
parent_prim_spec = parent_prim_spec.nameParent
# Copy content into variant
variant_set_spec = Sdf.VariantSetSpec(prim_spec, "model")
variant_spec = Sdf.VariantSpec(variant_set_spec, "myCoolVariant")
variant_prim_path = prim_path.AppendVariantSelection("model", "myCoolVariant")
Sdf.CopySpec(source_layer, prim_path, layer, variant_prim_path)
# Variant selection
prim_spec.SetInfo("variantSetNames", Sdf.StringListOp.Create(prependedItems=["model"]))
prim_spec.variantSelections["model"] = "myCoolVariant"
References
The reference arc is one of the most used arcs. Its main purpose is to aggregate scene description data from other files or sub-hierarchies. It is the only arc that has both file loading and internal hierarchy linking/loading possibilities. It does support adding time offsets via Sdf.LayerOffsets.
- The reference arc is one of the most used arcs in USD: Its main use case is to combine smaller pieces of scene description into larger aggregates. Its main applications are:
- Assets: For assets we mainly stick to payloading in the individual layers (model/fx/materials) or we create a single payload that then references all the individual layers. So depending on how you build your asset structure, you might end up not using references, except for when building assembly type assets. Assemblies are USD files that reference other USD files for a logical grouping of assets, for example a film set or city.
- Shots: This is the most common place of usage for references. We use references to bring in our assets or assemblies. We also use it to time offset assets or existing hierarchies, as the reference arc can point to another prim path in the active layer stack. This makes it a powerful tool to drive (time) variations of assets in shots.
- As written in the previous bullet point, the reference arc should aggregate data. That means the files it is loading should not be heavy, but contain only (lofted) metadata and references/payloads to other files.
- The reference arc targets a specific prim in the hierarchy. When using references to load a file, we either point to a specific prim we want to load from that file or we don't specify a prim and then the value of the "defaultPrim" layer metadata gets used. The default prim has to be a direct child prim of the pseudo root prim "/".
- The reference arc (as the payload arc) uses the principle of encapsulation. This means once a file is referenced in, the composition arcs in the file can't be list-edited any more.
If you want to create/edit reference arcs via code, see our Composition Arc - Code API section.
Composition encapsulation for references (and payloads)
Let's have a look at encapsulation of the list-editable ops of composition arcs:
As you can see, once we start loading another written USD file, we can't remove any composition arcs.
Let's compare this to other list-editable ops, like relationships:
As you can see they don't have the same restrictions as composition arc list-editable ops.
Encapsulation also affects what referenced (payload) content "sees". Inherits and specialized do not have this restriction, only their arc structure is encapsulated/"locked", but they remain live in the sense that they still look at the live composed prims that they target.
As mentioned in our fundamentals section, encapsulation affects the list-editable op. It also affects what payloads/references "see" when they load their content. Inherit and specialize arcs are kept "live", they always look at the current layer stack for what to load. Internal references do not, they only look at the active layer stack. As soon as the internally referenced content is loaded via a payload/reference into another layer stack, it only sees the layer stack where it came from. Let's look at an example:
As you can see in the live layer stack, the edit to the radius has the same result on all internal arcs. As soon as we reference it though (same with if we payload it), "only" the inherit and specialize arc are kept live.
Nested composition and list editable op order
Remember how with list editable ops we can specify if we want to pre-/append to the list op? Let's take a look how that works, when working with nested references, for example in assemblies:
As you can see, as soon as the encapsulated assembly ref is brought it, it doesn't matter if our asset scaled box ref is weaker or stronger. Why? In this case it is actually due to being the closer arc to the "box" prim. The closer (ancestor-wise) a composition arc is authored to a prim, the higher its strength will be when we have nested arcs.
Payloads
The payload arc is also one of the most used arcs. Its main purpose is to load heavy data. This means it is the arc that you'll use when loading any type of renderable geometry. It does support adding time offsets via Sdf.LayerOffsets.
- You might be wondering why we should use payloads when we have references? The answer is USD's hierarchy loading mechanisms. Payloads are special, in that we can tell USD to not load any payloads or only specific hierarchies with payloads when working with stages. We cover it in more detail in our Loading Mechanisms section. This makes payload's main purpose loading heavy data.
- The payload arc is therefore also one of the most used arcs in USD, its main applications are:
- Assets: Any layer in your asset, that contains geometry/renderable data, should be behind a payload. We can also first aggregate different files via references and then load this aggregated file via a payload. The important thing is that when we load the asset into the shot, we can opt-out of having to load the heavy data directly.
- Shots: In shots we use payloads to bring in shot relevant caches, most importantly animation and FX caches. Now you might have noticed that payloads are lower than references. This means if we want to load an fx cache over an asset that was brought in as a reference, we either have to first import the payload somewhere else and then link to it via an inherit or variant, or we don't load it as a payload and bring it in as a reference. More on how this affects performance below.
- The payload arc targets a specific prim in the hierarchy. When using payloads to load a file, we either point to a specific prim we want to load from that file or we don't specify a prim and then the value of the "defaultPrim" layer metadata gets used. The default prim has to be a direct child prim of the pseudo root prim "/".
- The payload arc (as the reference arc) uses the principle of encapsulation. This means once a file is payloaded in, the composition arcs in the file can't be list-edited any more. See the reference section above for more info. Now with payloads this isn't an issue that much, because typically we use payloads to point to a cache file that carries the raw data and not other cache files.
- Payloads can also be time offset via an
Sdf.LayerOffset.
If you want to create/edit payload arcs via code, see our Composition Arc - Code API section.
Workflows for loading payloads over references in shots
Let's take a look at how we can bring in payloads in shots:
As you can see, we could bring it in as a reference, when it "collides" with an existing asset reference, so that the shot data wins (the color and updated position in this case). When we unload the asset payload, you'll notice that we still have reference shot data. Remember when we talked about how composition builds a value source index (prim/property index) in our fundamentals section? In theory, USD doesn't load the actual values of attributes until a render delegate queries for it. So as long as we don't access the attributes (via UI panels/code), the hierarchy is still loaded, but the heavy data is not pulled yet. Now there are still downsides: USD still has to build the hierarchy, so there is a file read (USD is smart enough to only read the hierarchy structure and not load the full data). It also depends if your hydra delegate is smart enough to filter out prims, that can't be rendered. So in summary: We don't recommend doing this, but the option is there, and it will not impact performance as much as you think in small to midsize hierarchies.
For an production view on composition, check out our Composition in Production section, where we look at this in detail.
Specializes
The specialize arc is used to supply a base set of values to prims. You might be thinking, isn't that similar to what a schema should be doing? Well yes, but a specialize arc targets a whole hierarchy vs schemas only affect a single prim(type) at a time. The specialize arc is usually something we only want to use in assets (mostly materials) or in shots when we create new hierarchies that have nothing to do with any existing hierarchies. You can think of the specialize arc as the counter part to the inherit arc, as it does the same thing but only with the guaranteed lowest value opinion strength vs highest opinion strength. It does not support adding a time offset via Sdf.LayerOffset.
To quote from the USD glossary:
The specializes behavior is desirable in this context of building up many unique refinements of something whose base properties we may want to continue to update as assets travel down the pipeline, but without changing anything that makes the refinements unique.
The specializes behavior is desirable in this context of building up many unique refinements of something whose base properties we may want to continue to update as assets travel down the pipeline, but without changing anything that makes the refinements unique.
- We use specialize arcs as a "broadcast" operator for supplying a template-like hierarchy: When we want to supply a "base" hierarchy to multiple places, we typically create a class prim, whose child prims contain the properties we want to modify. After that we create a specialize arc on all prims that should receive the hierarchy.
- The specialize arc lookup is never encapsulated, the specialize arc list-editable op is. This means that any layer stack, that re-creates the prims that that the specialize targets, gets used by the specialize. This does come at a performance cost, as the composition engine needs to check all layer stacks from where the arc was authored and higher for the hierarchy that the specialize targets.
- The specialize arc commonly gets used together with the class prim specifier. The class prim specifier is specifically there to get ignored by default traversals and to provide template hierarchies that can then get inherited (or internally referenced/specialized) to have a "single source to multiple targets" effect.
- Depending on if we are working on shots or assets are common practices:
- Assets: As assets provide the data for our shot content, specializes are more typical here.
- When creating assets, we can author a
/__CLASS__/<assetName>specialize. When we use the asset in shots, we can then easily add "underrides" to all assets of this type, by creating prims and properties under that specific class prim hierarchy. Since specializes have the lowest strength, any other composition arc that provides data will win in any higher layer. While this sounds great in theory, artists often want to only selectively apply an override to an asset. Therefore having the additional performance cost of this arc in assets is something might not worth doing. - The other common case is to use them for materials:
- We put all of our materials under a
/__CLASS__and then specialize it to the asset materials. This way asset (material) variants can add overrides to the materials. We could also use an internal reference arc to achieve this, depending on how you structure your composition though it would defeat the purpose of even a non direction opinion style authoring. For example if we payload individual asset layers together (e.g. fx_layer.usd, model_layer.usd), then the internal reference would be encapsulated and not live anymore. Whereas a specialize would be. - We specialize materials with each other. You can find the example from the USD glossary below that shows how this works.
- We put all of our materials under a
- When creating assets, we can author a
- Shots: In shots, specializes are more rare, as the shot layer stack is the "final" layer stack that gets rendered. Some use cases might be:
- Batch apply render geometry settings to (instanceable) prims. This is a great way of having a single control point to editing render settings per different areas of interest in your scene. This has the same intent as inherits, the difference is that existing overrides are kept in place, as with inherits they are not (unless they are direct opinions on sublayers).
- Building a template hierarchy for new content hierarchies that don't 'over' over any existing prims.
- Assets: As assets provide the data for our shot content, specializes are more typical here.
If you want to create/edit specialize arcs via code, see our Composition Arc - Code API section.
In the accompanying Houdini file you can find the specialize example from the USD Glossary - Specializes section.
Let's look at some more examples.
As with inherits, an specialize "only" searches the active layer stack and layer stacks the reference/payload the active layer stack. That means if we create a specialize in a "final" stage (A stage that never gets referenced or payloaded), there is little performance cost to using specializes.
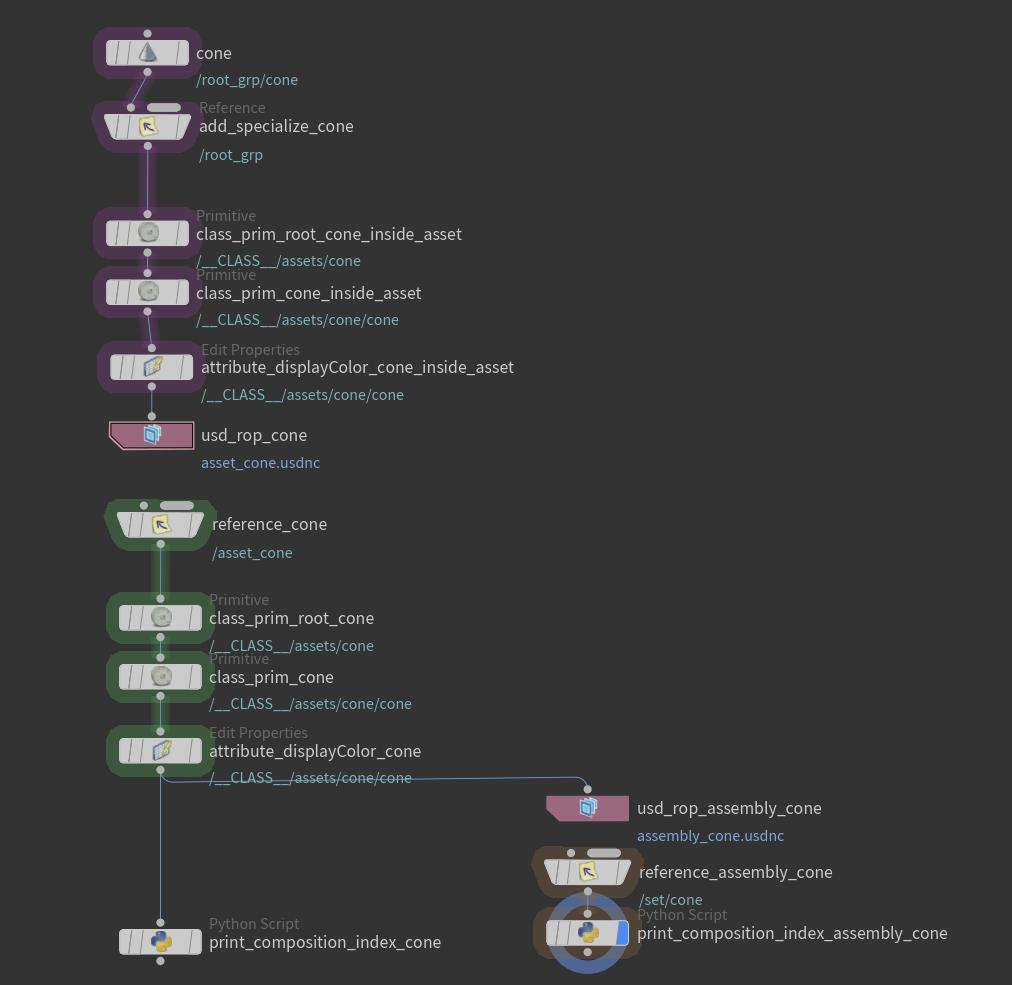
Here is the composition result (For how to log this, see our Inspecting composition section).

Let's compare it to the inherit visualization:
You might have expected it to look the exact same way, so why does it not? The answer lies in the composition calculation as described by our diagram in the Composition Strength Ordering section. (At least that's how we read the graph, if this is wrong, please correct us!) Specializes are special (hehe) in that, since they are the lowest arc, they can just directly look at the layer stacks of where they should specialize from as to "following" the composition arc structure. (It still follows, but builds a list of flattened sources in full LIVRPS mode (because it always has to follow all arcs because it is the weakest arc) as to recursively following the source by looking into files in LIVRP mode (no "S") and stopping on first source hit).
If we look at the right hand node output graph, this becomes more clear.

Vs inherits:

Let's have a look at the example from the USD Glossary - Specializes section:
This shows the individual arcs in action and also again the effect of encapsulation when using internal references.
Instancing in USD
You might be wondering: "Huh, why are we talking about instancing in the section about composition?". The answer is: The two are actually related.
Let's first define what instancing is:
Instancing is the multi re-use of a part of the hierarchy, so that we don't have to load it into memory multiple times. In USD speak the term for the "base" copy, all instances refer to, is Prototype.
Instancing is what keeps things fast as your stage content grows. It should be one of the main factors of how you design your composition setup.
USD has two ways of handling data instancing:
- Explicit: Explicit data instancing via
UsdGeom.PointInstancerprims. The idea is simple: Given a set of array attributes made up of positions, orientations, scales (and velocity) data, copy aPrototypeto each point. In this case prototype refers to any prim (and its sub-hierarchy) in your stage. We usually group them under the point instancer prims for readability. - Implicit: Implicit instances are instances that are marked with the
instanceablemetadata. Now we can't just mark any hierarchy prim with this data. (Well we can but it would have no effect.) This metadata has to be set on prims that have composition arcs written. Our usual case is an asset that was brought in via a reference. What USD then does is "lock" the composition and create on the fly/__Prototype_<index>prim as the base copy. Any prim in your hierarchy that has the exact same let's call it composition hash (exact same composition arcs), will then re-use this base copy. This also means that we can't edit any prim beneath theinstanceablemarked prim.
See the official docs here for a lengthy explanation.
We should always keep an eye on the prototype count, as it is a good performance indicator of if our composition structure is well setup.
We can also access the implicit prototypes via Python. They are not editable and on the fly re-spawned every time you edit your stage, so don't count on their naming/path/content to be the same.
We often do use them though to find the prims they are the prototype of. That way we can add arcs (for example an inherit) and still keep the prototype count the same, as the overall unique compositions structures stay the same.
print("Prototype Count", len(stage.GetPrototypes()))
In Houdini we can show the implicit prototypes by enabling the "Show Implicit Prototype Primitives" option in the sunglasses menu in our scene graph tree panel.
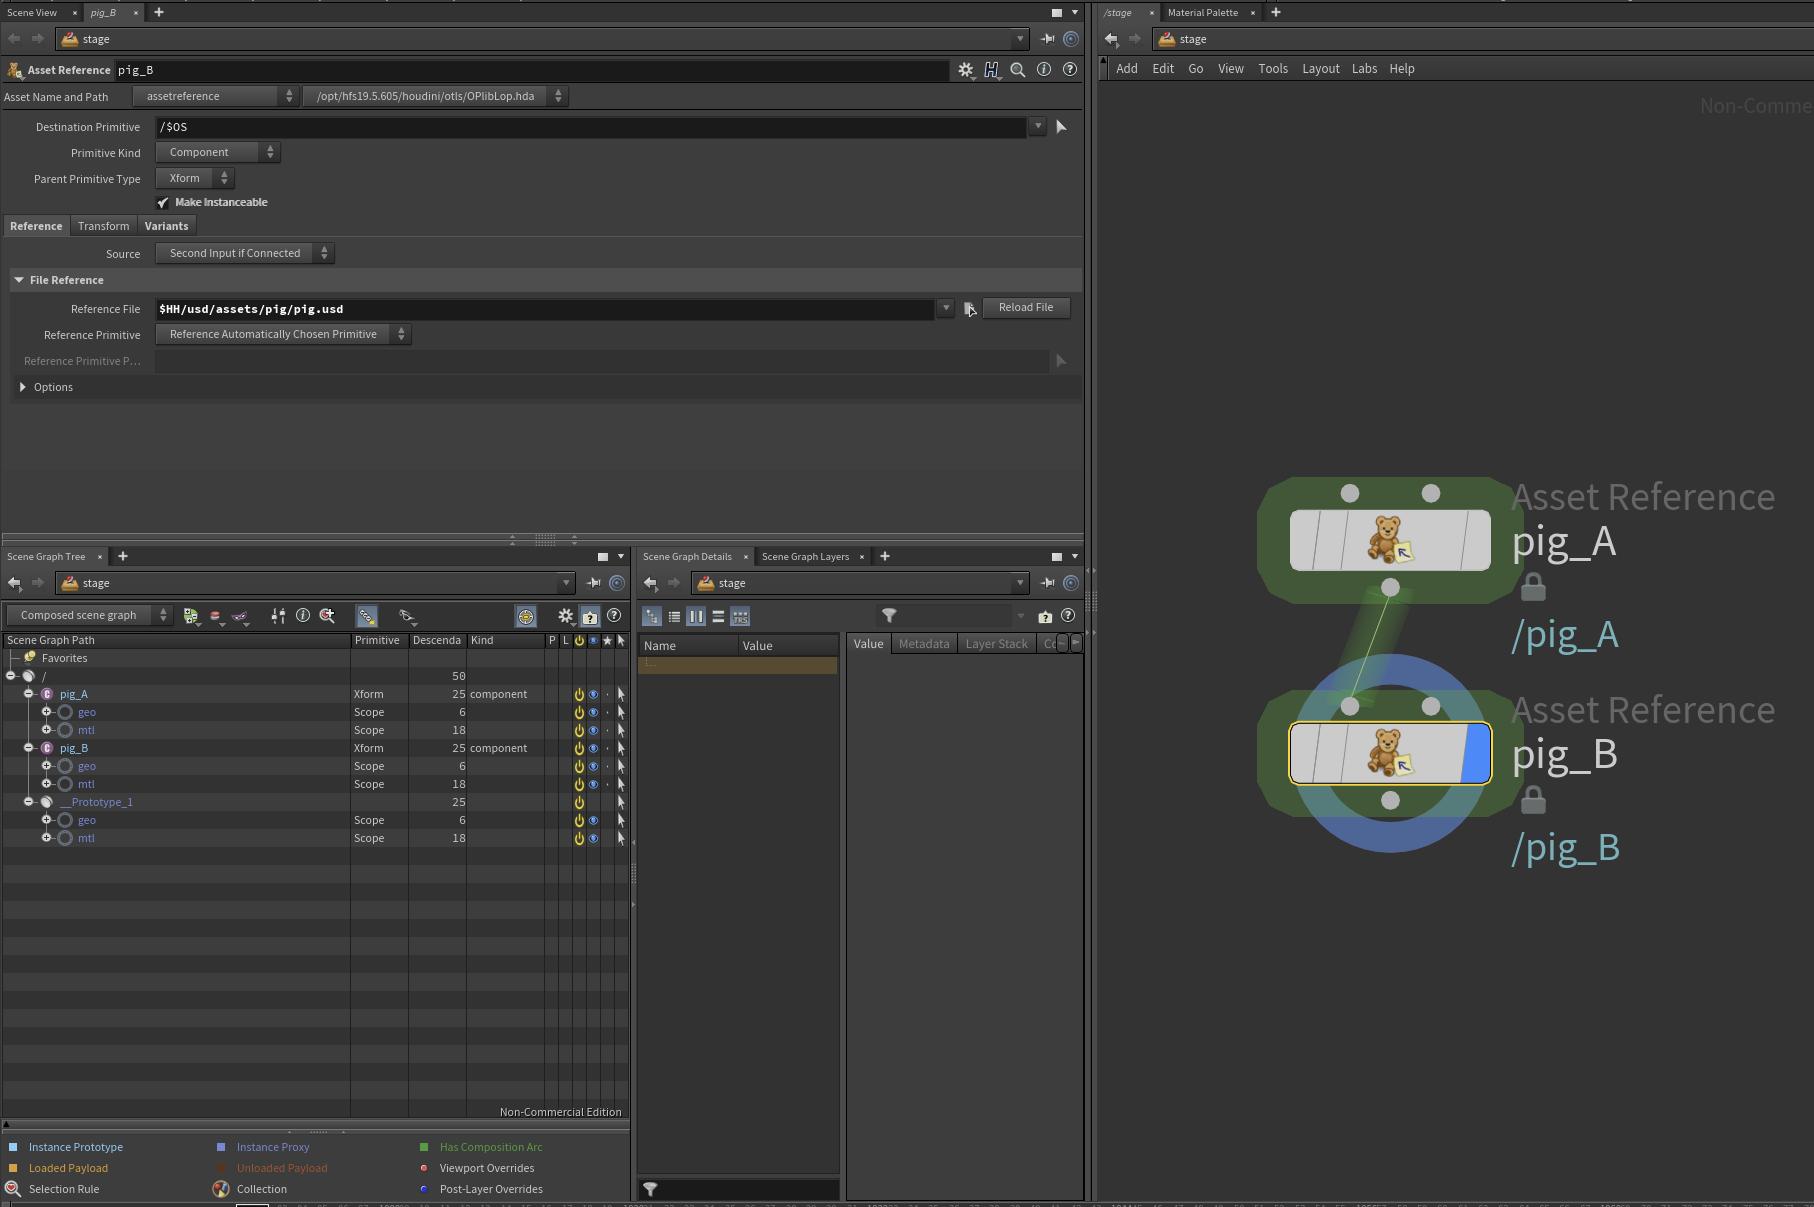
Here is how we can check if a prim is inside an instance or inside a prototype:
# Check if the active prim is marked as instanceable:
# The prim.IsInstance() checks if it is actually instanced, this
# just checks if the 'instanceable' metadata is set.
prim.IsInstanceable()
# Check if the active prim is an instanced prim:
prim.IsInstance()
# Check if we are inside an instanceable prim:
prim.IsInstanceProxy()
# Check if the active prim is a prototype root prim with the following format /__Prototype_<idx>
prim.IsPrototype()
# For these type of prototype root prims, we can get the instances via:
prim.GetInstances()
# From each instance we can get back to the prototype via
prim.GetPrototype()
# Check if we are in the /__Prototype_<idx> prim:
prim.IsInPrototype()
# When we are within an instance, we can get the prototype via:
if prim.IsInstanceProxy():
for ancestor_prim_path in prim.GetAncestorsRange():
ancestor_prim = stage.GetPrimAtPath(ancestor_prim_path)
if ancestor_prim.IsInstance():
prototype = ancestor_prim.GetPrototype()
print(list(prototype.GetInstances()))
break
Here is an example of how we can't edit the content within an instanceable prim. Instead we have to create a hierarchy (in this case a /__CLASS__ hierarchy) where we inherit from. As you can see the prototype count changes depending on if we apply the inherit to only a single reference or all. (Houdini shows the /__class__ prim in the righ click menu, this is because the Houdini test assets where setup with an inherit by default that always runs on all assets. Since we only want to selectively broadcast our edit, we have to create a different class hierarchy.)
List Editable Ops (Operations)
On this page we will have a look at list editable ops when not being used in composition arcs.
As mentioned in our fundamentals section, list editable ops play a crucial role to understanding composition. Please read that section before this one, as we build on what was written there.
Table of Contents
- List Editable Ops In-A-Nutshell
- What should I use it for?
- Resources
- Overview
- Composition Arcs
- Relationships
- Metadata
TL;DR List Editable Ops - In-A-Nutshell
- USD has the concept of list editable operations. Instead of having a "flat" array (
[Sdf.Path("/cube"), Sdf.Path("/sphere")]) that stores data, we have wrapper array class that stores multiple sub-arrays (prependedItems,appendedItems,deletedItems,explicitItems). When flattening the list op, it merges the prepended and appended items and also removes items in deletedItems as well as duplicates, so that the end result is like an ordered Pythonset(). When in explicit mode, it only keeps the elements in explicitItems and ignores previous layers. This merging is done per layer, so that for example anappendedItemsop in a higher layer, gets added to anexplicitItemsfrom a lower layer. This allows us to average the array data over multiple layers. - List editable ops behave differently based on the type:
- Composition: When using list editable ops to define composition arcs, we can only edit them in the active layer stack. Once referenced or payloaded, they become encapsulated.
- Relationships/Metadata: When making use of list editable ops when defining relationships and metadata, we do not have encapsulation. This means that any layer stack can add/delete/set explicit the list editable type. See the examples below for more info.
What should I use it for?
Using list editable ops in non composition arc scenarios is rare, as we often want a more attribute like value resolution behavior. It is good to know though that the mechanism is there. A good production use case is making metadata that tracks asset dependencies list editable, that way all layers can contribute to the sidecar data.
Resources
Overview
Let's first go other how list editable ops are edited and applied:
These are the list editable ops that are available to us:
- Composition:
Sdf.PathListOpSdf.PayloadListOpSdf.ReferenceListOp
- Base Data Types:
Sdf.PathListOpSdf.StringListOpSdf.TokenListOpSdf.IntListOpSdf.Int64ListOpSdf.UIntListOpSdf.UInt64ListOp
USD has the concept of list editable operations. Instead of having a "flat" array ([Sdf.Path("/cube"), Sdf.Path("/sphere")]) that stores data, we have wrapper array class that stores multiple sub-arrays (prependedItems, appendedItems, deletedItems, explicitItems). When flattening the list op, it merges the prepended and appended items and also removes items in deletedItems as well as duplicates, so that the end result is like an ordered Python set(). When in explicit mode, it only keeps the elements in explicitItems and ignores previous layers. This merging is done per layer, so that for example an appendedItems op in a higher layer, gets added to an explicitItems from a lower layer. This allows us to average the array data over multiple layers.
All list editable ops work the same way, the only difference is what data they can hold.
These are 100% identical in terms of list ordering functionality, the only difference is what items they can store (as noted above). Let's start of simple with looking at the basics:
from pxr import Sdf
path_list_op = Sdf.PathListOp()
# There are multiple sub-lists, which are just normal Python lists.
# 'prependedItems', 'appendedItems', 'deletedItems', 'explicitItems',
# Legacy sub-lists (do not use these anymore): 'addedItems', 'orderedItems'
# Currently the way these are exposed to Python, you have to re-assign the list, instead of editing it in place.
# So this won't work:
path_list_op.prependedItems.append(Sdf.Path("/cube"))
path_list_op.appendedItems.append(Sdf.Path("/sphere"))
# Instead do this:
path_list_op.prependedItems = [Sdf.Path("/cube")]
path_list_op.appendedItems = [Sdf.Path("/sphere")]
# To clear the list op:
print(path_list_op) # Returns: SdfPathListOp(Prepended Items: [/cube], Appended Items: [/sphere])
path_list_op.Clear()
print(path_list_op) # Returns: SdfPathListOp()
# Repopulate via constructor
path_list_op = Sdf.PathListOp.Create(prependedItems = [Sdf.Path("/cube")], appendedItems = [Sdf.Path("/sphere")])
print(path_list_op) # Returns: SdfPathListOp(Prepended Items: [/cube], Appended Items: [/sphere])
# Add remove items
path_list_op.deletedItems = [Sdf.Path("/sphere")]
print(path_list_op) # Returns: SdfPathListOp(Deleted Items: [/sphere], Prepended Items: [/cube], Appended Items: [/sphere])
# Notice how it just stores lists, it doesn't actually apply them. We'll have a look at that next.
When working with the high level API, all the function signatures that work on list-editable ops usually take a position kwarg which corresponds to what list to edit and the position (front/back):
Usd.ListPositionFrontOfAppendList: Prepend to append list, the same asSdf.<Type>ListOp.appendedItems.insert(0, item)Usd.ListPositionBackOfAppendList: Append to append list, the same asSdf.<Type>ListOp.appendedItems.append(item)Usd.ListPositionFrontOfPrependList: Prepend to prepend list, the same asSdf.<Type>ListOp.appendedItems.insert(0, item)Usd.ListPositionBackOfPrependList: Append to prepend list, the same asSdf.<Type>ListOp.appendedItems.append(item)
# For example when editing a relationship:
from pxr import Sdf, Usd
stage = Usd.Stage.CreateInMemory()
yard_prim = stage.DefinePrim("/yard")
car_prim = stage.DefinePrim("/car")
rel = car_prim.CreateRelationship("locationsOfInterest")
rel.AddTarget(yard_prim.GetPath(), position=Usd.ListPositionFrontOfAppendList)
# Result:
"""
def "car"
{
custom rel locationsOfInterest
append rel locationsOfInterest = </yard>
}
"""
# The "Set<Function>" signatures write an explicit list:
rel.SetTargets([yard_prim.GetPath()])
# Result:
"""
def "car"
{
custom rel locationsOfInterest = </yard>
}
"""
Now let's look at how multiple of these list editable ops are combined.
Again it is very important, that composition arc related list editable ops get combined with a different rule set. We cover this extensively in our fundamentals section.
Non-composition related list editable ops do not make use of encapsulation. This means that any layer can contribute to the result, meaning any layer can add/remove/set explicit. When getting the value of the list op for non-composition arc list ops, we get the absolute result, in the form of an explicit list editable item list.
In contrast: When looking at composition list editable ops, we only get the value of the last layer that edited the value, and we have to use composition queries to get the actual result.
This makes non-composition list editable ops a great mechanism to store averaged side car data. Checkout our Houdini example below, to see this in action.
Let's mock how USD does this (without using Sdf.Layers to keep it simple):
from pxr import Sdf
### Merging basics ###
path_list_op_layer_top = Sdf.PathListOp.Create(deletedItems = [Sdf.Path("/cube")])
path_list_op_layer_middle = Sdf.PathListOp.Create(prependedItems = [Sdf.Path("/disc"), Sdf.Path("/cone")])
path_list_op_layer_bottom = Sdf.PathListOp.Create(prependedItems = [Sdf.Path("/cube")], appendedItems = [Sdf.Path("/cone"),Sdf.Path("/sphere")])
result = Sdf.PathListOp()
result = result.ApplyOperations(path_list_op_layer_top)
result = result.ApplyOperations(path_list_op_layer_middle)
result = result.ApplyOperations(path_list_op_layer_bottom)
# Notice how on merge it makes sure that each sublist does not have the values of the other sublists, just like a Python set()
print(result) # Returns: SdfPathListOp(Deleted Items: [/cube], Prepended Items: [/disc, /cone], Appended Items: [/sphere])
# Get the flattened result. This does not apply the deleteItems, only ApplyOperations does that.
print(result.GetAddedOrExplicitItems()) # Returns: [Sdf.Path('/disc'), Sdf.Path('/cone'), Sdf.Path('/sphere')]
### Deleted and added items ###
path_list_op_layer_top = Sdf.PathListOp.Create(appendedItems=[Sdf.Path("/disc"), Sdf.Path("/cube")])
path_list_op_layer_middle = Sdf.PathListOp.Create(deletedItems = [Sdf.Path("/cube")])
path_list_op_layer_bottom = Sdf.PathListOp.Create(prependedItems = [Sdf.Path("/cube")], appendedItems = [Sdf.Path("/sphere")])
result = Sdf.PathListOp()
result = result.ApplyOperations(path_list_op_layer_top)
result = result.ApplyOperations(path_list_op_layer_middle)
result = result.ApplyOperations(path_list_op_layer_bottom)
print(result) # Returns: SdfPathListOp(Appended Items: [/sphere, /disc, /cube])
# Since it now was in the explicit list, it got removed.
### Explicit mode ###
# There is also an "explicit" mode. This clears all previous values on merge and marks the list as explicit.
# Once explicit and can't be un-explicited. An explicit list is like a reset, it
# doesn't know anything about the previous values anymore. All lists that are merged
# after combine the result to be explicit.
path_list_op_layer_top = Sdf.PathListOp.Create(deletedItems = [Sdf.Path("/cube")])
path_list_op_layer_middle = Sdf.PathListOp.CreateExplicit([Sdf.Path("/disc")])
path_list_op_layer_bottom = Sdf.PathListOp.Create(prependedItems = [Sdf.Path("/cube")], appendedItems = [Sdf.Path("/sphere")])
result = Sdf.PathListOp()
result = result.ApplyOperations(path_list_op_layer_top)
result = result.ApplyOperations(path_list_op_layer_middle)
result = result.ApplyOperations(path_list_op_layer_bottom)
print(result, result.isExplicit) # Returns: SdfPathListOp(Explicit Items: [/disc]), True
# Notice how the deletedItems had no effect, as "/cube" is not in the explicit list.
path_list_op_layer_top = Sdf.PathListOp.Create(deletedItems = [Sdf.Path("/cube")])
path_list_op_layer_middle = Sdf.PathListOp.CreateExplicit([Sdf.Path("/disc"), Sdf.Path("/cube")])
path_list_op_layer_bottom = Sdf.PathListOp.Create(prependedItems = [Sdf.Path("/cube")], appendedItems = [Sdf.Path("/sphere")])
result = Sdf.PathListOp()
result = result.ApplyOperations(path_list_op_layer_top)
result = result.ApplyOperations(path_list_op_layer_middle)
result = result.ApplyOperations(path_list_op_layer_bottom)
print(result, result.isExplicit) # Returns: SdfPathListOp(Explicit Items: [/disc]), True
# Since it now was in the explicit list, it got removed.
When working with multiple layers, each layer can have list editable ops data in (composition-) metadata fields and relationship specs. It then gets merged, as mocked above. The result is a single flattened list, without duplicates.
Composition Arcs
For a detailed explanation how list editable ops work in conjunction with composition arcs, please check out our composition fundamentals section.
Relationships
As with list editable metadata, relationships also show us the combined results from multiple layers. Since it is not a composition arc list editable op, we also don't have the restriction of encapsulation. That means, calling GetTargets/GetForwardedTargets can combine appended items from multiple layers. Most DCCs go for the .SetTargets method though, as layering relationship data can be confusing and often not what we want as an artist using the tools.
Since collections are made up of relationships, we can technically list edit them too. Most DCCs set the collection relationships as an explicit item list though, as layering paths can be confusing.
Metadata
The default metadata fields that ship with USD, are not of the list editable type. We can easily extend this via a metadata plugin though.
Here is a showcase from our composition example file that edits a custom string list op field which we registered via a custom meta plugin.
As you can see the result is dynamic, even across encapsulated arcs and it always returns an explicit list op with the combined results.
This can be used to combine metadata non destructively from multiple layers.
Prim Cache Population (PCP) - Composition Cache
The Prim Cache Population module is the backend of what makes USD composition work. You could call it the composition core, that builds the prim index.
The prim index is like an ordered list per prim, that defines where values can be loaded from. For example when we call Usd.Prim.GetPrimStack, the pcp gives us a list of value sources as an ordered list, with the "winning" value source as the first entry.
When USD opens a stage, it builds the prim index, so that it knows for each prim/property where to pull data from. This is then cached, and super fast to access.
When clients (like hydra delegates or C++/Python attribute queries) request data, only then the data is loaded. This way hierarchies can load blazingly fast, without actually loading the heavy attribute data.
To summarize: Composition (the process of calculating the value sources) is cached, value resolution is not, to allow random access data loading.
For a detailed explanation, checkout the Value Resolution docs page.
Table of Contents
- Prim Cache Population (PCP) In-A-Nutshell
- What should I use it for?
- Resources
- Overview
- Inspecting Composition
TL;DR - In-A-Nutshell
- The Prim Cache Population module in USD computes and caches the composition (how different layers are combined) by building an index of value sources per prim called prim index.
- This process of calculating the value sources is cached, value resolution is not, to allow random access to data. This makes accessing hierarchies super fast, and allows attribute data to be streamed in only when needed. This is also possible due to USD's binary crate format, which allows sparse "read only what you need" access from USD files.
- The Prim Cache Population (Pcp) module is exposed via two ways:
- High Level API: Via the
Usd.PrimCompositionQueryclass. - Low Level API: Via the
Usd.Prim.GetPrimIndex/Usd.Prim.ComputeExpandedPrimIndexmethods.
- High Level API: Via the
- Notice how both ways are still accessed via the high level API, as the low level
SdfAPI is not aware of composition.
What should I use it for?
We'll be using the prim cache population module for inspecting composition. This is more of a deep dive topic, but you may at some point run into this in production.
An example scenario might be, that when we want to author a new composition arc, we first need to check if there are existing strong arcs, than the arc we intend on authoring. For example if a composition query detects a variant, we must also author at least a variant or a higher composition arc in order for our edits to come through.
Resources
- PrimCache Population (Composition)
- Prim Index
- Pcp.PrimIndex
- Pcp.Cache
- Usd.CompositionArc
- Usd.CompositionArcQuery
- Value Resolution
- USD binary crate file format
Overview
This page currently focuses on the practical usage of the Pcp module, it doesn't aim to explain how the composition engine works under the hood. (As the author(s) of this guide also don't know the details 😉, if you know more in-depth knowledge, please feel free to share!)
There is a really cool plugin for the UsdView by chrizzftd called The Grill, that renders out the dot graph representation interactively based on the selected prim.
In the examples below, we'll look at how to do this ourselves via Python.
Inspecting Composition
To query data about composition, we have to go through the high level Usd API first, as the Sdf low level API is not aware of composition related data.
The high level Usd API then queries into the low level Pcp (Prim cache population) API, which tracks all composition related data and builds a value source index called prim index.
The prim stack in simple terms: A stack of layers per prim (and therefore also properties) that knows about all the value sources (layers) a value can come from. Once a value is requested, the highest layer in the stack wins and returns the value for attributes. For metadata and relationships the value resolution can consult multiple layers, depending on how it was authored (see list editable ops as an example for a multiple layer averaged value).
Prim/Property Stack
Let's first have a look at the prim and property stacks with a simple stage with a cubes that has written values in two different layers. These return us all value sources for a prim or attribute.
from pxr import Sdf, Usd
# Create stage with two different layers
stage = Usd.Stage.CreateInMemory()
root_layer = stage.GetRootLayer()
layer_top = Sdf.Layer.CreateAnonymous("exampleTopLayer")
layer_bottom = Sdf.Layer.CreateAnonymous("exampleBottomLayer")
root_layer.subLayerPaths.append(layer_top.identifier)
root_layer.subLayerPaths.append(layer_bottom.identifier)
# Define specs in two different layers
prim_path = Sdf.Path("/cube")
stage.SetEditTarget(layer_top)
prim = stage.DefinePrim(prim_path, "Xform")
prim.SetTypeName("Cube")
stage.SetEditTarget(layer_bottom)
prim = stage.DefinePrim(prim_path, "Xform")
prim.SetTypeName("Cube")
attr = prim.CreateAttribute("debug", Sdf.ValueTypeNames.Float)
attr.Set(5, 10)
# Print the stack (set of layers that contribute data to this prim)
# For prims this returns all the Sdf.PrimSpec objects that contribute to the prim.
print(prim.GetPrimStack()) # Returns: [Sdf.Find('anon:0x7f6e590dc300:exampleTopLayer', '/cube'),
# Sdf.Find('anon:0x7f6e590dc580:exampleBottomLayer', '/cube')]
# For attributes this returns all the Sdf.AttributeSpec objects that contribute to the attribute.
# If we pass a non default time code value clips will be included in the result.
# This type of function signature is very unique and can't be found anywhere else in USD.
time_code = Usd.TimeCode.Default()
print(attr.GetPropertyStack(1001)) # Returns: [Sdf.Find('anon:0x7f9eade0ae00:exampleBottomLayer', '/cube.debug')]
print(attr.GetPropertyStack(time_code)) # Returns: [Sdf.Find('anon:0x7f9eade0ae00:exampleBottomLayer', '/cube.debug')]
In Houdini/USD view we can also view these stacks in the UI.
Prim Index
Next let's look at the prim index.
import os
from subprocess import call
from pxr import Sdf, Usd
stage = Usd.Stage.CreateInMemory()
# Spawn temp layer
reference_layer = Sdf.Layer.CreateAnonymous("ReferenceExample")
reference_bicycle_prim_path = Sdf.Path("/bicycle")
reference_bicycle_prim_spec = Sdf.CreatePrimInLayer(reference_layer, reference_bicycle_prim_path)
reference_bicycle_prim_spec.specifier = Sdf.SpecifierDef
reference_bicycle_prim_spec.typeName = "Cube"
reference_layer_offset = Sdf.LayerOffset(offset=10, scale=1)
reference = Sdf.Reference(reference_layer.identifier, reference_bicycle_prim_path, reference_layer_offset)
bicycle_prim_path = Sdf.Path("/red_bicycle")
bicycle_prim = stage.DefinePrim(bicycle_prim_path)
references_api = bicycle_prim.GetReferences()
references_api.AddReference(reference, position=Usd.ListPositionFrontOfAppendList)
# You'll always want to use the expanded method,
# otherwise you might miss some data sources!
# This is also what the UIs use.
prim = bicycle_prim
print(prim.GetPrimIndex())
print(prim.ComputeExpandedPrimIndex())
# Dump the index representation to the dot format and render it to a .svg/.png image.
prim_index = prim.ComputeExpandedPrimIndex()
print(prim_index.DumpToString())
graph_file_path = os.path.expanduser("~/Desktop/usdSurvivalGuide_prim_index.txt")
graph_viz_png_file_path = graph_file_path.replace(".txt", ".png")
graph_viz_svg_file_path = graph_file_path.replace(".txt", ".svg")
prim_index.DumpToDotGraph(graph_file_path, includeMaps=False)
call(["dot", "-Tpng", graph_file_path, "-o", graph_viz_png_file_path])
call(["dot", "-Tsvg", graph_file_path, "-o", graph_viz_svg_file_path])
def iterator_child_nodes(root_node):
yield root_node
for child_node in root_node.children:
for child_child_node in iterator_child_nodes(child_node):
yield child_child_node
def iterator_parent_nodes(root_node):
iter_node = root_node
while iter_node:
yield iter_node
iter_node = iter_node.parent
print("Pcp Node Refs", dir(prim_index.rootNode))
for child in list(iterator_child_nodes(prim_index.rootNode))[::1]:
print(child, child.arcType, child.path, child.mapToRoot.MapSourceToTarget(child.path))
""" The arc type will one one of:
Pcp.ArcTypeRoot
Pcp.ArcTypeInherit
Pcp.ArcTypeVariant
Pcp.ArcTypeReference
Pcp.ArcTypeRelocate
Pcp.ArcTypePayload
Pcp.ArcTypeSpecialize
"""
The prim index class can dump our prim index graph to the dot file format. The dot commandline tool ships with the most operating systems, we can then use it to visualize our graph as a .svg/.png file.
Result of: print(prim_index.DumpToString()) | Click to view content
print(prim_index.DumpToString()) | Click to view contentNode 0:
Parent node: NONE
Type: root
DependencyType: root
Source path: </bicycle>
Source layer stack: @anon:0x7f9eae9f2400:tmp.usda@,@anon:0x7f9eae9f1000:tmp-session.usda@
Target path: <NONE>
Target layer stack: NONE
Map to parent:
/ -> /
Map to root:
/ -> /
Namespace depth: 0
Depth below introduction: 0
Permission: Public
Is restricted: FALSE
Is inert: FALSE
Contribute specs: TRUE
Has specs: TRUE
Has symmetry: FALSE
Prim stack:
</bicycle> anon:0x7f9eae9f2400:tmp.usda - @anon:0x7f9eae9f2400:tmp.usda@
Node 1:
Parent node: 0
Type: reference
DependencyType: non-virtual, purely-direct
Source path: </bicycle>
Source layer stack: @anon:0x7f9eae9f2b80:ReferenceExample@
Target path: </bicycle>
Target layer stack: @anon:0x7f9eae9f2400:tmp.usda@,@anon:0x7f9eae9f1000:tmp-session.usda@
Map to parent:
SdfLayerOffset(10, 1)
/bicycle -> /bicycle
Map to root:
SdfLayerOffset(10, 1)
/bicycle -> /bicycle
Namespace depth: 1
Depth below introduction: 0
Permission: Public
Is restricted: FALSE
Is inert: FALSE
Contribute specs: TRUE
Has specs: TRUE
Has symmetry: FALSE
Prim stack:
</bicycle> anon:0x7f9eae9f2b80:ReferenceExample - @anon:0x7f9eae9f2b80:ReferenceExample@
Result of writing the graph to a dot .txt file | Click to view content
digraph PcpPrimIndex {
140321959801344 [label="@anon:0x7f9ec906e400:tmp.usda@,@anon:0x7f9ec8f85a00:tmp-session.usda@</red_bicycle> (0)\n\ndepth: 0", shape="box", style="solid"];
140321959801448 [label="@anon:0x7f9ec906e900:ReferenceExample@</bicycle> (1)\n\ndepth: 1", shape="box", style="solid"];
140321959801344 -> 140321959801448 [color=red, label="reference"];
}
For example if we run it on a more advanced composition, in this case Houdini's pig asset:
Python print output for Houdini's pig asset | Click to view content
Pcp Node Ref
<pxr.Pcp.NodeRef object at 0x7f9ed3ad19e0> Pcp.ArcTypeRoot /pig /pig
<pxr.Pcp.NodeRef object at 0x7f9ed3ad17b0> Pcp.ArcTypeInherit /__class__/pig /pig
<pxr.Pcp.NodeRef object at 0x7f9ed3ad1cf0> Pcp.ArcTypeReference /pig /pig
<pxr.Pcp.NodeRef object at 0x7f9ed3ad1970> Pcp.ArcTypeInherit /__class__/pig /pig
<pxr.Pcp.NodeRef object at 0x7f9ed3ad1890> Pcp.ArcTypeVariant /pig{geo=medium} /pig{geo=medium}
<pxr.Pcp.NodeRef object at 0x7f9ed3ad1270> Pcp.ArcTypePayload /pig /pig
<pxr.Pcp.NodeRef object at 0x7f9ed3ad1660> Pcp.ArcTypeReference /pig /pig
<pxr.Pcp.NodeRef object at 0x7f9ed3ad1510> Pcp.ArcTypeVariant /pig{geo=medium} /pig{geo=medium}
<pxr.Pcp.NodeRef object at 0x7f9ed3ad13c0> Pcp.ArcTypeReference /ASSET_geo_variant_1/ASSET /pig
<pxr.Pcp.NodeRef object at 0x7f9ed3abbd60> Pcp.ArcTypeVariant /ASSET_geo_variant_1/ASSET{mtl=default} /pig{mtl=default}
<pxr.Pcp.NodeRef object at 0x7f9ed3abb6d0> Pcp.ArcTypeReference /ASSET_geo_variant_1/ASSET_mtl_default /pig
<pxr.Pcp.NodeRef object at 0x7f9ed3ad1a50> Pcp.ArcTypeReference /pig /pig
<pxr.Pcp.NodeRef object at 0x7f9ed3ad15f0> Pcp.ArcTypeReference /ASSET_geo_variant_2/ASSET /pig
<pxr.Pcp.NodeRef object at 0x7f9ed3abbe40> Pcp.ArcTypeVariant /ASSET_geo_variant_2/ASSET{geo=medium} /pig{geo=medium}
<pxr.Pcp.NodeRef object at 0x7f9ed3ad1ac0> Pcp.ArcTypeReference /ASSET_geo_variant_1/ASSET /pig
<pxr.Pcp.NodeRef object at 0x7f9ed3abbf90> Pcp.ArcTypeVariant /ASSET_geo_variant_1/ASSET{geo=medium} /pig{geo=medium}
<pxr.Pcp.NodeRef object at 0x7f9ed3abb430> Pcp.ArcTypeReference /ASSET_geo_variant_0/ASSET /pig
<pxr.Pcp.NodeRef object at 0x7f9ed3abb9e0> Pcp.ArcTypeVariant /ASSET_geo_variant_0/ASSET{geo=medium} /pig{geo=medium}
Result of writing the graph to a dot .txt file for Houdini's pig asset | Click to view content
digraph PcpPrimIndex {
140319730187168 [label="@anon:0x7f9ec9290900:LOP:rootlayer@,@anon:0x7f9ec906e680:LOP:rootlayer-session.usda@</pig> (0)\n\ndepth: 0", shape="box", style="solid"];
140319730187272 [label="@anon:0x7f9ec9290900:LOP:rootlayer@,@anon:0x7f9ec906e680:LOP:rootlayer-session.usda@</__class__/pig> (1)\n\ndepth: 1", shape="box", style="dotted"];
140319730187168 -> 140319730187272 [color=green, label="inherit", style=dashed];
140319730187272 -> 140319730187480 [style=dotted label="origin" constraint="false"];
140319730187376 [label="@pig.usd@</pig> (2)\n\ndepth: 1", shape="box", style="solid"];
140319730187168 -> 140319730187376 [color=red, label="reference"];
140319730187480 [label="@pig.usd@</__class__/pig> (3)\n\ndepth: 1", shape="box", style="solid"];
140319730187376 -> 140319730187480 [color=green, label="inherit"];
140319730187584 [label="@pig.usd@</pig{geo=medium}> (4)\n\ndepth: 1", shape="box", style="solid"];
140319730187376 -> 140319730187584 [color=orange, label="variant"];
140319730187688 [label="@payload.usdc@</pig> (5)\n\ndepth: 1", shape="box", style="solid"];
140319730187376 -> 140319730187688 [color=indigo, label="payload"];
140319730187792 [label="@mtl.usdc@</pig> (6)\n\ndepth: 1", shape="box", style="solid"];
140319730187688 -> 140319730187792 [color=red, label="reference"];
140319730187896 [label="@mtl.usdc@</pig{geo=medium}> (7)\n\ndepth: 1", shape="box", style="solid"];
140319730187792 -> 140319730187896 [color=orange, label="variant"];
140319730188000 [label="@mtl.usdc@</ASSET_geo_variant_1/ASSET> (8)\n\ndepth: 1", shape="box", style="solid"];
140319730187896 -> 140319730188000 [color=red, label="reference"];
140319730188104 [label="@mtl.usdc@</ASSET_geo_variant_1/ASSET{mtl=default}> (9)\n\ndepth: 2", shape="box", style="solid"];
140319730188000 -> 140319730188104 [color=orange, label="variant"];
140319730188208 [label="@mtl.usdc@</ASSET_geo_variant_1/ASSET_mtl_default> (10)\n\ndepth: 2", shape="box", style="solid"];
140319730188000 -> 140319730188208 [color=red, label="reference"];
140319730188312 [label="@geo.usdc@</pig> (11)\n\ndepth: 1", shape="box", style="solid"];
140319730187688 -> 140319730188312 [color=red, label="reference"];
140319730188416 [label="@geo.usdc@</ASSET_geo_variant_2/ASSET> (12)\n\ndepth: 1", shape="box", style="solid"];
140319730188312 -> 140319730188416 [color=red, label="reference"];
140319730188520 [label="@geo.usdc@</ASSET_geo_variant_2/ASSET{geo=medium}> (13)\n\ndepth: 2", shape="box", style="dotted"];
140319730188416 -> 140319730188520 [color=orange, label="variant"];
140319730188624 [label="@geo.usdc@</ASSET_geo_variant_1/ASSET> (14)\n\ndepth: 1", shape="box", style="solid"];
140319730188312 -> 140319730188624 [color=red, label="reference"];
140319730188728 [label="@geo.usdc@</ASSET_geo_variant_1/ASSET{geo=medium}> (15)\n\ndepth: 2", shape="box", style="solid"];
140319730188624 -> 140319730188728 [color=orange, label="variant"];
140319730188832 [label="@geo.usdc@</ASSET_geo_variant_0/ASSET> (16)\n\ndepth: 1", shape="box", style="solid"];
140319730188312 -> 140319730188832 [color=red, label="reference"];
140319730188936 [label="@geo.usdc@</ASSET_geo_variant_0/ASSET{geo=medium}> (17)\n\ndepth: 2", shape="box", style="dotted"];
140319730188832 -> 140319730188936 [color=orange, label="variant"];
}
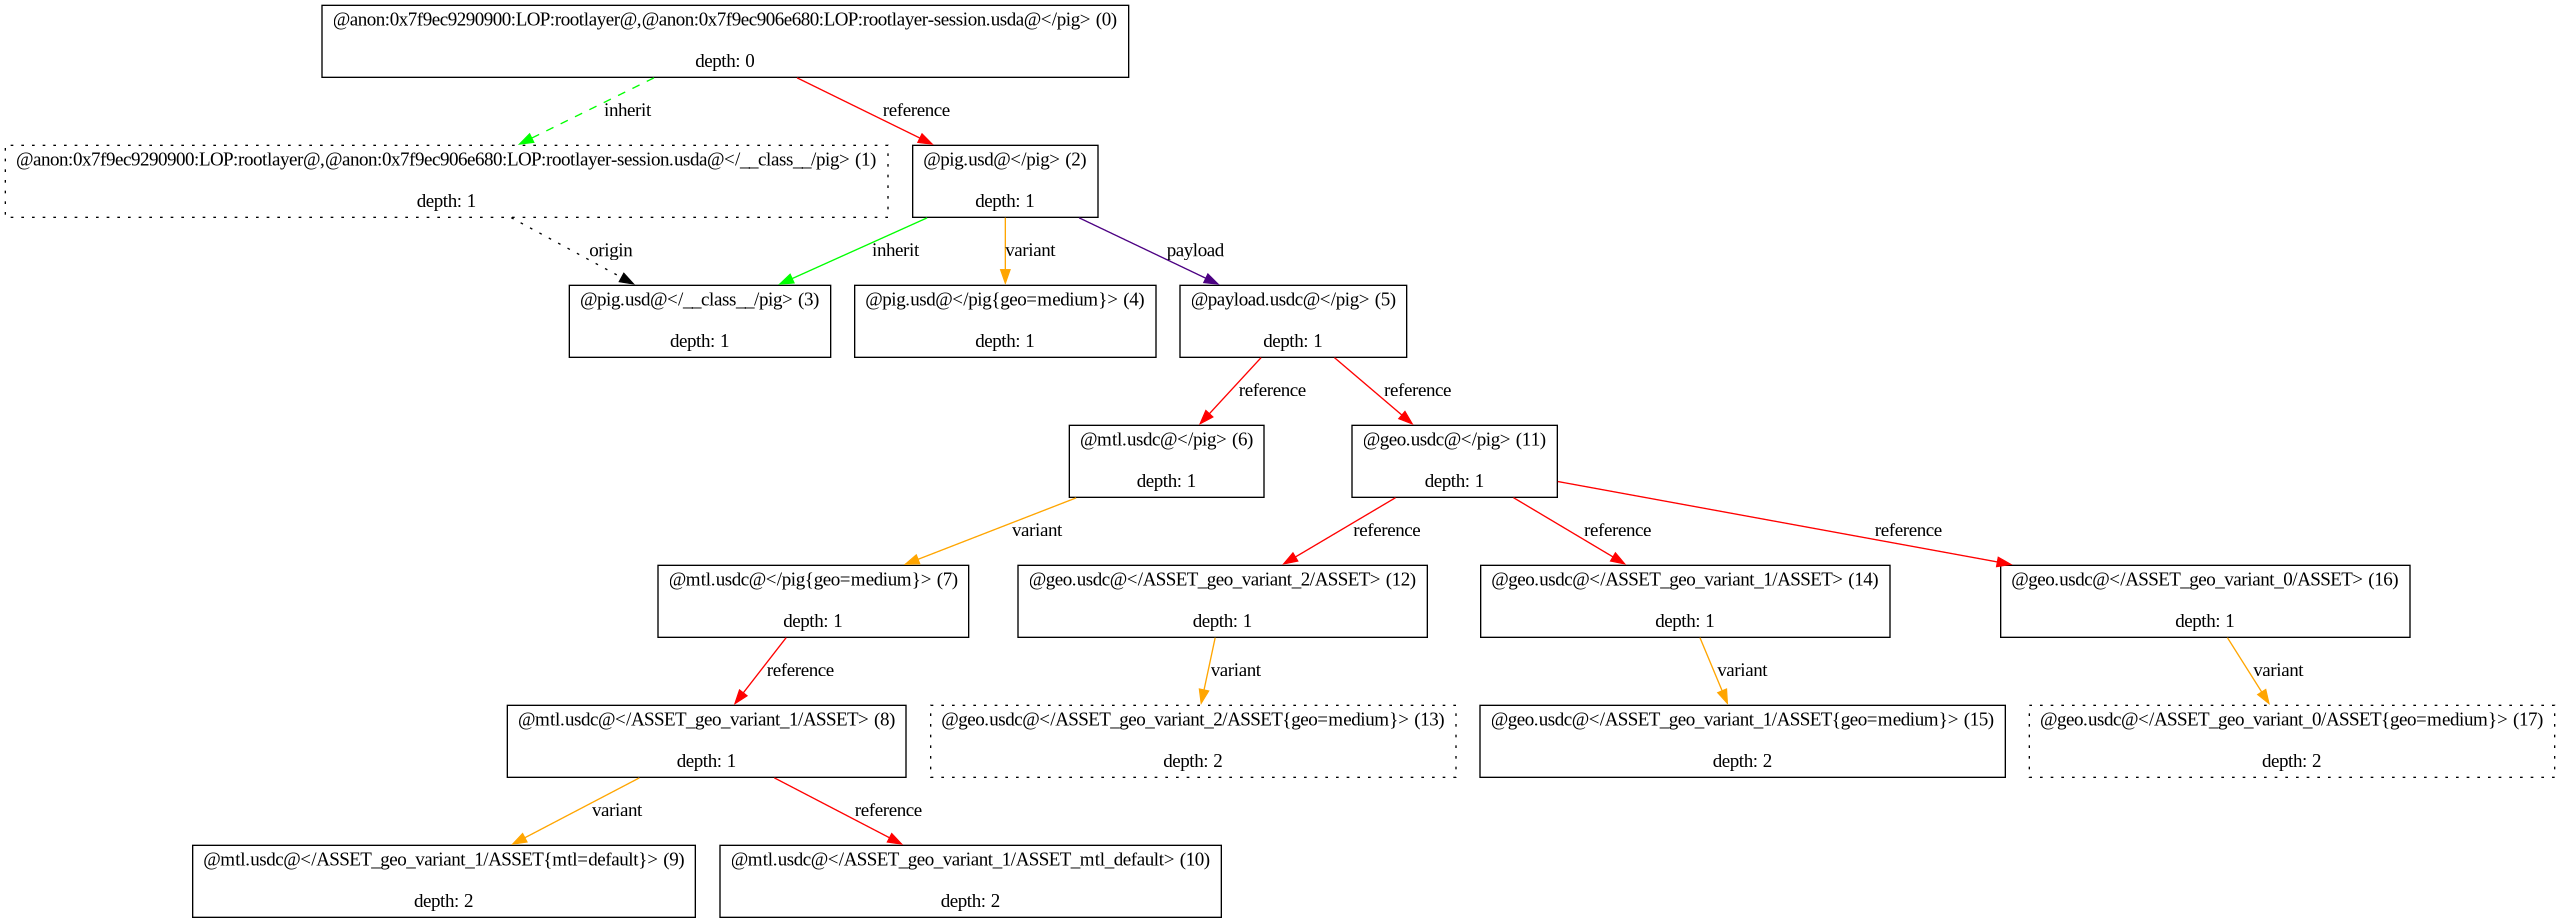
Prim Composition Query
Next let's look at prim composition queries. Instead of having to filter the prim index ourselves, we can use the Usd.PrimCompositionQuery to do it for us. More info in the USD API docs.
The query works by specifying a filter and then calling GetCompositionArcs.
USD provides these convenience filters, it returns a new Usd.PrimCompositionQuery instance with the filter applied:
Usd.PrimCompositionQuery.GetDirectInherits(prim): Returns all non ancestral inherit arcsUsd.PrimCompositionQuery.GetDirectReferences(prim): Returns all non ancestral reference arcsUsd.PrimCompositionQuery.GetDirectRootLayerArcs(prim): Returns arcs that were defined in the active layer stack.
These are the sub-filters that can be set. We can only set a single token value per filter:
- ArcTypeFilter: Filter based on different arc(s).
Usd.PrimCompositionQuery.ArcTypeFilter.AllUsd.PrimCompositionQuery.ArcTypeFilter.InheritUsd.PrimCompositionQuery.ArcTypeFilter.VariantUsd.PrimCompositionQuery.ArcTypeFilter.NotVariantUsd.PrimCompositionQuery.ArcTypeFilter.ReferenceUsd.PrimCompositionQuery.ArcTypeFilter.PayloadUsd.PrimCompositionQuery.ArcTypeFilter.NotReferenceOrPayloadUsd.PrimCompositionQuery.ArcTypeFilter.ReferenceOrPayloadUsd.PrimCompositionQuery.ArcTypeFilter.InheritOrSpecializeUsd.PrimCompositionQuery.ArcTypeFilter.NotInheritOrSpecializeUsd.PrimCompositionQuery.ArcTypeFilter.Specialize
- DependencyTypeFilter: Filter based on if the arc was introduced on a parent prim or on the prim itself.
Usd.PrimCompositionQuery.DependencyTypeFilter.AllUsd.PrimCompositionQuery.DependencyTypeFilter.DirectUsd.PrimCompositionQuery.DependencyTypeFilter.Ancestral
- ArcIntroducedFilter: Filter based on where the arc was introduced.
Usd.PrimCompositionQuery.ArcIntroducedFilter.AllUsd.PrimCompositionQuery.ArcIntroducedFilter.IntroducedInRootLayerStackUsd.PrimCompositionQuery.ArcIntroducedFilter.IntroducedInRootLayerPrimSpec
- HasSpecsFilter: Filter based if the arc has any specs (For example an inherit might not find any in the active layer stack)
Usd.PrimCompositionQuery.HasSpecsFilter.AllUsd.PrimCompositionQuery.HasSpecsFilter.HasSpecsUsd.PrimCompositionQuery.HasSpecsFilter.HasNoSpecs
from pxr import Sdf, Usd
stage = Usd.Stage.CreateInMemory()
prim = stage.DefinePrim("/pig")
refs_API = prim.GetReferences()
refs_API.AddReference("/opt/hfs19.5/houdini/usd/assets/pig/pig.usd")
print("----")
def _repr(arc):
print(arc.GetArcType(),
"| Introducing Prim Path", arc.GetIntroducingPrimPath() or "-",
"| Introducing Layer", arc.GetIntroducingLayer() or "-",
"| Is ancestral", arc.IsAncestral(),
"| In Root Layer Stack", arc.IsIntroducedInRootLayerStack())
print(">-> Direct Root Layer Arcs")
query = Usd.PrimCompositionQuery.GetDirectRootLayerArcs(prim)
for arc in query.GetCompositionArcs():
_repr(arc)
print(">-> Direct Inherits")
query = Usd.PrimCompositionQuery.GetDirectInherits(prim)
for arc in query.GetCompositionArcs():
_repr(arc)
print(">-> Direct References")
query = Usd.PrimCompositionQuery.GetDirectReferences(prim)
for arc in query.GetCompositionArcs():
_repr(arc)
"""Returns:
>-> Direct Root Layer Arcs
Pcp.ArcTypeRoot | Introducing Prim Path - | Introducing Layer - | Is ancestral False | In Root Layer Stack True
Pcp.ArcTypeReference | Introducing Prim Path /pig | Introducing Layer Sdf.Find('anon:0x7f9b60d56b00:tmp.usda') | Is ancestral False | In Root Layer Stack True
>-> Direct Inherits
Pcp.ArcTypeInherit | Introducing Prim Path /pig | Introducing Layer Sdf.Find('/opt/hfs19.5/houdini/usd/assets/pig/pig.usd') | Is ancestral False | In Root Layer Stack False
Pcp.ArcTypeInherit | Introducing Prim Path /pig | Introducing Layer Sdf.Find('/opt/hfs19.5/houdini/usd/assets/pig/pig.usd') | Is ancestral False | In Root Layer Stack False
>-> Direct References
Pcp.ArcTypeReference | Introducing Prim Path /pig | Introducing Layer Sdf.Find('anon:0x7f9b60d56b00:tmp.usda') | Is ancestral False | In Root Layer Stack True
Pcp.ArcTypeReference | Introducing Prim Path /pig | Introducing Layer Sdf.Find('/opt/hfs19.5/houdini/usd/assets/pig/payload.usdc') | Is ancestral False | In Root Layer Stack False
Pcp.ArcTypeReference | Introducing Prim Path /pig{geo=medium} | Introducing Layer Sdf.Find('/opt/hfs19.5/houdini/usd/assets/pig/mtl.usdc') | Is ancestral False | In Root Layer Stack False
Pcp.ArcTypeReference | Introducing Prim Path /ASSET_geo_variant_1/ASSET | Introducing Layer Sdf.Find('/opt/hfs19.5/houdini/usd/assets/pig/mtl.usdc') | Is ancestral False | In Root Layer Stack False
Pcp.ArcTypeReference | Introducing Prim Path /pig | Introducing Layer Sdf.Find('/opt/hfs19.5/houdini/usd/assets/pig/payload.usdc') | Is ancestral False | In Root Layer Stack False
Pcp.ArcTypeReference | Introducing Prim Path /pig | Introducing Layer Sdf.Find('/opt/hfs19.5/houdini/usd/assets/pig/geo.usdc') | Is ancestral False | In Root Layer Stack False
Pcp.ArcTypeReference | Introducing Prim Path /pig | Introducing Layer Sdf.Find('/opt/hfs19.5/houdini/usd/assets/pig/geo.usdc') | Is ancestral False | In Root Layer Stack False
Pcp.ArcTypeReference | Introducing Prim Path /pig | Introducing Layer Sdf.Find('/opt/hfs19.5/houdini/usd/assets/pig/geo.usdc') | Is ancestral False | In Root Layer Stack False
"""
# Custom filter
# For example let's get all direct payloads, that were not introduced in the active root layer stack.
query_filter = Usd.PrimCompositionQuery.Filter()
query_filter.arcTypeFilter = Usd.PrimCompositionQuery.ArcTypeFilter.Payload
query_filter.dependencyTypeFilter = Usd.PrimCompositionQuery.DependencyTypeFilter.Direct
query_filter.arcIntroducedFilter = Usd.PrimCompositionQuery.ArcIntroducedFilter.All
query_filter.hasSpecsFilter = Usd.PrimCompositionQuery.HasSpecsFilter.HasSpecs
print(">-> Custom Query (Direct payloads not in root layer that have specs)")
query = Usd.PrimCompositionQuery(prim)
query.filter = query_filter
for arc in query.GetCompositionArcs():
_repr(arc)
"""Returns:
>-> Custom Query (Direct payloads not in root layer that have specs)
Pcp.ArcTypePayload | Introducing Prim Path /pig | Introducing Layer Sdf.Find('/opt/hfs19.5/houdini/usd/assets/pig/pig.usd') | Is ancestral False | In Root Layer Stack False
"""
The returned filtered Usd.CompositionArc objects, allow us to inspect various things about the arc. You can find more info in the API docs
Plugin System
Usd has a plugin system over which individual components are loaded.
In this guide we will cover how to create these minimal set of plugins needed to setup a production ready Usd pipeline:
- Kinds Plugin (No compiling needed): For this plugin all you need is a simple .json file that adds custom kinds. Head over to our kind section to get started.
- Asset Resolver Plugin (Compiling needed or use pre-packed resolvers): Head over to our asset resolver section to get started. The actual code and guide is hosted here as it is a big enough topic of its own.
- Schema Plugin (Optional, compiling needed if you want Python C++/Bindings): A schema plugin allows you to create own prim types/API schemas. This is useful when you need to often create a standardized set of attributes on prims that are relevant for your pipeline. Head over to our schemas section to get going or to our schemas overview section to get an overview of what schemas are.
- Metadata Plugin (Optional, No compiling needed): A metadata plugin allows you to create own metadata entries, so that you don't have to use the
assetInfo/customDatadict fields for transporting custom metadata. Schema plugins can also specify metadata, it is limited to the prim/applied schema though, so a standalone metadata plugin allows us to make metadata available on all prims/properties regardless of prim type/schema.
As listed above, some plugins need to be compiled. Most DCCs ship with a customized USD build, where most vendors adhere to the VFX Reference Platform and only change USD with major version software releases. They do backport important production patches though from time to time. That's why we recommend using the USD build from the DCC instead of trying to self compile and link it to the DCC, as this guarantees the most stability. This does mean though, that you have to compile all plugins against each (major version) releases of each individual DCC.
Typical plugins are:
- Schemas
- Metadata
- Kinds
- Asset Resolver
- Hydra Delegates (Render Delegates)
- File Format Plugins (.abc/.vdb)
You can inspect if whats plugins were registered by setting the TF_DEBUG variable as mentioned in the debugging section:
export TF_DEBUG=PLUG_REGISTRATION
If you want to check via Python, you have to know under what registry the plugin is installed. There are several (info shamelessly copied from the below linked USD-CookBook page ;)):
- KindRegistry
- PlugRegistry
- Sdf_FileFormatRegistry
- ShaderResourceRegistry
- UsdImagingAdapterRegistry
Colin Kennedy's USD-Cookbook has an excellent overview on this topic: USD Cook-Book Plugins
Plugins are detected by looking at the PXR_PLUGINPATH_NAME environment variable for folders containing aplugInfo.json file.
To set it temporarily, you can run the following in a shell and then run your Usd application:
// Linux
export PXR_PLUGINPATH_NAME=/my/cool/plugin/resources:${PXR_PLUGINPATH_NAME}
// Windows
set PXR_PLUGINPATH_NAME=/my/cool/plugin/resources:${PXR_PLUGINPATH_NAME}
If you search your Usd installation, you'll find a few of these for different components of Usd. They are usually placed in a
Via Python you can also partially search for plugins (depending on what registry they are in) and also print their plugInfo.json file content via the .metadata attribute.
from pxr import Plug
registry = Plug.Registry()
for plugin in registry.GetAllPlugins():
print(plugin.name, plugin.path, plugin.isLoaded)
# To print the plugInfo.json content run:
# print(plugin.metadata)
We can also use the plugin registry to lookup from what plugin a specific type/class (in this case a schema) is registered by:
from pxr import Plug, Tf, Usd
registry = Plug.Registry()
print(">>>>>", "Typed Schemas")
for type_name in registry.GetAllDerivedTypes(Usd.Typed):
print(type_name)
print(">>>>>", "API Schemas")
for type_name in registry.GetAllDerivedTypes(Usd.APISchemaBase):
print(type_name)
# For example to lookup where the "Cube" type is registered from,
# we can run:
print(">>>>>", "Cube Schema Plugin Source")
plugin = registry.GetPluginForType(Tf.Type.FindByName("UsdGeomCube"))
print(plugin.name)
print(plugin.path)
print(plugin.resourcePath)
print(plugin.metadata)
Kinds
The kind metadata is a special metadata entry on prims that can be written to mark prims with data what "hierarchy level type" it is. This way we can quickly traverse and select parts of the hierarchy that are of interest to us, without traversing into every child prim. The most common types are component and group. We use these (or sub-kinds) of these to make our stage more easily browse-able, so that we can visually/programmatically easily detect where assets start.
Table of Contents
TL;DR - Kinds In-A-Nutshell
The kind metadata is mainly used to for two things:
- Traversal: You can quickly detect (and stop traversal to children) where the assets are in your hierarchy by marking them as a a
modelsubtype likecomponent. A typical use case would be "find me allfxassets": In your pipeline you would define a 'fx' model kind subtype and then you can traverse for all prims that have the 'fx' kind set. - DCCs use this to drive user selection in UIs. This way we can quickly select non-leaf prims that are of interest. For example to transform an asset in the hierarchy, we only want to select the asset root prim and not its children, so we can tell our DCC to select only
modelkind prims. This will limit the selection to all sub-kinds ofmodel.
If you have created custom kinds, you can place icons (png/svg) in your $HOUDINI_PATH/config/Icons/SCENEGRAPH_kind_<name>.<ext> folder and they will be shown in your scene graph tree panel.
What should I use it for?
In production, you'll use kinds as a way to filter prims when looking for data. As kind data is written in prim metadata, it is very fast to access and suited for high performance queries/traversals. For more info on traversals, take a look at the traversal section.
You should always tag all prims in the hierarchy with kinds at least to the asset level. Some Usd methods as well as DCCs will otherwise not traverse into the child hierarchy of a prim if they come across a prim without a kind being set.
So this means you should have at least group kind metadata set for all parent prims of model sub-kind prims.
Resources
Overview
Usd ships with these kinds by default, to register your own kinds, see the below examples for more details:
model: The base kind for all model kinds, don't use it directly.group: A group of model prims.assembly: A collection of model prims, typically used for sets/a assembled collection of models or environments.
component: A sub-kind of 'model' that has no other child prims of type 'model'
subcomponent: An important subhierarchy of an component.
You should always tag all prims with kinds at least to the asset level in the hierarchy. Some DCCs will otherwise not traverse into the hierarchy if they come across a prim without a hierarchy.
So this means you should have group kinds set for all parent prims of model prims.
Reading and Writing Kinds
Kinds can be easily set via the high and low level APIs:
### High Level ###
from pxr import Kind, Sdf, Usd
stage = Usd.Stage.CreateInMemory()
prim_path = Sdf.Path("/bicycle")
prim = stage.DefinePrim(prim_path, "Xform")
model_API = Usd.ModelAPI(prim)
model_API.SetKind(Kind.Tokens.component)
# The prim class' IsModel/IsGroup method checks if a prim (and all its parents) are (sub-) kinds of model/group.
model_API.SetKind(Kind.Tokens.model)
kind = model_API.GetKind()
print(kind, (Kind.Registry.GetBaseKind(kind) or kind) == Kind.Tokens.model, prim.IsModel())
model_API.SetKind(Kind.Tokens.group)
kind = model_API.GetKind()
print(kind, (Kind.Registry.GetBaseKind(kind) or kind) == Kind.Tokens.group, prim.IsGroup())
### Low Level ###
from pxr import Kind, Sdf
layer = Sdf.Layer.CreateAnonymous()
prim_path = Sdf.Path("/bicycle")
prim_spec = Sdf.CreatePrimInLayer(layer, prim_path)
prim_spec.SetInfo("kind", Kind.Tokens.component)
An example Usd file could look likes this
def Xform "set" (
kind = "set"
)
{
def Xform "garage" (
kind = "group"
)
{
def Xform "bicycle" (
kind = "prop"
)
{
}
}
def Xform "yard" (
kind = "group"
)
{
def Xform "explosion" (
kind = "fx"
)
{
}
}
}
Creating own kinds
We can register kinds via the plugin system.
{
"Plugins":[
{
"Type": "python",
"Name": "usdSurvivalGuideKinds",
"Info":{
"Kinds":{
"character":{
"baseKind":"component",
"description":"A (hero) character"
},
"prop":{
"baseKind":"component",
"description":"A generic prop asset"
},
"fx":{
"baseKind":"component",
"description":"A FX asset"
},
"environment":{
"baseKind":"assembly",
"description":"A large scale environment like a city."
},
"set":{
"baseKind":"assembly",
"description":"A individual section of an environment, typically a movie set placed in an environment."
}
}
}
}
]
}
To register the above kinds, copy the contents into a file called plugInfo.json. Then set your PXR_PLUGINPATH_NAME environment variable to the folder containing the plugInfo.json file.
For Linux this can be done for the active shell as follows:
export PXR_PLUGINPATH_NAME=/my/cool/plugin/resources:${PXR_PLUGINPATH_NAME}
If you downloaded this repo, we provide an example kind plugin here. All you need to do is point the environment variable there and launch a USD capable application.
Kind Registry
We can also check if a plugin with kind data was registered via Python.
from pxr import Kind
registry = Kind.Registry()
for kind in registry.GetAllKinds():
base_kind = Kind.Registry.GetBaseKind(kind)
print(f"{kind:<15} - Base Kind - {base_kind}")
# Returns:
"""
set - Base Kind - assembly
assembly - Base Kind - group
fx - Base Kind - component
environment - Base Kind - assembly
character - Base Kind - component
group - Base Kind - model
component - Base Kind - model
model - Base Kind
subcomponent - Base Kind
"""
print(registry.HasKind("fx")) # Returns: True
print(registry.IsA("fx", "model")) # Returns: True
Kind IsA Checks & Traversal
We can then also use our custom kinds for traversal checks.
Usd offers the prim.IsModel and prim.IsGroup checks as convenience methods to check if a kind is a sub-kind of the base kinds.
Make sure that your whole hierarchy has kinds defined (to the prim you want to search for), otherwise your prim.IsModel and prim.IsGroup checks will fail. This also affects how DCCs implement traversal: For example when using Houdini's LOPs selection rules with the %kind:component syntax, the selection rule will not traverse into the prim children and will stop at the parent prim without a kind. Manually checking via registry.IsA(prim.GetKind(), "component") still works though, as this does not include the parents in the check. (See examples below)
#ToDo Add icon
from pxr import Kind, Sdf, Usd
stage = Usd.Stage.CreateInMemory()
prim = stage.DefinePrim(Sdf.Path("/set"), "Xform")
Usd.ModelAPI(prim).SetKind("set")
prim = stage.DefinePrim(Sdf.Path("/set/garage"), "Xform")
Usd.ModelAPI(prim).SetKind("group")
prim = stage.DefinePrim(Sdf.Path("/set/garage/bicycle"), "Xform")
Usd.ModelAPI(prim).SetKind("prop")
prim = stage.DefinePrim(Sdf.Path("/set/yard"), "Xform")
Usd.ModelAPI(prim).SetKind("group")
prim = stage.DefinePrim(Sdf.Path("/set/yard/explosion"), "Xform")
Usd.ModelAPI(prim).SetKind("fx")
# Result:
print(stage.ExportToString())
"""
def Xform "set" (
kind = "set"
)
{
def Xform "garage" (
kind = "group"
)
{
def Xform "bicycle" (
kind = "prop"
)
{
}
}
def Xform "yard" (
kind = "group"
)
{
def Xform "explosion" (
kind = "fx"
)
{
}
}
}
"""
for prim in stage.Traverse():
print("{:<20} - IsModel: {} - IsGroup: {}".format(prim.GetPath().pathString, prim.IsModel(), prim.IsGroup()))
# Returns:
"""
/set - IsModel: True - IsGroup: True
/set/garage - IsModel: True - IsGroup: True
/set/garage/bicycle - IsModel: True - IsGroup: False
/set/yard - IsModel: True - IsGroup: True
/set/yard/explosion - IsModel: True - IsGroup: False
"""
registry = Kind.Registry()
for prim in stage.Traverse():
kind = Usd.ModelAPI(prim).GetKind()
print("{:<25} - {:<5} - {}".format(prim.GetPath().pathString, kind, registry.IsA("fx", "component")))
# Failed traversal because of missing kinds
stage = Usd.Stage.CreateInMemory()
prim = stage.DefinePrim(Sdf.Path("/set"), "Xform")
Usd.ModelAPI(prim).SetKind("set")
prim = stage.DefinePrim(Sdf.Path("/set/garage"), "Xform")
prim = stage.DefinePrim(Sdf.Path("/set/garage/bicycle"), "Xform")
Usd.ModelAPI(prim).SetKind("prop")
prim = stage.DefinePrim(Sdf.Path("/set/yard"), "Xform")
prim = stage.DefinePrim(Sdf.Path("/set/yard/explosion"), "Xform")
Usd.ModelAPI(prim).SetKind("fx")
registry = Kind.Registry()
for prim in stage.Traverse():
kind = Usd.ModelAPI(prim).GetKind()
print("{:<20} - Kind: {:10} - IsA('component') {}".format(prim.GetPath().pathString, kind, registry.IsA(kind, "component")))
print("{:<20} - IsModel: {} - IsGroup: {}".format(prim.GetPath().pathString, prim.IsModel(), prim.IsGroup()))
"""
/set - Kind: set - IsA('component') False
/set - IsModel: True - IsGroup: True
/set/garage - Kind: - IsA('component') False
/set/garage - IsModel: False - IsGroup: False
/set/garage/bicycle - Kind: prop - IsA('component') True
/set/garage/bicycle - IsModel: False - IsGroup: False
/set/yard - Kind: - IsA('component') False
/set/yard - IsModel: False - IsGroup: False
/set/yard/explosion - Kind: fx - IsA('component') True
/set/yard/explosion - IsModel: False - IsGroup: False
"""
Metadata
USD allows us to extend the base metadata that is attached to every layer, prim and property (Supported are Sdf.Layer and subclasses of Sdf.Spec). This allows us to write custom fields with a specific type, so that we don't have to rely on writing everything into the assetInfo and customData entries.
To get an overview of metadata in USD, check out our dedicated metadata section.
Table of Contents
TL;DR - Metadata Plugins In-A-Nutshell
- Extending USD with custom metadata fields is as simple as creating a
plugInfo.jsonfile with entires for what custom fields you want and on what entities (Supported areSdf.Layerand subclasses ofSdf.Spec).
What should I use it for?
In production, most of the sidecar metadata should be tracked via the assetInfo and customData metadata entries. It does make sense to extend the functionality with own metadata keys for:
- Doing high performance lookups. Metadata is fast to read, as it follows simpler composition rules, so we can use it as a
IsAreplacement mechanism we can tag our prims/properties with. - We can add list editable ops metadata fields, this can be used as a way to layer together different array sidecar data. For an example see our Reading/Writing the installed custom metadata section.
Resources
Overview
Here is the minimal plugin template with all options you can configure for your metadata:
{
"Plugins": [
{
"Name": "<PluginName>",
"Type": "resource",
"Info": {
"SdfMetadata": {
"<field_name>" : {
"appliesTo": "<Optional comma-separated list of spec types this field applies to>",
"default": "<Optional default value for field>",
"displayGroup": "<Optional name of associated display group>",
"type": "<Required name indicating field type>",
}
}
}
}
]
}
We can limit the metadata entry to the following Sdf.Layer/Subclasses of Sdf.Specs with the type entry:
| "appliesTo" token | Spec type |
|---|---|
| layers | SdfLayer (SdfPseudoRootSpec) |
| prims | SdfPrimSpec, SdfVariantSpec |
| properties | SdfPropertySpec |
| attributes | SdfAttributeSpec |
| relationships | SdfRelationshipSpec |
| variants | SdfVariantSpec |
You can find all the supported data types on this page in the official docs: USD Cookbook - Extending Metadata.
Installing a metadata plugin
Here is an example plugInfo.json file for metadata, it also ships with this repo here.
{
"Plugins": [
{
"Name": "usdSurvivalGuideMetadata",
"Type": "resource",
"Info": {
"SdfMetadata": {
"usdSurvivalGuideOverrideTimeCode": {
"type": "double[]",
"appliesTo": "layers",
"default": [1001.0, 1050.0]
},
"usdSurvivalGuideFloat": {
"type": "double",
"appliesTo": "prims",
"default": 5
},
"usdSurvivalGuideAssetDependencies": {
"type": "stringlistop",
"appliesTo": "prims"
}
}
}
}
]
}
To register the above metadata plugin, copy the contents into a file called plugInfo.json. Then set your PXR_PLUGINPATH_NAME environment variable to the folder containing the plugInfo.json file.
For Linux this can be done for the active shell as follows:
export PXR_PLUGINPATH_NAME=/my/cool/plugin/resources:${PXR_PLUGINPATH_NAME}
If you downloaded this repo, we provide the above example metadata plugin here. All you need to do is point the environment variable there and launch a USD capable application.
Reading/Writing the installed custom metadata
Once the plugin is loaded, we can now read and write to the custom entry.
Custom metadata fields on the Sdf.Layer are not exposed via Python (as far as we could find).
from pxr import Usd, Sdf
# Here we test it in an example stage:
stage = Usd.Stage.CreateInMemory()
layer = stage.GetEditTarget().GetLayer()
prim = stage.DefinePrim("/prim")
prim_spec = layer.GetPrimAtPath(prim.GetPath())
# To see all the globally registered fields for the metadata on prim specs:
print(Sdf.PrimSpec.GetMetaDataInfoKeys(prim_spec))
# Float field
metadata_name = "usdSurvivalGuideFloat"
print(prim.GetMetadata(metadata_name)) # Returns: None
print(prim_spec.GetFallbackForInfo(metadata_name)) # Returns: 5
prim.SetMetadata(metadata_name, 10)
print(prim.GetMetadata(metadata_name)) # Returns: 10
# String List Editable Op
metadata_name = "usdSurvivalGuideAssetDependencies"
string_list_op = Sdf.StringListOp.Create(appendedItems=["motor.usd", "tire.usd"])
print(prim.GetMetadata(metadata_name))
prim.SetMetadata(metadata_name, string_list_op)
print(prim.GetMetadata(metadata_name))
Schemas
This page only covers how to compile/install custom schemas, as we cover what schemas are in our schemas basic building blocks of USD section.
As there is a very well written documentation in the official docs, we only cover compilation(less) schema creation and installation here as a hands-on example and won't go into any customization details. You can also check out Colin's excellent Usd-Cook-Book example.
Table of Contents
- API Overview In-A-Nutshell
- What should I use it for?
- Resources
- Overview
- Generate Codeless Schema
- Generate Compiled Schema
TL;DR - Schema Creation In-A-Nutshell
- Generating schemas in Usd is as easy as supplying a customized
schema.usdafile to theusdGenSchemacommandline tool that ships with Usd. That's right, you don't need to code! - Custom schemas allow us to create custom prim types/properties/metadata (with fallback values) so that we don't have to repeatedly re-create it ourselves.
- In OOP speak: It allows you to create your own subclasses that nicely fit into Usd and automatically generates all the
Get<PropertyName>/Set<PropertyName>methods, so that it feels like you're using native USD classes. - We can also create
codelessschemas, these don't need to be compiled, but we won't get our nice automatically generated getters and setters and schema C++/Python classes.
Codeless schemas are ideal for smaller studios or when you need to prototype a schema. The result only consists of a plugInfo.json and generatedSchema.usda file and is instantly created without any need for compiling.
Most DCCs ship with a customized USD build, where most vendors adhere to the VFX Reference Platform and only change USD with major version software releases. They do backport important production patches though from time to time. That's why we recommend using the USD build from the DCC instead of trying to self compile and link it to the DCC, as this guarantees the most stability. This does mean though, that you have to compile all plugins against each (major version) releases of each individual DCC.
What should I use it for?
We'll usually want to generate custom schemas, when we want to have a set of properties/metadata that should always exist (with a fallback value) on certain prims. A typical use case for creating an own typed/API schema is storing common render farm settings or shot related data.
Resources
Overview
For both examples we'll start of with the example schema that USD ships with in its official repo.
You can copy and paste the content into a file and then follow along or take the prepared files from here that ship with this repo.
Our guide focuses on working with Houdini, therefore we use the usdGenSchema that ships with Houdini. You can find it in your Houdini /bin directory.
$HFS/bin/usdGenSchema
# For example on Linux:
/opt/hfs19.5/bin/usdGenSchema
If you download/clone this repo, we ship with .bash scripts that automatically runs all the below steps for you.
You'll first need to cd to the root repo dir and then run ./setup.sh. Make sure that you edit the setup.sh file to point to your Houdini version. By default it will be the latest Houdini major release symlink, currently /opt/hfs19.5, that Houdini creates on install.
Then follow along the steps as mentioned below.
Codeless Schema
Codeless schemas allow us to generate schemas without any C++/Python bindings. This means your won't get fancy Schema.Get<PropertyName>/Schema.Set<PropertyName> getters and setters. On the upside you don't need to compile anything.
Codeless schemas are ideal for smaller studios or when you need to prototype a schema. The result only consists of a plugInfo.json and generatedSchema.usda file.
To enable codeless schema generation, we simply have to add bool skipCodeGeneration = true to the customData metadata dict on the global prim in our schema.usda template file.
over "GLOBAL" (
customData = {
bool skipCodeGeneration = true
}
) {
}
Let's do this step by step for our example schema.
Step 1: Edit 'GLOBAL' prim 'customData' dict
Update the global prim custom data dict from:
over "GLOBAL" (
customData = {
string libraryName = "usdSchemaExamples"
string libraryPath = "."
string libraryPrefix = "UsdSchemaExamples"
}
) {
}
over "GLOBAL" (
customData = {
string libraryName = "usdSchemaExamples"
string libraryPath = "."
string libraryPrefix = "UsdSchemaExamples"
bool skipCodeGeneration = true
}
) {
}
Result | Click to expand content
#usda 1.0
(
""" This file contains an example schemata for code generation using
usdGenSchema.
"""
subLayers = [
@usd/schema.usda@
]
)
over "GLOBAL" (
customData = {
string libraryName = "usdSchemaExamples"
string libraryPath = "."
string libraryPrefix = "UsdSchemaExamples"
bool skipCodeGeneration = true
}
) {
}
class "SimplePrim" (
doc = """An example of an untyped schema prim. Note that it does not
specify a typeName"""
# IsA schemas should derive from </Typed>, which is defined in the sublayer
# usd/lib/usd/schema.usda.
inherits = </Typed>
customData = {
# Provide a different class name for the C++ and python schema classes.
# This will be prefixed with libraryPrefix.
# In this case, the class name becomes UsdSchemaExamplesSimple.
string className = "Simple"
}
)
{
int intAttr = 0 (
doc = "An integer attribute with fallback value of 0."
)
rel target (
doc = """A relationship called target that could point to another prim
or a property"""
)
}
# Note that it does not specify a typeName.
class ComplexPrim "ComplexPrim" (
doc = """An example of a untyped IsA schema prim"""
# Inherits from </SimplePrim> defined in simple.usda.
inherits = </SimplePrim>
customData = {
string className = "Complex"
}
)
{
string complexString = "somethingComplex"
}
class "ParamsAPI" (
inherits = </APISchemaBase>
)
{
double params:mass (
# Informs schema generator to create GetMassAttr() method
# instead of GetParamsMassAttr() method
customData = {
string apiName = "mass"
}
doc = "Double value denoting mass"
)
double params:velocity (
customData = {
string apiName = "velocity"
}
doc = "Double value denoting velocity"
)
double params:volume (
customData = {
string apiName = "volume"
}
doc = "Double value denoting volume"
)
}
Step 2: Run usdGenSchema
Next we need to generate the schema.
Make sure that you first sourced you Houdini environment by running $HFS/houdini_setup so that it find all the correct libraries and python interpreter.
On Windows you can also run hython usdGenSchema schema.usda dst to avoid having to source the env yourself.
Then run the following
cd /path/to/your/schema # In our case: .../VFX-UsdSurvivalGuide/files/plugins/schemas/codelessSchema
usdGenSchema schema.usda dst
cd ./files/plugins/schemas/codelessTypedSchema/
chmod +x build.sh # Add execute rights
source ./build.sh # Run usdGenSchema and source the env vars for the plugin path
Not sure if this is a bug, but the usdGenSchema in codeless mode currently outputs a wrong plugInfo.json file. (It leaves in the cmake @...@ string replacements).
The fix is simple, open the plugInfo.json file and replace:
...
"LibraryPath": "@PLUG_INFO_LIBRARY_PATH@",
"Name": "usdSchemaExamples",
"ResourcePath": "@PLUG_INFO_RESOURCE_PATH@",
"Root": "@PLUG_INFO_ROOT@",
"Type": "resource"
...
To:
...
"LibraryPath": ".",
"Name": "usdSchemaExamples",
"ResourcePath": ".",
"Root": ".",
"Type": "resource"
...
Result | Click to expand content
# Portions of this file auto-generated by usdGenSchema.
# Edits will survive regeneration except for comments and
# changes to types with autoGenerated=true.
{
"Plugins": [
{
"Info": {
"Types": {
"UsdSchemaExamplesComplex": {
"alias": {
"UsdSchemaBase": "ComplexPrim"
},
"autoGenerated": true,
"bases": [
"UsdSchemaExamplesSimple"
],
"schemaKind": "concreteTyped"
},
"UsdSchemaExamplesParamsAPI": {
"alias": {
"UsdSchemaBase": "ParamsAPI"
},
"autoGenerated": true,
"bases": [
"UsdAPISchemaBase"
],
"schemaKind": "singleApplyAPI"
},
"UsdSchemaExamplesSimple": {
"alias": {
"UsdSchemaBase": "SimplePrim"
},
"autoGenerated": true,
"bases": [
"UsdTyped"
],
"schemaKind": "abstractTyped"
}
}
},
"LibraryPath": ".",
"Name": "usdSchemaExamples",
"ResourcePath": ".",
"Root": ".",
"Type": "resource"
}
]
}
Step 3: Add the generated pluginInfo.json director to 'PXR_PLUGINPATH_NAME' env var.
Next we need to add the pluginInfo.json directory to the PXR_PLUGINPATH_NAME environment variable.
// Linux
export PXR_PLUGINPATH_NAME=/Enter/Path/To/dist:${PXR_PLUGINPATH_NAME}
// Windows
set PXR_PLUGINPATH_NAME=/Enter/Path/To/dist;%PXR_PLUGINPATH_NAME%
Step 4: Run your Usd (capable) application.
Yes, that's right! It was that easy. (Puts on sunglass, ah yeeaah! 😎)
If you run Houdini and then create a primitive, you can now choose the ComplexPrim as well as assign the ParamAPI API schema.

Or if you want to test it in Python:
from pxr import Usd, Sdf
### High Level ###
stage = Usd.Stage.CreateInMemory()
prim_path = Sdf.Path("/myCoolCustomPrim")
prim = stage.DefinePrim(prim_path, "ComplexPrim")
prim.AddAppliedSchema("ParamsAPI") # Returns: True
# AddAppliedSchema does not check if the schema actually exists,
# you have to use this for codeless schemas.
### Low Level ###
from pxr import Sdf
layer = Sdf.Layer.CreateAnonymous()
prim_path = Sdf.Path("/myCoolCustomPrim")
prim_spec = Sdf.CreatePrimInLayer(layer, prim_path)
prim_spec.typeName = "ComplexPrim"
schemas = Sdf.TokenListOp.Create(
prependedItems=["ParamsAPI"]
)
prim_spec.SetInfo("apiSchemas", schemas)
Compiled Schema
Compiled schemas allow us to generate schemas with any C++/Python bindings. This means we'll get Schema.Get<PropertyName>/Schema.Set<PropertyName> getters and setters automatically which gives our schema a very native Usd feeling. You can then also edit the C++ files to add custom features on top to manipulate the data generated by your schema. This is how many of the schemas that ship with USD do it.
Currently these instructions are only tested for Linux. We might add Windows support in the near future. (We use CMake, so in theory it should be possible to run the same steps in Windows too.)
Let's get started step by step for our example schema.
We also ship with a build.sh for running all the below steps in one go. Make sure you first run the setup.sh as described in the overview section and then navigate to the compiledSchema folder.
cd .../VFX-UsdSurvivalGuide/files/plugins/schemas/compiledSchema
chmod +x build.sh # Add execute rights
source ./build.sh # Run usdGenSchema and source the env vars for the plugin path
This will completely rebuild all directories and set the correct environment variables. You can then go straight to the last step to try it out.
Step 1: Run usdGenSchema
First we need to generate the schema.
Make sure that you first sourced you Houdini environment by running $HFS/houdini_setup so that it can find all the correct libraries and python interpreter.
On Windows you can also run hython usdGenSchema schema.usda dst to avoid having to source the env yourself.
Then run the following
cd /path/to/your/schema # In our case: ../VFX-UsdSurvivalGuide/files/plugins/schemas/compiledSchema
rm -R src
usdGenSchema schema.usda src
Currently usdGenSchema fails to generate the following files:
module.cppmoduleDeps.cpp__init__.py
We needs these for the Python bindings to work, so we supplied them in the VFX-UsdSurvivalGuide/files/plugins/schemas/compiledSchema/auxiliary folder of this repo. Simply copy them into the src folder after running usdGenSchema.
It does automatically detect the boost namespace, so the generated files will automatically work with Houdini's hboost namespace.
If you adjust your own schemas, you will have edit the following in these files:
module.cpp: Per user define schema you need to add a line consisting ofTF_WRAP(<SchemaClassName>);moduleDeps.cpp: If you add C++ methods, you will need to declare any dependencies what your schemas have. This file also contains the namespace for C++/Python where the class modules will be accessible. We changeRegisterLibrary(TfToken("usdSchemaExamples"), TfToken("pxr.UsdSchemaExamples"), reqs);toRegisterLibrary(TfToken("usdSchemaExamples"), TfToken("UsdSchemaExamples"), reqs);as we don't want to inject into the default pxr namespace for this demo.
Step 2: Compile schema
Next up we need to compile the schema. You can check out our asset resolver guide for more info on system requirements. In short you'll need a recent version of:
- gcc (compiler)
- cmake (build tool).
To compile, we first need to adjust our CMakeLists.txt file.
USD actually ships with a CMakeLists.txt file in the examples section. It uses some nice USD CMake convenience functions generate the make files.
We are not going to use that one though. Why? Since we are building against Houdini and to make things more explicit, we prefer showing how to explicitly define all headers/libraries ourselves. For that we provide the CMakeLists.txt file here.
Then run the following
# Clear build & install dirs
rm -R build
rm -R dist
# Build
cmake . -B build
cmake --build build --clean-first # make clean all
cmake --install build # make install
Here is the content of the CMakeLists.txt file. We might make a CMake intro later, as it is pretty straight forward to setup once you know the basics.
CMakeLists.txt | Click to expand content
### Configuration ###
# Here we declare some custom variables that configure namings
set(USDSG_PROJECT_NAME UsdExamplesSchemas)
set(USDSG_EXAMPLESCHEMAS_USD_PLUGIN_NAME usdExampleSchemas)
set(USDSG_EXAMPLESCHEMAS_USD_CXX_CLASS_NAME UsdExampleSchemas)
set(USDSG_EXAMPLESCHEMAS_USD_PYTHON_MODULE_NAME UsdExampleSchemas)
set(USDSG_EXAMPLESCHEMAS_TARGET_LIB usdExampleSchemas)
set(USDSG_EXAMPLESCHEMAS_TARGET_PYTHON _${USDSG_EXAMPLESCHEMAS_TARGET_LIB})
# Arch
set(USDSG_ARCH_LIB_SUFFIX so)
# Houdini
set(USDSG_HOUDINI_ROOT $ENV{HFS})
set(USDSG_HOUDINI_LIB_DIR ${USDSG_HOUDINI_ROOT}/dsolib)
set(USDSG_HOUDINI_INCLUDE_DIR ${USDSG_HOUDINI_ROOT}/toolkit/include)
# Usd
set(USDSG_PXR_LIB_DIR ${USDSG_HOUDINI_ROOT}/dsolib)
set(USDSG_PXR_LIB_PREFIX "pxr_")
set(USDSG_PXR_INCLUDE_DIR ${USDSG_HOUDINI_INCLUDE_DIR})
# Python
set(USDSG_PYTHON_LIB_DIR ${USDSG_HOUDINI_ROOT}/python/lib)
set(USDSG_PYTHON_LIB python3.9)
set(USDSG_PYTHON_LIB_NUMBER python39)
set(USDSG_PYTHON_LIB_SITEPACKAGES ${USDSG_PYTHON_LIB_DIR}/${USDSG_PYTHON_LIB}/site-packages)
set(USDSG_PYTHON_INCLUDE_DIR ${USDSG_HOUDINI_INCLUDE_DIR}/${USDSG_PYTHON_LIB})
# Boost
set(USDSG_BOOST_NAMESPACE hboost)
set(USDSG_BOOST_INCLUDE_DIR "${USDSG_HOUDINI_INCLUDE_DIR}/${USDSG_BOOST_NAMESPACE}")
set(USDSG_BOOST_PYTHON_LIB ${USDSG_BOOST_NAMESPACE}_${USDSG_PYTHON_LIB_NUMBER})
# usdGenSchema plugInfo.json vars
set(PLUG_INFO_ROOT ".")
set(PLUG_INFO_LIBRARY_PATH "../lib/${USDSG_EXAMPLESCHEMAS_TARGET_LIB}.${USDSG_ARCH_LIB_SUFFIX}")
set(PLUG_INFO_RESOURCE_PATH ".")
### Init ###
cmake_minimum_required(VERSION 3.14 FATAL_ERROR)
project(${USDSG_PROJECT_NAME} VERSION 1.0.0 LANGUAGES CXX)
### CPP Settings ###
set(BUILD_SHARED_LIBS ON)
# Preprocessor Defines (Same as #define)
add_compile_definitions(_GLIBCXX_USE_CXX11_ABI=0 HBOOST_ALL_NO_LIB BOOST_ALL_NO_LIB)
# This is the same as set(CMAKE_CXX_FLAGS "${CMAKE_CXX_FLAGS} -DHBOOST_ALL_NO_LIB -D_GLIBCXX_USE_CXX11_ABI=0")
# Compiler Options
add_compile_options(-fPIC -Wno-deprecated -Wno-deprecated-declarations -Wno-changes-meaning) # -Zc:inline-
### Packages ### (Settings for all targets)
# Houdini
link_directories(${USDSG_HOUDINI_LIB_DIR})
# Usd (Already provided via Houdini)
# link_directories(${USDSG_PXR_LIB_DIR})
# Python (Already provided via Houdini)
# link_directories(${USDSG_PYTHON_LIB_DIR})
### CPP Settings ###
SET(CMAKE_INSTALL_PREFIX "${CMAKE_SOURCE_DIR}/dist" CACHE PATH "Default install dir " FORCE)
### Targets ###
## Target library > usdSchemaExamples ##
add_library(${USDSG_EXAMPLESCHEMAS_TARGET_LIB}
SHARED
src/complex.cpp
src/paramsAPI.cpp
src/simple.cpp
src/tokens.cpp
)
# Libs
target_link_libraries(${USDSG_EXAMPLESCHEMAS_TARGET_LIB}
${USDSG_PXR_LIB_PREFIX}tf
${USDSG_PXR_LIB_PREFIX}vt
${USDSG_PXR_LIB_PREFIX}usd
${USDSG_PXR_LIB_PREFIX}sdf
)
# Headers
target_include_directories(${USDSG_EXAMPLESCHEMAS_TARGET_LIB}
PUBLIC
${USDSG_BOOST_INCLUDE_DIR}
${USDSG_PYTHON_INCLUDE_DIR}
${USDSG_PXR_INCLUDE_DIR}
)
# Props
# Remove default "lib" prefix
set_target_properties(${USDSG_EXAMPLESCHEMAS_TARGET_LIB} PROPERTIES PREFIX "")
# Preprocessor Defines (Same as #define)
target_compile_definitions(${USDSG_EXAMPLESCHEMAS_TARGET_LIB}
PRIVATE
# USD Plugin Internal Namings
MFB_PACKAGE_NAME=${USDSG_EXAMPLESCHEMAS_USD_PLUGIN_NAME}
)
# Install
configure_file(src/plugInfo.json plugInfo.json)
install(FILES ${CMAKE_CURRENT_BINARY_DIR}/plugInfo.json DESTINATION resources)
install(FILES src/generatedSchema.usda DESTINATION resources)
install(TARGETS ${USDSG_EXAMPLESCHEMAS_TARGET_LIB} RUNTIME DESTINATION lib)
## Target library > usdSchemaExamples Python ##
add_library(${USDSG_EXAMPLESCHEMAS_TARGET_PYTHON}
SHARED
src/wrapComplex.cpp
src/wrapParamsAPI.cpp
src/wrapSimple.cpp
src/wrapTokens.cpp
src/module.cpp
src/moduleDeps.cpp
)
# Libs
target_link_libraries(${USDSG_EXAMPLESCHEMAS_TARGET_PYTHON}
${USDSG_EXAMPLESCHEMAS_TARGET_LIB}
${USDSG_BOOST_PYTHON_LIB}
)
# Headers
target_include_directories(${USDSG_EXAMPLESCHEMAS_TARGET_PYTHON}
PUBLIC
${USDSG_BOOST_INCLUDE_DIR}
${USDSG_PYTHON_INCLUDE_DIR}
${USDSG_PXR_INCLUDE_DIR}
)
# Props
# Remove default "lib" prefix
set_target_properties(${USDSG_EXAMPLESCHEMAS_TARGET_PYTHON} PROPERTIES PREFIX "")
# Preprocessor Defines (Same as #define)
target_compile_definitions(${USDSG_EXAMPLESCHEMAS_TARGET_PYTHON}
PRIVATE
# USD Plugin Internal Namings
MFB_PACKAGE_NAME=${USDSG_EXAMPLESCHEMAS_USD_PLUGIN_NAME}
MFB_PACKAGE_MODULE=${USDSG_EXAMPLESCHEMAS_USD_PYTHON_MODULE_NAME}
)
# Install
install(FILES src/__init__.py DESTINATION lib/python/${USDSG_EXAMPLESCHEMAS_USD_PYTHON_MODULE_NAME})
install(
TARGETS ${USDSG_EXAMPLESCHEMAS_TARGET_PYTHON}
DESTINATION lib/python/${USDSG_EXAMPLESCHEMAS_USD_PYTHON_MODULE_NAME}
)
# Status
message(STATUS "--- Usd Example Schemas Instructions Start ---")
message(NOTICE "To use the compiled files, set the following environment variables:")
message(NOTICE "export PYTHONPATH=${CMAKE_INSTALL_PREFIX}/lib/python:${USDSG_PYTHON_LIB_SITEPACKAGES}:$PYTHONPATH")
message(NOTICE "export PXR_PLUGINPATH_NAME=${CMAKE_INSTALL_PREFIX}/resources:$PXR_PLUGINPATH_NAME")
message(NOTICE "export LD_LIBRARY_PATH=${CMAKE_INSTALL_PREFIX}/lib:${HFS}/python/lib:${HFS}/dsolib:$LD_LIBRARY_PATH")
message(STATUS "--- Usd Example Schemas Instructions End ---\n")
Step 3: Update environment variables.
Next we need to update our environment variables. The cmake output log actually has a message that shows what to set:
PXR_PLUGINPATH_NAME: The USD plugin search path variable.PYTHONPATH: This is the standard Python search path variable.LD_LIBRARY_PATH: This is the search path variable for how.sofiles are found on Linux.
// Linux
export PYTHONPATH=..../VFX-UsdSurvivalGuide/files/plugins/schemas/compiledSchema/dist/lib/python:/opt/hfs19.5/python/lib/python3.9/site-packages:$PYTHONPATH
export PXR_PLUGINPATH_NAME=.../VFX-UsdSurvivalGuide/files/plugins/schemas/compiledSchema/dist/resources:$PXR_PLUGINPATH_NAME
export LD_LIBRARY_PATH=.../VFX-UsdSurvivalGuide/files/plugins/schemas/compiledSchema/dist/lib:/python/lib:/dsolib:$LD_LIBRARY_PATH
// Windows
set PYTHONPATH=..../VFX-UsdSurvivalGuide/files/plugins/schemas/compiledSchema/dist/lib/python;/opt/hfs19.5/python/lib/python3.9/site-packages;%PYTHON_PATH%
set PXR_PLUGINPATH_NAME=.../VFX-UsdSurvivalGuide/files/plugins/schemas/compiledSchema/dist/resources;%PXR_PLUGINPATH_NAME%
For Windows, specifying the linked .dll search path is different. We'll add more info in the future.
Step 4: Run your Usd (capable) application.
If we now run Houdini and then create a primitive, you can now choose the ComplexPrim as well as assign the ParamAPI API schema.
Or if you want to test it in Python:
from pxr import Usd, Sdf
### High Level ###
stage = Usd.Stage.CreateInMemory()
prim_path = Sdf.Path("/myCoolCustomPrim")
prim = stage.DefinePrim(prim_path, "ComplexPrim")
prim.AddAppliedSchema("ParamsAPI") # Returns: True
# AddAppliedSchema does not check if the schema actually exists,
# you have to use this for codeless schemas.
### Low Level ###
from pxr import Sdf
layer = Sdf.Layer.CreateAnonymous()
prim_path = Sdf.Path("/myCoolCustomPrim")
prim_spec = Sdf.CreatePrimInLayer(layer, prim_path)
prim_spec.typeName = "ComplexPrim"
schemas = Sdf.TokenListOp.Create(
prependedItems=["ParamsAPI"]
)
prim_spec.SetInfo("apiSchemas", schemas)
### Python Classes ###
stage = Usd.Stage.CreateInMemory()
prim = stage.GetPrimAtPath("/prim")
print(prim.GetTypeName())
print(prim.GetPrimTypeInfo().GetSchemaType().pythonClass)
# Schema Classes
import UsdExampleSchemas as schemas
print(schemas.Complex)
print(schemas.ParamsAPI)
print(schemas.Simple)
print(schemas.Tokens)
# Schema Get/Set/Create methods
schemas.Complex.CreateIntAttrAttr()
As you can see we now get our nice Create<PropertyName>/Get<PropertyName>/Set<PropertyName> methods as well as full Python exposure to our C++ classes.
Asset Resolver
The Asset Resolver is one of those core Usd topics you have to face eventually and can't get around if you plan on using Usd in production. To summarize its functionality in a simple diagram:
flowchart LR
assetIdentifier(["@Asset Identifier@"]) --> assetResolver([Asset Resolver])
assetResolver --> assetResolvedPath([Resolved Asset Path])
In Usd itself, asset paths are separated from normal strings so that they can be identified as something that has to run through the resolver. In the Usd file, you'll see the @assset_identifier@ syntax:
def "bicycle" (
assetInfo = {
dictionary UsdSurvivalGuide = {
asset Asset = @assetMetadata@
asset[] AssetDependencyPaths = [@dependencyPathA@, @dependencyPathB@]
}
}
prepend references = @/opt/hfs19.5/houdini/usd/assets/pig/pig.usd@
){
custom asset Asset = @someAsset@
custom asset[] AssetArray = [@someAssetA@, @someAssetB@]
}
All file based composition arcs use asset paths as well as any metadata (especially assetInfo) and any (custom) attributes of type Asset/AssetArray. In Usd files the naming convention for asset paths is Asset, in the API it is pxr.Sdf.AssetPath. So any time you see the @...@ syntax, just remember it is an asset path.
An important thing to note is that asset resolvers only go in one direction (at least in the Usd API): From asset identifier to resolved asset path. I assume this is because you can have multiple asset identifiers that point the the same resolved asset path. Depending on your asset resolver implementation, you can also make it bidirectional.
Table of Contents
- Asset Resolvers In-A-Nutshell
- What should I use it for?
- Resources
- Asset Resolver
- Asset Resolver Contexts
- Common Resolver Code Examples
TL;DR - Asset Resolvers In-A-Nutshell
Asset resolvers resolve asset identifiers (encoded in Usd with the @...@ syntax) to loadable file paths/URIs.
flowchart LR
assetIdentifier(["@Asset Identifier@"]) --> assetResolver([Asset Resolver])
assetResolver --> assetResolvedPath([Resolved Asset Path])
assetResolverContext([Asset Resolver Context]) --> assetResolver
Contexts are handled per stage: They are optionally given on stage open and can also be shared between stages. If you do not provide a context, your resolver will provide a default fallback context.
To resolve an asset identifier you can call:
resolved_path = stage.ResolveIdentifierToEditTarget("someAssetIdentifier")
# Get the Python string
resolved_path_str = resolved_path.GetPathString() # Or str(resolved_path)
from pxr import Ar
resolver = Ar.GetResolver()
resolved_path = resolver.Resolve("someAssetIdentifier")
# Get the Python string
resolved_path_str = resolved_path.GetPathString() # Or str(resolved_path)
One important thing to not confuse is the Ar.ResolvedPath and the Sdf.AssetPath classes.
The Sdf.AssetPath is the class you instantiate when you set any asset path related field/property/composition arc when writing to your layer/stage. It does not resolve anything, it only has dummy properties which just reflect what you pass to the constructor.
from pxr import Sdf
asset_path = Sdf.AssetPath("someAssetIdentifier", "/some/Resolved/Path.usd")
print(asset_path.path) # Returns: "someAssetIdentifier"
print(asset_path.resolvedPath) # Returns: "/some/Resolved/Path.usd"
To soften the blow on the steep asset resolver implementation learning curve we provide production ready asset resolvers here in our GitHub Repository. These include:
- A fully functional file based resolver with pinning support and on runtime modification.
- A fully functional python based resolver with feature parity to the file resolver, that you can use to debug/prototype your resolver. This might be enough for very small studios, who don't access thousands of assets.
- A hybrid pre-cached python resolver is in the works, keep an eye on this repo for updates.
This should help you get up and running (or at least protoype easily and possibly outsource the C++ implementation if you need a lot of customization).
Currently the asset resolvers only ship with instructions for compiling against Houdini on Linux. It is on the roadmap to include Windows instructions as well as to create a build pipeline via GitHub, so that you don't necessarily have to self compile it. We'll keep you posted :)
All the implementation details and examples can be found in the below resources links. We separated it from these docs, as it is a big enough topic on its own.
Most DCCs ship with a customized USD build, where most vendors adhere to the VFX Reference Platform and only change USD with major version software releases. They do backport important production patches though from time to time. That's why we recommend using the USD build from the DCC instead of trying to self compile and link it to the DCC, as this guarantees the most stability. This does mean though, that you have to compile all plugins against each (major version) releases of each individual DCC.
What should I use it for?
We'll be using the asset resolver to redirect file paths for different reasons, mainly:
- Pinning: As USD pipelines are often based on "the latest asset/shot gets automatically refreshed/loaded" principle, we use the asset resolver to pin a USD stage to a specific version/state, so that it doesn't receive any asset/shot updates anymore.
- Redirecting the path from a custom identifier to an actual data resource. You'll only be using this aspect, if your resolver is not file based and instead URI (
myCustomURIPrefix:<identifier>) based.
Resources
- Asset Resolver API Docs
- Asset Resolver Context API Docs
- Usd Asset Resolver - Reference Implementations - GitHub Repository
- Usd Asset Resolver - Reference Implementations - Documentation
Asset Resolver
You can register multiple asset resolvers via the plugin system:
- There must be one primary resolver that is not URI based. As a fallback the default resolver will be used
- Any number of URI based resolvers: These resolvers will be called when they find a path prefixed with the scheme name syntax
"<scheme>:..."for examplehttp://usdSurvivalGuide/assets/bicycle.usd)
Here is an example for a primary resolver plugin .json file:
To see the file click here
{
"Plugins": [
{
"Info": {
"Types": {
"MyPrimaryResolver": {
"bases": ["ArResolver"],
"implementsContexts" : true
}
}
},
"LibraryPath": "../lib/myPrimaryResolver.so",
"Name": "myPrimaryResolver",
"Root": ".",
"Type": "library"
}
]
}
And an example for a URI resolver plugin .json file:
To see the file click here
{
"Plugins": [
{
"Info": {
"Types": {
"HybridResolver": {
"bases": ["MyUriResolver"],
"implementsContexts" : true
}
}
},
"LibraryPath": "../lib/myUriResolver.so",
"Name": "myUriResolver",
"Root": ".",
"Type": "library"
}
]
}
The Usd files save the asset identifiers with the @someString@ syntax. Depending on the resolver context, these identifiers might resolve to different
paths. This allows us to save the pinned state of a Usd file. For example if we have an asset path @assets/bicycle@ we might resolve it to @/server/assets/bicycle/bicycle_latest.usd@ which points to a symlink of the latest bicycle USD file. Once we submit a rendering, we usually want to pin the whole Usd file to the state it is actively being viewed in. To do that we collect all asset paths and then store their current mapping. This way we can then map the bicycle to the active version by storing @assets/bicycle@ -> @/server/assets/bicycle/bicycle_v003.usd@ in our resolver context.
An asset identifier can be a string with any characters except [] brackets, as these are used for reading .usdz package files.
Asset Resolver Contexts
To assist the resolver with processing asset paths, Usd adds the option of passing in an Asset Resolver Context. The context is just a very simple class, that your resolver can use to aid path resolution. A simple context only needs to implement:
- Default and copy constructors
- < and == operators
- hash_value
The rest is up to you to implement and Python expose.
Contexts are handled per stage: They are optionally given on stage open and can also be shared between stages. If you do not provide a context, your resolver will provide a default fallback context. You can not change the context without re-opening the stage, but you can implement methods to modify the active stages and then signal a change notification to the stages. The resolvers listed above implement different methods to modify the mapping pairs. Are refresh can be called as follows:
from pxr import Ar
...
resolver = Ar.GetResolver()
# The resolver context is actually a list, as there can be multiple resolvers
# running at the same time. In this example we only have a single non-URI resolver
# running, therefore we only have a single element in the list.
context_collection = stage.GetPathResolverContext()
activeResolver_context = context_collection.Get()[0]
# Your asset resolver has to Python expose methods to modify the context.
activeResolver_context.ModifySomething()
# Trigger Refresh (Some DCCs, like Houdini, additionally require node re-cooks.)
resolver.RefreshContext(context_collection)
...
As you can see the stage.GetPathResolverContext() actually returns a list and not a single resolver context. This is because there can be multiple resolvers running at the same time. As stated above a single primary resolver and multiple URI-resolvers, you therefore have a resolver context per resolver.
context_collection = stage.GetPathResolverContext()
activeResolver_context = context_collection.Get()[0]
There can only be a single resolver context object instance of the same class in the resolver context. Usually each resolver ships with its own context class, if the resolver tries to create another instance of the resolver context, it will be ignored when trying to add it the the bound context list. This is nothing you have to worry about in Python, we'd just thought we'd mention it here for completeness, as it can cause some head-scratching when coding a resolver.
When implementing the context in C++, make sure that the internal data is accessed via a shared pointer as Usd currently creates resolver context copies when exposed via Python
instead of passing thru the pointer. Otherwise calling ArNotice::ResolverChanged(*ctx).Send(); won't work!
See for more info: Usd Interest Forum Thread
Common Resolver Code Examples
Let's look at some practical examples that you'll use in the day to day work, we'll discuss Houdini specifics in the Houdini section of this guide:
Initialization
To see if your resolver is being loaded you can set the TF_DEBUG environment variable to AR_RESOLVER_INIT:
export TF_DEBUG=AR_RESOLVER_INIT
ArGetResolver(): Using asset resolver FileResolver from plugin ../dist/fileResolver/lib/fileResolver.so for primary resolver
ArGetResolver(): Found URI resolver ArDefaultResolver
ArGetResolver(): Found URI resolver FS_ArResolver
ArGetResolver(): Using FS_ArResolver for URI scheme(s) ["op", "opdef", "oplib", "opdatablock"]
ArGetResolver(): Found URI resolver FileResolver
ArGetResolver(): Found package resolver USD_NcPackageResolver
ArGetResolver(): Using package resolver USD_NcPackageResolver for usdlc from plugin usdNc
ArGetResolver(): Using package resolver USD_NcPackageResolver for usdnc from plugin usdNc
ArGetResolver(): Found package resolver Usd_UsdzResolver
ArGetResolver(): Using package resolver Usd_UsdzResolver for usdz from plugin usd
For more information about debugging, check out our Debugging & Performance Profiling section.
To check what the active primary resolver is, you can also run:
from pxr import Ar
from usdAssetResolver import FileResolver
print(Ar.GetResolver())
print(Ar.GetUnderlyingResolver()) # Returns: <usdAssetResolver.FileResolver.Resolver object at <address>>
Scoped resolver caches
To ensure that we always get the same resolved paths, you can use a scoped resolver cache. When working in DCCs, you don't have to worry about this as the DCC should handle this for you.
from pxr import Ar
with Ar.ResolverScopedCache() as scope:
resolver = Ar.GetResolver()
path = resolver.Resolve("box.usda")
Creating/Opening a stage with a resolver context
from pxr import Ar, Usd
from usdAssetResolver import FileResolver
resolver = Ar.GetUnderlyingResolver()
context_collection = resolver.CreateDefaultContext() # Returns: Ar.ResolverContext(FileResolver.ResolverContext())
context = context_collection.Get()[0]
context.ModifySomething() # Call specific functions of your resolver.
# Create a stage that uses the context
stage = Usd.Stage.CreateInMemory("/output/stage/filePath.usd", pathResolverContext=context)
# Or
stage = Usd.Stage.Open("/Existing/filePath/to/UsdFile.usd", pathResolverContext=context)
Resolving a path with a given bound context
This is probably most used resolved method you'll use. It resolves the asset identifier using the active stage's context.
resolved_path = stage.ResolveIdentifierToEditTarget("someAssetIdentifier")
# Get the Python string
resolved_path_str = resolved_path.GetPathString() # Or str(resolved_path)
If you don't want to use any context you can call:
from pxr import Ar
resolver = Ar.GetResolver()
resolved_path = resolver.Resolve("someAssetIdentifier")
# Get the Python string
resolved_path_str = resolved_path.GetPathString() # Or str(resolved_path)
Asset Paths vs Resolved Paths
One important thing to not confuse is the Ar.ResolvedPath and the Sdf.AssetPath classes.
The Sdf.AssetPath is the class you instantiate when you set any asset path related field/property/composition arc when writing to your layer/stage. It does not resolve anything, it only has dummy properties which just reflect what you pass to the constructor.
from pxr import Sdf
asset_path = Sdf.AssetPath("someAssetIdentifier", "/some/Resolved/Path.usd")
print(asset_path.path) # Returns: "someAssetIdentifier"
print(asset_path.resolvedPath) # Returns: "/some/Resolved/Path.usd"
Debugging & Performance Profiling
Usd ships with extensive debugging and profiling tools. You can inspect the code execution a various levels, which allows you to really pinpoint where the performance issues are.
When starting out these to two interfaces are of interest:
- Debug Symbols: Enable logging of various API sections to stdout. Especially useful for plugins like asset resolvers or to see how DCCs handle Usd integration.
- Performance Profiling: Usd has a powerful performance profiler, which you can also view with Google Chrome's Trace Viewer.
Debugging
The Usd API ships with a debug class, which allows you to log different messages by setting the TF_DEBUG environment variable to one of the symbols. This is useful to see if plugins are loaded or to see if the asset resolver is correctly hooked in.
TL;DR - Debug In-A-Nutshell
- You can set the
TF_DEBUGenvironment variable to one the the values listed below or symbol name from a plugin. - You can also activate a symbol in the active session via Python:
pxr.Tf.Debug.SetDebugSymbolsByName("AR_RESOLVER_INIT", True)
What should I use it for?
Enabling debug symbols, allows you to inspect specific log outputs of Usd. Typical use cases are to check if plugins are loaded correctly or if data is properly being refreshed.
Resources
Overview
Environment Variables:
| Name | Value |
|---|---|
| TF_DEBUG | 'DEBUG_SYMBOL_NAME' |
| TF_DEBUG_OUTPUT_FILE | 'stdout' or 'stderr' |
activated_symbols = pxr.Tf.Debug.SetDebugSymbolsByName("AR_RESOLVER_INIT", True) # Returns: ["AR_RESOLVER_INIT"]
activated_symbols = pxr.Tf.Debug.SetDebugSymbolsByName("AR_*", True)
External plugins (like asset resolvers) often register own debug symbols which you can then use to see exactly what is going on.
To get a list of value TF_DEBUGvalues you can run:
from pxr import Tf
# To check if a symbol is active:
Tf.Debug.IsDebugSymbolNameEnabled("MY_SYMBOL_NAME")
# To print all symbols
docs = Tf.Debug.GetDebugSymbolDescriptions()
for name in Tf.Debug.GetDebugSymbolNames():
desc = Tf.Debug.GetDebugSymbolDescription(name)
print("{:<50} | {}".format(name, desc))
Full list of debug codes:
| Variable Name | Description |
|---|---|
| AR_RESOLVER_INIT | Print debug output during asset resolver initialization |
| GLF_DEBUG_CONTEXT_CAPS | Glf report when context caps are initialized and dump contents |
| GLF_DEBUG_DUMP_SHADOW_TEXTURES | Glf outputs shadows textures to image files |
| GLF_DEBUG_ERROR_STACKTRACE | Glf dump stack trace on GL error |
| GLF_DEBUG_POST_SURFACE_LIGHTING | Glf post surface lighting setup |
| GLF_DEBUG_SHADOW_TEXTURES | Glf logging for shadow map management |
| GUSD_STAGECACHE | GusdStageCache details. |
| HDST_DISABLE_FRUSTUM_CULLING | Disable view frustum culling |
| HDST_DISABLE_MULTITHREADED_CULLING | Force the use of the single threaded version of frustum culling |
| HDST_DRAW | Reports diagnostics for drawing |
| HDST_DRAWITEMS_CACHE | Reports lookups from the draw items cache. |
| HDST_DRAW_BATCH | Reports diagnostics for draw batches |
| HDST_DRAW_ITEM_GATHER | Reports when draw items are fetched for a render pass. |
| HDST_DUMP_FAILING_SHADER_SOURCE | Print generated shader source code for shaders that fail compilation |
| HDST_DUMP_FAILING_SHADER_SOURCEFILE | Write out generated shader source code to files for shaders that fail compilation |
| HDST_DUMP_GLSLFX_CONFIG | Print composed GLSLFX configuration |
| HDST_DUMP_SHADER_SOURCE | Print generated shader source code |
| HDST_DUMP_SHADER_SOURCEFILE | Write out generated shader source code to files |
| HDST_FORCE_DRAW_BATCH_REBUILD | Forces rebuild of draw batches. |
| HDST_MATERIAL_ADDED | Report when a material is added |
| HDST_MATERIAL_REMOVED | Report when a material is removed |
| HDX_DISABLE_ALPHA_TO_COVERAGE | Disable alpha to coverage transpancy |
| HDX_INTERSECT | Output debug info of intersector |
| HDX_SELECTION_SETUP | Output debug info during creation of selection buffer |
| HD_BPRIM_ADDED | Report when bprims are added |
| HD_BPRIM_REMOVED | Report when bprims are removed |
| HD_BUFFER_ARRAY_INFO | Report detail info of HdBufferArrays |
| HD_BUFFER_ARRAY_RANGE_CLEANED | Report when bufferArrayRange is cleaned |
| HD_CACHE_HITS | Report every cache hit |
| HD_CACHE_MISSES | Report every cache miss |
| HD_COUNTER_CHANGED | Report values when counters change |
| HD_DIRTY_ALL_COLLECTIONS | Reports diagnostics when all collections are marked dirty |
| HD_DIRTY_LIST | Reports dirty list state changes |
| HD_DISABLE_MULTITHREADED_RPRIM_SYNC | Run RPrim sync on a single thread |
| HD_DRAWITEMS_CULLED | Report the number of draw items culled in each render pass |
| HD_ENGINE_PHASE_INFO | Report the execution phase of the Hydra engine |
| HD_EXT_COMPUTATION_ADDED | Report when ExtComputations are added |
| HD_EXT_COMPUTATION_EXECUTION | Report when ExtComputations are executed |
| HD_EXT_COMPUTATION_REMOVED | Report when ExtComputations are removed |
| HD_EXT_COMPUTATION_UPDATED | Report when ExtComputations are updated |
| HD_FREEZE_CULL_FRUSTUM | Freeze the frustum used for culling at it's current value |
| HD_INSTANCER_ADDED | Report when instancers are added |
| HD_INSTANCER_CLEANED | Report when instancers are fully cleaned |
| HD_INSTANCER_REMOVED | Report when instancers are removed |
| HD_INSTANCER_UPDATED | Report when instancers are updated |
| HD_RENDER_SETTINGS | Report render settings changes |
| HD_RPRIM_ADDED | Report when rprims are added |
| HD_RPRIM_CLEANED | Report when rprims are fully cleaned |
| HD_RPRIM_REMOVED | Report when rprims are removed |
| HD_RPRIM_UPDATED | Report when rprims are updated |
| HD_SAFE_MODE | Enable additional security checks |
| HD_SELECTION_UPDATE | Report when selection is updated |
| HD_SHARED_EXT_COMPUTATION_DATA | Report info related to deduplication of ext computation data buffers |
| HD_SPRIM_ADDED | Report when sprims are added |
| HD_SPRIM_REMOVED | Report when sprims are removed |
| HD_SYNC_ALL | Report debugging info for the sync all algorithm. |
| HD_TASK_ADDED | Report when tasks are added |
| HD_TASK_REMOVED | Report when tasks are removed |
| HD_VARYING_STATE | Reports state tracking of varying state |
| HGIGL_DEBUG_ERROR_STACKTRACE | HgiGL dump stack trace on GL error |
| HGIGL_DEBUG_FRAMEBUFFER_CACHE | Debug framebuffer cache management per context arena. |
| HGI_DEBUG_DEVICE_CAPABILITIES | Hgi report when device capabilities are initialized and dump contents |
| HIO_DEBUG_DICTIONARY | glslfx dictionary parsing |
| HIO_DEBUG_FIELD_TEXTURE_DATA_PLUGINS | Hio field texture data plugin registration and loading |
| HIO_DEBUG_GLSLFX | Hio GLSLFX info |
| HIO_DEBUG_TEXTURE_IMAGE_PLUGINS | Hio image texture plugin registration and loading |
| NDR_DEBUG | Advanced debugging for Node Definition Registry |
| NDR_DISCOVERY | Diagnostics from discovering nodes for Node Definition Registry |
| NDR_INFO | Advisory information for Node Definition Registry |
| NDR_PARSING | Diagnostics from parsing nodes for Node Definition Registry |
| NDR_STATS | Statistics for registries derived from NdrRegistry |
| PCP_CHANGES | Pcp change processing |
| PCP_DEPENDENCIES | Pcp dependencies |
| PCP_NAMESPACE_EDIT | Pcp namespace edits |
| PCP_PRIM_INDEX | Print debug output to terminal during prim indexing |
| PCP_PRIM_INDEX_GRAPHS | Write graphviz 'dot' files during prim indexing (requires PCP_PRIM_INDEX) |
| PLUG_INFO_SEARCH | Plugin info file search |
| PLUG_LOAD | Plugin loading |
| PLUG_LOAD_IN_SECONDARY_THREAD | Plugins loaded from non-main threads |
| PLUG_REGISTRATION | Plugin registration |
| SDF_ASSET | Sdf asset resolution |
| SDF_ASSET_TRACE_INVALID_CONTEXT | Post stack trace when opening an SdfLayer with no path resolver context |
| SDF_CHANGES | Sdf change notification |
| SDF_FILE_FORMAT | Sdf file format plugins |
| SDF_LAYER | SdfLayer loading and lifetime |
| SDR_TYPE_CONFORMANCE | Diagnostcs from parsing and conforming default values for Sdr and Sdf type conformance |
| TF_ATTACH_DEBUGGER_ON_ERROR | attach/stop in a debugger for all errors |
| TF_ATTACH_DEBUGGER_ON_FATAL_ERROR | attach/stop in a debugger for fatal errors |
| TF_ATTACH_DEBUGGER_ON_WARNING | attach/stop in a debugger for all warnings |
| TF_DEBUG_REGISTRY | debug the TfDebug registry |
| TF_DISCOVERY_DETAILED | detailed debugging of TfRegistryManager |
| TF_DISCOVERY_TERSE | coarse grain debugging of TfRegistryManager |
| TF_DLCLOSE | show files closed by TfDlclose |
| TF_DLOPEN | show files opened by TfDlopen |
| TF_ERROR_MARK_TRACKING | capture stack traces at TfErrorMark ctor/dtor, enable TfReportActiveMarks debugging API. |
| TF_LOG_STACK_TRACE_ON_ERROR | log stack traces for all errors |
| TF_LOG_STACK_TRACE_ON_WARNING | log stack traces for all warnings |
| TF_PRINT_ALL_POSTED_ERRORS_TO_STDERR | print all posted errors immediately, meaning that even errors that are expected and handled will be printed, producing possibly confusing output |
| TF_SCRIPT_MODULE_LOADER | show script module loading activity |
| TF_TYPE_REGISTRY | show changes to the TfType registry |
| USDGEOM_BBOX | UsdGeom bounding box computation |
| USDGEOM_EXTENT | Reports when Boundable extents are computed dynamically because no cached authored attribute is present in the scene. |
| USDIMAGING_CHANGES | Report change processing events |
| USDIMAGING_COLLECTIONS | Report collection queries |
| USDIMAGING_COMPUTATIONS | Report Hydra computation usage in usdImaging. |
| USDIMAGING_COORDSYS | Coordinate systems |
| USDIMAGING_INSTANCER | Report instancer messages |
| USDIMAGING_PLUGINS | Report plugin status messages |
| USDIMAGING_POINT_INSTANCER_PROTO_CREATED | Report PI prototype stats as they are created |
| USDIMAGING_POINT_INSTANCER_PROTO_CULLING | Report PI culling debug info |
| USDIMAGING_POPULATION | Report population events |
| USDIMAGING_SELECTION | Report selection messages |
| USDIMAGING_SHADERS | Report shader status messages |
| USDIMAGING_TEXTURES | Report texture status messages |
| USDIMAGING_UPDATES | Report non-authored, time-varying data changes |
| USDMTLX_READER | UsdMtlx reader details |
| USDSKEL_BAKESKINNING | UsdSkelBakeSkinningLBS() method. |
| USDSKEL_CACHE | UsdSkel cache population. |
| USDUTILS_CREATE_USDZ_PACKAGE | UsdUtils USDZ package creation details |
| USD_AUTO_APPLY_API_SCHEMAS | USD API schema auto application details |
| USD_CHANGES | USD change processing |
| USD_CLIPS | USD clip details |
| USD_COMPOSITION | USD composition details |
| USD_DATA_BD | USD BD file format traces |
| USD_DATA_BD_TRY | USD BD call traces. Prints names, errors and results. |
| USD_INSTANCING | USD instancing diagnostics |
| USD_PATH_RESOLUTION | USD path resolution diagnostics |
| USD_PAYLOADS | USD payload load/unload messages |
| USD_PRIM_LIFETIMES | USD prim ctor/dtor messages |
| USD_SCHEMA_REGISTRATION | USD schema registration details. |
| USD_STAGE_CACHE | USD stage cache details |
| USD_STAGE_INSTANTIATION_TIME | USD stage instantiation timing |
| USD_STAGE_LIFETIMES | USD stage ctor/dtor messages |
| USD_STAGE_OPEN | USD stage opening details |
| USD_VALIDATE_VARIABILITY | USD attribute variability validation |
| USD_VALUE_RESOLUTION | USD trace of layers inspected as values are resolved |
You scrolled all the way to the end 🥳. Congratulations, you have now earned the rank of "Usd Nerd"!
Performance Profiling
For low level profiling Usd ships with the trace profiling module.
This is also what a few DCCs (like Houdini) expose to profile Usd writing/rendering.

TL;DR - Profiling In-A-Nutshell
- The trace module offers easy to attach Python decorators (
@Trace.TraceMethod/TraceFunction) that you can wrap your functions with to expose them to the profiler. - You can dump the profiling result to .txt or the GoogleChrome tracing format you can open under
chrome://tracing. Even if you don't attach custom traces, you'll get extensive profiling stats of the underlying Usd API execution.
What should I use it for?
If you want to benchmark you Usd stage operations, the profiling module offers a fast and easy way to visualize performance.
Resources
Overview
The trace module is made up of two parts:
TraceCollector: A singleton thread-safe recorder of (globale) events.TraceReporter: Turn event data to meaning full views.
Via the C++ API, you can customize the behavior further, for Python 'only' the global collector is exposed.
Marking what to trace
First you mark what to trace. You can also mark nothing, you'll still have access to all the default profiling:
import os
from pxr import Trace, Usd
# Code with trace attached
class Bar():
@Trace.TraceMethod
def foo(self):
print("Bar.foo")
@Trace.TraceFunction
def foo(stage):
with Trace.TraceScope("InnerScope"):
bar = Bar()
for prim in stage.Traverse():
prim.HasAttribute("size")
Trace collector & reporter
Then you enable the collector during the runtime of what you want to trace and write the result to the disk.
import os
from pxr import Trace, Usd
# The Trace.Collector() and Trace.Reporter.globalReporter return a singletons
# The default traces all go to TraceCategory::Default, this is not configurable via python
global_reporter = Trace.Reporter.globalReporter
global_reporter.ClearTree()
collector = Trace.Collector()
collector.Clear()
# Start recording events.
collector.enabled = True
# Enable the Usd Python API tracing (No the manually attached tracers)
collector.pythonTracingEnabled = False
# Run code
stage = Usd.Stage.CreateInMemory()
prim_path = Sdf.Path("/bicycle")
prim = stage.DefinePrim(prim_path, "Xform")
foo(stage)
# Stop recording events.
collector.enabled = False
# Print the ASCII report
trace_dir_path = os.path.dirname(os.path.expanduser("~/Desktop/UsdTracing"))
global_reporter.Report(os.path.join(trace_dir_path, "report.trace"))
global_reporter.ReportChromeTracingToFile(os.path.join(trace_dir_path,"report.json"))
Here is an example (from the Usd docs) of a report to a .txt file. If you have ever rendered with Houdini this will be similar to when you increase the log levels.
Tree view ==============
inclusive exclusive
358.500 ms 1 samples Main Thread
0.701 ms 0.701 ms 8 samples | SdfPath::_InitWithString
0.003 ms 0.003 ms 2 samples | {anonymous}::VtDictionaryToPython::convert
275.580 ms 275.580 ms 3 samples | PlugPlugin::_Load
0.014 ms 0.014 ms 3 samples | UcGetCurrentUnit
1.470 ms 0.002 ms 1 samples | UcIsKnownUnit
1.467 ms 0.026 ms 1 samples | Uc::_InitUnitData [initialization]
1.442 ms 1.442 ms 1 samples | | Uc_Engine::GetValue
0.750 ms 0.000 ms 1 samples | UcGetValue
0.750 ms 0.750 ms 1 samples | Uc_Engine::GetValue
9.141 ms 0.053 ms 1 samples | PrCreatePathResolverForUnit
0.002 ms 0.002 ms 6 samples | UcIsKnownUnit
Here is an example of a report to a Google Chrome trace .json file opened at chrome://tracing in Google Chrome with a custom python trace marked scope.

Measuring time deltas
Usd ships with a simpel stop watch class that offers high precision time deltas.
from pxr import Tf
sw = Tf.Stopwatch()
sw.Start()
sw.Stop()
sw.Start()
sw.Stop()
print(sw.milliseconds, sw.sampleCount)
sw.Reset()
# Add sampleCount + accumulated time from other stop watch
other_sw = Tf.StopWatch()
other_sw.Start()
other_sw.Stop()
sw.AddFrom(other_sw)
print(sw.milliseconds, sw.sampleCount)
Stage Stats
You can also gather stage stats, this is mainly used to expose statistics for UIs.
from pxr import UsdUtils
print(UsdUtils.ComputeUsdStageStats(stage))
# Returns (On stage with a single cube):
{
'assetCount': 0,
'instancedModelCount': 0,
'modelCount': 0,
'primary': {'primCounts': {'activePrimCount': 2,
'inactivePrimCount': 0,
'instanceCount': 0,
'pureOverCount': 0,
'totalPrimCount': 2},
'primCountsByType': {'Cube': 1}},
'prototypeCount': 0,
'totalInstanceCount': 0,
'totalPrimCount': 2,
'usedLayerCount': 10
}
Vocabulary Cheatsheet
| USD Terminology | Meaning |
|---|---|
| property | Parent class of attribute/relationship |
| prim | Container for your properties |
| layer | Container for storing your prims and properties |
| stage | A view of a set of composed layers |
| compose | Load a layer or another part of a hierarchy via a composition arc |
| author | Explicitly written value for a property/metadata entry (rather than it coming from a schema fallback) |
| Value Resolution Source | What layer(s) has the winning priority out of all your layers where the data can be loaded from |
Resources
If you are interested in diving into topics yourself, here is a rough categorization:
General
High Level API
- Usd Core API
- Asset Resolution (How file paths are evaluated)
- Cameras
- Collections
- Event Listeners/Notifications / Notices
- Hierarchy Iteration
- Kinds
- Layers
- Plugins
- Schemas (USD speak for classes)
- Query/Lookup Caches
- Stages
- Statistics
- Utils
Low Level API
USD in Production
In this section we'll take a look at USD from a production perspective.
It aims to cover more higher level concepts and pitfalls that we should avoid when first starting out in USD.
'Are we ready for production'? Here is a preflight checklist for your USD pipeline
Now that you know the basics (if you did your homework 😉), let's make sure you are ready for your first test flight.
Below is a checklist that you can use to test if everything is ready to go.
You can never prepare a 100%, some times you gotta run before you walk as the experience (and pressure) from an actual project running on USD will be more valuable than any RnD. So make sure you have kept the points below in mind to at least some degree.
Vocabulary:
- Usd comes with a whole lot of new words, as a software developer you'll get used to it quite quickly, but don't forget about your users. Having an onboarding for vocab is definitely worth it, otherwise everyone speaks a different language which can cause a lot of communication overhead.
Plugins (Covered in our plugins section):
- Kinds (Optional, Recommended): All you need for this one, is a simple .json file that you put in your
PXR_PLUGINPATH_NAMEsearch path. - Schemas (Optional, Recommended): There are two flavours of creating custom schemas: Codeless (only needs a
schema.usda+plugInfo.jsonfile) and compiled schemas (Needs compilation, but gives your software devs a better UX). If you don't have the resources for a C++ developer, codeless schemas are the way to go and more than enough to get you started. - Asset Resolver (Mandatory): You unfortunately can't get around not using one, luckily we got you covered with our production ready asset resolvers over in our VFX-UsdAssetResolver GitHub Repo.
Data IO and Data Flow:
- As a pipeline/software developer the core thing that has to work is data IO. This is something a user should never have to think about. What does this mean for you:
- Make sure your UX experience isn't too far from what artists already know.
- Make sure that your system of tracking layers and how your assets/shots are structured is solid enough to handle these cases:
- Assets with different layers (model/material/fx/lighting)
- FX (Asset and Shot FX, also make sure that you can also track non USD dependencies, like .bgeo, via metadata/other means)
- Assemblies (Assets that reference other assets)
- Multi-Shot workflows (Optional)
- Re-times (Technically these are not possible via USD (at least over a whole layer stack), so be aware of the restrictions and communicate these!)
- It is very likely that you have to adjust certain aspects of how you handle composition at some point. In our composition section we cover composition from an abstract implementation viewpoint, that should help keep your pipeline flexible down the line. It is one of the ways how you can be prepared for future eventualities, it does add a level of complexity though to your setups (pipeline wise, users should not have to worry about this).
A practical guide to composition
As composition is USD's most complicated topic, this section will be enhanced with more examples in the future. If you detect an error or have useful production examples, please submit a ticket, so we can improve the guide!
In the near future, we'll add examples for:
- Best practice asset structures
- Push Vs Pull / FullPin Opt-In pipelines
We have a supplementary Houdini scene, that you can follow along with, available in this site's repository. All the examples below will walk through this file as it easier to prototype and showcase arcs in Houdini via nodes, than writing it all in code.
How to approach shot composition
When prototyping your shot composition, we recommend an API like approach to loading data:
We create a /__CLASS__/assets and a /__CLASS__/shots/<layer_name> hierarchy. All shot layers first load assets via references and shot (fx/anim/etc.) caches via payloads into their respective class hierarchy. We then inherit this into the actual "final" hierarchy. This has one huge benefit:
The class hierarchy is a kind of "API" to your scene hierarchy. For example if we want to time shift (in USD speak layer offset) an asset that has multiple occurrences in our scene, we have a single point of control where we have to change the offset. Same goes for any other kind of edit.
We take a look at variations of this pattern in our Composition Strength Ordering (LIVRPS) section in context of different arcs, we highly recommend looking through the "Pro Tip" sections there.
This approach solves composition "problems": When we want to payload something over an asset reference, we can't because the payload arc is weaker than the reference arc. By "proxying" it to a class prim and then inheriting it, we guarantee that it always has the strongest opinion. This makes it easier to think about composition, as it is then just a single list-editable op rather than multiple arcs coming from different sources.
The downside to this approach is that we (as pipeline devs) need to restructure all imports to always work this way. The cache files themselves can still write the "final" hierarchy, we just have to reference/payload it all in to the class hierarchy and then inherit it. This may sound like a lot of work, but it is actually quick to setup and definitely helps us/artists keep organized with larger scenes.
It also keeps our whole setup instanceable, so that we have the best possible performance.
When creating our composition structure concept, we should always try to keep everything instanceable until the very last USD file (the one that usually gets rendered). This way we ensure optimal performance and scalability.
We also show an example for this approach in our Composition Payloads section as well as bellow in the next bullet point.
Loading heavy caches into your shots
When writing heavy caches, we usually write per frame/chunk files and load them via value clips. Let's have a look how to best do this: As a best practice we always want to keep everything instanceable, so let's keep that in mind when loading in the data.
- When making prims instanceable, the value clip metadata has to be under the instanceable prim, as the value clip metadata can't be read from outside of the instance (as it would then mean each instance could load different clips, which would defeat the purpose of instanceable prims).
- Value clip metadata can't be inherited/internally referenced/specialized in. It must reside on the prim as a direct opinion.
- We can't have data above the prims where we write our metadata. In a typical asset workflow, this means that all animation is below the asset prims (when using value clips).
Let's have a look how we can set it up in Houdini while prototyping, in production you should do this via code, see our animation section for how to do this.
The simplest version is to write the value clips, stitch them and load the resulting file as a payload per asset root prim. This doesn't work though, if you have to layer over a hierarchy that already exists, for example an asset.
We therefore go for the "API" like approach as discussed above: We first load the cache via a payload into a class hierarchy and then inherit it onto its final destination. This is a best-practise way of loading it. By "abstracting" the payload to class prims, we have a way to load it via any arc we want, for example we could also payload it into variants. By then inherting it to the "final" hierarchy location, we ensure that no matter what arc, the cache gets loaded. This way we can load the cache (as it has heavy data) as payloads and then ensure it gets loaded with the highest opinion (via inherits).
Let's also take a look at why this doesn't work when trying to write value clips at non asset root prims:
Loading a payload for a whole cache file works, the problem you then run into though is, that the inherit arcs don't see the parent prims value clip metadata. So we'd have to load the whole layer as a value clip. While this is possible, we highly don't recommend it, as it is not clear where the data source is coming from and we are making the scene structure messy by not having clear points of data loading. We also can't make it instanceable (unles we intend on making the whole hierarchy instanceable, which in shots doesn't work because we need per prim overrides (on at least asset (parent) prims)).
Commonly used schemas ('Classes' in OOP terminology) for production
Here is a list of the most used production schemas with a short explanation of what the schema provides:
- Typed:
- UsdGeom.Imageable: Purpose, Visibility, Bounding Box
- UsdGeom
- UsdGeom.PointInstancer: PointInstancers
- UsdGeom.PointBased:
- UsdGeom.Mesh: Polygon Meshes
- UsdGeom.Points: Points
- UsdGeom.Curves: Curves
- UsdVol.Volume: Volumes
- UsdVol.OpenVDBAsset: VDB Volumes
- UsdGeom.Xformable: Transforms
- UsdGeom.Boundable: Extents
- UsdGeom.Camera: Camera Attributes, Access to Gf.Camera
- UsdGeom
- UsdGeom.Imageable: Purpose, Visibility, Bounding Box
- API:
- Usd.ModeAPI: Asset info, Kind
- UsdGeom.ModelAPI: Draw Mode, ExtentHint
- Usd.ClipsAPI: Value Clips (Metadata for per frame caches)
- Usd.CollectionAPI: Collections
- Usd.PrimvarsAPI: Primvars Attributes
- UsdGeom.XformCommonAPI: Simplified transforms
- Usd.VisibilityAPI (Beta): Visibility per purpose
- UsdSkel.BindingAPI: Skeleton bindings
- UsdShade.ConnectableAPI: Shader connections
- UsdShade.CoordSysAPI: Coordinate spaces for shaders
- Graphics Foundations (Gf):
- Gf.Camera: Camera
- Gf.Frustum: Frustum
Stage API Query Caches
When inspecting stages, we often want to query a lot of data.
Some types of data, like transforms/material bindings or primavars, are inherited down the hierarchy. Instead of re-querying the ancestor data for each leaf prim query, USD ships with various query classes that cache their result, so that repeated queries have faster look ups.
For currently cover these query caches:
- Xforms
- BoundingBox
- Attribute/(Inherited) Primvars
- Material Binding
- Collection Membership
- Composition
Xform Queries
As mentioned in our transforms section, we can batch query transforms via the UsdGeom.XformCache().
It caches ancestor parent xforms, so that when we query leaf prims under the same parent hierarchy, the lookup retrieves the cached parent xforms. The cache is managed per time code, so if we use XformCache.SetTime(Usd.TimeCode(<someOtherFrame>)), it clears the cache and re-populates it on the next query for the new time code.
Checkout the official API docs for more info.
import math
from pxr import Gf, Sdf, Usd, UsdGeom
stage = Usd.Stage.CreateInMemory()
root_prim_path = Sdf.Path("/root")
root_prim = stage.DefinePrim(root_prim_path, "Xform")
cone_prim_path = Sdf.Path("/root/cone")
cone_prim = stage.DefinePrim(cone_prim_path, "Cone")
# Set local transform of leaf prim
cone_xformable = UsdGeom.Xformable(cone_prim)
cone_translate_op = cone_xformable.AddTranslateOp(opSuffix="upAndDown")
for frame in range(1, 100):
cone_translate_op.Set(Gf.Vec3h([5, math.sin(frame * 0.1) * 3, 0]), frame)
# A transform is combined with its parent prims' transforms
root_xformable = UsdGeom.Xformable(root_prim)
root_rotate_op = root_xformable.AddRotateZOp(opSuffix= "spinMeRound")
for frame in range(1, 100):
root_rotate_op.Set(frame * 15, frame)
# For single queries we can use the xformable API
print(cone_xformable.ComputeLocalToWorldTransform(Usd.TimeCode(15)))
## Xform Cache
# For batched queries, we should always use the xform cache, to avoid recomputing parent xforms.
# Get: 'GetTime', 'ComputeRelativeTransform', 'GetLocalToWorldTransform', 'GetLocalTransformation', 'GetParentToWorldTransform'
# Set: 'SetTime'
# Clear: 'Clear'
xform_cache = UsdGeom.XformCache(Usd.TimeCode(1))
for prim in stage.Traverse():
print("Worldspace Transform", xform_cache.GetLocalToWorldTransform(prim))
print("Localspace Transform", xform_cache.GetLocalTransformation(prim))
Bounding Box Queries
Whenever we change our geometry data, we have to update our "extents" attribute on boundable prims. The bbox cache allows us to efficiently query bounding boxes. The result is always returned in the form of a Gf.BBox3d object.
For some production related examples, check out our Frustum Culling and Particles sections.
Checkout the official API docs for more info.
The "extents" attribute is managed via the UsdGeom.Boundable schema, you can find the docs here. This has to be set per boundable prim.
The "extensHint" attribute is managed via the UsdGeom.ModeAPI, you can find the docs here. This can be used to accelerate lookups, by not looking into the child-hierarchy. We typically write it on prims that load payloads, to have extent data when the payload is unloaded.
from pxr import Gf, Sdf, Usd, UsdGeom, Vt
stage = Usd.Stage.CreateInMemory()
# Setup scene
root_prim_path = Sdf.Path("/root")
root_prim = stage.DefinePrim(root_prim_path, "Xform")
cone_prim_path = Sdf.Path("/root/cone")
cone_prim = stage.DefinePrim(cone_prim_path, "Cone")
root_xformable = UsdGeom.Xformable(root_prim)
root_translate_op = root_xformable.AddTranslateOp()
root_translate_op.Set(Gf.Vec3h([50, 30, 10]))
root_rotate_op = root_xformable.AddRotateZOp()
root_rotate_op.Set(45)
cone_xformable = UsdGeom.Xformable(cone_prim)
cone_translate_op = cone_xformable.AddTranslateOp()
cone_rotate_op = cone_xformable.AddRotateXYZOp()
## UsdGeom.BBoxCache()
# Get: 'GetTime', 'GetIncludedPurposes', 'GetUseExtentsHint',
# Set: 'SetTime', 'SetIncludedPurposes',
# Clear: 'Clear'
# Compute: 'ComputeWorldBound', 'ComputeLocalBound', 'ComputeRelativeBound', 'ComputeUntransformedBound',
# Compute Instances: 'ComputePointInstanceWorldBound', 'ComputePointInstanceWorldBounds',
# 'ComputePointInstanceLocalBound', 'ComputePointInstanceLocalBounds',
# 'ComputePointInstanceRelativeBound', 'ComputePointInstanceRelativeBounds',
# 'ComputePointInstanceUntransformedBounds', 'ComputePointInstanceUntransformedBound'
time_code = Usd.TimeCode(1) # Determine frame to lookup
bbox_cache = UsdGeom.BBoxCache(time_code, [UsdGeom.Tokens.default_, UsdGeom.Tokens.render],
useExtentsHint=False, ignoreVisibility=False)
# Useful for intersection testing:
bbox = bbox_cache.ComputeWorldBound(cone_prim)
print(bbox) # Returns: [([(-1, -1, -1)...(1, 1, 1)]) (( (0.7071067811865475, 0.7071067811865476, 0, 0), (-0.7071067811865476, 0.7071067811865475, 0, 0), (0, 0, 1, 0), (50, 30, 10, 1) )) false]
# When payloading prims, we want to write an extentsHint attribute to give a bbox hint
# We can either query it via UsdGeom.BBoxCache or for individual prims via UsdGeom.Xformable.ComputeExtentsHint
root_geom_model_API = UsdGeom.ModelAPI.Apply(root_prim)
extentsHint = root_geom_model_API.ComputeExtentsHint(bbox_cache)
root_geom_model_API.SetExtentsHint(extentsHint, time_code)
# Or
bbox = bbox_cache.ComputeUntransformedBound(root_prim)
aligned_range = bbox.ComputeAlignedRange()
extentsHint = Vt.Vec3hArray([Gf.Vec3h(list(aligned_range.GetMin())), Gf.Vec3h(list(aligned_range.GetMax()))])
root_geom_model_API.SetExtentsHint(extentsHint, time_code)
Attribute Queries
When we query attribute via Usd.Attribute.Get(), the value source resolution is re-evaluated on every call.
This can be cached by using Usd.AttributeQuery(<prim>, <attributeName>). This small change can already bring a big performance boost, when looking up a large time sample count. In our example below, it doubled the speed.
For value clips the speed increase is not as high, as the value source can vary between clips.
The Usd.AttributeQuery object has a very similar signature to the Usd.Attribute. We can also get the time sample count, bracketing time samples and time samples within an interval.
For more information, check out the official API docs.
from pxr import Sdf, Usd
stage = Usd.Stage.CreateInMemory()
prim = stage.DefinePrim(Sdf.Path("/cube"), "Cube")
size_attr = prim.GetAttribute("size")
for frame in range(10000):
size_attr.Set(frame, frame)
attr_query = Usd.AttributeQuery(prim, "size")
print(attr_query.Get(1001)) # Returns 2.0
from pxr import Tf
# Attribute
sw = Tf.Stopwatch()
sw.Start()
for frame in range(10000):
size_attr.Get(frame)
sw.Stop()
print(sw.milliseconds) # Returns: 14
sw.Reset()
# Attribute Query
sw = Tf.Stopwatch()
sw.Start()
for frame in range(10000):
attr_query.Get(frame)
sw.Stop()
print(sw.milliseconds) # Returns: 7
sw.Reset()
Primvars Queries
As mentioned in our properties section, we couldn't get the native FindIncrementallyInheritablePrimvars primvars API method to work correctly. That's why we implemented it ourselves here, which should be nearly as fast, as we are not doing any calls into parent prims and tracking the inheritance ourselves.
It's also a great example of when to use .PreAndPostVisit() prim range iterators.
from pxr import Sdf, Usd, UsdGeom
stage = Usd.Stage.CreateInMemory()
bicycle_prim = stage.DefinePrim(Sdf.Path("/set/garage/bicycle"), "Cube")
car_prim = stage.DefinePrim(Sdf.Path("/set/garage/car"), "Cube")
set_prim = stage.GetPrimAtPath("/set")
garage_prim = stage.GetPrimAtPath("/set/garage")
tractor_prim = stage.DefinePrim(Sdf.Path("/set/yard/tractor"), "Cube")
"""Hierarchy
/set
/set/garage
/set/garage/bicycle
/set/garage/car
/set/yard
/set/yard/tractor
"""
# Setup hierarchy primvars
primvar_api = UsdGeom.PrimvarsAPI(set_prim)
size_primvar = primvar_api.CreatePrimvar("size", Sdf.ValueTypeNames.Float)
size_primvar.Set(10)
primvar_api = UsdGeom.PrimvarsAPI(garage_prim)
size_primvar = primvar_api.CreatePrimvar("size", Sdf.ValueTypeNames.Float)
size_primvar.Set(5)
size_primvar = primvar_api.CreatePrimvar("point_scale", Sdf.ValueTypeNames.Float)
size_primvar.Set(9000)
primvar_api = UsdGeom.PrimvarsAPI(bicycle_prim)
size_primvar = primvar_api.CreatePrimvar("size", Sdf.ValueTypeNames.Float)
size_primvar.Set(2.5)
# High performance primvar check with our own cache
primvar_stack = [{}]
iterator = iter(Usd.PrimRange.PreAndPostVisit(stage.GetPseudoRoot()))
for prim in iterator:
primvar_api = UsdGeom.PrimvarsAPI(prim)
if not iterator.IsPostVisit():
before_hash = hex(id(primvar_stack[-1]))
parent_primvars = primvar_stack[-1]
authored_primvars = {p.GetPrimvarName(): p for p in primvar_api.GetPrimvarsWithAuthoredValues()}
if authored_primvars and parent_primvars:
combined_primvars = {name: p for name, p in parent_primvars.items()}
combined_primvars.update(authored_primvars)
primvar_stack.append(combined_primvars)
elif authored_primvars:
primvar_stack.append(authored_primvars)
else:
primvar_stack.append(parent_primvars)
after_hash = hex(id(primvar_stack[-1]))
print(before_hash, after_hash, prim.GetPath(), [p.GetAttr().GetPath().pathString for p in primvar_stack[-1].values()], len(primvar_stack))
else:
primvar_stack.pop(-1)
# Returns:
"""
0x7fea12b349c0 0x7fea12b349c0 / [] 2
0x7fea12b349c0 0x7fea12b349c0 /HoudiniLayerInfo [] 3
0x7fea12b349c0 0x7fea12bfe980 /set ['/set.primvars:size'] 3
0x7fea12bfe980 0x7fea12a89600 /set/garage ['/set/garage.primvars:size', '/set/garage.primvars:point_scale'] 4
0x7fea12a89600 0x7fea367b87c0 /set/garage/bicycle ['/set/garage/bicycle.primvars:size', '/set/garage.primvars:point_scale'] 5
0x7fea12a89600 0x7fea12a89600 /set/garage/car ['/set/garage.primvars:size', '/set/garage.primvars:point_scale'] 5
0x7fea12bfe980 0x7fea12bfe980 /set/yard ['/set.primvars:size'] 4
0x7fea12bfe980 0x7fea12bfe980 /set/yard/tractor ['/set.primvars:size'] 5
"""
Material Binding
This sub-section is still under development, we'll add more advanced binding lookups in the near future!
Looking up material bindings is as simple as running materials, relationships = UsdShade.MaterialBindingAPI.ComputeBoundMaterials([<list of prims>].
This gives us the bound material as a UsdShade.Material object and the relationship that bound it.
That means if the binding came from a parent prim, we'll get the material:binding relationship from the parent.
from pxr import Sdf, Usd, UsdGeom, UsdShade
stage = Usd.Stage.CreateInMemory()
# Leaf prims
cube_prim = stage.DefinePrim(Sdf.Path("/root/RENDER/pointy/cube"), "Cube")
sphere_prim = stage.DefinePrim(Sdf.Path("/root/RENDER/round_grp/sphere"), "Sphere")
cylinder_prim = stage.DefinePrim(Sdf.Path("/root/RENDER/round_grp/cylinder"), "Cylinder")
round_grp_prim = sphere_prim.GetParent()
material_prim = stage.DefinePrim(Sdf.Path("/root/MATERIALS/example_material"), "Material")
# Parent prims
for prim in stage.Traverse():
if prim.GetName() not in ("cube", "sphere", "cylinder", "example_material"):
prim.SetTypeName("Xform")
# Bind materials via direct binding
material = UsdShade.Material(material_prim)
# Bind parent group
mat_bind_api = UsdShade.MaterialBindingAPI.Apply(round_grp_prim)
mat_bind_api.Bind(material)
# Bind leaf prim
mat_bind_api = UsdShade.MaterialBindingAPI.Apply(cube_prim)
mat_bind_api.Bind(material)
# Query material bindings
materials, relationships = UsdShade.MaterialBindingAPI.ComputeBoundMaterials([cube_prim, sphere_prim, cylinder_prim])
for material, relationship in zip(materials, relationships):
print(material.GetPath(), relationship.GetPath())
"""Returns
/root/MATERIALS/example_material /root/RENDER/pointy/cube.material:binding
/root/MATERIALS/example_material /root/RENDER/round_grp.material:binding
/root/MATERIALS/example_material /root/RENDER/round_grp.material:binding
"""
Collection Membership
Let's have a look at how we can query if a prim path is in a collection. For more info about how collections work, check out our Collections section.
Creating & querying collections
We interact with collectins via the Usd.CollectionAPI class API Docs. The collection api is a multi-apply API schema, so we can add multiple collections to any prim. We can them access them via the collection API. The UsdUtils module also offers some useful functions to recompute collections so that they don't consume to much disk storage.
Here are the UsdUtils.ComputeCollectionIncludesAndExcludes API docs.
# Usd.CollectionAPI.Apply(prim, collection_name)
# collection_api = Usd.CollectionAPI(prim, collection_nam)
# collection_query = collection_api.ComputeMembershipQuery()
### High Level ###
from pxr import Sdf, Usd, UsdUtils
stage = Usd.Stage.CreateInMemory()
bicycle_prim = stage.DefinePrim(Sdf.Path("/set/yard/biycle"), "Cube")
car_prim = stage.DefinePrim(Sdf.Path("/set/garage/car"), "Sphere")
tractor_prim = stage.DefinePrim(Sdf.Path("/set/garage/tractor"), "Cylinder")
helicopter_prim = stage.DefinePrim(Sdf.Path("/set/garage/helicopter"), "Cube")
boat_prim = stage.DefinePrim(Sdf.Path("/set/garage/boat"), "Cube")
set_prim = bicycle_prim.GetParent().GetParent()
set_prim.SetTypeName("Xform")
bicycle_prim.GetParent().SetTypeName("Xform")
car_prim.GetParent().SetTypeName("Xform")
# Create collection
collection_name = "vehicles"
collection_api = Usd.CollectionAPI.Apply(set_prim, collection_name)
collection_api.GetIncludesRel().AddTarget(set_prim.GetPath())
collection_api.GetExcludesRel().AddTarget(bicycle_prim.GetPath())
collection_api.GetExpansionRuleAttr().Set(Usd.Tokens.expandPrims)
print(Usd.CollectionAPI.GetAllCollections(set_prim)) # Returns: [Usd.CollectionAPI(Usd.Prim(</set>), 'vehicles')]
print(Usd.CollectionAPI.GetCollection(set_prim, "vehicles")) # Returns: Usd.CollectionAPI(Usd.Prim(</set>), 'vehicles')
collection_query = collection_api.ComputeMembershipQuery()
print(collection_api.ComputeIncludedPaths(collection_query, stage))
# Returns:
# [Sdf.Path('/set'), Sdf.Path('/set/garage'), Sdf.Path('/set/garage/boat'),
# Sdf.Path('/set/garage/car'), Sdf.Path('/set/garage/helicopter'),
# Sdf.Path('/set/garage/tractor'), Sdf.Path('/set/yard')]
# Set it to explicit only
collection_api.GetExpansionRuleAttr().Set(Usd.Tokens.explicitOnly)
collection_query = collection_api.ComputeMembershipQuery()
print(collection_api.ComputeIncludedPaths(collection_query, stage))
# Returns: [Sdf.Path('/set')]
# To help speed up collection creation, USD also ships with util functions:
# UsdUtils.AuthorCollection(<collectionName>, prim, [<includePathList>], [<excludePathList>])
collection_api = UsdUtils.AuthorCollection("two_wheels", set_prim, [set_prim.GetPath()], [car_prim.GetPath()])
collection_query = collection_api.ComputeMembershipQuery()
print(collection_api.ComputeIncludedPaths(collection_query, stage))
# Returns:
# [Sdf.Path('/set'), Sdf.Path('/set/garage'), Sdf.Path('/set/yard'), Sdf.Path('/set/yard/biycle')]
# UsdUtils.ComputeCollectionIncludesAndExcludes() gives us the possibility to author
# collections more sparse, that the include to exclude ratio is kept at an optimal size.
# The Python signature differs from the C++ signature:
"""
include_paths, exclude_paths = UsdUtils.ComputeCollectionIncludesAndExcludes(
target_paths,
stage,
minInclusionRatio = 0.75,
maxNumExcludesBelowInclude = 5,
minIncludeExcludeCollectionSize = 3,
pathsToIgnore = [] # This ignores paths from computation (this is not the exclude list)
)
"""
target_paths = [tractor_prim.GetPath(), car_prim.GetPath(), helicopter_prim.GetPrimPath()]
include_paths, exclude_paths = UsdUtils.ComputeCollectionIncludesAndExcludes(target_paths,stage, minInclusionRatio=.9)
print(include_paths, exclude_paths)
# Returns:
# [Sdf.Path('/set/garage/car'), Sdf.Path('/set/garage/tractor'), Sdf.Path('/set/garage/helicopter')] []
include_paths, exclude_paths = UsdUtils.ComputeCollectionIncludesAndExcludes(target_paths,stage, minInclusionRatio=.1)
print(include_paths, exclude_paths)
# Returns: [Sdf.Path('/set/garage')] [Sdf.Path('/set/garage/boat')]
# Create a collection from the result
collection_api = UsdUtils.AuthorCollection("optimized", set_prim, include_paths, exclude_paths)
Inverting a collection
When we want to isolate a certain part of the hierarchy (for example to pick what to render), a typical thing to do, is to give users a "render" collection which then gets applied by setting all prims not included to be inactive. Here is an example of how to iterate a stage by pruning (skipping the child traversal) and deactivating anything that is not in the specific collection.
This is very fast and "sparse" as we don't edit leaf prims, instead we find the highest parent and deactivate it, if no children are part of the target collection.
from pxr import Sdf, Usd, UsdUtils
stage = Usd.Stage.CreateInMemory()
# Create hierarchy
prim_paths = [
"/set/yard/biycle",
"/set/yard/shed/shovel",
"/set/yard/shed/flower_pot",
"/set/yard/shed/lawnmower",
"/set/yard/shed/soil",
"/set/yard/shed/wood",
"/set/garage/car",
"/set/garage/tractor",
"/set/garage/helicopter",
"/set/garage/boat",
"/set/garage/key_box",
"/set/garage/key_box/red",
"/set/garage/key_box/blue",
"/set/garage/key_box/green",
"/set/people/mike",
"/set/people/charolotte"
]
for prim_path in prim_paths:
prim = stage.DefinePrim(prim_path, "Cube")
print("<< hierarchy >>")
for prim in stage.Traverse():
print(prim.GetPath())
parent_prim = prim.GetParent()
while True:
if parent_prim.IsPseudoRoot():
break
parent_prim.SetTypeName("Xform")
parent_prim = parent_prim.GetParent()
# Returns:
"""
<< hierarchy >>
/HoudiniLayerInfo
/set
/set/yard
/set/yard/biycle
/set/yard/shed
/set/yard/shed/shovel
/set/yard/shed/flower_pot
/set/yard/shed/lawnmower
/set/yard/shed/soil
/set/yard/shed/wood
/set/garage
/set/garage/car
/set/garage/tractor
/set/garage/helicopter
/set/garage/boat
/set/garage/key_box
/set/garage/key_box/red
/set/garage/key_box/blue
/set/garage/key_box/green
/set/people
/set/people/mike
/set/people/charolotte
"""
# Collections
collection_prim = stage.DefinePrim("/collections")
storage_include_prim_paths = ["/set/garage/key_box", "/set/yard/shed"]
storage_exclude_prim_paths = ["/set/yard/shed/flower_pot"]
collection_api = UsdUtils.AuthorCollection("storage", collection_prim, storage_include_prim_paths, storage_exclude_prim_paths)
collection_query = collection_api.ComputeMembershipQuery()
included_paths = collection_api.ComputeIncludedPaths(collection_query, stage)
# print(included_paths)
# Prune inverse:
print("<< hierarchy pruned >>")
iterator = iter(Usd.PrimRange(stage.GetPseudoRoot()))
for prim in iterator:
if prim.IsPseudoRoot():
continue
if prim.GetPath() not in included_paths and not len(prim.GetAllChildrenNames()):
iterator.PruneChildren()
prim.SetActive(False)
else:
print(prim.GetPath())
# Returns:
"""
<< hierarchy pruned >>
/set
/set/yard
/set/yard/shed
/set/yard/shed/shovel
/set/yard/shed/lawnmower
/set/yard/shed/soil
/set/yard/shed/wood
/set/garage
/set/garage/key_box
/set/garage/key_box/red
/set/garage/key_box/blue
/set/garage/key_box/green
/set/people
"""
Composition Query
Next let's look at prim composition queries. Instead of having to filter the prim index ourselves, we can use the Usd.PrimCompositionQuery to do it for us. For more info check out our Inspecting Composition section.
The query works by specifying a filter and then calling GetCompositionArcs.
USD provides these convenience filters, it returns a new Usd.PrimCompositionQuery instance with the filter applied:
Usd.PrimCompositionQuery.GetDirectInherits(prim): Returns all non ancestral inherit arcsUsd.PrimCompositionQuery.GetDirectReferences(prim): Returns all non ancestral reference arcsUsd.PrimCompositionQuery.GetDirectRootLayerArcs(prim): Returns arcs that were defined in the active layer stack.
These are the sub-filters that can be set. We can only set a single token value per filter:
- ArcTypeFilter: Filter based on different arc(s).
- DependencyTypeFilter: Filter based on if the arc was introduced on a parent prim or on the prim itself.
- ArcIntroducedFilter: Filter based on where the arc was introduced.
- HasSpecsFilter: Filter based if the arc has any specs (For example an inherit might not find any in the active layer stack)
from pxr import Sdf, Usd
stage = Usd.Stage.CreateInMemory()
prim = stage.DefinePrim("/pig")
refs_API = prim.GetReferences()
refs_API.AddReference("/opt/hfs19.5/houdini/usd/assets/pig/pig.usd")
print("----")
def _repr(arc):
print(arc.GetArcType(),
"| Introducing Prim Path", arc.GetIntroducingPrimPath() or "-",
"| Introducing Layer", arc.GetIntroducingLayer() or "-",
"| Is ancestral", arc.IsAncestral(),
"| In Root Layer Stack", arc.IsIntroducedInRootLayerStack())
print(">-> Direct Root Layer Arcs")
query = Usd.PrimCompositionQuery.GetDirectRootLayerArcs(prim)
for arc in query.GetCompositionArcs():
_repr(arc)
print(">-> Direct Inherits")
query = Usd.PrimCompositionQuery.GetDirectInherits(prim)
for arc in query.GetCompositionArcs():
_repr(arc)
print(">-> Direct References")
query = Usd.PrimCompositionQuery.GetDirectReferences(prim)
for arc in query.GetCompositionArcs():
_repr(arc)
"""Returns:
>-> Direct Root Layer Arcs
Pcp.ArcTypeRoot | Introducing Prim Path - | Introducing Layer - | Is ancestral False | In Root Layer Stack True
Pcp.ArcTypeReference | Introducing Prim Path /pig | Introducing Layer Sdf.Find('anon:0x7f9b60d56b00:tmp.usda') | Is ancestral False | In Root Layer Stack True
>-> Direct Inherits
Pcp.ArcTypeInherit | Introducing Prim Path /pig | Introducing Layer Sdf.Find('/opt/hfs19.5/houdini/usd/assets/pig/pig.usd') | Is ancestral False | In Root Layer Stack False
Pcp.ArcTypeInherit | Introducing Prim Path /pig | Introducing Layer Sdf.Find('/opt/hfs19.5/houdini/usd/assets/pig/pig.usd') | Is ancestral False | In Root Layer Stack False
>-> Direct References
Pcp.ArcTypeReference | Introducing Prim Path /pig | Introducing Layer Sdf.Find('anon:0x7f9b60d56b00:tmp.usda') | Is ancestral False | In Root Layer Stack True
Pcp.ArcTypeReference | Introducing Prim Path /pig | Introducing Layer Sdf.Find('/opt/hfs19.5/houdini/usd/assets/pig/payload.usdc') | Is ancestral False | In Root Layer Stack False
Pcp.ArcTypeReference | Introducing Prim Path /pig{geo=medium} | Introducing Layer Sdf.Find('/opt/hfs19.5/houdini/usd/assets/pig/mtl.usdc') | Is ancestral False | In Root Layer Stack False
Pcp.ArcTypeReference | Introducing Prim Path /ASSET_geo_variant_1/ASSET | Introducing Layer Sdf.Find('/opt/hfs19.5/houdini/usd/assets/pig/mtl.usdc') | Is ancestral False | In Root Layer Stack False
Pcp.ArcTypeReference | Introducing Prim Path /pig | Introducing Layer Sdf.Find('/opt/hfs19.5/houdini/usd/assets/pig/payload.usdc') | Is ancestral False | In Root Layer Stack False
Pcp.ArcTypeReference | Introducing Prim Path /pig | Introducing Layer Sdf.Find('/opt/hfs19.5/houdini/usd/assets/pig/geo.usdc') | Is ancestral False | In Root Layer Stack False
Pcp.ArcTypeReference | Introducing Prim Path /pig | Introducing Layer Sdf.Find('/opt/hfs19.5/houdini/usd/assets/pig/geo.usdc') | Is ancestral False | In Root Layer Stack False
Pcp.ArcTypeReference | Introducing Prim Path /pig | Introducing Layer Sdf.Find('/opt/hfs19.5/houdini/usd/assets/pig/geo.usdc') | Is ancestral False | In Root Layer Stack False
"""
# Custom filter
# For example let's get all direct payloads, that were not introduced in the active root layer stack.
query_filter = Usd.PrimCompositionQuery.Filter()
query_filter.arcTypeFilter = Usd.PrimCompositionQuery.ArcTypeFilter.Payload
query_filter.dependencyTypeFilter = Usd.PrimCompositionQuery.DependencyTypeFilter.Direct
query_filter.arcIntroducedFilter = Usd.PrimCompositionQuery.ArcIntroducedFilter.All
query_filter.hasSpecsFilter = Usd.PrimCompositionQuery.HasSpecsFilter.HasSpecs
print(">-> Custom Query (Direct payloads not in root layer that have specs)")
query = Usd.PrimCompositionQuery(prim)
query.filter = query_filter
for arc in query.GetCompositionArcs():
_repr(arc)
"""Returns:
>-> Custom Query (Direct payloads not in root layer that have specs)
Pcp.ArcTypePayload | Introducing Prim Path /pig | Introducing Layer Sdf.Find('/opt/hfs19.5/houdini/usd/assets/pig/pig.usd') | Is ancestral False | In Root Layer Stack False
"""
The returned filtered Usd.CompositionArc objects, allow us to inspect various things about the arc. You can find more info in the API docs
Advanced Concepts
Table of Contents
- Edit Targets
- Utility functions in the Usd.Utils module
- Utility functions in the Sdf module
- Relationships
Edit Targets
A edit target defines, what layer all calls in the high level API should write to.
An edit target's job is to map from one namespace to another, we mainly use them for writing to layers in the active layer stack (though we could target any layer) and to write variants, as these are written "inline" and therefore need an extra name space injection.
We cover edit targets in detail in our composition fundamentals section.
Utility functions in the Usd.Utils module
Usd provides a bunch of utility functions in the UsdUtils module (USD Docs):
For retrieving/upating dependencies:
- UsdUtils.ExtractExternalReferences: This is similar to
layer.GetCompositionAssetDependencies(), except that it returns three lists:[<sublayers>], [<references>], [<payloads>]. It also consults the assetInfo metadata, so result might be more "inclusive" thanlayer.GetCompositionAssetDependencies(). - UsdUtils.ComputeAllDependencies: This recursively calls
layer.GetCompositionAssetDependencies()and gives us the aggregated result. - UsdUtils.ModifyAssetPaths: This is similar to Houdini's output processors. We provide a function that gets the input path and returns a (modified) output path.
For animation and value clips stitching:
- Various tools for stitching/creating value clips. We cover these in our animation section. These are also what the commandline tools that ship with USD use.
For collection authoring/compression:
- We cover these in detail in our collection section.
Utility functions in the Sdf module
Moving/Renaming/Removing prim/property/variant specs with Sdf.BatchNamespaceEdit()
We've actually used this quite a bit in the guide so far, so in this section we'll summarize its most important uses again:
Using Sdf.BatchNamespaceEdit() moving/renaming/removing prim/property (specs)
We main usage is to move/rename/delete prims. We can only run the name space edit on a layer, it does not work with stages. Thats means if we have nested composition, we can't rename prims any more. In production this means we'll only be using this with the "active" layer, that we are currently creating/editing. All the edits added are run in the order they are added, we have to be careful what order we add removes/renames if they interfere with each other.
Sdf.BatchNamespaceEdit | Moving/renaming/removing prim/property specs | Click to expand!
### High Level / Low Level ###
# The Sdf.BatchNamespaceEdit() always runs only on an individual layer.
from pxr import Gf, Sdf, Usd
stage = Usd.Stage.CreateInMemory()
layer = stage.GetEditTarget().GetLayer()
bicycle_prim_path = Sdf.Path("/bicycle")
bicycle_prim = stage.DefinePrim(bicycle_prim_path, "Xform")
bicycle_color_attr = bicycle_prim.CreateAttribute("color", Sdf.ValueTypeNames.Color3h)
bicycle_color_attr.Set(Gf.Vec3h([0,1,2]))
car_prim_path = Sdf.Path("/car")
car_prim = stage.DefinePrim(car_prim_path, "Xform")
soccer_ball_prim_path = Sdf.Path("/soccer_ball")
soccer_ball_prim = stage.DefinePrim(soccer_ball_prim_path, "Xform")
soccer_ball_player_rel = soccer_ball_prim.CreateRelationship("player")
soccer_ball_player_rel.SetTargets([Sdf.Path("/players/mike")])
print(layer.ExportToString())
"""Returns:
#usda 1.0
def Xform "bicycle"
{
custom color3h color = (0, 1, 2)
}
def Xform "car"
{
}
def Xform "soccer_ball"
{
custom rel player = </players/mike>
}
"""
with Sdf.ChangeBlock():
edit = Sdf.BatchNamespaceEdit()
## Important: Edits are run in the order they are added.
# If we try to move and then remove, it will error.
## Prim Specs
# Remove
edit.Add(car_prim_path, Sdf.Path.emptyPath)
# Move
edit.Add(bicycle_prim_path, car_prim_path)
# Rename
basket_ball_prim_path = soccer_ball_prim_path.ReplaceName("basket_ball")
edit.Add(soccer_ball_prim_path, basket_ball_prim_path)
## Property Specs
edit.Add(car_prim_path.AppendProperty("color"), car_prim_path.AppendProperty("style"))
soccer_ball_player_rel_path = basket_ball_prim_path.AppendProperty("player")
edit.Add(soccer_ball_player_rel_path, soccer_ball_player_rel_path.ReplaceName("people"))
# We can als
if not layer.Apply(edit):
raise Exception("Failed to apply layer edit!")
print(layer.ExportToString())
"""Returns:
#usda 1.0
def Xform "car"
{
custom color3h style = (0, 1, 2)
}
def Xform "basket_ball"
{
custom rel people = </players/mike>
}
"""
Using Sdf.BatchNamespaceEdit() for variant creation
We can create variant via the namespace edit, because variants are in-line USD namespaced paths.
Sdf.BatchNamespaceEdit | Moving prim specs into variants | Click to expand!
### High Level / Low Level ###
# The Sdf.BatchNamespaceEdit() always runs only on an individual layer.
from pxr import Sdf, Usd
stage = Usd.Stage.CreateInMemory()
prim_path = Sdf.Path("/bicycle")
prim = stage.DefinePrim(prim_path, "Xform")
stage.DefinePrim(Sdf.Path("/bicycle/cube"), "Cube")
layer = stage.GetEditTarget().GetLayer()
with Sdf.ChangeBlock():
edit = Sdf.BatchNamespaceEdit()
prim_spec = layer.GetPrimAtPath(prim_path)
# Move content into variant
variant_set_spec = Sdf.VariantSetSpec(prim_spec, "model")
variant_spec = Sdf.VariantSpec(variant_set_spec, "myCoolVariant")
variant_prim_path = prim_path.AppendVariantSelection("model", "myCoolVariant")
edit.Add(prim_path.AppendChild("cube"), variant_prim_path.AppendChild("cube"))
# Variant selection
prim_spec.SetInfo("variantSetNames", Sdf.StringListOp.Create(prependedItems=["model"]))
prim_spec.variantSelections["model"] = "myCoolVariant"
if not layer.Apply(edit):
raise Exception("Failed to apply layer edit!")
We also cover variants in detail in respect to Houdini in our Houdini - Tips & Tricks section.
Copying data with Sdf.CopySpec
We use the Sdf.CopySpec method to copy/duplicate content from layer to layer (or within the same layer).
Copying specs (prim and properties) from layer to layer with Sdf.CopySpec()
The Sdf.CopySpec can copy anything that is representable via the Sdf.Path. This means we can copy prim/property/variant specs.
When copying, the default is to completely replace the target spec.
We can filter this by passing in filter functions. Another option is to copy the content to a new anonymous layer and then
merge it via UsdUtils.StitchLayers(<StrongLayer>, <WeakerLayer>). This is often more "user friendly" than implementing
a custom merge logic, as we get the "high layer wins" logic for free and this is what we are used to when working with USD.
Sdf.CopySpec | Copying prim/property specs | Click to expand!
### High Level / Low Level ###
# The Sdf.BatchNamespaceEdit() always runs only on an individual layer.
from pxr import Gf, Sdf, Usd
stage = Usd.Stage.CreateInMemory()
layer = stage.GetEditTarget().GetLayer()
bicycle_prim_path = Sdf.Path("/bicycle")
bicycle_prim = stage.DefinePrim(bicycle_prim_path, "Xform")
bicycle_color_attr = bicycle_prim.CreateAttribute("color", Sdf.ValueTypeNames.Color3h)
bicycle_color_attr.Set(Gf.Vec3h([0,1,2]))
car_prim_path = Sdf.Path("/car")
car_prim = stage.DefinePrim(car_prim_path, "Xform")
soccer_ball_prim_path = Sdf.Path("/soccer_ball")
soccer_ball_prim = stage.DefinePrim(soccer_ball_prim_path, "Xform")
soccer_ball_player_rel = soccer_ball_prim.CreateRelationship("player")
soccer_ball_player_rel.SetTargets([Sdf.Path("/players/mike")])
print(layer.ExportToString())
"""Returns:
#usda 1.0
def Xform "bicycle"
{
custom color3h color = (0, 1, 2)
}
def Xform "car"
{
}
def Xform "soccer_ball"
{
custom rel player = </players/mike>
}
"""
# When copying data, the target prim spec will be replaced by the source prim spec.
# The data will not be averaged
with Sdf.ChangeBlock():
# Copy Prim Spec
Sdf.CopySpec(layer, soccer_ball_prim_path, layer, car_prim_path.AppendChild("soccer_ball"))
# Copy Property
Sdf.CopySpec(layer, bicycle_color_attr.GetPath(), layer, car_prim_path.AppendChild("soccer_ball").AppendProperty("color"))
print(layer.ExportToString())
"""Returns:
#usda 1.0
def Xform "bicycle"
{
custom color3h color = (0, 1, 2)
}
def Xform "car"
{
def Xform "soccer_ball"
{
custom color3h color = (0, 1, 2)
custom rel player = </players/mike>
}
}
def Xform "soccer_ball"
{
custom rel player = </players/mike>
}
"""
Using Sdf.CopySpec() for variant creation
We can also use Sdf.CopySpec for copying content into a variant.
Sdf.CopySpec | Copying prim specs into variants | Click to expand!
### High Level / Low Level ###
# The Sdf.CopySpec() always runs on individual layers.
from pxr import Sdf, Usd
stage = Usd.Stage.CreateInMemory()
bicycle_prim_path = Sdf.Path("/bicycle")
bicycle_prim = stage.DefinePrim(bicycle_prim_path, "Xform")
cube_prim_path = Sdf.Path("/cube")
cube_prim = stage.DefinePrim(cube_prim_path, "Cube")
layer = stage.GetEditTarget().GetLayer()
with Sdf.ChangeBlock():
edit = Sdf.BatchNamespaceEdit()
prim_spec = layer.GetPrimAtPath(bicycle_prim_path)
# Copy content into variant
variant_set_spec = Sdf.VariantSetSpec(prim_spec, "model")
variant_spec = Sdf.VariantSpec(variant_set_spec, "myCoolVariant")
variant_prim_path = bicycle_prim_path.AppendVariantSelection("model", "myCoolVariant")
Sdf.CopySpec(layer, cube_prim_path, layer, variant_prim_path.AppendChild("cube"))
# Variant selection
prim_spec.SetInfo("variantSetNames", Sdf.StringListOp.Create(prependedItems=["model"]))
prim_spec.variantSelections["model"] = "myCoolVariant"
print(layer.ExportToString())
"""Returns:
#usda 1.0
def Xform "bicycle" (
variants = {
string model = "myCoolVariant"
}
prepend variantSets = "model"
)
{
variantSet "model" = {
"myCoolVariant" {
def Cube "cube"
{
}
}
}
}
def Cube "cube"
{
}
"""
We also cover variants in detail in respect to Houdini in our Houdini - Tips & Tricks section.
Delaying change notifications with the Sdf.ChangeBlock
Whenever we edit something in our layers, change notifications get sent to all consumers (stages/hydra delegates) that use the layer. This causes them to recompute and trigger updates.
When performing a large edit, for example creating large hierarchies, we can batch the edit, so that the change notification gets the combined result.
In theory it is only safe to use the change block with the lower level Sdf API. We can also use it with the high level API, we just have to make sure that we don't accidentally query an attribute, that we just overwrote or perform ops on deleted properties.
We therefore recommend work with a read/write code pattern:
- We first query all the data via the Usd high level API
- We then write our data via the Sdf low level API
When writing data, we can also write it to a temporary anonymous layer, that is not linked to a stage and then merge the result back in via UsdUtils.StitchLayers(anon_layer, active_layer). This is a great solution when it is to heavy to query all data upfront.
For more info see the Sdf.ChangeBlock API docs.
from pxr import Sdf, Tf, Usd
def callback(notice, sender):
print("Changed Paths", notice.GetResyncedPaths())
stage = Usd.Stage.CreateInMemory()
# Add
listener = Tf.Notice.Register(Usd.Notice.ObjectsChanged, callback, stage)
# Edit
layer = stage.GetEditTarget().GetLayer()
for idx in range(5):
Sdf.CreatePrimInLayer(layer, Sdf.Path(f"/test_{idx}"))
# Remove
listener.Revoke()
# Returns:
"""
Changed Paths [Sdf.Path('/test_0')]
Changed Paths [Sdf.Path('/test_1')]
Changed Paths [Sdf.Path('/test_2')]
Changed Paths [Sdf.Path('/test_3')]
Changed Paths [Sdf.Path('/test_4')]
"""
stage = Usd.Stage.CreateInMemory()
# Add
listener = Tf.Notice.Register(Usd.Notice.ObjectsChanged, callback, stage)
with Sdf.ChangeBlock():
# Edit
layer = stage.GetEditTarget().GetLayer()
for idx in range(5):
Sdf.CreatePrimInLayer(layer, Sdf.Path(f"/test_{idx}"))
# Remove
listener.Revoke()
# Returns:
# Changed Paths [Sdf.Path('/test_0'), Sdf.Path('/test_1'), Sdf.Path('/test_2'), Sdf.Path('/test_3'), Sdf.Path('/test_4')]
Relationships
Special Relationships
This sub-section is still under development, it is subject to change and needs extra validation.
These special relationships have primvar like inheritance from parent to child prims:
material:binding: This controls the material binding.coordSys:<customName>: Next to collections, this is currently the only other multi-apply API schema that ships natively with USD. It allows us to target an xform prim, whose transform we can then read into our shaders at render time.skel:skeleton/skel:animationSource:skel:skeleton: This defines what skeleton prims with the skelton binding api schema should bind to.skel:animationSource: This relationship can be defined on mesh prims to target the correct animation, but also on the skeletons themselves to select the skeleton animation prim.
Relationship Forwarding (Binding post)
This sub-section is still under development, it is subject to change and needs extra validation.
Collections
We cover collections in detail in our collection section with advanced topics like inverting or compressing collections.
FAQ (Frequently Asked Questions)
Table of Contents
- Should I prefer assets with a lot of prims or prefer combined meshes?
- How is "Frames Per Second" (FPS) handled in USD?
- How is the scene scale unit handled in USD?
Should I prefer assets with a lot of prims or prefer combined meshes?
When working in hierarchy based formats, an important influence factor of performance is the hierarchy size.
Basically it boils down to these rules: Keep hierarchies as small as possible at all times, only start creating separates meshes when:
- your mesh point/prim count starts going into the millions
- you need to assign different render geometry settings
- you need to add different transforms
- you need to hide the prims individually
- you need separate materials (We can also use
UsdGeom.Subsets, which are face selections per mesh, to assign materials, to workaround this)
At the end of the day it is a balancing act of What do I need to be able to access separately in the hierarchy vs I have a prim that is super heavy (100 Gbs of data) and takes forever to load. A good viewpoint is the one of a lighting/render artist, as they are the ones that need to often work on individual (sub-)hierarchies and can say how it should be segmented.
How is "frames per second" (FPS) handled in USD?
Our time samples that are written in the time unit-less {<frame>: <value> } format are interpreted based on the timeCodesPerSecond/framesPerSecond metadata set in the session/root layer.
(
endTimeCode = 1010
framesPerSecond = 24
metersPerUnit = 1
startTimeCode = 1001
timeCodesPerSecond = 24
)
You can find more details about the specific metadata priority and how to set the metadata in our animation section.
How is the scene scale unit and up axis handled in USD?
We can supply an up axis and scene scale hint in the layer metadata, but this does not seem to be used by most DCCs or in fact Hydra itself when rendering the geo. So if you have a mixed values, you'll have to counter correct via transforms yourself.
The default scene metersPerUnit value is centimeters (0.01) and the default upAxis is Y.
You can find more details about how to set these metrics see our layer metadata section.
Houdini
Houdini's USD implementation, codenamed Solaris, is one of the most easy to use and "getting started to USD" entry points currently on the market.
We highly recommend grabbing a free-for-private use copy of Houdini via the SideFX website.
Houdini offers an extensive tool set around USD, often exposing common API calls as easy to use nodes. It therefore is also a great way to get started with the USD API, as the terminology is the same.
In this guide's Houdini section we focus on the production related side of USD. That means we cover things like:
- How to best approach USD in Houdini, what to expect from a artist vs pipeline perspective
- What Houdini handles differently to using native bare-bone USD
- Typical pitfalls in common production scenarios
- Optimizing HDAs and geometry import/export
General Approach
We'll expand our Houdini section in the future with topics such as:
- lighting
- rendering (render products/render vars (USD speak for AOVs)/render procedurals)
- asset/shot templates
This page will focus on the basics of what you need to know before getting started in LOPs.
Currently this is limited to LOPs basics and SOP geometry importing/exporting, we'll expand this in the future to other topics.
Table of Contents
- Houdini LOPs In-A-Nutshell
- What should I use it for?
- Resources
- Overview
- Artist Vs Pipeline
- Path Structure
- How to convert between LOPs and SOPs
- Composition
TL;DR - Approach In-A-Nutshell
When working in Houdini, the basics our pipeline has to handle is USD import/export as well as setting up the correct composition.
As covered in our composition section, composition arcs are centered around loading a specific prim (and its children) in the hierarchy. We usually design our path structure around "root" prims. That way we can load/unload a specific hierarchy selection effectively. With value clips (USD speak for per frame/chunk file loading) we also need to target a specific root prim, so that we can keep the hierarchy reference/payloadable and instanceable.
To make it convenient for our artists to use USD, we should therefore make handling paths and composition as easy as possible. Our job is to abstract away composition, so that we use its benefits as best as possible without inconveniencing our artists.
As for paths, Houdini's SOPs to LOPs mechanism in a nutshell is:
- Check what "path" attribute names to consult
- Check (in order) if the attribute exists and has a non-empty value
- If the value is relative (starts with "./some/Path", "some/Path", "somePath", so no
/), prefix the path with the setting defined in "Import Path Prefix" (unless it is a point instance prototype/volume grid path, see exceptions below). - If no value is found, use a fallback value with the
<typeName>_<idx>syntax.
There are two special path attributes, that cause a different behavior for the relative path anchoring.
- usdvolumesavepath: This defines the path of your "Volume" prim.
- usdinstancerpath: This defines the path of your "PointInstancer" prim (when exporting packed prims as point instancers).
What should I use it for?
Resources
Overview
You can find all the examples we take a look at in our USD Survival Guide - GitHub Repository
We have a lot of really cool nodes available for us what ship natively with Houdini. Quite a few of them are actually bare-bone wrappers around USD API commands, so that we don't have to master the API to use them.
Now for pipeline developers, these are the nodes you'll primarily be interacting with:
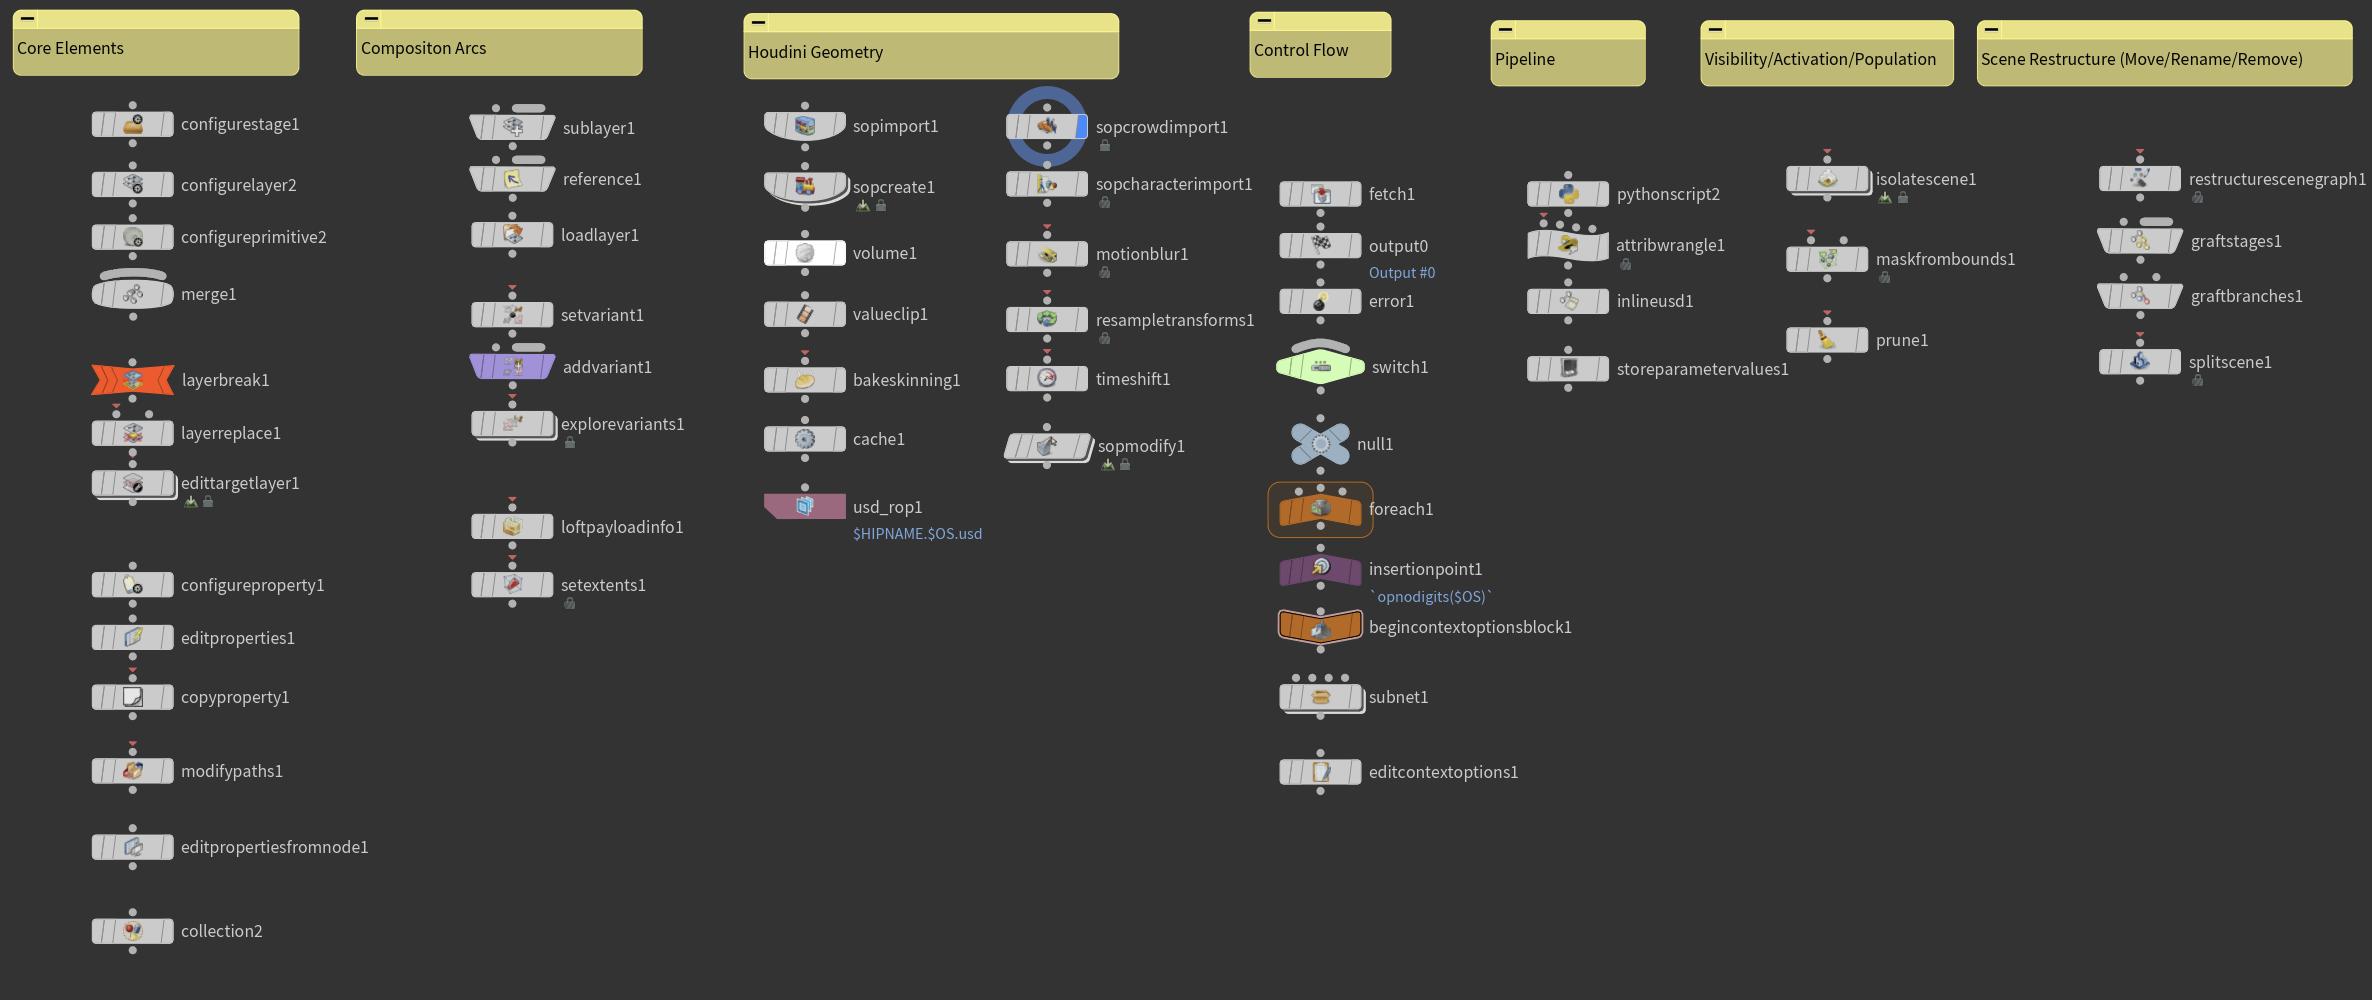
You favorite node will be the Python LOP node, as we have exposure to the full USD API and can modify the stage to our needs.
Ready!?! Let's goooooooo!
Artist Vs Pipeline
When switching to a USD backed pipeline, an important thing to not gloss over, is how to market USD to artists.
Here are the most important things to keep in mind of what a pipeline should abstract away and what it should directly communicate to artists before getting started:
- As USD is its own data format, we will not have the native file IO speeds of .bgeo(.sc). The huge benefit is that we can use our caches in any DCC that offers a USD implementation. The downside is, that we have to be more "explicit" of what data we are exporting. For example for packed geometry we have to define how to map it to USD, e.g. as "PointInstancers", "Xforms" or flattened geometry. This means there is now an additional step, that has to be made aware of, before each export.
- USD exposes other departments work to us directly through its layering mechanism. This a very positive aspect, but it also comes with more communication overhead. Make sure you have setup clear communication structures beforehand of who to contact should questions and issues arise.
- USD comes with its own terminology. While we do recommend teaching and learning it, when first transitioning to USD, we should try to keep in familiar waters where possible to soften the blow.
Here are a few things pipeline can/should cover to make things as easy going as possible:
- Provide learning material in the form of documentation, follow along workshops and template scenes. We recommend putting a strong focus on this before going "live" as once a show is running, it can cause a high demand in one-on-one artist support. The more you prepare in advance, the more things will flow smoothly. We also recommend tieing artists into your development process, as this keeps you on your toes and also helps ease the transition.
- A core element pipeline should always handle is data IO. We provide various tips on how to make exporting to LOPs similar to SOP workflows in this guide.
- We recommend being more restrictive in different workflow aspects rather than allowing to mix'n'match all different styles of geometry import/export and node tree flow "designs". What we mean with this is, that we should "lock" down specific use cases like "What geo am I exporting (characters/water/debris/RBD/etc.)" and build specific HDAs around these. This way there is no ambiguity to how to load in geometry to USD. It also makes pre-flight checks easy to implement, because we know in advance what to expect.
- In LOPs, we can often stick to building a "monolithic" node stream (as to SOPs where we often branch and merge). As order of operation in LOPs is important, there are fewer ways to merge data. This means we can/should pre-define how our node tree should be structured (model before material, material before lighting etc.). A good approach is to segment based on tasks and then merge their generated data into the "main" input stream. For example when creating lights, we can create a whole light rig and then merge it in.
These tips may sound like a lot of work, but the benefits of USD are well worth it!
Path Structure
As covered in our composition section, composition arcs are centered around loading a specific prim (and its children) in the hierarchy. We usually design our path structure around "root" prims. That way we can load/unload a specific hierarchy selection effectively. With value clips (USD speak for per frame/chunk file loading) we also need to target a specific root prim, so that we can keep the hierarchy reference/payloadable and instanceable.
As pipeline developers, we therefore should make it as convenient as possible for artists to not have to worry about these "root" prims.
We have two options:
- We give artists the option to not be specific about these "root" prims. Everything that doesn't have one in its name, will then be grouped under a generic "/root" prim (or whatever we define as a "Import Path Prefix" on our import configure nodes). This makes it hard for pipeline to re-target it into a specific (shot) hierarchy. It kind of breaks the USD principle of layering data together.
- We enforce to always have these root prims in our path. This looses the flexibility a bit, but makes our node network easier to read as we always deal with absolute(s, like the Sith) prim paths.
When working in SOPs, we don't have sidecar metadata per path segment (prim) as in LOPs, therefore we need to define a naming convention upfront, where we can detect just based on the path, if a root is defined or not. There is currently no industry standard (yet), but it might be coming sooner than we might think! Say goodbye to vendor specific asset structures, say hello to globally usable assets.
As also mentioned in our composition section, this means that only prims under the root prims can have data (as the structure above is not payloaded/referenced). Everything we do in SOPs, affects only the leaf prims in world space. So we are all good on that side.
How to convert between LOPs and SOPs
To handle the SOPs to LOPs conversion we can either configure the import settings on the LOPs sop import node or we can use the SOPs USD configure node, which sets the exact same settings, but as detail attributes. For pipeline tools, we recommend using the SOPs detail attributes, as we can dynamically change them depending on what we need.
| LOPs Sop Import | SOPs USD Configure Name |
|---|---|
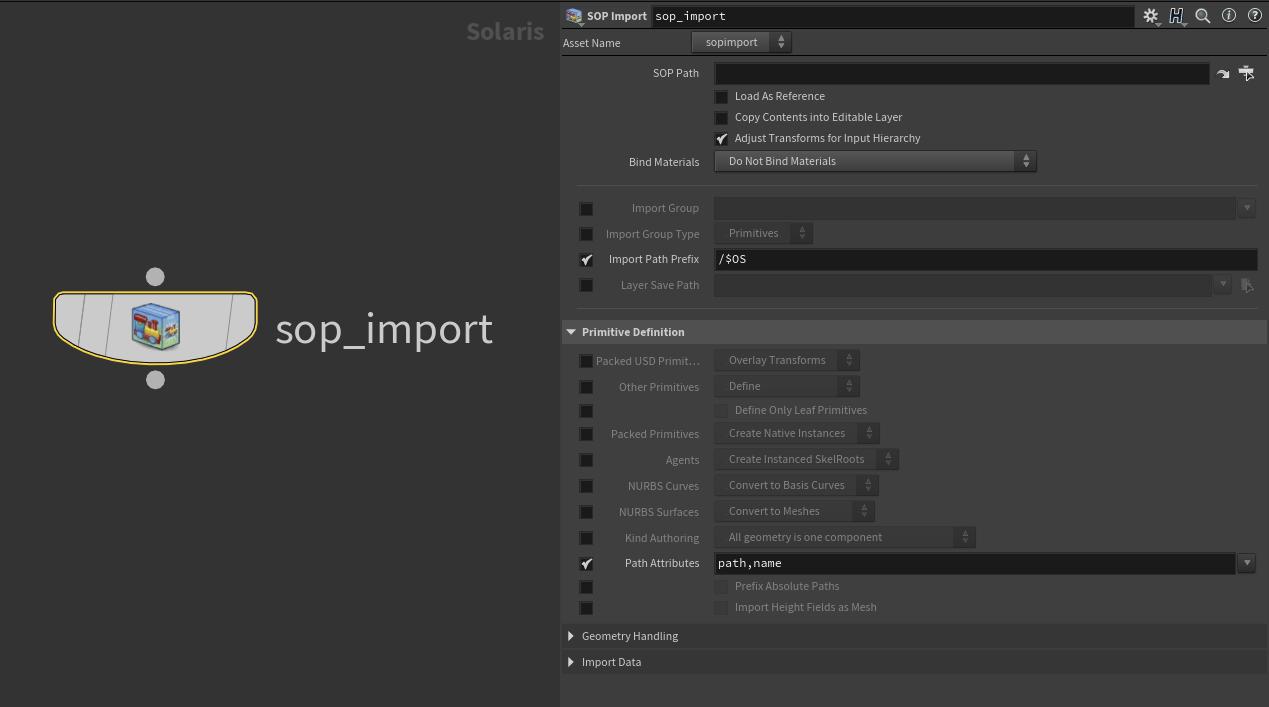 | 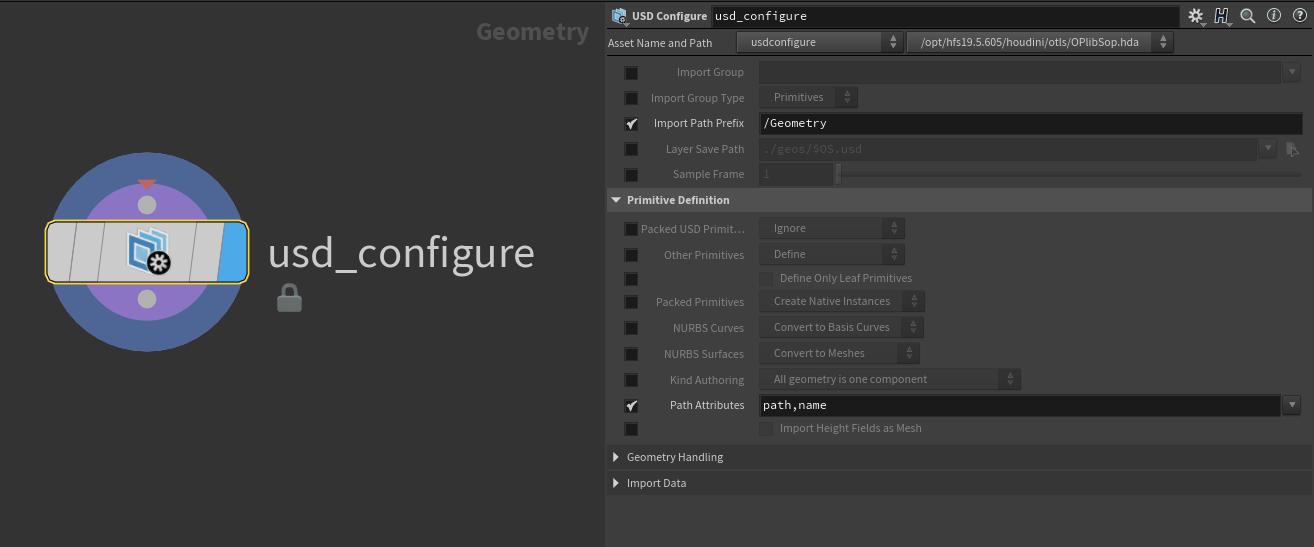 |
We strongly recommend reading the official docs Importing SOP geometry into USD as supplementary reading material.
In our Basic Building Blocks of Usd section, the first thing we covered was how to handle paths. Before we look at our import/export nodes let's do the same for Houdini.
In Houdini we can define what attributes Houdini consults for defining the Sdf.Path for our prims. By default it is the path and name attribute. When looking up the path, it looks through the path attributes in the order we define on the sop import/USD configure node. If the value is empty it moves onto the next attribute. If it doesn't find a valid value, it will fallback to defaults (<typeName>_<idx>, e.g. "mesh_0").
We can also specify relative paths. These are any paths, that don't start with /. These will be prefixed with the prefix defined via the "Import Path Prefix" parm on either ones of the configure nodes.
- Check what "path" attribute names to consult
- Check (in order) if the attribute exists and has a non-empty value
- If the value is relative (starts with "./some/Path", "some/Path", "somePath", so no
/), prefix the path with the setting defined in "Import Path Prefix" (unless it is a point instance prototype/volume grid path, see exceptions below). - If no value is found, use a fallback value with the
<typeName>_<idx>syntax.
When working with packed prims (or nested levels of packed prims), the relative paths are anchored to the parent packed level for the nested levels. The top level packed prim is then anchored as usual against the import settings prefix.
For example:
- Packed: "/level_0"
- Packed: "./level_1"
- Mesh: "myCoolMesh"
- Packed: "./level_1"
The resulting path will be "/level_0/level_1/myCoolMesh". Be careful, using "../../../myPath" works too, strongly not recommended as it breaks out of the path (like a `cd ../../path/to/other/folder``)!
When working with paths in SOPs and packed prims, we have to set the path before we pack the geometry. We can't adjust it afterwards, without unpacking the geometry. If we define absolute paths within packed geometry, they will not be relative to the parent packed level. This can cause unwanted behaviours (as your hierarchy "breaks" out of its packed level). We therefore recommend not having absolute paths inside packed prims.
We can easily enforce this, by renaming our "outside" packed attributes to something else and using these as "path" import attributes. That way the inside get's the fallback behavior, unless explicitly set to our "outer" path attributes.
There are two special path attributes, that cause a different behavior for the relative path anchoring.
- usdvolumesavepath: This defines the path of your "Volume" prim. As for volumes we usually use the "name" attribute to drive the volume grid/field name, this gives us "/my/cool/explosionVolume/density", "/my/cool/explosionVolume/heat", etc, as long as we don't define another path attribute that starts with "/". So this gives us a convenient way to define volumes with (VDB) grids.
- usdinstancerpath: This defines the path of your "PointInstancer" prim (when exporting packed prims as point instancers). When we define a relative path, it is anchored under "/my/cool/debrisInstancer/Prototypes/ourRelativePathValue". Collecting our prototypes under the "/Prototypes" prim is a common USD practice, as it visually is clear where the data is coming as well as it make the hierarchy "transportable" as we don't point to random other prims, that might be unloaded.
When these two attributes are active, our path attributes that are relative, are anchored differently:
- usdvolumesavepath: "/my/cool/explosionVolume/relativePathValue".
- usdinstancerpath: "/my/cool/debrisInstancer/Prototypes/relativePathValue"
Here's a video showing all variations, you can find the file, as mentioned above, in our GitHub repo:
Importing from LOPs to SOPs
Importing from LOPs is done via two nodes:
- LOP Import: This imports packed USD prims.
- USD Unpack: This unpacks the packed USD prims to polygons.
If we select a parent and child prim at the same time, we will end up with duplicated geometry on import (and the import will take twice as long).
By default the "USD Unpack" node traverses to "GPrims" (Geometry Prims), so it only imports anything that is a geo prim. That means on LOP import, we don't have to select our leaf mesh prims ourselves, when we want the whole model.
As loading data takes time, we recommend being as picky as possible of what you want to import. We should not import our whole stage as a "USD Packed Prim" and then traverse/break it down, instead we should pick upfront what to load. This avoids accidentally creating doubled imports and keeps things fast.
Our packed USD prims, carry the same transform information as standard packed geo. We can use this to parent something in SOPs by extracting the packed intrinsic transform to the usual point xform attributes.
If we want to import data from a LOPs PointInstancer prim, we can LOP import the packed PointInstancer prim and then unpack it polygons. This will give us a packed USD prim per PoinstInstancer prin (confusing right?). Be careful with displaying this in the viewport, we recommend extracting the xforms and then adding a add node that only keeps the points for better performance.
Displaying a lot of packed prims in SOPS can lead to Houdini being unstable. We're guessing because it has to draw via Hydra and HoudiniGL and because USD packed prims draw a stage partially, which is a weird intermediate filter level.
We recommend unpacking to polygons as "fast" as possible and/or pre-filtering the LOP import as best as possible.
Exporting from SOPs to LOPs
Export to LOPs is as simple as creating a SOP Import node and picking the SOP level geo.
As described above, we can drive the SOP import settings via the "USD Configure" SOPs level node or the "SOP Import" LOPs node.
We go into detail on how to handle the different (FX) geometry types in our Geometry IO/FX section.
We recommend building workflows for each geo type (points/deformed meshes/transforms/copy-to-points/RBD/crowds) as this makes it easy to pre-flight check as we know exactly what to export and we can optimize (the heck) out of it.
When working LOPs, we like to use the terminology: "We are working against a stage."
What do we mean with that? When importing from or editing our stage, we are always making the edits relative to our current stage. When importing to SOPs, we can go out of sync, if our SOP network intermediate-caches geometry. For example if it writes SOP imported geometry to a .bgeo.sc cache and the hierarchy changes in LOPs, you SOPs network will not get the correct hierarchy until it is re-cached.
This can start being an issue, when you want to "over" the data from SOPs onto an existing hierarchy. Therefore we should always try to write our caches "against a stage". Instead of just caching our USD to disk and then composition arc-ing it into our "main" node stream.
This means that we can validate our hierarchy and read stage metrics like shutter sample count or local space transforms on USD export. This ensures that the resulting cache is valid enough to work downstream in our pipeline. Houdini's "SOP Import" node is also constructed to work against the input connected stage and does alot of this for you (e.g. material binding/local space correction ("Adjust Transforms for Input Hierarchy")).
Another thing we have to keep in mind is that SOPs only represents the active frame, where as a written USD cache file represents the whole frame range.
To emulate this we can add a cache LOPs node. If we have geometry "popping" in and out across the frame range, it will by default always be visible in the whole frame range cached file. When we write USD files on different machines (for example on a farm), each frame that is being cooked does not know of the other frames.
To solve this USD has two solutions:
- If our output file is a single stitched USD file, then we have to manually check the layers before stitching them and author visibility values if we want to hide the prims on frames where they produced no data.
- With value clips we have to write an "inherited" visibility time sample per prim for every time sample. If the hierarchy does not exist, it will fallback to the manifest, where we have to write a value of "invisible".
Houdini has the option to track visibility for frame ranges (that are cooked in the same session) to prevent this. For large production scenes, we usually have to resort to the above to have better scalability.
Stage/Layer Metrics
As mentioned in our stage/layer and animation sections, we can/should setup layer related metrics.
They work the same way in Houdini, the only difference is we have to use Houdini's Configure Layer node to set them, if we want to set them on the root layer/stage (due to how Houdini manages stages).
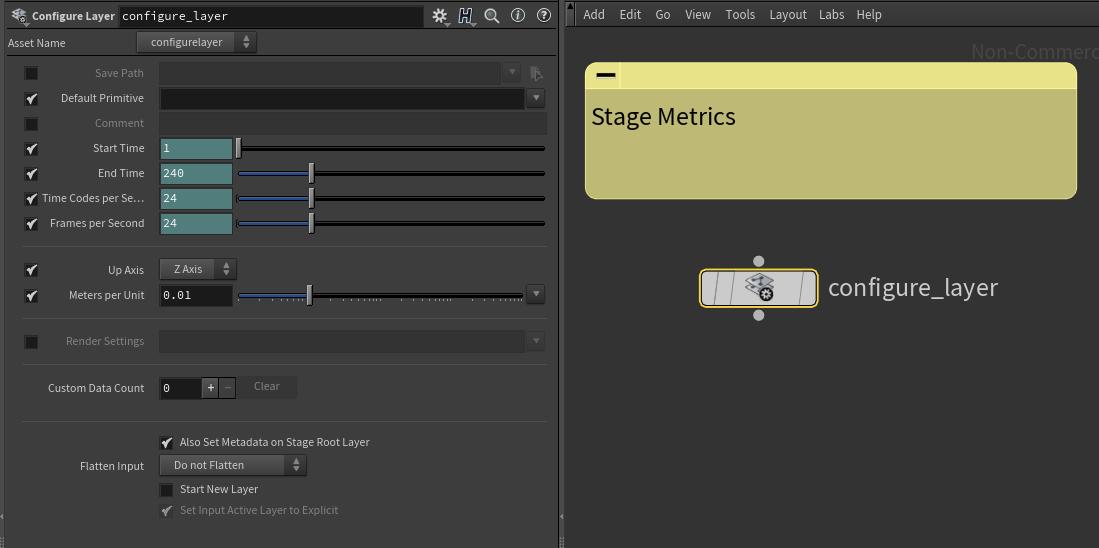
Composition
Asset Resolver
In Houdini our asset resolver is loaded as usual via the plugin system. If we don't provide a context, the default context of the resolver is used.
We can pass in our asset resolver context in two ways:
- Via the the configure stage node. When set via the stage node, the left most node stream with a context "wins", when we start merging node trees.
- Globally via the scene graph tree panel settings.
| Node Tree | Global Context |
|---|---|
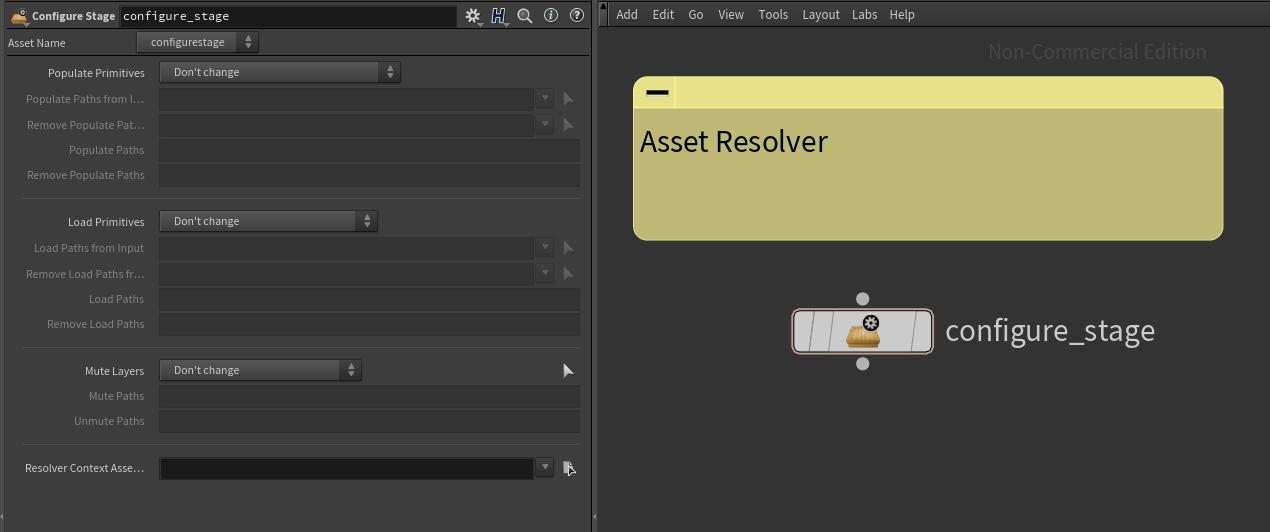 | 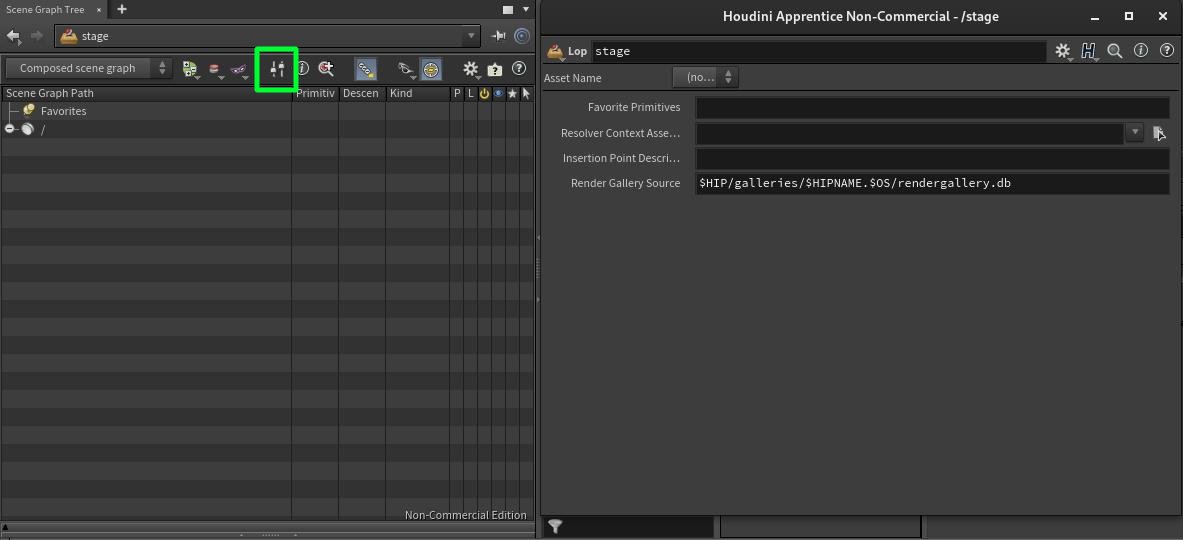 |
If you are using the scene graph tree panel settings, be sure to turn off "Set Asset Resolver Context From LOP Node Parameters" in the preferences.
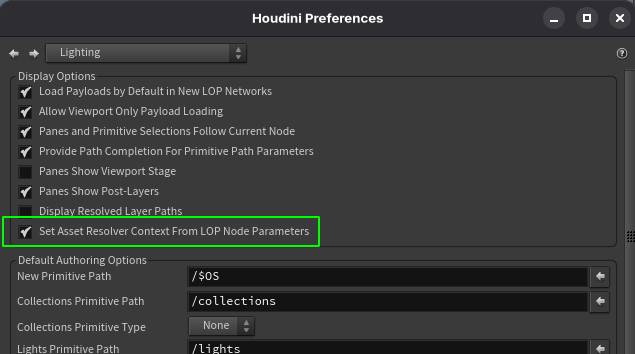
For more info about resolvers, check out our asset resolver section. We provide reference resolver implementations that are ready to be used in production.
Creating Composition Arcs
Creating composition arcs in LOPs can be done via Houdini's sublayer, variant and reference (for inherit/payload/specializes) nodes.
We recommend using these for prototyping composition. Once we've figured out where we want to go, we should re-write it in Python, as it is easier and a lot faster when working on large hierarchies.
This guide comes with an extensive composition fundamentals/composition in production section with a lot of code samples.
We also cover advanced composition arc creation, specifically for Houdini, in our Tips & Tricks section.
Creating efficient LOPs HDAs
As with any other network in Houdini, we can also create HDAs in LOPs.
This page will focus on the most important performance related aspects of LOP HDAs, we will be referencing some of the points mentioned in the performance optimizations section with a more practical view.
You can find all the .hip files of our shown examples in our USD Survival Guide - GitHub Repo.
Table of Contents
Overview
When building LOP HDAs with USD, the big question is:
What should we do in Python and would should we do with HDAs/nodes that Houdini ships with?
The answer depends on your knowledge level of USD and the pipeline resources you have.
If you want to go the "expert" route, this is the minimal working set of nodes you'll be using:
Technically we won't be needing more, because everything else can be done in Python. (There are also the standard control flow related nodes, we skipped those in the above image). It is also faster to run operations in Python, because we can batch edits, where as with nodes, Houdini has to evaluate the node tree.
So does this mean we shouldn't use the Houdini nodes at all? Definitely not! Houdini's LOPs tool set offers a lot of useful nodes, especially when your are prototyping, we definitely recommend using these first. A common workflow for developers is therefore:
Build everything with LOP HDAs first, then rebuild it, where possible, with Python LOPs when we notice performance hits.
We'll always use the "Material Library" and "SOP Import" nodes as these pull data from non LOP networks.
There are also a lot of UI related nodes, which are simply awesome. We won't be putting these in our HDAs, but they should be used by artists to complement our workflows.
HDA Template Setup
Let's take a look at how we can typically structure HDAs:
For parms we can make use of Houdini's internal loputils under the following path:
$HFS/houdini/python3.9libs/loputils.py
You can simply import via import loputils. It is a good point of reference for UI related functions, for example action buttons on parms use it at lot.
Here you can find the loputils.py - Sphinx Docs online.
It gives us common lop related helpers, like selectors etc.
For the structure we recommend:
- Create a new layer
- Perform your edits (best-case only a single Python node) or merge in content from other inputs.
- Create a new layer
Why should we spawn the new layers? See our layer size and content section below for the answer.
When merging other layers via the merge node we recommend first flattening your input layers and then using the "Separate Layers" mode. That way we also avoid the layer size problem and keep our network fast.
Order of Operations
The same as within SOPs, we have to pay attention to how we build our node network to have it perform well.
Let's look at a wrong example and how to fix it:
Here is a more optimized result:
The name of the game is isolating your time dependencies. Now the above is often different how a production setup might look, but the important part is that we try to isolate each individual component that can stand by itself to a separate node stream before combining it into the scene via a merge node.
In our HDAs we can often build a separate network and then merge it into the main node stream, that way not everything has to re-cook, only the merge, if there is an upstream time dependency.
Now you may have noticed that in the first video we also merged a node stream with itself.
If Ghostbusters taught us one thing:
The solution is simple, add a layer break (and make sure that your have the "Strip Layers Above Layer Breaks" toggle turned on). We have these "diamond" shaped networks quite a lot, so make sure you always layer break them correctly. For artists it can be convenient to build a HDA that does this for them.
USD is also very "forgiving", if we create content in a layer, that is already there from another layer (or layer stack via a reference or payload). The result is the same (due to composition), but the layer stack is "doubled". This is particularly risky and can lead to strange crashes, e.g. when we start to duplicate references on the same prim.
Now if we do this in the same layer stack, everything is fine as our list-editable ops are merged in the active layer stack. So you'll only have the reference being loaded once, even though it occurs twice in the same layer stack.
Now if we load a reference that is itself referenced, it is another story due to encapsulation. We now have the layer twice, which gives us the same output visually/hierarchy wise, but our layers that are used by composition now has really doubled.
Check out this video for comparison:
What also is important, is the merge order. Now in SOPs we can just merge in any order, and our result is still the same (except the point order).
For LOPs this is different: The merge order is the sublayer order and therefore effects composition. As you can see in the video below, if we have an attribute that is the same in both layers (in this case the transform matrix), the order matters.
Dealing with time dependencies
As with SOPs, we should also follow the design principle of keeping everything non-time dependent where possible.
When we have time dependencies, we should always isolate them, cache them and then merge them into our "main" node stream.
When writing Python code, we can write time samples for the full range too. See our animation section for more info. We recommend using the lower level API, as it is a lot faster when writing a large time sample count. A typical example would be to write the per image output file or texture sequences via Python, as this is highly performant.
The very cool thing with USD is that anything that comes from a cached file does not cause a Houdini time dependency, because the time samples are stored in the file/layer itself. This is very different to how SOPs works and can be confusing in the beginning.
Essentially the goal with LOPs is to have no time dependency (at least when not loading live caches).
Starting with H19.5 most LOP nodes can also whole frame range cache their edits. This does mean that a node can cook longer for very long frame ranges, but overall your network will not have a time dependency, which means when writing your node network to disk (for example for rendering), we only have to write a single frame and still have all the animation data. How cool is that!
If a node doesn't have that option, we can almost always isolate that part of the network and pre cache it, that way we have the same effect but for a group of nodes.
If we want to preview xform/deformation motionblur that is not based on the velocities/accelerations attribute, then we have to pre-cache the time samples in interactive sessions. This is as simple as adding a LOPs cache node as shown above.
Also check out our Tips & Tricks section to see how we can query if an attribute is time sampled or only has a default value. This is a bit different in Houdini than bare-bone USD, because we often only have a single time sample for in session generated data.
Layer Size/Count
As mentioned in the overview, layer content size can become an issue.
We therefore recommend starting of with a new layer and ending with a new layer. That way our HDA starts of fast, can create any amount of data and not affect downstream nodes.
For a full explanation see our performance section.
Composition
We strongly recommend reading up on our composition section before getting started in LOPs.
When setting up composition arcs in Houdini, we can either do it via nodes or code. We recommend first doing everything via nodes and then refactoring it to be code based, as it is faster. Our custom HDAs are usually the ones that bring in data, as this is the core task of every pipeline.
In our Tips & Tricks section, we have provided these common examples:
- Extracting payloads and references from an existing layer stack with anonymous layers
- Efficiently re-writing existing hierarchies as variants
- Adding overrides via inherits
These provide entry points of how you can post-process data do you needs, after you have SOP imported it.
Handeling Geometry Input/Output and FX
We'll expand this section in the future with topics such as:
- Deforming Meshes
- Volumes
- Local/World Transform Space Handling
In this section, we'll have a look at how to import/export different geometry types to and from USD.
We'll also explain advanced setups, that can increase your IO performance drastically.
Particles
Importing particles (points) is the simplest form of geometry import.
Let's see how we can make it complicated 🤪. We'll take a look at these two cases:
- Houdini native point import
- Render overrides via (Numpy) Python wrangles
You can find all the .hip files of our shown examples in our USD Survival Guide - GitHub Repo.
For all options for SOP to LOP importing, check out the official Houdini docs.
Houdini Native Import
When importing points, all you need to set is a path attribute on your points (rather than on prims as with polygon meshes), because we don't have any prims on sop level. (Thanks captain obvious).
For an exercise, let's build a simple SOP import ourselves. Should we use this in production: No, Houdini's geo conversion is a lot faster, when it comes to segmenting your input based on the path attribute. Nonetheless it is a fun little demo:
import numpy as np
from pxr import UsdGeom
sop_node = node.parm("spare_input0").evalAsNode()
sop_geo = sop_node.geometry()
frame = hou.frame()
prim = stage.DefinePrim("/points", "Points")
attribute_mapping = {
"P": "points",
"id": "ids",
"pscale": "widths",
"Cd": "primvars:displayColor",
}
# Import attributes
for sop_attr in sop_geo.pointAttribs():
attr_name = attribute_mapping.get(sop_attr.name())
if not attr_name:
continue
attr = prim.GetAttribute(attr_name)
if not attr:
continue
attr_type_name = attr.GetTypeName()
attr_type = attr_type_name.type
attr_class = attr_type.pythonClass
# The pointFloatAttribValuesAsString always gives us a float array
value = np.frombuffer(sop_geo.pointFloatAttribValuesAsString(sop_attr.name()), dtype=np.float32)
# This casts it back to its correct type
attr.Set(attr_class.FromNumpy(value), frame)
# Enforce "vertex" (Houdini speak "Point") interpolation
attr.SetMetadata("interpolation", "vertex")
# Re-Compute extent hints
boundable_api = UsdGeom.Boundable(prim)
extent_attr = boundable_api.GetExtentAttr()
extent_value = UsdGeom.Boundable.ComputeExtentFromPlugins(boundable_api, frame)
if extent_value:
extent_attr.Set(extent_value, frame)
Why should we do it ourselves, you might ask? Because there are instances, where we can directly load in the array, because we know we are only editing a single prim. Some of Houdini's nodes actually use this mechanism in a few of the point instancer related nodes.
Render-Time Overrides via (Numpy) Python Wrangles
Now you might be thinking, is Python performant enough to actually manipulate geometry?
In the context of points (also point instancers), we answer is yes. As we do not have to do geometry operations, manipulating points is "just" editing arrays. This can be done very efficiently via numpy, if we use it for final tweaking. So don't expect to have the power of vex, the below is a "cheap" solution to adding render time overrides, when you don't have the resources to write your own compiled language (looking at your DNEG (OpenVDB AX)).
In the near future, this can probably also be done by Houdini's render procedurals (it actually already can be). The method we show here, is DCC independent though, so it does have its benefits, because you don't need a Houdini (engine) license.
To showcase how we manipulate arrays at render time, we've built a "Python Wrangle" .hda. Here is the basic .hda structure:
As discussed in our Creating efficient LOPs .Hdas section, we start and end the Hda with a new layer to ensure that we don't "suffer" from the problem of our layer getting to data heavy. Then we have two python nodes: The first one serializes the Hda parms to a json dict and stores it on our point prims, the second one modifies the attributes based on the parm settings. Why do we need to separate the data storage and execution? Because we want to only opt-in into the python code execution at render-time. So that's why we put down a switch node that is driven via a context variable. Context variables are similar to global Houdini variables, the main difference is they are scoped to a section of our node graph or are only set when we trigger a render.
This means that when rendering the USD file to disk, all the points will store is our wrangle code (and the original point data, in production this usually comes from another already cached USD file that was payloaded in). In our pre render scripts, we can then iterate over our stage and execute our code.
Let's talk about performance: The more attributes we manipulate, the slower it will get. To stress test this, let's try building a point replicator with a constant seed. To "upres" from 1 million to 10 million points, it takes around 30 seconds. For this being a "cheap" solution to implement, I'd say that is manageable for interactivity. Now we could also do a similar thing by just using a point instancer prim and upres-ing our prototypes, using this method allows for per point overrides though, which gives us more detail.
Here is a demo of a point replicator:
Another cool thing is, that this is actually not limited to points prims (We lied in our intro 😱). Since all attributes are is arrays of data, we can run the python wrangle on any prim. For example if we just wan't to increase our pscale width or multiply our velocities, operating on an array via numpy is incredibly fast, we're talking a few 100 milliseconds at most for a few millions points. As mentioned in our data types section, USD implements the buffer protocol, so we don't actually duplicate any memory until really needed and mapping Vt.Arrays to numpy is as straight forward as casting the array to a numpy array.
Now the below code might look long, but the import bits are:
- Getting the data:
np.array(attr.Get(frame) - Setting the data:
attr.Set(attr.GetTypeName().type.pythonClass.FromNumpy(output_data[binding.property_name]), frame)) - Updating the extent hint:
UsdGeom.Boundable.ComputeExtentFromPlugins(boundable_api, frame)
Python Wrangle Hda | Summary | Click to expand!
...
# Read data
input_data[binding.property_name] = np.array(attr.Get(frame))
...
# Write data
for binding in bindings:
attr = prim.GetAttribute(binding.property_name)
if len(output_data[binding.property_name]) != output_point_count:
attr.Set(pxr.Sdf.ValueBlock())
continue
attr_class = attr.GetTypeName().type.pythonClass
attr.Set(attr_class.FromNumpy(output_data[binding.property_name]), frame)
...
# Re-Compute extent hints
boundable_api = pxr.UsdGeom.Boundable(prim)
extent_attr = boundable_api.GetExtentAttr()
extent_value = pxr.UsdGeom.Boundable.ComputeExtentFromPlugins(boundable_api, frame)
if extent_value:
extent_attr.Set(extent_value, frame)
The code for our "python kernel" executor:
Python Wrangle Hda | Python Kernel | Click to expand!
import pxr
import numpy as np
class Tokens():
mode = "vfxSurvivalGuide:attributeKernel:mode"
module_code = "vfxSurvivalGuide:attributeKernel:moduleCode"
execute_code = "vfxSurvivalGuide:attributeKernel:executeCode"
bindings = "vfxSurvivalGuide:attributeKernel:bindings"
class Binding():
fallback_value_type_name = pxr.Sdf.ValueTypeNames.FloatArray
def __init__(self):
self.property_name = ""
self.variable_name = ""
self.value_type_name = ""
class Point():
def __init__(self, bindings):
self.ptnum = -1
self.bindings = bindings
for binding in self.bindings:
setattr(self, binding.variable_name, None)
class Points():
def __init__(self):
self.bindings = []
for binding in self.bindings:
setattr(self, binding.variable_name, [])
def run_kernel(stage, frame):
# Process
for prim in stage.Traverse():
attr = prim.GetAttribute(Tokens.bindings)
if not attr:
continue
if not attr.HasValue():
continue
mode = prim.GetAttribute(Tokens.mode).Get(frame)
module_code = prim.GetAttribute(Tokens.module_code).Get(frame)
execute_code = prim.GetAttribute(Tokens.execute_code).Get(frame)
bindings_serialized = eval(prim.GetAttribute(Tokens.bindings).Get(frame))
# Bindings
bindings = []
for binding_dict in bindings_serialized:
binding = Binding()
binding.property_name = binding_dict["property_name"]
binding.variable_name = binding_dict["variable_name"]
binding.value_type_name = binding_dict["value_type_name"]
bindings.append(binding)
# Kernel
module_code_compiled = compile(module_code, "module_code", "exec")
execute_code_compiled = compile(execute_code, "code", "exec")
exec(module_code_compiled)
# Read data
input_data = {}
input_point_count = -1
output_data = {}
output_point_count = -1
initialize_attrs = []
for binding in bindings:
# Read attribute or create default fallback value
attr = prim.GetAttribute(binding.property_name)
if not attr:
value_type_name_str = binding.fallback_value_type_name if binding.value_type_name == "automatic" else binding.value_type_name
value_type_name = getattr(pxr.Sdf.ValueTypeNames, value_type_name_str)
attr = prim.CreateAttribute(binding.property_name, value_type_name)
if attr.HasValue():
input_data[binding.property_name] = np.array(attr.Get(frame))
input_point_count = max(input_point_count, len(input_data[binding.property_name]))
else:
initialize_attrs.append(attr)
# Enforce interpolation to points
attr.SetMetadata(pxr.UsdGeom.Tokens.interpolation, pxr.UsdGeom.Tokens.vertex)
output_data[binding.property_name] = []
for initialize_attr in initialize_attrs:
input_data[initialize_attr.GetName()] = np.array([initialize_attr.GetTypeName().scalarType.defaultValue] * input_point_count)
# Utils
def npoints():
return input_point_count
# Modes
if mode == "kernel":
# Kernel Utils
points_add = []
points_remove = set()
def create_point():
point = Point(bindings)
points_add.append(point)
def copy_point(source_point):
point = Point(source_point.bindings)
for binding in point.bindings:
setattr(point, binding.variable_name, np.copy(getattr(source_point, binding.variable_name)))
points_add.append(point)
return point
def remove_point(point):
points_remove.add(point.ptnum)
# Kernel
point = Point(bindings)
for elemnum in range(len(list(input_data.values())[0])):
point.ptnum = elemnum
for binding in bindings:
setattr(point, binding.variable_name, input_data[binding.property_name][elemnum])
# User Kernel Start
exec(execute_code_compiled)
# User Kernel End
if points_remove and point.ptnum in points_remove:
continue
for binding in bindings:
output_data[binding.property_name].append(getattr(point, binding.variable_name))
for binding in bindings:
for point_add in points_add:
output_data[binding.property_name].append(getattr(point_add, binding.variable_name))
for binding in bindings:
output_data[binding.property_name] = np.array(output_data[binding.property_name])
output_point_count = max(output_point_count, len(output_data[binding.property_name]))
elif mode == "array":
points = Points()
for binding in bindings:
setattr(points, binding.variable_name, input_data[binding.property_name])
# User Kernel Start
exec(execute_code_compiled)
# User Kernel End
for binding in bindings:
output_data[binding.property_name] = getattr(points, binding.variable_name)
output_point_count = max(output_point_count, len(output_data[binding.property_name]))
# If the output is invalid, block it to prevent segfaults
if input_point_count != output_point_count:
for attr in prim.GetAttributes():
if attr.GetName() in input_data.keys():
continue
if not attr.HasValue():
continue
if not attr.GetTypeName().isArray:
continue
if len(attr.Get(frame)) == output_point_count:
continue
attr.Set(pxr.Sdf.ValueBlock())
# Write data
for binding in bindings:
attr = prim.GetAttribute(binding.property_name)
if len(output_data[binding.property_name]) != output_point_count:
attr.Set(pxr.Sdf.ValueBlock())
continue
attr_class = attr.GetTypeName().type.pythonClass
attr.Set(attr_class.FromNumpy(output_data[binding.property_name]), frame)
# Re-Compute extent hints
boundable_api = pxr.UsdGeom.Boundable(prim)
extent_attr = boundable_api.GetExtentAttr()
extent_value = pxr.UsdGeom.Boundable.ComputeExtentFromPlugins(boundable_api, frame)
if extent_value:
extent_attr.Set(extent_value, frame)
The code for our pre render script:
Python Wrangle Hda | Pre-Render Script | Click to expand!
import os
import sys
from imp import reload
# Python Wrangle Module
dir_path = os.path.dirname(hou.hipFile.path())
if dir_path not in sys.path:
sys.path.insert(0, dir_path)
import pythonWrangle
reload(pythonWrangle)
from pythonWrangle import run_kernel
frame = hou.frame()
run_kernel(stage, frame)
Point Instancers ('Copy To Points')
We have four options for mapping Houdini's packed prims to USD:
- As transforms
- As point instancers
- As deformed geo (baking down the xform to actual geo data)
- As skeletons, more info in our RBD section
We'll always want to use USD's PointInstancer prims, when representing a "replicate a few unique meshes to many points" scenario. In SOPs we usually do this via the "Copy To Points" node.
You can find all the .hip files of our shown examples in our USD Survival Guide - GitHub Repo.
For all options for SOP to LOP importing, check out the official Houdini docs.
In the below examples, we use the path/name attributes to define the prim path. You can actually configure yourself what attributes Houdini should use for defining our prim paths on the "SOP import node" LOP/"USD Configure" SOP node.
Houdini Native Import (and making it convenient for artists)
To import our geometry to "PointInstancer" USD prims, we have to have it as packed prims in SOPs. If you have nested packed levels, they will be imported as nested point instancers. We do not recommend doing this, as it can cause some confusing outputs. The best practice is to always have a "flat" packed hierarchy, so only one level of packed prims.
Houdini gives us the following options for importing:
- The
usdinstancerpathattribute defines the location of ourPointInstancerprim. - The
path/nameattribute defines the location of the prototype prims. Prototypes are the unique prims that should get instances, they are similar to the left input on your "copy to points" node.
An important thing to note is, that if your path/name attribute does not have any / slashes or starts with ./, the prototypes will be imported with the following path: <usdinstancerpath>/Prototypes/<pathOrName>. Having the /Prototypes prim is just a USD naming convention thing.
To make it easy to use for artists, we recommend mapping the traditional path attribute value to usdinstancerpath and making sure that the name attribute is relative.
Another important thing to know about packed prims is, that the path/name attributes are also used to define the hierarchy within the packed prim content. So before you pack your geometry, it has to have a valid path value.
Good, now that we know the basics, let's have a look at a not so expectable behavior: If you remember, in our Basic Building Blocks of Usd section, we explained that relationships can't be animated. Here's the fun part:
The mapping of what point maps to what prototype prim is stored via the protoIndices attribute. This maps an index to the prim paths targetd by the prototypes relationship. Since relationships can't be animated, the protoIndices/prototypes properties has to be aware of all prototypes, that ever get instanced across the whole cache.
This is the reason, why in our LOPs instancer node, we have to predefine all prototypes. The problem is in SOPs, it kind of goes against the usual artist workflow. For example when we have debris instances, we don't want to have the artist managing to always have at least one copy of all unique prims we are trying to instance.
The artist should only have to ensure a unique name attribute value per unique instance and a valid usdinstancerpath value.
Making sure the protoIndices don't jump, as prototypes come in and out of existence, is something we can fix on the pipeline side.
Luckily, we can fix this behavior, by tracking the prototypes ourselves per frame and then re-ordering them as a post process of writing our caches.
Let's take a look at the full implementation:
As you can see, all looks good, when we only look at the active frame, because the active frame does not know about the other frames. As soon as we cache it to disk though, it "breaks", because the protoIndices map to the wrong prototype.
All we have to do is create an attribute, that per frame stores the relation ship targets as a string list. After the cache is done, we have to map the wrong prototype index to the write one.
Here is the tracker script:
PointInstancer | Re-Order Prototypes | Track Prototypes | Click to expand
import pxr
node = hou.pwd()
layer = node.editableLayer()
ref_node = node.parm("spare_input0").evalAsNode()
ref_stage = ref_node.stage()
with pxr.Sdf.ChangeBlock():
for prim in ref_stage.TraverseAll():
prim_path = prim.GetPath()
if prim.IsA(pxr.UsdGeom.PointInstancer):
prim_spec = layer.GetPrimAtPath(prim_path)
# Attrs
prototypes = prim.GetRelationship(pxr.UsdGeom.Tokens.prototypes)
protoIndices_attr = prim.GetAttribute(pxr.UsdGeom.Tokens.protoIndices)
if not protoIndices_attr:
continue
if not protoIndices_attr.HasValue():
continue
protoTracker_attr_spec = pxr.Sdf.AttributeSpec(prim_spec, "protoTracker", pxr.Sdf.ValueTypeNames.StringArray)
layer.SetTimeSample(protoTracker_attr_spec.path, hou.frame(), [p.pathString for p in prototypes.GetForwardedTargets()])
And here the post processing script. You'll usually want to trigger this after the whole cache is done writing. It also works with value clips, you pass in all the individual clip files into the layers list. This is also another really cool demo, of how numpy can be used to get C++ like performance.
PointInstancer | Re-Order Prototypes | Track Prototypes | Click to expand
import pxr
import numpy as np
node = hou.pwd()
layer = node.editableLayer()
layers = [layer]
def pointinstancer_prototypes_reorder(layers):
"""Rearrange the prototypes to be the actual value that they were written with
based on the 'protoTracker' attribute.
We need to do this because relationship attributes can't be animated,
which causes instancers with varying prototypes per frame to output wrong
prototypes once the scene is cached over the whole frame range.
This assumes that the 'protoTracker' attribute has been written with the same
time sample count as the 'protoIndices' attribute. They will be matched by time
sample index.
Args:
layers (list): A list of pxr.Sdf.Layer objects that should be validated.
It is up to the caller to call the layer.Save() command to
commit the actual results of this function.
"""
# Constants
protoTracker_attr_name = "protoTracker"
# Collect all point instancer prototypes
instancer_prototype_mapping = {}
def collect_data_layer_traverse(path):
if not path.IsPrimPropertyPath():
return
if path.name != protoTracker_attr_name:
return
instancer_prim_path = path.GetPrimPath()
instancer_prototype_mapping.setdefault(instancer_prim_path, set())
time_samples = layer.ListTimeSamplesForPath(path)
if time_samples:
for timeSample in layer.ListTimeSamplesForPath(path):
prototype_prim_paths = layer.QueryTimeSample(path, timeSample)
instancer_prototype_mapping[instancer_prim_path].update(prototype_prim_paths)
for layer in layers:
layer.Traverse(layer.pseudoRoot.path, collect_data_layer_traverse)
# Exit if not valid instancers were found
if not instancer_prototype_mapping:
return
# Combine prototype mapping data
for k, v in instancer_prototype_mapping.items():
instancer_prototype_mapping[k] = sorted(v)
# Apply combined targets
for layer in layers:
for instancer_prim_path, prototypes_prim_path_strs in instancer_prototype_mapping.items():
instancer_prim_spec = layer.GetPrimAtPath(instancer_prim_path)
if not instancer_prim_spec:
continue
protoTracker_attr_spec = layer.GetPropertyAtPath(
instancer_prim_path.AppendProperty(protoTracker_attr_name)
)
if not protoTracker_attr_spec:
continue
protoIndices_attr_spec = layer.GetPropertyAtPath(
instancer_prim_path.AppendProperty(pxr.UsdGeom.Tokens.protoIndices)
)
if not protoIndices_attr_spec:
continue
prototypes_rel_spec = layer.GetRelationshipAtPath(
instancer_prim_path.AppendProperty(pxr.UsdGeom.Tokens.prototypes)
)
if not prototypes_rel_spec:
continue
# Update prototypes
prototypes_prim_paths = [pxr.Sdf.Path(p) for p in prototypes_prim_path_strs]
prototypes_rel_spec.targetPathList.ClearEdits()
prototypes_rel_spec.targetPathList.explicitItems = prototypes_prim_paths
# Here we just match the time sample by index, not by actual values
# as some times there are floating precision errors when time sample keys are written.
protoIndices_attr_spec_time_samples = layer.ListTimeSamplesForPath(
protoIndices_attr_spec.path
)
# Update protoIndices
for protoTracker_time_sample_idx, protoTracker_time_sample in enumerate(
layer.ListTimeSamplesForPath(protoTracker_attr_spec.path)
):
# Reorder protoIndices
protoTracker_prim_paths = list(
layer.QueryTimeSample(
protoTracker_attr_spec.path,
protoTracker_time_sample,
)
)
# Skip if order already matches
if prototypes_prim_paths == protoTracker_prim_paths:
continue
prototype_order_mapping = {}
for protoTracker_idx, protoTracker_prim_path in enumerate(protoTracker_prim_paths):
prototype_order_mapping[protoTracker_idx] = prototypes_prim_paths.index(
protoTracker_prim_path
)
# Re-order protoIndices via numpy (Remapping via native Python is slow).
source_value = np.array(
layer.QueryTimeSample(
protoIndices_attr_spec.path,
protoIndices_attr_spec_time_samples[protoTracker_time_sample_idx],
),
dtype=int,
)
destination_value = np.copy(source_value)
for k in sorted(prototype_order_mapping.keys(), reverse=True):
destination_value[source_value == k] = prototype_order_mapping[k]
layer.SetTimeSample(
protoIndices_attr_spec.path,
protoIndices_attr_spec_time_samples[protoTracker_time_sample_idx],
destination_value,
)
# Force deallocate
del source_value
del destination_value
# Update protoTracker attribute to reflect changes, allowing
# this function to be run multiple times.
layer.SetTimeSample(
protoTracker_attr_spec.path,
protoTracker_time_sample,
pxr.Vt.StringArray(prototypes_prim_path_strs),
)
pointinstancer_prototypes_reorder(layers)
Phew, now everything looks alright again!
Performance Optimizations
You may have noticed, that we always have to create packed prims on SOP level, to import them as PointInstancer prims. If we really want to go all out on the most high performance import, we can actually replicate a "Copy To Points" import. That way we only have to pass in the prototypes and the points, but don't have the overhead of spawning the packed prims in SOPs.
Is this something you need to be doing? No, Houdini's LOPs import as well as the packed prim generation are highly performant, the following solution is really only necessary, if you are really picky about making your export a few hundred milliseconds faster with very large instance counts.
As you can see we are at a factor 20 (1 seconds : 50 milliseconds). Wow! Now what we don't show is, that we actually have to conform the point instances attributes to what the PointInstancer prim schema expects. So the ratio we just mentioned is the best case scenario, but it can be a bit slower, when we have to map for example N/up to orientations. This is also only this performant because we are importing a single PointInstancer prim, which means we don't have to segment any of the protoIndices.
We also loose the benefit of being able to work with our packed prims in SOP level, for example for collision detection etc.
Let's look at the details:
On SOP level:
- We create a "protoIndices" attribute based on all unique values of the "name" attribute
- We create a "protoHash" attribute in the case we have multiple PointInstancer prim paths, so that we can match the prototypes per instancer
- We conform all instancing related attributes to have the correct precision. This is very important, as USD does not allow other precisions types than what is defined in the PointInstancer schema.
- We conform the different instancing attributes Houdini has to the attributes the PointInstancer schema expects. (Actually the setup in the video doesn't do this, but you have to/should, in case you want to use this in production)
On LOP level:
- We import the points as a "Points" prim, so now we have to convert it to a "PointInstancer" prim. For the prim itself, this just means changing the prim type to "PointInstancer" and renaming "points" to "positions".
- We create the "prototypes" relationship property.
PointInstancer | Custom Import | Click to expand
import pxr
node = hou.pwd()
layer = node.editableLayer()
ref_node = node.parm("spare_input0").evalAsNode()
ref_stage = ref_node.stage()
time_code = pxr.Usd.TimeCode.Default() if not ref_node.isTimeDependent() else pxr.Usd.TimeCode(hou.frame())
with pxr.Sdf.ChangeBlock():
edit = pxr.Sdf.BatchNamespaceEdit()
for prim in ref_stage.TraverseAll():
prim_path = prim.GetPath()
if prim.IsA(pxr.UsdGeom.Points):
prim_spec = layer.GetPrimAtPath(prim_path)
# Prim
prim_spec.typeName = "PointInstancer"
purpose_attr_spec = pxr.Sdf.AttributeSpec(prim_spec, pxr.UsdGeom.Tokens.purpose, pxr.Sdf.ValueTypeNames.Token)
# Rels
protoTracker_attr = prim.GetAttribute("protoTracker")
protoHash_attr = prim.GetAttribute("protoHash")
if protoTracker_attr and protoTracker_attr.HasValue():
protoTracker_prim_paths = [pxr.Sdf.Path(p) for p in protoTracker_attr.Get(time_code)]
prototypes_rel_spec = pxr.Sdf.RelationshipSpec(prim_spec, pxr.UsdGeom.Tokens.prototypes)
prototypes_rel_spec.targetPathList.explicitItems = protoTracker_prim_paths
# Cleanup
edit.Add(prim_path.AppendProperty("protoTracker:indices"), pxr.Sdf.Path.emptyPath)
edit.Add(prim_path.AppendProperty("protoTracker:lengths"), pxr.Sdf.Path.emptyPath)
elif protoHash_attr and protoHash_attr.HasValue():
protoHash_pairs = [i.split("|") for i in protoHash_attr.Get(time_code)]
protoTracker_prim_paths = [pxr.Sdf.Path(v) for k, v in protoHash_pairs if k == prim_path]
prototypes_rel_spec = pxr.Sdf.RelationshipSpec(prim_spec, pxr.UsdGeom.Tokens.prototypes)
prototypes_rel_spec.targetPathList.explicitItems = protoTracker_prim_paths
protoTracker_attr_spec = pxr.Sdf.AttributeSpec(prim_spec, "protoTracker", pxr.Sdf.ValueTypeNames.StringArray)
layer.SetTimeSample(protoTracker_attr_spec.path, hou.frame(), [p.pathString for p in protoTracker_prim_paths])
# Cleanup
edit.Add(prim_path.AppendProperty("protoHash"), pxr.Sdf.Path.emptyPath)
edit.Add(prim_path.AppendProperty("protoHash:indices"), pxr.Sdf.Path.emptyPath)
edit.Add(prim_path.AppendProperty("protoHash:lengths"), pxr.Sdf.Path.emptyPath)
# Children
Prototypes_prim_spec = pxr.Sdf.CreatePrimInLayer(layer, prim_path.AppendChild("Prototypes"))
Prototypes_prim_spec.typeName = "Scope"
Prototypes_prim_spec.specifier = pxr.Sdf.SpecifierDef
# Rename
edit.Add(prim_path.AppendProperty(pxr.UsdGeom.Tokens.points),
prim_path.AppendProperty(pxr.UsdGeom.Tokens.positions))
if not layer.Apply(edit):
raise Exception("Failed to modify layer!")
RBD (Rigid Body Dynamics)
As mentioned in our Point Instancer section, we have four options for mapping Houdini's packed prims to USD:
- As transforms
- As point instancers
- As deformed geo (baking down the xform to actual geo data)
- As skeletons
Which confronts us with the question:
As mentioned in our production FAQ, large prim counts cause a significant decrease in performance. That's why we should avoid writing RBD sims as transform hierarchies and instead either go for deformed geo (not memory efficient) or skeletons (memory efficient).
Currently Hydra does not yet read in custom normals, when calculating skinning. This will likely be resolved in the very near future, until then we have to bake the skinning pre-render. This is very fast to do via the skeleton API, more details below.
On this page we'll focus on the skeleton import, as it is the only viable solution for large hierarchy imports. It is also the most efficient one, as skeletons only store the joint xforms, just like the RBD simulation point output.
Using skeletons does have one disadvantage: We can't select a mesh separately and hide it as skeletons deform subsets of each individual prim based on weighting.
The solution is to set the scale of the packed piece to 0. For hero simulations, where we need to have a separate hierarchy entry for every piece, we'll have to use the standard packed to xform import. We can also do a hybrid model: Simply change the hierarchy paths to your needs and import them as skeletons. This way, we can still disable meshes based on what we need, but get the benefits of skeletons.
You can find all the .hip files of our shown examples in our USD Survival Guide - GitHub Repo.
Houdini Native Import via KineFX/Crowd Agents
Let's first take a look at what Houdini supports out of the box:
- We can import KineFX characters and crowd agents as skeletons. This does have the overhead of creating KineFX characters/crowd agents in a way that they map to our target output hierarchy we want in LOPs. It is also harder to setup with a lot of different skeletons (Or we couldn't figure, input is always welcome).
- The "RBD Destruction" LOP node has a reference implementation of how to import packed prims as skeletons animations. It relies on Python for the heavy data lifting and doesn't scale well, we'll take a look at a high performance solution in the next section below, that uses Houdini's native import for the data loading and Python to map everything to its correct place.
Here is a video showing both methods:
This works great, if we have a character like approach.
Houdini High Performance RBD Skeleton Import
The problem is with RBD sims this is not the case: We usually have a large hierarchy consisting of assets, that we fracture, that should then be output to the same hierarchy location as the input hierarchy. As skeletons are only evaluated for child hierarchies, where we have a "SkelRoot" prim as an ancestor, our approach should be to make all asset root prims (the ones that reference/payload all the data), be converted to have the "SkelRoot" prim type. This way we can nicely attach a skeleton to each asset root, which means we can selectively payload (un)load our hierarchy as before, even though each asset root pulls the skeleton data from the same on disk cache.
Let's take a look how that works:
Now we won't breakdown how skelton's themselves work, as this is a topic on its own. You can read up on it in the official API docs.
What we'll do instead is break down our approach. We have three inputs from LOPs, where we are pulling data from:
- Geometry data: Here we import our meshes with:
- their joint weighting (RBD always means a weight of 1, because we don't want to blend xforms).
- their joint index. Skeleton animations in USD can't have time varying joint index to joint name mapping. This is designed on purpose, to speed up skeleton mesh binding calculation.
- their target skeleton. By doing our custom import we can custom build our skeleton hierarchy. In our example we choose to group by asset, so one skeleton per asset.
- Rest data: As with a SOP transform by points workflow, we have to provide:
- the rest position
- the bind position (We can re-use the rest position)
- the joint names. We could also import them via the animation data, there is no benefit though, as joint idx to name mappings can't be animated (even though they are attributes and not relationships).
- Animation data: This pulls in the actual animation data as:
- translations
- rotations
- scales (Houdini's RBD destruction .hda optionally disables animation import for scales as an performance opt-in)
After the initial import, we then "only" have to apply a few schemas and property renames. That's it, it's as simple as that!
So why is this a lot faster, than the other methods?
We use Houdini's super fast SOP import to our benefit. The whole thing that makes this work are the following two pieces of our node network:
Our joint name to index mapping is driven by a simple "Enumerate" node that runs per skeleton target prim path.
Our joint xforms then create the same skeleton target prim path. We don't have to enumerate, because on LOP import our geometry is segmented based on the skeleton prim path. This slices the arrays the exact same way as the enumerate node.
The outcome is that we let Houdini do all the heavy data operations like mesh importing and attribute segmentation by path. We then only have to remap all the data entries to their correct parts. As USD is smart enough to not duplicate data for renames, this is fast and memory efficient.
Frustum Culling
USD also ships with 3d related classes in the Gf module. These allow us to also do bounding box intersection queries.
We also have a frustum class available to us, which makes implementing frustum culling quite easy! The below code is a great exercise that combines using numpy, the core USD math modules, cameras and time samples. We recommend studying it as it is a great learning resource.
The code also works on "normal" non point instancer boundable prims.
You can find all the .hip files of our shown examples in our USD Survival Guide - GitHub Repo.
If you look closely you'll notice that the python LOP node does not cause any time dependencies. This is where the power of USD really shines, as we can sample the full animation range at once. It also allows us to average the culling data.
For around 10 000 instances and 100 frames, this takes around 2 seconds.
Here is the code shown in the video.
import numpy as np
from pxr import Gf, Sdf, Usd, UsdGeom
stage_file_path = "/path/to/your/stage"
stage = Usd.Open(stage_file_path)
# Or
import hou
stage = hou.pwd().editableStage()
camera_prim_path = Sdf.Path("/cameras/camera")
camera_prim = stage.GetPrimAtPath(camera_prim_path)
prim_paths = [Sdf.Path("/set/toys/instancer")]
time_samples = list(range(1001, 1101))
# Mode
mode = "average" # "frame" or "average"
data = {}
for time_sample in time_samples:
time_code = Usd.TimeCode(time_sample)
# Get frustum
camera_type_API = UsdGeom.Camera(camera_prim)
camera_API = camera_type_API.GetCamera(time_code)
frustum = camera_API.frustum
# Manually override clipping planes
# frustum.SetNearFar(Gf.Range1d(0.01, 100000))
# Get bbox cache
bbox_cache = UsdGeom.BBoxCache(
time_code,
["default", "render", "proxy", "guide"],
useExtentsHint=False,
ignoreVisibility=False
)
for prim_path in prim_paths:
prim = stage.GetPrimAtPath(prim_path)
# Skip inactive prims
if not prim.IsActive():
continue
# Skip non boundable prims
if not prim.IsA(UsdGeom.Boundable):
conitune
# Visibility
imageable_type_API = UsdGeom.Imageable(prim)
visibility_attr = imageable_type_API.GetVisibilityAttr()
# Poininstancer Prims
if prim.IsA(UsdGeom.PointInstancer):
pointinstancer_type_API = UsdGeom.PointInstancer(prim)
protoIndices_attr = pointinstancer_type_API.GetProtoIndicesAttr()
if not protoIndices_attr.HasValue():
continue
protoIndices_attr_len = len(protoIndices_attr.Get(time_sample))
bboxes = bbox_cache.ComputePointInstanceWorldBounds(
pointinstancer_type_API, list(range(protoIndices_attr_len))
)
# Calculate intersections
invisibleIds_attr_value = np.arange(protoIndices_attr_len)
for idx, bbox in enumerate(bboxes):
if frustum.Intersects(bbox):
invisibleIds_attr_value[idx] = -1
# The invisibleIds can be written as a sparse attribute. The array length can differ
# from the protoIndices count. If an ids attribute exists, then it will use those
# indices, other wise it will use the protoIndices element index. Here we don't work
# with the ids attribute to keep the code example simple.
invisibleIds_attr_value = invisibleIds_attr_value[invisibleIds_attr_value != -1]
if len(invisibleIds_attr_value) == protoIndices_attr_len:
visibility_attr_value = UsdGeom.Tokens.invisible
invisibleIds_attr_value = []
else:
visibility_attr_value = UsdGeom.Tokens.inherited
invisibleIds_attr_value = invisibleIds_attr_value
# Apply averaged frame range value
if mode != "frame":
data.setdefault(prim_path, {"visibility": [], "invisibleIds": [], "invisibleIdsCount": []})
data[prim_path]["visibility"].append(visibility_attr_value == UsdGeom.Tokens.inherited)
data[prim_path]["invisibleIds"].append(invisibleIds_attr_value)
data[prim_path]["invisibleIdsCount"].append(protoIndices_attr_len)
continue
# Apply value per frame
visibility_attr.Set(UsdGeom.Tokens.inherited, time_code)
invisibleIds_attr = pointinstancer_type_API.GetInvisibleIdsAttr()
invisibleIds_attr.Set(invisibleIds_attr_value, time_code)
else:
# Boundable Prims
bbox = bbox_cache.ComputeWorldBound(prim)
intersects = frustum.Intersects(bbox)
# Apply averaged frame range value
if mode != "frame":
data.setdefault(prim_path, {"visibility": [], "invisibleIds": []})
data[prim_path]["visibility"].append(visibility_attr_value == UsdGeom.Tokens.inherited)
data[prim_path]["invisibleIds"].append(invisibleIds_attr_value)
continue
# Apply value per frame
visibility_attr.Set(UsdGeom.Tokens.inherited
if intersects else UsdGeom.Tokens.invisible, time_code)
# Apply averaged result
# This won't work with changing point counts! If we want to implement this, we
# have to map the indices to the 'ids' attribute value per frame.
if mode == "average" and data:
for prim_path, visibility_data in data.items():
prim = stage.GetPrimAtPath(prim_path)
imageable_type_API = UsdGeom.Imageable(prim)#
visibility_attr = imageable_type_API.GetVisibilityAttr()
visibility_attr.Block()
# Pointinstancer Prims
if visibility_data.get("invisibleIds"):
pointinstancer_type_API = UsdGeom.PointInstancer(prim)
invisibleIds_average = set(np.arange(max(visibility_data['invisibleIdsCount'])))
for invisibleIds in visibility_data.get("invisibleIds"):
invisibleIds_average = invisibleIds_average.intersection(invisibleIds)
invisibleIds_attr = pointinstancer_type_API.GetInvisibleIdsAttr()
invisibleIds_attr.Set(np.array(sorted(invisibleIds_average)), time_code)
continue
# Boundable Prims
prim = stage.GetPrimAtPath(prim_path)
imageable_type_API = UsdGeom.Imageable(prim)
visibility_attr = imageable_type_API.GetVisibilityAttr()
visibility_attr.Block()
visibility_attr.Set(UsdGeom.Tokens.inherited if any(visibility_data["visibility"]) else UsdGeom.Tokens.invisible)
Motion Blur
Motion blur is computed by the hydra delegate of your choice using either the interpolated position data(deformation/xforms) or by making use of velocity/acceleration data.
You can find all the .hip files of our shown examples in our USD Survival Guide - GitHub Repo.
As noted in our Motion Blur - Computing Velocities and Accelerations, we can also easily derive the velocity and acceleration data from our position data, if the point count doesn't change.
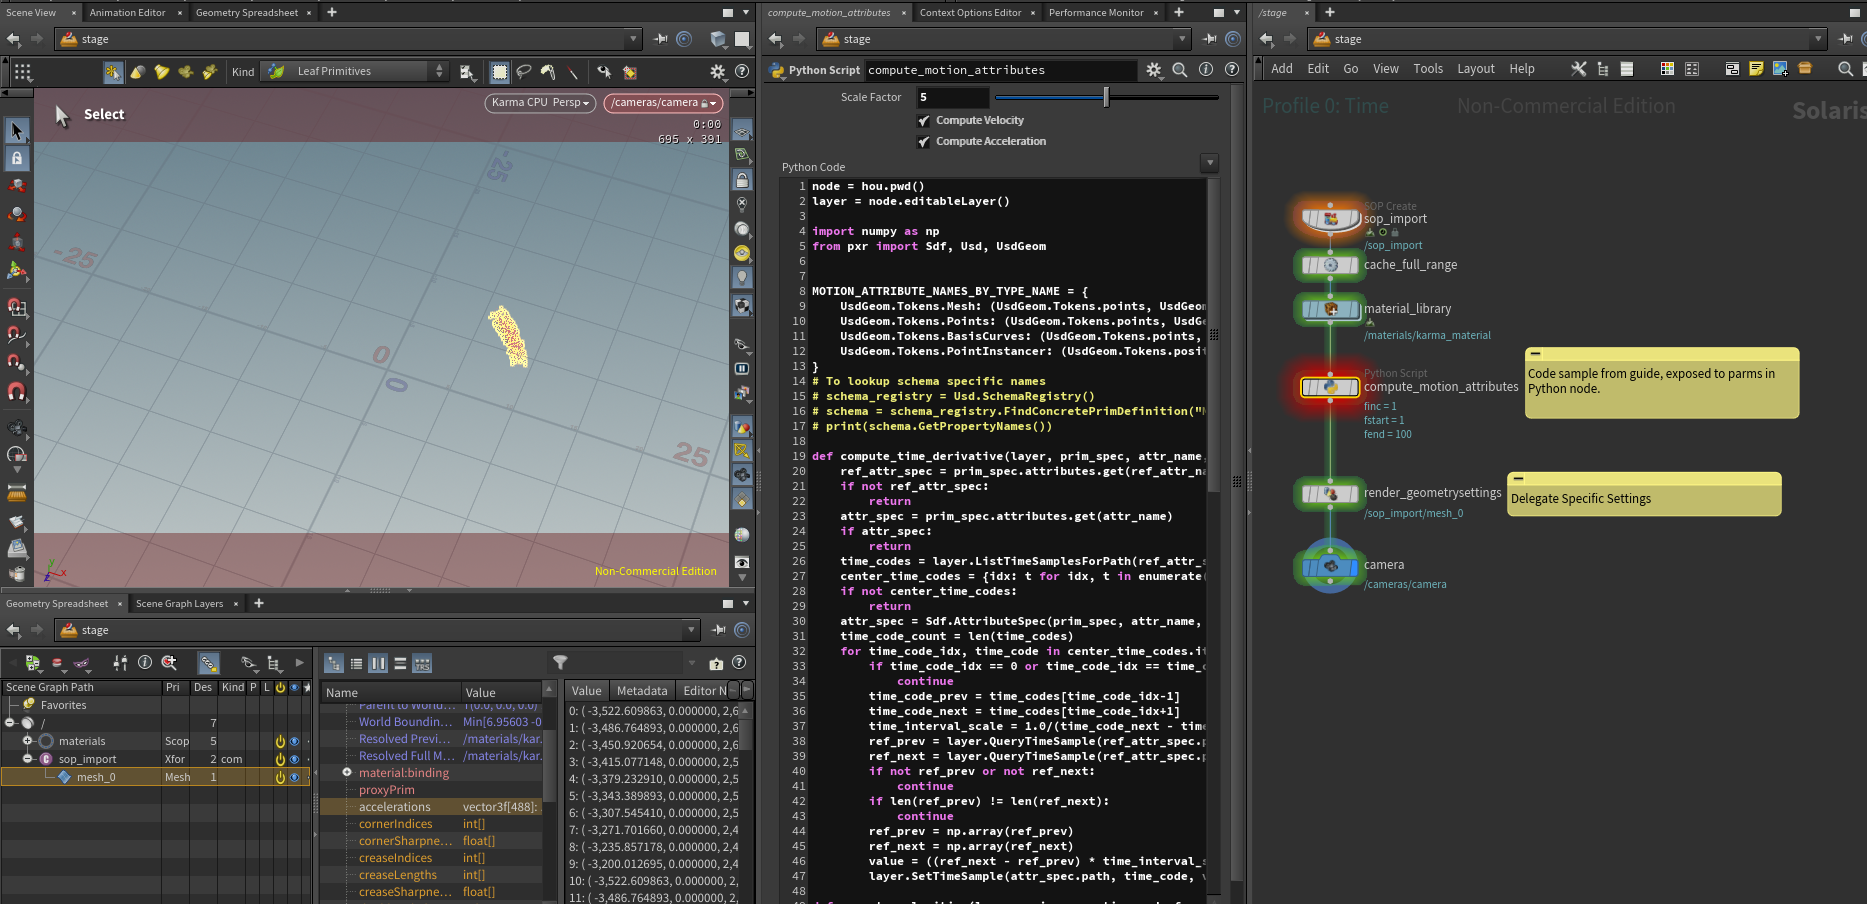
Depending on the delegate, you will likely have to set specific primvars that control the sample rate of the position/acceleration data.
We can also easily derive velocities/accelerations from position data, if our point count doesn't change:
Motionblur | Compute | Velocity/Acceleration | Click to expand
import numpy as np
from pxr import Sdf, Usd, UsdGeom
MOTION_ATTRIBUTE_NAMES_BY_TYPE_NAME = {
UsdGeom.Tokens.Mesh: (UsdGeom.Tokens.points, UsdGeom.Tokens.velocities, UsdGeom.Tokens.accelerations),
UsdGeom.Tokens.Points: (UsdGeom.Tokens.points, UsdGeom.Tokens.velocities, UsdGeom.Tokens.accelerations),
UsdGeom.Tokens.BasisCurves: (UsdGeom.Tokens.points, UsdGeom.Tokens.velocities, UsdGeom.Tokens.accelerations),
UsdGeom.Tokens.PointInstancer: (UsdGeom.Tokens.positions, UsdGeom.Tokens.velocities, UsdGeom.Tokens.accelerations)
}
# To lookup schema specific names
# schema_registry = Usd.SchemaRegistry()
# schema = schema_registry.FindConcretePrimDefinition("Mesh")
# print(schema.GetPropertyNames())
def compute_time_derivative(layer, prim_spec, attr_name, ref_attr_name, time_code_inc, multiplier=1.0):
ref_attr_spec = prim_spec.attributes.get(ref_attr_name)
if not ref_attr_spec:
return
attr_spec = prim_spec.attributes.get(attr_name)
if attr_spec:
return
time_codes = layer.ListTimeSamplesForPath(ref_attr_spec.path)
if len(time_codes) == 1:
return
center_time_codes = {idx: t for idx, t in enumerate(time_codes) if int(t) == t}
if not center_time_codes:
return
attr_spec = Sdf.AttributeSpec(prim_spec, attr_name, Sdf.ValueTypeNames.Vector3fArray)
time_code_count = len(time_codes)
for time_code_idx, time_code in center_time_codes.items():
if time_code_idx == 0:
time_code_prev = time_code
time_code_next = time_codes[time_code_idx+1]
elif time_code_idx == time_code_count - 1:
time_code_prev = time_codes[time_code_idx-1]
time_code_next = time_code
else:
time_code_prev = time_codes[time_code_idx-1]
time_code_next = time_codes[time_code_idx+1]
time_interval_scale = 1.0/(time_code_next - time_code_prev)
ref_prev = layer.QueryTimeSample(ref_attr_spec.path, time_code_prev)
ref_next = layer.QueryTimeSample(ref_attr_spec.path, time_code_next)
if not ref_prev or not ref_next:
continue
if len(ref_prev) != len(ref_next):
continue
ref_prev = np.array(ref_prev)
ref_next = np.array(ref_next)
value = ((ref_next - ref_prev) * time_interval_scale) / (time_code_inc * 2.0)
layer.SetTimeSample(attr_spec.path, time_code, value * multiplier)
def compute_velocities(layer, prim_spec, time_code_fps, multiplier=1.0):
# Time Code
time_code_inc = 1.0/time_code_fps
prim_type_name = prim_spec.typeName
if prim_type_name:
# Defined prim type name
attr_type_names = MOTION_ATTRIBUTE_NAMES_BY_TYPE_NAME.get(prim_type_name)
if not attr_type_names:
return
pos_attr_name, vel_attr_name, _ = attr_type_names
else:
# Fallback
pos_attr_name, vel_attr_name, _ = MOTION_ATTRIBUTE_NAMES_BY_TYPE_NAME[UsdGeom.Tokens.Mesh]
pos_attr_spec = prim_spec.attributes.get(pos_attr_name)
if not pos_attr_spec:
return
# Velocities
compute_time_derivative(layer,
prim_spec,
vel_attr_name,
pos_attr_name,
time_code_inc,
multiplier)
def compute_accelerations(layer, prim_spec, time_code_fps, multiplier=1.0):
# Time Code
time_code_inc = 1.0/time_code_fps
prim_type_name = prim_spec.typeName
if prim_type_name:
# Defined prim type name
attr_type_names = MOTION_ATTRIBUTE_NAMES_BY_TYPE_NAME.get(prim_type_name)
if not attr_type_names:
return
_, vel_attr_name, accel_attr_name = attr_type_names
else:
# Fallback
_, vel_attr_name, accel_attr_name = MOTION_ATTRIBUTE_NAMES_BY_TYPE_NAME[UsdGeom.Tokens.Mesh]
vel_attr_spec = prim_spec.attributes.get(vel_attr_name)
if not vel_attr_spec:
return
# Acceleration
compute_time_derivative(layer,
prim_spec,
accel_attr_name,
vel_attr_name,
time_code_inc,
multiplier)
### Run this on a layer with time samples ###
layer = Sdf.Layer.CreateAnonymous()
time_code_fps = layer.timeCodesPerSecond or 24.0
multiplier = 5
def traversal_kernel(path):
if not path.IsPrimPath():
return
prim_spec = layer.GetPrimAtPath(path)
compute_velocities(layer, prim_spec, time_code_fps, multiplier)
compute_accelerations(layer, prim_spec, time_code_fps, multiplier)
with Sdf.ChangeBlock():
layer.Traverse(layer.pseudoRoot.path, traversal_kernel)
Tips & Tricks
You can find all the .hip files of our shown examples in our USD Survival Guide - GitHub Repo.
Table of Contents
- Composition
- How do I check if an attribute has time samples (if there is only a single time sample)?
- Where are Houdini's internal lop utils stored?
- How do I get the LOPs node that last edited a prim?
- How do I store side car data from node to node?
Composition
Now we've kind of covered these topics in our A practical guide to composition and Composition - LIVRPS sections.
We strongly recommend reading these pages before this one, as they cover the concepts in a broader perspective.
Extracting payloads and references from an existing layer stack with anonymous layers
When building our composition in USD, we always have to make sure that layers that were generated in-memory are loaded via the same arc as layers loaded from disk. If we don't do this, our composition would be unreliable in live preview vs cache preview mode.
Composition arcs always reference a specific prim in a layer, therefore we usually attach our caches to some sort of predefined root prim (per asset). This means that if we import SOP geometry, with multiple of these root hierarchies, we should also create multiple references/payloads so that each root prim can be unloaded/loaded via the payload mechanism.
Instead of having a single SOP import or multiple SOP imports that are flattened to a single layer, we can put a SOP import within a for loop. Each loop iteration will then carry only the data of the current loop index (in our example box/sphere/tube) its own layer, because we filter the sop level by loop iteration.
The very cool thing then is that in a Python node, we can then find the layers from the layer stack of the for loop and individually payload them in.
Again you can also do this with a single layer, this is just to demonstrate that we can pull individual layers from another node.
You can find this example in the composition.hipnc file in our USD Survival Guide - GitHub Repo.
Efficiently re-writing existing hierarchies as variants
Via the low level API we can also copy or move content on a layer into a variant. This is super powerful to easily create variants from caches.
Here is how it can be setup in Houdini:
Here is the code for moving variants:
from pxr import Sdf, Usd
node = hou.pwd()
layer = node.editableLayer()
source_node = node.parm("spare_input0").evalAsNode()
source_stage = source_node.stage()
source_layer = source_node.activeLayer()
with Sdf.ChangeBlock():
edit = Sdf.BatchNamespaceEdit()
iterator = iter(Usd.PrimRange(source_stage.GetPseudoRoot()))
for prim in iterator:
if "GEO" not in prim.GetChildrenNames():
continue
iterator.PruneChildren()
prim_path = prim.GetPath()
prim_spec = layer.GetPrimAtPath(prim_path)
# Move content into variant
variant_set_spec = Sdf.VariantSetSpec(prim_spec, "model")
variant_spec = Sdf.VariantSpec(variant_set_spec, "myCoolVariant")
variant_prim_path = prim_path.AppendVariantSelection("model", "myCoolVariant")
edit.Add(prim_path.AppendChild("GEO"), variant_prim_path.AppendChild("GEO"))
# Variant selection
prim_spec.SetInfo("variantSetNames", Sdf.StringListOp.Create(prependedItems=["model"]))
prim_spec.variantSelections["model"] = "myCoolVariant"
if not layer.Apply(edit):
raise Exception("Failed to apply layer edit!")
And for copying:
from pxr import Sdf, Usd
node = hou.pwd()
layer = node.editableLayer()
source_node = node.parm("spare_input0").evalAsNode()
source_stage = source_node.stage()
source_layer = source_node.activeLayer()
with Sdf.ChangeBlock():
iterator = iter(Usd.PrimRange(source_stage.GetPseudoRoot()))
for prim in iterator:
if "GEO" not in prim.GetChildrenNames():
continue
iterator.PruneChildren()
prim_path = prim.GetPath()
prim_spec = Sdf.CreatePrimInLayer(layer, prim_path)
prim_spec.specifier = Sdf.SpecifierDef
prim_spec.typeName = "Xform"
parent_prim_spec = prim_spec.nameParent
while parent_prim_spec:
parent_prim_spec.specifier = Sdf.SpecifierDef
parent_prim_spec.typeName = "Xform"
parent_prim_spec = parent_prim_spec.nameParent
# Copy content into variant
variant_set_spec = Sdf.VariantSetSpec(prim_spec, "model")
variant_spec = Sdf.VariantSpec(variant_set_spec, "myCoolVariant")
variant_prim_path = prim_path.AppendVariantSelection("model", "myCoolVariant")
Sdf.CopySpec(source_layer, prim_path, layer, variant_prim_path)
# Variant selection
prim_spec.SetInfo("variantSetNames", Sdf.StringListOp.Create(prependedItems=["model"]))
prim_spec.variantSelections["model"] = "myCoolVariant"
Adding overrides via inherits
We can add inherits as explained in detail in our composition - LIVRPS section.
We typically drive the prim selection through a user defined prim pattern/lop selection rule. In the example below, for simplicity, we instead iterate over all instances of the prototype of the first pig prim.
from pxr import Gf, Sdf, Usd
node = hou.pwd()
stage = node.editableStage()
pig_a_prim = stage.GetPrimAtPath(Sdf.Path("/pig_A"))
# Inspect prototype and collect what to override
prototype = pig_a_prim.GetPrototype()
# Create overrides
class_prim = stage.CreateClassPrim(Sdf.Path("/__CLASS__/pig"))
edit_prim = stage.DefinePrim(class_prim.GetPath().AppendPath("geo/shape"))
xform = Gf.Matrix4d()
xform.SetTranslate([0, 2, 0])
edit_prim.CreateAttribute("xformOpOrder", Sdf.ValueTypeNames.TokenArray).Set(["xformOp:transform:transform"])
edit_prim.CreateAttribute("xformOp:transform:transform", Sdf.ValueTypeNames.Matrix4d).Set(xform)
# Add inherits
instance_prims = prototype.GetInstances()
for instance_prim in instance_prims:
inherits_api = instance_prim.GetInherits()
# if instance_prim.GetName() == "pig_B":
# continue
inherits_api.AddInherit(class_prim.GetPath(), position=Usd.ListPositionFrontOfAppendList)
How do I check if an attribute has time samples (if there is only a single time sample)?
We often need to check if an attribute has animation or not. Since time samples can come through many files when using value clips, USD ships with the Usd.Attribute.ValueMightBeTimeVarying() method. This checks for any time samples and exists as soon as it has found some as to opening every file like Usd.Attribute.GetTimeSamples does.
The issue is that if there is only a single time sample (not default value) it still returns False, as the value is not animated per se. (By the way, this is also how the .abc file did it). Now that kind of makes sense, the problem is when working with live geometry in Houdini, we don't have multiple time samples, as we are just looking at the active frame.
So unless we add a "Cache" LOP node afterwards that gives us multiple time samples, the GetTimeSamples will return a "wrong" value.
Here is how we get a correct value:
def GetValueMightBeTimeVarying(attribute, checkVariability=False):
"""Check if an attribute has time samples.
Args:
attribute (Usd.Attribute): The attribute to check.
checkVariability (bool): Preflight check if the time variability metadata is uniform,
if yes return False and don't check the value
Returns:
bool: The state if the attribute has time samples
"""
if checkVariability and attribute.GetVariability() == pxr.Sdf.VariabilityUniform:
return False
# Get the layer stack without value clips
property_stack = attribute.GetPropertyStack(pxr.Usd.TimeCode.Default())
if property_stack[0].layer.anonymous:
# It is fast to lookup data that is in memory
return attribute.GetNumTimeSamples() > 0
# Otherwise fallback to the default behaviour as this inspects only max two timeSamples
return attribute.ValueMightBeTimeVarying()
The logic is relatively simple: When looking at in-memory layers, use the usual command of GetNumTimeSamples as in-memory layers are instant when querying data.
When looking at on disk files, use the ValueMightBeTimeVarying, as it is the fastest solution.
You can find the shown file here: UsdSurvivalGuide - GitHub
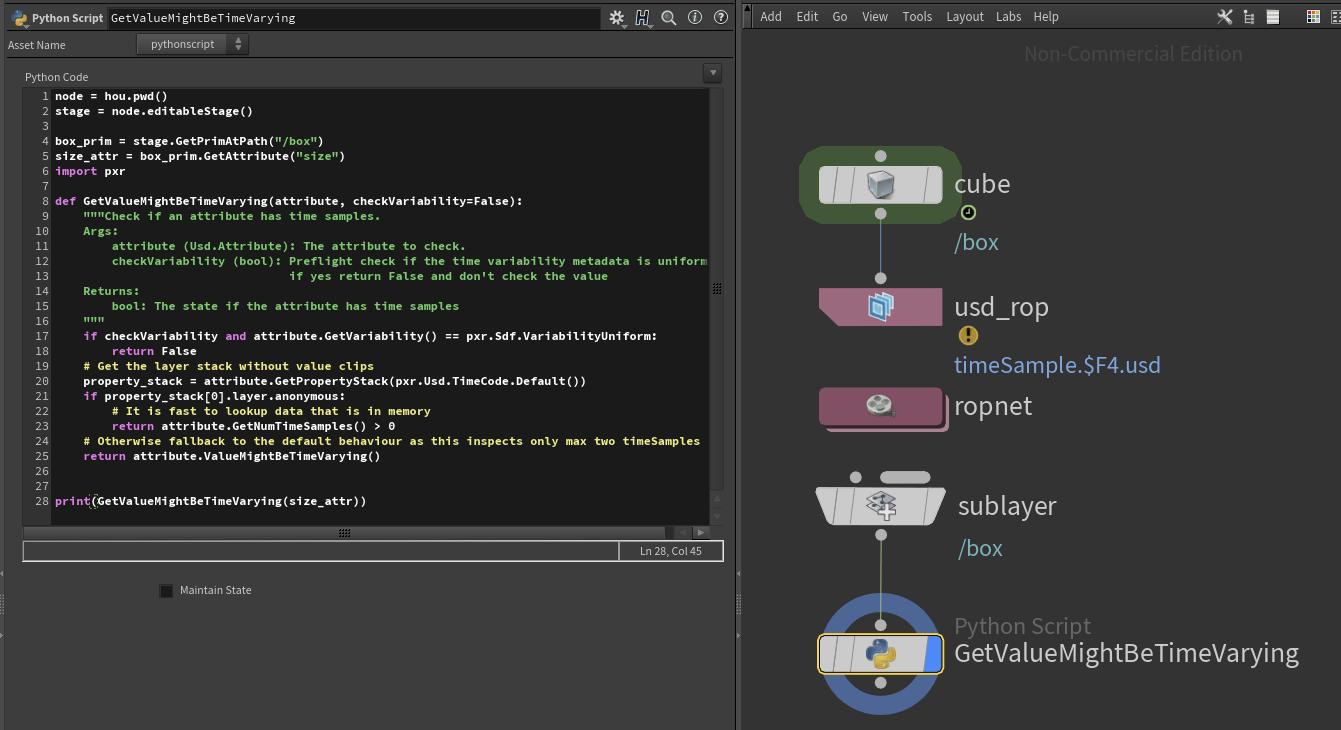
Where are Houdini's internal lop utils stored?
You can find Houdini's internal loputils under the following path:
$HFS/houdini/python3.9libs/loputils.py
You can simply import via import loputils. It is a good point of reference for UI related functions, for example action buttons on parms use it at lot.
Here you can find the loputils.py - Sphinx Docs online.
How do I get the LOPs node that last edited a prim?
When creating data on your layers, Houdini attaches some custom data to the customData prim metadata. Among the data is the HoudiniPrimEditorNodes. This stores the internal hou.Node.sessionId and allows you to get the last node that edited a prim.
This value is not necessarily reliable, for example if you do custom Python node edits, this won't tag the prim (unless you do it yourself). Most Houdini nodes track it correctly though, so it can be useful for UI related node selections.
...
def Xform "pig" (
customData = {
int[] HoudiniPrimEditorNodes = [227]
}
kind = "component"
)
...
import hou
from pxr import Sdf
stage = node.stage()
prim = stage.GetPrimAtPath(Sdf.Path("/pig"))
houdini_prim_editor_nodes = prim.GetCustomDataByKey("HoudiniPrimEditorNodes")
edit_node = None
if houdini_prim_editor_nodes:
edit_node = hou.nodeBySessionId(houdini_prim_editor_nodes[-1])
You can also set it:
import hou
from pxr import Sdf, Vt
node = hou.pwd()
stage = node.editableStage()
prim = stage.GetPrimAtPath(Sdf.Path("/pig"))
houdini_prim_editor_nodes = prim.GetCustomDataByKey("HoudiniPrimEditorNodes") or []
houdini_prim_editor_nodes = [i for i in houdini_prim_editor_nodes]
houdini_prim_editor_nodes.append(node.sessionId())
prim.SetCustomDataByKey("HoudiniPrimEditorNodes", Vt.IntArray(houdini_prim_editor_nodes))
The Houdini custom data gets stripped from the file, if you enable it on the USD rop (by default it gets removed).

How do I store side car data from node to node?
To have a similar mechanism like SOPs detail attributes to track data through your network, we can write our data to the /HoudiniLayerInfo prim. This is a special prim that Houdini creates (and strips before USD file write) to track Houdini internal data. It is hidden by default, you have to enable "Show Layer Info Primitives" in your scene graph tree under the sunglasses icon to see it. We can't track data on the root or session layer customData as Houdini handles these different than with bare bone USD to enable efficient node based stage workflows.
You can either do it via Python:
import hou
import json
from pxr import Sdf
node = hou.pwd()
stage = node.editableStage()
prim = stage.GetPrimAtPath(Sdf.Path("/HoudiniLayerInfo"))
custom_data_key = "usdSurvivalGuide:coolDemo"
my_custom_data = json.loads(prim.GetCustomDataByKey(custom_data_key) or "{}")
print(my_custom_data)
prim.SetCustomDataByKey(custom_data_key, json.dumps(my_custom_data))
Or with Houdini's Store Parameters Values node. See the docs for more info (It also uses the loputils module to pull the data).
Performance Optimizations
You can find all the .hip files of our shown examples in our USD Survival Guide - GitHub Repo.
Table of Contents
- Selection Rules
- How to get your stage to load and open fast
- Write full time sample ranges (with subsamples)
- Layer Content Size
- Layer Count
- AOV Count
Selection Rules
Houdini's LOPs Selection Rule/Prim Pattern Matching syntax is a artist friendly wrapper around stage traversals.
Pretty much any artist selectable prim pattern parm is/should be run through the selection rules. Now we won't cover how they work here, because Houdini's documentation is really detailed on this topic.
Instead we'll compare it to our own traversal section.
import hou
rule = hou.LopSelectionRule()
# Set traversal demand, this is similar to USD's traversal predicate
# https://openusd.org/dev/api/prim_flags_8h.html#Usd_PrimFlags
hou.lopTraversalDemands.Active
hou.lopTraversalDemands.AllowInstanceProxies
hou.lopTraversalDemands.Default
hou.lopTraversalDemands.Defined
hou.lopTraversalDemands.Loaded
hou.lopTraversalDemands.NoDemands
hou.lopTraversalDemands.NonAbstract
rule.setTraversalDemands(hou.lopTraversalDemands.Default)
# Set rule pattern
rule.setPathPattern("%type:Boundable")
# Evaluate rule
prim_paths = rule.expandedPaths(lopnode=None, stage=stage)
for prim_path in prim_paths:
print(prim_path) # Returns: Sdf.Path
As you can see we have a similar syntax, the predicate is "replaced" by hou.lopTraversalDemands.
Now the same rules apply for fast traversals:
- Fast traversals mean not going into the hierarchies we are not interested in. The equivalent to
iterator.PruneChildrenis the~tilde symbol (e.g.%type:Xform ~ %kind:component) - We should aim to pre-filter by type
%type:<ConcreteTypedSchemaName>and kind%kind:component, before querying other data as this is fast - Attributes lookups (via vex in the expression) are heavy to compute
How to get your stage to load and open fast
As discussed in our Loading/Traversing section, we can limit how stages are opened via our three loading mechanisms (ordered from lowest to highest granularity):
- Layer Muting: This controls what layers are allowed to contribute to the composition result.
- Prim Population Mask: This controls what prim paths to consider for loading at all.
- Payload Loading: This controls what prim paths, that have payloads, to load.
Before we proceed, it is important to note, that USD is highly performant in loading hierarchies. When USD loads .usd/.usdc binary crate files, it sparsely loads the content: It can read in the hierarchy without loading in the attributes. This allows it to, instead of loading terabytes of data, to only read the important bits in the file and lazy load on demand the heavy data when requested by API queries or a hydra delegate.
What does this mean for Houdini? It can often be enough to pause the scene viewer when opening the file. It can be done via this snippet:
for pane in hou.ui.paneTabs():
if pane.type == hou.paneTabType.SceneViewer:
pane.setSceneGraphStageLocked(False)
Houdini exposes these three loading mechanisms in two different ways:
- Configure Stage LOP node: This is the same as setting it per code via the stage.
- Scene Graph Tree panel: In Houdini, that stage that gets rendered, is actually not the stage of your node (at least what we gather from reverse engineering). Instead it is a duplicate, that has overrides in the session layer and loading mechanisms listed above.
Everything you set in your scene graph tree panel is a viewport only override to your stage. This can be very confusing when first starting out in Houdini. If we want to apply it to the actual stage, we have to use the configure stage node. This will then also affect our scene graph tree panel.
Why does Houdini do this? As mentioned hierarchy loading is fast, streaming the data to Hydra is not. This way we can still see the full hierarchy, but separately limit what the viewer sees, which is actually a pretty cool mechanism.
Let's have a look at the differences, as you can see anything we do with the configure stage node actually affects our hierarchy, whereas scene graph tree panel edits are only for the viewport:
Another great tip is to disable tieing the scene graph panel to the active selected node:
Instead it is then tied to you active display flag, which makes things a lot faster when clicking through your network.
Write full time sample ranges (with subsamples)
In Houdini we always want to avoid time dependencies where possible, because that way the network doesn't have to recook the tree per frame.
We cover this in more detail for HDAs in our HDA section as it is very important when building tools, but here is the short version.
We have two ways of caching the animation, so that the node itself loses its time dependency.
Starting with H19.5 most LOP nodes can whole frame range cache their edits. This does mean that a node can cook longer for very long frame ranges, but overall your network will not have a time dependency, which means when writing your node network to disk (for example for rendering), we only have to write a single frame and still have all the animation data. How cool is that!
If a node doesn't have that option, we can almost always isolate that part of the network and pre cache it, that way we have the same effect but for a group of nodes.
The common workflow is to link the shutter samples count to your camera/scene xform sample count and cache out the frames you need.
We recommend driving the parms through global variables or functions, that you can attach to any node via the node onLoaded scripts.
This is also how you can write out SOP geometry with deform/xform subsamples, simply put the cache node after a "SOP Import" and set the mode to "Sample Current Frame". We usually do this in combination with enabling "Flush Data After Each Frame" on the USD render rop plus adding "$F4" to your file path. This way we stay memory efficient and dump the layer from memory to disk every frame. After that we stitch it via value clips or the "UsdStitch" commandline tool/rop node.
Layer Content Size
In Houdini the size of the active layer can impact performance.
To quote from the docs:
As LOP layers have more and more opinions and values added, there can be slow-downs in the viewport. If you notice simple transforms are very slow in the viewport, try using a Configure Layer to start a new layer above where you're working, and see if that improves interactivity.
from pxr import Sdf
node = hou.pwd()
layer = node.editableLayer()
with Sdf.ChangeBlock():
root_grp_prim_path = Sdf.Path(f"/root_grp")
root_grp_prim_spec = Sdf.CreatePrimInLayer(layer, root_grp_prim_path)
root_grp_prim_spec.typeName = "Xform"
root_grp_prim_spec.specifier = Sdf.SpecifierDef
prim_count = 1000 * 100
for idx in range(prim_count):
prim_path = Sdf.Path(f"/root_grp/prim_{idx}")
prim_spec = Sdf.CreatePrimInLayer(layer, prim_path)
prim_spec.typeName = "Cube"
prim_spec.specifier = Sdf.SpecifierDef
attr_spec = Sdf.AttributeSpec(prim_spec, "debug", Sdf.ValueTypeNames.Float)
attr_spec.default = float(idx)
if idx != 0:
prim_spec.SetInfo(prim_spec.ActiveKey, False)
Now if we add an edit property node and tweak the "debug" attribute on prim "/root_grp/prim_0", it will take around 600 milliseconds!
The simple solution as stated above is to simply add a "Configure Layer" LOP node and enable "Start New Layer". Now all edits are fast again.
So why is this slow? It is actually due to how Houdini makes node based editing of layers possible. Houdini tries to efficiently cache only the active layer, where all the edits go, per node (if a node did write operations). The active layer in Houdini speak is the same as the stage's edit target layer. This means every node creates a duplicate of the active layer, so that we can jump around the network and display different nodes, without recalculating everything all the time. The down side is the copying of the data, which is causing the performance hit we are seeing.
The solution is simple: Just start a new layer and then everything is fast again (as it doesn't have to copy all the content). Houdini colors codes its nodes every time they start a new (active) layer, so you'll also see a visual indicator that the nodes after the "Configure Layer" LOP are on a new layer.
What does this mean for our .hda setups? The answer is simple: As there is no downside to having a large layer count (unless we start going into the thousands), each .hda can simply start of and end with creating a new layer. That way all the edits in the .hda are guaranteed to not be impacted by this caching issue.
Here is a comparison video:
Layer Count
Now as mentioned in the layer content size section, there is no down side to having thousands of layers. Houdini will merge these to a single (or multiple, depending on how you configured your save paths) layers on USD rop render. Since this is done on write, the described active layer stashing mechanism doesn't kick in and therefore it stays fast.
Does that mean we should write everything on a new layer? No, the sweet spot is somewhere in between. For example when grafting (moving a certain part of the hierarchy somewhere else) we also have to flatten the layer on purpose (Houdini's "Scene Restructure"/"Graft" nodes do this for us). At some layer count, you will encounter longer layer merging times, so don't over do it! This can be easily seen with the LOPs for loop.
So as a rule of thumb: Encapsulate heavy layer edits with newly started layers, that way the next node downstream will run with optimal performance. Everything else is usually fine to be on the active input layer.
In LOPs we also often work with the principle of having a "main" node stream (the stream, where your shot layers are loaded from). A good workflow would be to always put anything you merge into the main node stream into a new layer, as often these "side" streams create heavy data.
LOPs "for each loops" work a bit different: Each iteration of the loop is either merged with the active layer or kept as a separate layer, depending on the set merge style. When we want to spawn a large hierarchy, we recommend doing it via Python, as it is a lot faster. We mainly use the "for each loop" nodes for stuff we can't do in Python code. For example for each looping a sop import.
AOV Count
Now this tip is kind of obvious, but we'd though we'd mention it anyway:
When rendering interactively in the viewport, deactivating render var prims that are connected to the render outputs you are rendering, can speed up interactivity. Why? We are rendering to fewer image buffers, so less memory consumption and less work for the renderer to output your rays to pixels.
Our AOVs are connected via the orderedVars relationship to the render product. That means we can just overwrite it to only contain render vars we need during interactive sessions. For farm submissions we can then just switch back to all.
The same goes for the products relationship on your render settings prim. Here you can also just connect the products you need.
def Scope "Render"
{
def Scope "Products"
{
def RenderProduct "beauty" (
)
{
rel orderedVars = [
</Render/Products/Vars/Beauty>,
</Render/Products/Vars/CombinedDiffuse>,
</Render/Products/Vars/DirectDiffuse>,
</Render/Products/Vars/IndirectDiffuse>,
]
token productType = "raster"
}
}
def RenderSettings "rendersettings" (
prepend apiSchemas = ["KarmaRendererSettingsAPI"]
)
{
rel camera = </cameras/render_cam>
rel products = </Render/Products/beauty>
int2 resolution = (1280, 720)
}
}
In Houdini this is as simple as editing the relationship and putting the edit behind a switch node with a context option switch. On our render USD rop we can then set the context option to 1 and there you go, it is now always on for the USD rop write.